How to change default apps on Galaxy Note 8

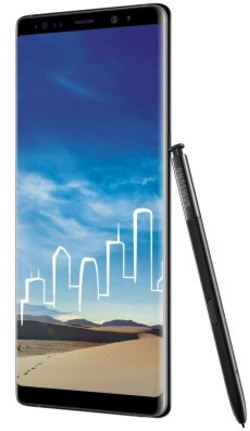
By default set apps on your Samsung galaxy Note 8 and other android devices. You can see set messages app, phone call app, browser app and home app / launcher in your Note 8. In Galaxy Note 8 device, you can set automatically select default apps or choose from default app options. In this tutorial, I will show you complete guide to change default apps on Galaxy Note 8 device.

If you are not comfortable with by default SMS apps in your device, change default messages app on Galaxy Note 8 device. Also clear default apps on galaxy Note 8 to again set default apps in your device. Follow below given step by step process to set or change default apps on Galaxy Note 8.

Read More:

How to change the navigation button Galaxy Note 8

How to turn off notification badges app icons on Galaxy Note 8

How to set or change default apps on Galaxy Note 8

Change default apps on Galaxy Note 8

Step 1: Go to settings in your galaxy note 8

Step 2: Tap apps

Step 3: Tap Menu

Step 4: Tap default apps

Here you can see by default set browser app, text message app, call app and home app or launcher app.

Step 5: Tap app want to change default app

Step 6: Choose from list

Now change text message or browser or any other apps with third party downloaded app. To install third party app on note 8, enable install unknown sources on galaxy Note 8 using below settings.

Settings > Lock screen & security > unknown sources

In Samsung galaxy Note 8 device, you can also set automatically set default apps.

How to control app permissions on galaxy Note 8

In android devices you’ll manage app permissions individually.

Manage app permissions on galaxy Note 8

Step 1: Go to settings in your Note 8

Step 2: Tap applications

Step 3: Select app want to change permissions

Step 4: Tap app permission

Here you will see several options for selected app permissions such as contact, calendar, chrome, carrier services, phone, WhatsApp or other social media apps and more.

And that’s it. I hope this simple tutorial helpful to change default apps on Galaxy Note 8 device. If you have any kind of trouble, tell us in below comment box. Stay connected with us for latest Galaxy Note 8 tips and tricks. If you found it helpful, don’t forget to share with others.

How to Enable and Use Smart Lock on Android 8.1 to Unlock your Phone

Do you want to unlock your phone automatically using a smart lock? A smart lock is the type of lock screen security you can use to unlock the phone without touch. Android smart lock includes trusted devices, trusted places, on-body detection, trusted face, and trusted voice. Most Android users use a Fingerprint sensor, PIN, Pattern lock, Password, and more. Here’s how to enable and use smart lock on Android 8.1 (Oreo) devices.

You will use Android smart lock trusted face, trusted devices, and other features to unlock your Android 8.1 devices. This trusted face on Android 8.1 is less secure than a fingerprint and additional security. Let’s see how to use a smart lock on Android devices.

Read More: How to Reset Android Phone When Locked

How To Enable Smart Lock on Android 8.1

Step 1: Go to Settings in your Android 8.1.

Step 2: Tap Security & location.

Smart lock under device security in Android Oreo

Step 3: Tap Smart lock under device security.

Confirm the pattern lock or password you set. Now you can use below given five options to unlock your Android devices automatically.

Set up and use smart lock on android Oreo 8.0

On-body Detection

This Android on-body detection lock helps unlock your android phone while it’s on you. When you’re holding or carrying your device, it will automatically unlock your phone. By default, turn on this lock, and enable on-body detection to use it.

Settings > Security & location > Smart lock > On-body detection > Toggle on

Toggle off the button to turn off on-body detection on your phone.

Trusted Places

In this smart lock option, you can add a location or places list where your android device unlocked automatically. Make sure to enable location on Android to access trusted places.

Settings > Security & location > Smart lock > Trusted places > Add trusted places

You can delete, rename, and edit the address anytime using the above settings.

Trusted Devices

To unlock the android phone with a trusted device lock, add a trusted Bluetooth device to keep your device unlocked when nearby this. You can add a Bluetooth watch, a car’s Bluetooth system, etc. This Bluetooth connection is supported up to 100 meters range.

Settings > Security & location > Smart lock > Trusted devices > Add trusted device > Choose a device

Trusted Face

You can unlock your Android 8.1 device with your face. To use smart lock trusted face on Android, set up facial recognition in Android 8.1 devices. This facial recognition is less secure than another security lock. Someone who looks like you or your photo could unlock your android device.

Settings > Security & location > Smart lock > Trusted face > Add a trusted face

Also, improve facial recognition, or delete trusted face from your devices.

Trusted Voice

A trusted voice is the last smart lock option. First of all, set up your voice on your Android device. After that trusted voice will unlock your phone automatically when matching the voice.

Settings > Security & location > Smart lock > Trusted voice

Also, set up Google voice using this: Google app > More > Settings > Voice > Voice match

You can see above all the options to unlock your Android 8.1 (Oreo) automatically, Android 7.1.2 (Nougat), Android 6.1, Android 5.1.2, and other devices.

Read More: Enable Smart Lock on Android 9 (Pie)

How to Turn Off Smart Lock

Settings > Security & privacy > More security settings > Trusted agents > Toggle off Smart lock (Google) > Tap back button

Step 1: Go to Settings.

Step 2: Tap on Security & privacy.

Step 3: Tap on More security settings.

Step 4: Tap on Trusted agents.

Step 5: Toggle off the Smart lock (Google).

Step 6: Tap the Back button.

You can remove or hide the Smart lock option on your latest Android devices. To get back the Android smart lock feature, enable it.

And that’s all. Did you find the above tutorial helpful to set up and use a smart lock on Android 8.1 devices? If you have any trouble, please tell us in below comment box. Don’t miss our single Android tips and tricks.

Read More:

How to Set Up Fingerprint on Pixel 2 and Pixel 2 XL

Here’s how to set up a fingerprint on Pixel 2 and Pixel 2 XL. You can maximum add up to 5 fingerprints in your Pixel devices. Go to security settings and tap on Pixel imprint to add fingerprint in your Pixels. Also, set up a screen lock on your Pixel 2 and Pixel 2 XL devices. There are several options available to set a screen lock on Pixel 2 devices such as Fingerprint, Pattern lock, Password, PIN Number, and more. Password or PIN number is one of the strongest security to secure your Pixel 2 XL device from unknown persons. Also, set up and use smart lock on Pixel 2 and Pixel 2 XL to automatically unlock your phone. Google smart lock includes trusted devices, trusted places, and on-body detection.

Read Also:

How to Set Up Fingerprint on Pixel 2 XL and Pixel 2

Step 1: Go to Settings on your Pixel 2 & Pixel 2 XL.

Step 2: Tap Security.

Step 3: Tap Pixel imprint under the device security section.

Step 4: Tap Next.

Now choose a backup screen lock to use with Pixel Imprint from below given three options.

Pixel 2 unlock pattern security select

Pixel Imprint + Pattern / Pixel Imprint + PIN / Pixel Imprint + Password

Step 5: Choose from the above given options.

I have chosen the Pixel Imprint + Pattern.

Step 6: Draw a pattern and tap Continue.

Step 7: Again draw a pattern and tap Confirm.

You can show below notifications options on your device when your Google Pixel 2 is locked.

Choose notification when Pixel 2 locked

Show all notification content/Hide sensitive notification content/Don’t show a notification at all

Step 8: Choose from the above-given option & Tap Done.

Find the sensor of your Google Pixel 2 and Pixel 2 XL device, you can find it back on your phone.

Step 9: Put your finger on the back of your phone sensor and lift after you fill a vibration.

Move your finger slightly to add all the different parts of your fingerprint. After complete setup, you can see Fingerprint added! Here you can see add another option to add new fingerprint.

Use fingerprint on Pixel 2 and Pixel 2 XL

Step 10: Tap Done.

Set up fingerprint on Pixel 2 and Pixel 2 XL

Now set up fingerprint on Pixel 2 and Pixel 2 XL device. You can unlock your Pixel 2 and Pixel 2 XL phone using the back of your phone sensor within a second.

How to Add New Fingerprint on Pixel 2 & Pixel 2 XL

Settings > Security > Pixel imprint > + Add fingerprint

How to Remove Fingerprint on Pixel 2 & Pixel 2 XL

Settings > Security > Pixel imprint > Tap Trash icon > Delete

How to Rename Fingerprint on Pixel 2 & Pixel 2 XL

Settings > Security > Pixel imprint > Tap existing fingerprint > Rename > OK

And that’s all. I hope you will enjoy viewing set up fingerprint on Pixel 2 and Pixel 2 XL device. If you have any kind of problem, tell us in below comment box. Stay connected with us for the latest Android tips.

How to disable notification badges on Galaxy Note 8

Galaxy Note 8 launched with cool features and one of them is notification badges. This Notification badges feature helpful to find unread notifications of app in your Note 8 device. This is the same work as latest android Oreo’s notification dots feature. You can see notification badge on app icons if not read. Let see complete guide to hide or disable notification badges on Galaxy Note 8.

This Notification badge looks every time when you open apps menu in your device. You can individually hide notification badge on galaxy Note 8 such as Facebook, WhatsApp, Messages etc. There are two ways to clear notification badge of apps in galaxy Note 8, one is temporary and another is permanent. Follow below given step by step guide to disable notification badges on Galaxy Note 8.

Read This:

How to use app pair on Galaxy Note 8 as multi-window mode

How to change navigation button on Samsung galaxy Note 8

How to disable notification badges on Galaxy Note 8

Disable notification badges on Galaxy Note 8


Check out below given two methods to hide notification badge on Samsung galaxy Note 8 device.

1st Method: How to clear unread notifications badges on galaxy Note 8 (Temporary)

Step 1: Long press on app icon

Step 2: Tap clear badge

Now it will remove the notification from the app icon until receive another app notifications in your galaxy Note 8 devices. This is the temporary solutions to hide notification badge from app icons.

2nd Method: Disable notification badges on Galaxy Note 8 (Permanent)

To disable notification badge from app icons on galaxy Note 8, first of all download package disable pro application (Paid app) from Google Play store.

Before use package disable pro app in your Note 8, make sure clear notification badge of all app icons. After cleared icon badges, follow below given steps.

Step 1: Open Package disable pro app

Step 2: Enter password in text field & tap Enable admin

Step 3: Tap active

You will see list of packages on your Note 8 screen.

Step 4: Scroll down until see the BadgeProvider and then check the box

Step 5: Now exit the app

Now you can’t see any notification badge on any apps icons when received any notifications in your device. If you want back again notification badge, uncheck the box or uninstall the app from your device.

And that’s all. Do you still have any problem to disable notification badges on Galaxy Note 8? Tell us in below comment box. We will respond as soon as possible. Don’t miss our single Samsung Galaxy Note 8 tips.

Fix OK Google Not Working After Oreo Update

Recently updated Google Pixel to Android 8.0 Oreo OS and facing the issue of Ok Google not working. So I will search for solutions online and got few solutions to fix OK Google not working after the Oreo update problem. One of the easiest solutions is to delete the Ok Google voice model and again retrain voice mode in your Oreo devices.

OK Google command doesn’t work when the screen is locked before the Oreo update, but after updated unlock Oreo devices when said Ok Google. But sometimes when say Ok Google on the Oreo lock screen, you can see this message “voice unlock has been paused”. Check out below given several methods to fix Ok Google not working on Android after the Oreo update.

Read Also:

How to Fix Ok Google Not Working After Oreo Update in Pixel and Pixel XL

There are three handy tips to fix Ok Google doesn’t work after the Android Oreo update.

1st Method: Check for system software update on Oreo

This system update for android Oreo 8.0 will fix critical bugs and improves the performance and stability of your Pixel and Pixel XL device.

Settings > System > System updates > Check for update

If not available any update, you can see the message: Your system is up to date.

2nd Method: Delete Ok Google voice model in Oreo

In my Google Pixel device, these solutions fix Ok Google not working on Android Oreo 8.0 devices such as Pixel, Pixel XL, Pixel 2, Pixel 2 XL, Nexus 6P, Nexus 5X, Moto Z Play, Moto Z, LG V30, etc.

Step 1: Go to Settings.

Step 2: Tap Apps & notifications.

Step 3: Tap Advanced.

Step 4: Tap Default apps.

Step 5: Tap Assistant & voice input.

Assist & voice input settings on android 8.0 Oreo

Step 6: Tap Settings gear icon of the Assist app.

Ok Google detection in android Oreo

Step 7: Tap “Ok Google” detection.

Fix Ok Google not working after Oreo update in Pixel

Step 8: Tap Delete voice model.

Delete Ok Google voice model in your Oreo device

Step 9: Tap OK.

It will reset the Ok Google voice model in your latest android 8.0 Oreo devices.

Step 10: Tap Retrain voice model.

Now follow the on-screen instruction to set up your voice and use Ok Google in your android Oreo devices again.

3rd Method: Check assistant language to fix Ok Google not working after Oreo update

Make sure system language and voice language is the same in your Android Oreo devices.

Change language in Oreo to fix OK Google not working

Settings > Apps & notifications > Advanced > Default apps > Assistant & voice input > Assist app settings gear icon > Languages

Now check the set voice model language is the same as system language. If not the same, choose from the language list.

Several users also facing the issue of can’t make a call/USB file transfer not working/can’t send or receive messages after Oreo updates on Nexus 6P, Nexus 5X, and Pixel devices.

End the list of possible solutions to fix Ok Google not working after Oreo update on Pixel and Pixel XL. Do you have any tips want to share? Don’t forget to mention which method worked for you to fix the Oreo issue. Stay connected with us for the latest Android Oreo 8.0 tips.

How to Show or Hide Lock Screen Notifications on Samsung Galaxy Note 8

By default, show all notifications of messages, calls, and other activities in your Galaxy Note 8 and other devices. You will individually hide content in some app notifications or turn off lock screen notifications on Samsung Galaxy Note 8 devices. In Galaxy Note 8, you can also set only show notifications as app icons on the lock screen. In this tutorial, I will show you a guide to show or hide lock screen notifications on Samsung Galaxy Note 8.

To hide lock screen notifications on Galaxy Note, you will choose to hide sensitive notification content. Also, turn off app notifications or disable pop-up notifications on an app and set priority on the app in your Galaxy Note 8 device. Let’s see step by step process to change lock screen notifications on Galaxy Note 8.

Read More: How to Change Lock Screen Clock on Samsung Galaxy Note 20 Ultra

How to Show or Hide Lock Screen Notifications on Samsung Galaxy Note 8

Change lock screen notifications on Galaxy note 8

Step 1: Go to Settings in your Galaxy Note 8

Step 2: Tap the Lock screen & security.

Step 3: Tap Notifications.

Step 4: Tap on the Lock screen.

Step 5: Tap Don’t show notifications at all/hide content notifications.

Now disable all notification content from the lock screen in your Samsung Galaxy Note 8 device,s including phone calls, messages, etc. It’s pretty easy to change lock screen notifications on Galaxy Note 8. To quickly access notification settings from the home screen, double-tap a notification, open the app, and change the settings you want.

If you are annoyed by some specific app or game notifications, you’ll individually disable lock screen notifications on Galaxy Note 8.

Settings > Lock screen & security > Notifications > Tap app want to hide content > Disable lock screen notifications.

How to Show the App Icon on the Lock Screen on Samsung Galaxy Note 8

You can see only those app icons on the lock screen when any app notification comes to your Samsung Galaxy Note 8 device.

Settings > Lock screen & security > Notifications > Notification icons only.

Disable Pop-up Notifications in Galaxy Note 8

Now you can’t get a notification for that app appearing at the top of the screen when it arrives.

Settings > Notifications > Advanced > Tap app > Show silently.

And that’s all. I hope this tip helps change lock screen notifications on Galaxy Note 8. If you find this tutorial useful, don’t forget to share it with others. Please stay connected with us for the latest Samsung Galaxy Note tips and tricks daily.

Read More: