How to Fix Android Phone Restarts When Charging [9 Fixes]

Annoying by Android phone rebooting itself? After updating my Android device, it keeps restarting or sometimes crashing. The reason behind your Android phone restarts when charging might be a software update, hardware issue, or any downloaded apps causing the problem. When this error happens, the phone speed is slow or ineffective. You can try the solutions below to fix the Android phone keeps restarting while charging.

Read More: How to Fix SIM Not Provisioned Error on Android Samsung 

9 Methods to Fix Android Phone Restarts When Charging or Randomly Restart

1. Check for System Update

Ensure the latest system update is installed on your Android device. It may fix your Android phone’s constant reboots when charging.

Step 1: Go to Settings.

Step 2: Scroll down and tap the System.

Step 3: Tap the System update.

Check System Update to Fix Android Phone Restarts When Charging

Step 4: Tap the Check for update.

Step 5: Tap Download and install if update is available.

Your system is up-to-date if you have already installed the latest version. If available update, update your Android device. It helps to fix some minor bugs in the device.

2. Remove your Phone Case

Remove your phone case and other accessories that heat your device and automatically restart or power off your Android phone. Remove the case and check the fix my phone keeps restarting and not turning on issues.

3. Check for App Updates 

Step 1: Open the Google Play Store on your device.

Step 2: Tap the Profile icon at the top right corner.

Step 3: Tap the Manage apps & device.

Check for App Update to Fix phone keep restarting


Step 4: Tap Update All if available update.

4. Clear App Cache

If you find specific apps crashing or freezing, you must clear the app cache and data on your Android devices.

Step 1: Open the Settings app.

Step 2: Tap the Apps.

Step 3: Tap See all apps.

Step 4: Select the App you want to clear the app cache.

Step 5: Tap Storage & cache.

Clear App Cache on your Android Phone to Fix Restarting issues

Step 6: Tap Clear cache.

5. Check Battery Health

Search the Battery health or Battery usage on your phone and find the app’s more battery in the background even if you don’t use it. Force stop that app or uninstall the app if unnecessary.

6. Close All Running Apps on Android

If multiple apps are running in the background, you must close all running apps to improve your Android phone’s performance.

Step 1: Swipe up and hold to view all recent apps.

Close All Running Apps to fix Android Phone Keeps Restarting

Step 2: Swipe the screen on the right side and tap Clear all to close all background running apps.

7. Use Safe Mode to Check Any Third-Party App Causing the Issue

Enable safe mode on your Android device using the settings below.

Step 1: Press & hold the power button until you view the power menu on your phone.

Step 2: Touch & hold power off until you see the Reboot to safe mode.

Step 3: Tap the OK.

You can see the Safe mode on the bottom left side. If your Android phone keeps restarting while charging in safe mode, it means any hardware or software issues. If you have problems issues in safe mode, any downloaded app causes the phone to restart issues. Exit the safe mode to restart your Android phone. Remove the recently installed third-party apps once you find the app causing the problem.

8. Ensure Free Up Space

You can be facing sudden apps stopping working or restarting your phone if your phone storage is almost full. Ensure free up space on your Android device.

Settings > Storage > Free up space.

9. Factory Reset Your Android Device

Make sure to backup & restore your phone data before performing a factory reset on your Android devices.

Step 1: Go to Settings > System.

Step 2: Tap the Reset options.

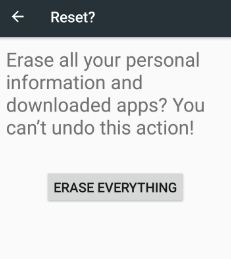
Step 3: Tap the Erase all data (Factory Reset).

You can see the list of data deleted from your Android device.

Factory Reset your phone to Fix Android phone keeps restarting while charging

Step 4: Tap the Erase all data.

Unlock your Android device.

Step 5: Tap the Erase all data.

All tricks I know to fix Android phone restarting constantly are shared with you above. Don’t forget to mention which method worked for you to solve the Android rebooting problem. If you find it helpful, share it with others.

Read Also:

How to Fix Google Play Error 927 When Downloading or Updating Apps

Seen Error 927 when downloading or updating apps from the play store. Due to this error code 927 in Google play store, can not download or update apps. You can see this error message on the device screen: “App could not be downloaded due to error”. (Error code 927). Make sure you’re phone memory is not full. If full device storage, then removes unnecessary files and try to download the app from play store.

In this tutorial, I will show you possible solutions to fix error 927 in Google play store and its related errors such as error 942, error 492, error 194, error 921 and more play store errors. You can fix this error 927 & other related errors in the android device using below given troubleshooting steps.

Related:

How to Fix Google Play Store Error 927 Code When Downloading Apps

fix Google Play store error 927

Try below given five different methods to fix error code 927 in the Google Play store. I hope it will be solved your play store error issue.

1st Method: Clear the cache & data of Google Play Store in android

Step 1: Go to “Settings”.

Step 2: Under the device section, tap “Apps”.

Step 3: Touch “Google play store”.

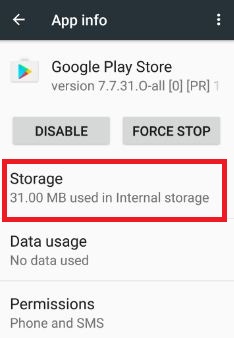
Step 4: Tap “Storage”.

How to Clear the cache & data of play store to fix error 927

Step 5: Tap “Clear cache” & “Clear data”.

Clear cache of Google play services

Settings > Device > Apps > Google Play Services > Storage > Clear cache

2nd Method: Uninstall Google play store updates in android

Step 1: Go to the “Settings” app.

Step 2: Tap “Apps” under the device section.

Step 3: Scroll down until view “Google Play Store” and tap on it.

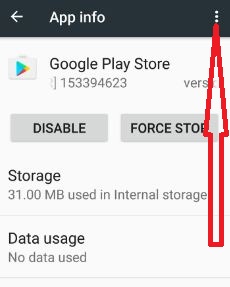
Step 4: Touch “More”.

Uninstall updates of Google play store to fix error 927 in android

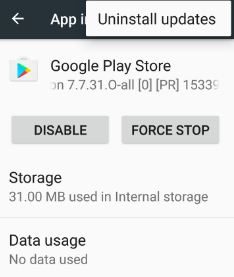
Step 5: Tap “Uninstall updates”.

Step 6: Tap “OK”.

Reboot your device and again try to downloading or updating apps from Google play store in your android device.

3rd Way: Force stop Google Play Store to fix Google Play Error 927

Force stop Google Play Store to fix error 927

Settings > Device > Apps > Google Play store > Force stop

4th Way: Remove your Google account from android device

Step 1: Go to “Settings”.

Step 2: In the Personal section, Tap “Accounts”.

Step 3: Touch “Google”.

Step 4: Touch “More”.

Remove Google account to fix error 927

Step 5: Tap “Remove account”.

Step 6: Tap again “Remove account”.

After removing the account, reboot your android device and log in again your account & try downloading the app from the play store.

All of the possible solutions given above to fix Google Play store error 927 in android devices. If you have any kind of trouble, let us know on below comment box. Don’t forget to share this useful trick with your friends on social networks.

How to Transfer Music From Phone to Laptop/Computer

Download new songs to your PC and want to transfer music files from the phone to Laptop or PC. You can send or receive music files over Bluetooth and easily transfers music from the computer to the phone via USB cable. There are also other ways to transfer songs from phone to PC via Xender, Dropbox, OneDrive and more. Using the Xender application, you can quickly transfer files compare to Bluetooth or USB connection.

You can only transfer those music files that stored on your android phone or tablet device. When using Bluetooth to transfer music, just pair your phone with the device sending the music. In this tutorial, I will show you step by step guide to transfer music from Compute to Android devices via USB cable or Bluetooth.

Related Trick:

How to Transfer Music From Android to Computer using USB Cable or Bluetooth

transfer music files from phone to PC via USB cable

Below you can see steps to send or receive music files from computer to phone using Bluetooth.

1st Way: Copy Music to your Android phone to computer via Bluetooth

Step 1: Turn on Bluetooth on your PC & phone.

Turn on bluetooth in your android phone

Step 2: Pair your phone with a computer Bluetooth device.

Music folder in file manager

Step 3: Open the “Music” folder under the file manager.

List of installed songs & ringtone seen in your android device.

Step 4: Select songs that want to share or transfer to pc.

You can move, copy or share selected music files.

sahre music files android phone to PC via bluetooth

Step 5: Tap “More” & touch “Share”.

Turn on bluetooth in your android phone

Step 6: Tap “Bluetooth“.

You can see a list of Bluetooth devices.

pair with bluetooth device in android

Step 7: Select the Bluetooth device that wants to transfer music files from the phone to the PC.

Now your selected music files copy from phone to PC. To receive music files using Bluetooth, try below steps in your android device.

Step 1: Pair your android phone with another device.

Step 2: Select music and tap the sending button.

Step 3: When receive Bluetooth notification & tap “Accept”.

These music files are saved in music or Bluetooth name folder in your android nougat 7.0 phone or tablet devices. You can check Bluetooth files received, Go to settings > Bluetooth > More > Show received files

2nd Way: Transfer Music From PC to Android Phone via USB cable

Step 1: Connect your phone to PC via USB cable.

Make sure your device is unlocked. You can transfer music, videos, photos and other files between your device storage and computer or laptop device.

Step 2: Open the music folder from your phone storage.

Step 3: Copy the music files want to transfer & paste it to PC.

You can easily transfer music files both ways from phone to PC or laptop to phone. That’s all about file transfer. Also, transfer files android to Google Pixel & Pixel XL device and transfer data iPhone to Pixel XL device. All of the solutions of transfer files from android to iPhone seen above.

I hope the above-given steps helpful to transfer music files from phone to PC using a USB cable or Bluetooth connection. If you find it helpful, don’t forget to share this article with others on social networks. Stay connected with us for daily latest updates.

How to Fix Google Play Error 923 When Downloading Apps

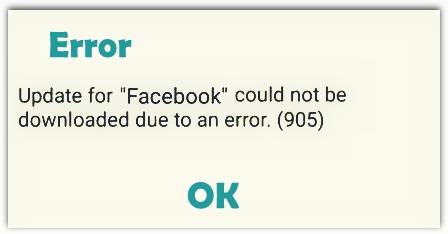
Receive error 923 code when downloading or updating apps/games from Google play store. This is another common error that the android user needs to fix Google play store error 923. When you try downloading apps, it shows the app downloading is running but not downloads. You can see this error message: update for “Google play games” could not be downloaded due to an error. (923)
Other errors related to this type of issues including error 927, error 923, error 495 and more. One of the simplest solutions is to restart your device and try downloading apps. Sometimes restarting your device fixes a small bug. In this tutorial, I will show you easy solutions to fix Google play store error 923 code in android phone or tablet devices.
Related:

How to Fix Error 923 in Google Play Store – App could not be downloaded 

fix Google play store error 923

1st Method: Clear Cache & data of Google Play Store

Step 1: Go to “Settings”.

Step 2: Touch “Apps” under the device section.

Step 3: Scroll down until you see the Google Play Store and tap it.

Step 4: Tap “Storage”.

Clear the cache & data of play store to fix error 923 code

Step 5: Touch “Clear cache” & “Clear data

Clear the cache of Google Play Services in Android

Settings > Device > Apps > Google Play Services > Storage > Clear cache

Clear data of Google Services Framework to Fix Google Play Store Error 923

Clear data of Google services framework

Settings > Device > Apps > More > Show system > Google service framework > Storage > Clear data

2nd Method: Uninstall Play Store Updates

Step 1: Follow the above-given method steps 1 to 3.

Step 2: Touch “More”.

Uninstall Google play store updates to fix error 923

Step 3: Tap “Uninstall updates”.

Step 4: Press “OK”.

Now try to downloading or updating apps from Google play store.

3rd Method: Force Stop Google Play store

Force stop Google Play Store to fix error 923 code

Settings > Device > Apps > Google Play store > Force stop

4th Method: Remove Google account from your device

Step 1: Go to “Settings”.

Step 2: Tap “Accounts” under the Personal section.

You can show created accounts on your android phone or tablet device.

Step 3: Tap “Google”.

Step 4: Touch “More”.

Remove Google account to fix error 923 in play store

Step 5: Tap “Remove account”.

Step 6: Tap again “Remove account”.

After removing your Google account, restart your device and login to Google account with other email ID and try to downloading or updating app from Google play store.

All possible solutions listed above. If none of the above solutions fix error 923 in Google play store, you should factory data reset your android device.

Don’t forget to mention which method worked for you to fix Google play store error 923. If you have known other solutions to fix error 923 code, please share it with us.

How to Fix Error 194 in Google Play Store

Recently try to download the LINE app from the play store and seen error code 194 and message of “can’t download the app” in the android device. This 194 error in Google play store occurs because of the play store problem or internet connection issue in your android phone or tablet device. In-play store other errors also related to this issue including error 492, error 413, error 914, error 963, etc.

When you download your favorite apps and not downloading them, it may be annoying you. When I am downloading the app, play store not downloading apps and this error message are seen: “Line: Free Calls & Messages” can’t be downloaded. (Error code 194). Check out below-given possible tricks to fix solve Error code 194 in the Android Play store.

Related:

How to Fix Google Play Store Error 194 When Downloading the App

fix Google play store error 194

Try below given different methods to fix play store errors.

1st Method: Clear the cache & data Google Play Store

Step 1: Go to “Settings”.

Step 2: Under the device section, Touch “Apps”.

Step 3: Scroll down until you see Google Play Store and tap on it.

Step 4: Touch “Storage”.

Clear the cache & data of play store to fix error 194

Step 5: Tap “Clear cache”.

Step 6: Tap “Clear data”.

Clear the cache of Google Play Services in Android

Settings > Device > Apps > Google Play Services > Storage > Clear cache

2nd Method: Uninstall Google Play Store Updates in Android

Step 1: Go to “Settings”.

Step 2: Tap “Apps” in the device section.

Step 3: Tap “Google play store”.

Step 4: Touch “More”.

Uninstall Google play store update to fix error 194 in android

Step 5: Tap “Uninstall updates”.

Step 6: Press “OK”.

Now try to download apps from Google play store. I hope it will work for you.

3rd Way: Remove Google account to fix error 194 in play store

Step 1: Go to “Settings”.

Step 2: Under the Personal section, tap “Accounts”.

You can see a list of created accounts such as WhatsApp, Dropbox, OneDrive, Office and more.

Step 3: Touch “Google”.

Step 4: Tap “More”.

Remove Google account to fix play store 194 error

Step 5: Tap “Remove account”.

Step 6: Again tap “Remove account” to remove from the device.

After deleting your Google account, restart your android device and log in with other Google account and Check to download the app from Google play store. If not work then again log in with you’re account.

4th Method: Force stop Google Play store

Force stop Google Play Store to fix error code 194

Settings > Device > Apps > Google Play store > Force stop

All solutions listed above to fix Google play store error 194 in android phone or tablet device. Don’t forget to mention the method worked for you. If you find it helpful then share this solution with your friends on social networks. To view other play store solutions in bestusefultips content, visit our Twitter and Facebook page.

Fix Google Play Store Error 120

Error when installing apps or games from the play store. This Google Play store error 120 code seen due to your device is old or not supported the latest version of the play store. Click here to check play store supported devices. After downloading or updating android apps, when you’re installing the app and see the message of Error code during application install: “-120”. You can also update your device play store to fix error code 120 in the play store.

After updating apps in your Android device, when not installed latest updates mean this error occurs in your device. You can solve error 120 in the Google Play Store using clear the cache & data, or uninstall updates of Google play store in your android phone devices.

Related:

How to Fix Error 120 on Google Play Store

Google Play store error 120

After this play store error, you can not install any apps or games from Google Play Store. This is the rarely generate error 120 in Google play store.

1st Method: Clear the play store Cache & data

Step 1: Go to “Settings”.

Step 2: Under the device section, Tap on “Apps”.

Step 3: Scroll down until view Google Play Store and tap on it.

Step 4: Touch “Storage”.

Clear cache & data play store to fix error 120

Step 5: Touch “Clear cache”.

Step 6: Tap “Clear data”.

Clear the cache of Google play services

Settings > Device > Apps > Google Play Services > Storage > Clear cache

2nd Method: Uninstall Google play store updates to fix Error 120 Google Play store

Step 1: Go to “Settings”.

Step 2: Tap “Apps” under the device.

Step 3: Touch “Google play store”.

Step 4: Touch “More”.

Uninstall Google play store update to fix error 120 code

Step 5: Tap “Uninstall updates”.

Step 6: Touch “OK”.

Now try to install apps from Google play store.

3rd Method: Check Play Store Version – Latest Updated

Step 1: Open the “Google Play Store” app.

Step 2: Tap “Three horizontal lines” from top of the left side corner.

settings in play store in nougat device

Step 3: Touch “Settings”.

Google Play Store version

Step 4: Tap “Play Store version” under about section.

If the latest version installed then seen this message on screen: Google play store is up to date

You can download the latest Google Play store versions:

Download the latest Google Play Store version7.6.08.N-all[0] [PR]

That’s all about play store error 120 code related solutions.

End the list of possible solutions to fix Google Play store error 120 in android device. If you find it helpful, share this trick with your friends on social networks.