How to Limit Data Usage on Pixel 2 XL and Pixel 2

Annoying by usage more mobile data on Google Pixel 2 and Pixel 2 XL? Here’s how to set or limit data usage on Pixel 2 and Pixel 2 XL. You can see individually app data usage and Wi-Fi data usage using network and internet settings. To reduce data usage, you need to set a data limit and data warning in your Pixel 2 and other devices. Your phone will turn off mobile data once it reaches the limit you set in your Pixel devices. Also, disable app background data that unnecessary if using cellular data in your devices.

Read Also:

How to Set Data Usage Limit on Pixel 2 and Pixel 2 XL

Below you can see both mobile and Wi-Fi data usage settings for Google Pixel 2 and Pixel 2 XL devices.

Step 1: Go to Settings in your Pixel 2.

Step 2: Tap on Network & internet.

Here you can see Wi-Fi, Mobile network, Data saver, Hotspot & tethering, VPN, Aeroplane mode, and advanced settings.

Mobile Network settings on Pixel 2 to reduce data usge

Step 3: Tap Mobile network.

Data warning and limit settings Pixel 2 XL

Step 4: Tap Data warning and limit.

Set data limit on Google Pixel 2 XL

Step 5: Toggle on Set data limit.

How to Limit Data Usage on Pixel 2 and Pixel 2 XL

Step 6: Tap OK.

Step 7: Tap Data limit.

How to Set Data Usage Limit on Pixel 2

Step 8: Set the data usage limit in GB/MB and tap Set.

How to Set Data Warning on Pixel 2 and Pixel 2 XL

How to Set Data Warning on Pixel 2 and Pixel 2 XL Devices

Settings > Network & internet > Mobile network > Data warning and limit > Data Warning > Set mobile data usage warning > Set

How to Set Mobile Data Usage Cycle on Google Pixel 2 XL and Pixel 2

Set Mobile Data Usage Cycle on Google Pixel 2 XL

Settings > Network & internet > Mobile network > Data warning and limit > Mobile data usage cycle > Set date > Set

How to Disable App Background Data on Pixel 2 XL Usage More Data

Disable App Background Data on Pixel 2 XL Usage More Data

Settings > Network & internet > Mobile network > App data usage > Select the app usage mode cellular data > Toggle off “Background data”

How to Show Wi-Fi Data Usage on Pixels Running Latest Android 11 Stock OS

Show Wi-Fi Data Usage on Pixels

Settings > Network & internet > Wi-Fi > Wi-Fi data usage

That’s it. We hope this makes it clear how to set a data usage limit on Pixel 2 and Pixel 2 XL. If you have any problem, leave your feedback in below comment section. Do you have any other Pixel 2 tips you want to share? Share it with us in below comment box.

How to Fix Pixel 2 At a Glance Widget Not Showing or Working

Irritate by at a glance widget not working on Google Pixel 2 & Pixel 2 XL? Let see possible solutions to fix Pixel 2 at a glance widget not showing. In Google Pixel 2 at a glance widget, you can see three options including calendar events, reminders, and work profile. We already discussed add a weather widget to the Pixel 2 home screen. In Google Pixel, Pixel 2, and other Pixel devices, by default Pixel launcher used. Several users reported at a glance widget not working on the Pixel user community. You can add the next calendar event using the Pixel 2 launcher widget. Also, use Nova launcher to show the weather widget on the home screen in Google Pixel 2.

Read Also:

How to Fix Pixel 2 At a Glance Widget Not Showing

Follow below given four different methods to fix Pixel 2 at a glance not working calendar events and weather widget.

Make Sure Enable At a Glance in Your Pixel 2

You can enable/disable calendar events, upcoming flight information, and traffic information on the home screen. If latest updated Stock Android 11 OS, you can see calendar events, reminders, and work prfile options.

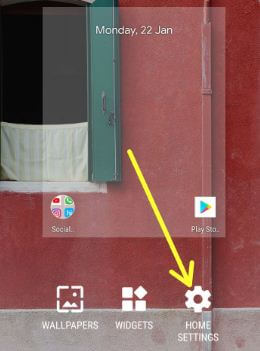
Step 1: Tap & hold the blank space on the Pixel 2 home screen.

Step 2: Tap on Home settings.

Step 3: Tap on At a glance.

How to fix Pixel 2 at a glance widget not showing

Step 4: Make sure to enable all events.

Clear Pixel Launcher Data to fix Pixel 2 at a glance widget not showing

Step 1: Open App drawer in your Google Pixel 2.

Step 2: Tap on Settings.

Step 3: Tap on Apps & notifications.

Step 4: Tap on See all apps.

Step 5: Find Pixel launcher and tap on it.

Step 6: Tap on Storage or Storage & cache.

Clear Pixel launcher data in your Google Pixel 2 Oreo

Step 7: Tap on Clear data.

You can see this message on your device screen: Delete app data?

Pixel 2 at a glance widget not working

Step 8: Tap on OK to clear pixel launcher data.

Now restart your Google Pixel 2 and check fix at a glance widget not working problem or not.

Reset App Preferences Pixel 2

Step 1: Go to Settings.

Step 2: Tap on System.

Step 3: Tap on Advanced.

Step 4: Tap on Reset options.

Step 5: Tap on Reset app preferences.

Step 6: Tap on Reset apps.

It will reset all preferences for background data restrictions for apps, disable apps & app notifications, any app permission restrictions, and more.

Check enable weather updates & weather updates for your location

If weather not showing up in Google Pixel 2 at a glance widget, try the below settings in your Android or Pixel devices.

Step 1: Swipe left to right in Pixel 2 home screen.

Step 2: Tap on Three vertical dots at the top right corner.

Customize feed in Google Now on Pixel 2

Step 3: Select Customize feed.

Step 4: Scroll down up to weather and tap on view all settings.

You can see weather updates and weather updates for your location options. When enabling this option, displaying the weather widget on Google Pixel 2 home screen.

Weather not showing up in Google Pixel 2 at a glance widget

Step 5: Enable weather widget in Pixel 2 and Pixel 2 XL.

Also, change temperature settings to Celsius to Fahrenheit in the Pixel 2 home screen using this setting.

End the list of possible solutions to fix Pixel 2 at a glance widget not showing. Do you have any tips we missed above? Share with us in below comment box. Don’t forget to check out our other Google Pixel 2 XL tips.

How to Put Google Weather Widget on Home Screen Pixel 2 & 2 XL

Do you want to add a Google weather widget on the Pixel or Pixel 2 home screen? Here’s how to add a weather widget to Pixel 2/2 XL/3 XL/4 XL home screen. In my Google Pixel, weather not showing up on an At a glance widget. You can see only calendar events, upcoming flight information, and traffic information on the Google Pixel home screen.

Are you displaying weather widget on Google Pixel 2 home screen? We surf the web and find some possible solutions to add a weather widget to the Pixel 2 home screen. You can see steps to hide or remove weather widget from the home screen on your Google Pixel 2 and other latest Pixel devices also.

Read Also:

How to Add a Weather Widget to Pixel 2 home screen

If Pixel 2 weather widget not working or missing from the home screen, you’ll add it home screen using below given possible methods.

How to Add a Weather Widget to the home screen

Step 1: Long press on the blank space in your Pixel home screen.

Pixel 2 Widget settings

Step 2: Tap Widgets.

How to Add a Weather Widget to home screen

Step 3: Scroll down until Google and tap & hold the At a glance widget and drag it to the home screen.

How to Put Google Weather Widget on Home Screen Pixel 2 & 2 XL

Step 4: You can see the weather info, date, and day on your Pixel home screen.

Remove Weather Widgets

Remove Weather Widgets

To remove a widget, long-press the widget and move it to Remove at the top of the screen.

Find Hidden Weather Widget

Step 1: Unlock your Google Pixel 2 & swipe left to right from the screen

Tap on upcoming event icon at top right side in Pixel 2

Step 2: Tap on the upcoming event icon at the top right side

You can see the below-given screen in your Google Pixel 2 devices.

Tap on home icon at below left corner in Google Now feed

Step 3: Tap on the Home button at the below-left side corner.

Pixel 2 at a glance weather widget

Step 4: Tap on > icon from the given screen (show above screenshot).

Pixel 2 weather widget

Step 5: Tap on weather option.

You can see weather details on your Google Pixel 2 screen.

Step 6: Tap on three horizontal lines at the top right side.

Add weather widget to Pixel 2 home screen

Step 8: Tap on Add to the home screen.

Also, change weather temperature C to F. Now add weather widget on your Pixel 2, Pixel 2 XL, and other android devices.

How to add weather widget to Pixel 2 home screen

Step 9: Tap on Add automatically.

Now weather info shows on Google Pixel, Pixel 2, and Pixel 2 XL home screen.

2nd Method:

Step 1: Swipe left to right your Google Pixel 2 screen.

Here you’ll see Google now page with different topic stories such as Sports, News, Technology, and more.

Step 2: Tap on Three vertical dots at the top right corner.

Step 3: Select Customize feed.

Customize weather widgets in Pixel 2 Oreo

Step 4: Find weather and tap on view all settings.

You can see weather updates and weather updates for your location options. When enabling this option, displaying weather widget on the home screen in Pixel 2 and Pixel 2 XL devices.

Change temperature settings to Celsius to Fahrenheit in Pixel 2 weather widget

Step 5: Enable/disable weather widget in your Google Pixel 2.

You’ll also change temperature settings to Celsius to Fahrenheit in your Google Pixel 2 home screen.

Do you have any tips to remove the weather widget from Google Pixel 2 home screen? Share with us if you have any possible solution.

You can also change temperature units to Fahrenheit, customize weather info, hide weather stories from Google Feed, and never show weather updates in your Pixel 2 using Google feed settings.

Step 1: Swipe left to right your Google Pixel 2 screen.

Remove weather widget from Google Pixel 2 home screen

Step 2: Find Weather stories & tap on three dots.

Change weather widget stories settings in Pixel 2

Step 3: Choose from above-given weather widget settings in Pixel 2.

That’s all about Pixel 2 at glance weather. Did you find the above article helpful to add a weather widget to the Pixel 2 home screen? Let us know your thoughts related to this content in below comment section. Don’t forget to check out our other Pixel 2 tips.

How to Clear Google Search History on All Pixels

Do you want to clear Google search history or browsing history your Google Pixel devices? Here’s how to delete search history on Google Pixel 7 Pro, Pixel 7, Pixel 6 Pro, Pixel 6, Pixel 6a 5G, Pixel 5a 5G, Pixel 5, Pixel 4 XL, and Pixel 4 running latest version (Android 13). In daily routine life, we surf the internet and all search data stored at your Google account which is called web & app activity. You can clear search history on phone individually or clear all browsing history in your Pixel devices using Google Chrome. This clear history on Google Chrome includes browsing history, clear cache & cookies, site data, saved passwords, and cached images & files.

Read Also: How to Change Google Background in PC, Laptop

How to Delete All History on Google Pixels

There are two ways to search history delete on Google Pixel devices.

How to Auto Clear Search History Google on Phone

Step 1: Open the Google app in your device.

Step 2: Click on the Profile icon at the upper right corner.

Step 3: Click the Search history.

Step 4: Tap the Auto-delete (By default 3 months).

How to Auto Clear Search History Google on Phone

Step 5: Click on Auto-delete activity older than 3 months/18 months/36 months and tap on the Next button at the bottom right.

You can auto-delete your location history and YouTube history.

How to Clear the History for Last 15 Minutes on Google Pixel 7 Pro, 7, 6 Pro, 6, 6a, 5, 5a 5G

To clear Google history for last 15 minutes, apply the below steps.

How to Clear History Google for Last 15 Minutes

Google App > Profile icon at the upper right corner > Delete last 15 minutes

How to Deleting Search History of All Web & App Activity on Google Pixel

You can delete history search or my activity (App activity) on the Google Pixel devices.

Step 1: Open the Google App.

Step 2: Tap on the Profile icon at the upper right side.

Step 3: Tap on Search history.

Step 4: Tap on the Delete.

You can search the all activity and filter using date & product in your Pixels.

How to Clear Google Search History on All Pixels


Step 5: Select from Delete today, Delete custom range, Delete all time, Auto-delete.

Step 6: Choose a Activity you want to delete and click on the Next at the bottom right corner.

Step 7: Click on Delete at the bottom right side.

How to Delete All Searches History on Chrome PC/Laptop

You can delete history on Google chrome using below steps.

Step 1: Open Activity.Google.Com in your PC and log in with your account.

Step 2: Click on the × icon to clear history individually or Click on Web & app activity to delete old history.

Step 3: Tap on the View all.

Step 4: Click on the Delete.

Step 5: Choose from Last hour, Last day, All time, or Custom range.

How to Delete All Searches History on Chrome PC

Step 6: Choose a Activity to Delete and Click the Next button.

Step 7: Tap the Delete.

It’s easy to clear search history.

How to Chrome Clear Search History on Pixels – Clear Browsing Data

Step 1: Open Google chrome or other browsers your use to surf the web activity.

Open Google chrome browser settings in Google Pixel phone

Step 2: Tap the Three vertical dots (More) at the top right corner.

Clear Google search history from Google Pixel phone

Step 3: Click on History.

Delete Google search history on Pixel phone

Step 4: Tap on Clear browsing data or tap on the Trash icon for individually remove Google search history.

Here you’ll see two sections including Basic and Advanced for clear browsing data in Google Pixel and Pixel XL. You can select time range for clear Google search history from Google Pixel device.

Basic:

It includes clear browsing history, cookies and site data and cached images & files from your Google Pixel devices.

Advanced: In advanced settings, you’ll also delete saved password, autofill form data, site settings and media licenses.    

Step 5: Tap on the Basic or Advanced.

Clear browsing history on Google Pixel 2 XL

Step 6: Tick mark the option you want to remove & tap on the Clear data.

You can view this message: Clear site storage?

How to delete Google search history on Pixel XL Oreo

Step 7: Tap on the Clear.

It will delete all history on your Pixel phone for all sites including YouTube and Google search history.


That’s it. Did you find above tutorial helpful to delete Google search history on the Pixel device? If you have any kind of trouble, tell us in below comment section. Stay and connect with us for latest Android tips and tricks.

Read Also:

How to Add Multiple Photos to Instagram Story Android and iPhone

Do you add multiple pictures to Instagram story on Android or iPhone (iOS 16.1)? Here’s how to post multiple photos on Instagram story Android, Samsung Galaxy, OnePlus and iOS devices. Choose a photos from camera or your phone gallery (Photos, videos, camera, Inshot, download, etc.). You can upload up to 10 photos simultaneously on your Instagram story with music (Songs). If create Instagram story collage, you can add 2 to 6 photos in layout. Instagram add new photo sticker feature to add more than one picture in one page in your story. Also, edit your Instagram story to make it attractive like enter text, mention (Tag) your friends, font style & size, add music to the story, add GIFs, photo stickers, add different types of Instagram effects, and more.

Read Also: How to Block or Unblock Someone on Instagram

How to Put Multiple Pictures on Instagram Story Android Phone or Tablet

You can add pictures to Instagram story on your Android phone using the below-given settings.

How to Add Multiple Photos to Instagram Story on Android device

Step 1: Open the Instagram app and sign in with your account.

Tap on plus icon on Instagram app on your Android


Step 2: Tap on the + icon in the upper right corner.

How to Add Multiple Pictures to Instagram Story


Step 3: Tap on Story at the bottom.

Tap on Photo icon in the bottom left corner in Instagram Story

Step 4: To select a photos from your phone gallery, tap on Photo icon in the bottom left corner.

How to Put Multiple Pictures on One Instagram Story on Android Phone

Step 5: Click on Select and Selecting the multiple photos (Select up to 10 pictures) you want to upload to your story.

How to Put Multiple Pictures on Instagram Story Android Phone


Step 6: Tap on the Next button at the bottom right corner.

How to Add Multiple Photos to Instagram Story on Android device

Step 7: Choose from Separate or Layout (Only work with 2 to 6 photos) you want to upload.

Edit your Instagram Story Android

Step 8: Here, you can add text, mention people, add location, font style & color, add music, questions, poll, quiz, and more for individual photo.

How to Add Multiple Photos to Instagram Story Android and iPhone

Step 9: Tap again on Next button at the bottom right.


Share Instagram story on Android device


Step 10: Choose from Your story or Close friends and tap on Share.

You can directly share to your Instagram followers also here.

Create an Instagram story on your Android phone


Step 11: Tap the Done.

View your uploaded Instagram Story Android

Step 12: Tap on Your story icon in the upper left corner to view your uploaded Instagram story.

Now, your first Instagram stories are created on your Android devices.

How to Make a Collage on Instagram Story (Photo Collage)

You can add 2 pictures to Instagram story to select your layout.

Step 1: Open the Instagram app and log in with your account.

Step 2: Swipe screen right side to view your story screen.

Add 2 Pictures to Instagram Story

Step 3: Tapping the Layout icon at bottom left side of the screen.

How to Make a Collage on Instagram Story

Step 4: You can see different Instagram story layout here. Select the collage you want to set.

Step 5: Click on the Photo icon at the bottom left corner.

How do you Make Collage on Instagram Story

Step 6: Select a Photo from your gallery and tap on Right arrow with circle icon.

You can add stickers, mention person, add music, font style & size, and more.

Create Instagram Story Collage

Step 7: Tap the Your stories or Close friends and “>” icon in the bottom right.

Step 8: Select Your story or Close friends and click on Share.

Step 9: Click on Done to posting multiple photos in your phone.

How to Put Two Pictures on One Instagram Story Page on Android

Step 1: Swipe screen right to view story screen on your Instagram app.

How to Put Two Pictures on One Instagram Story Page on Android

Step 2: Tap on Aa icon in the middle left side.

Click on the Photo icon on your Instagram App Android

Step 3: Tap the Photo icon at the bottom left.

Step 4: Choose a Photo from your phone gallery or camera roll.

How to Put Two Pictures on One Instagram Story Page on Android

Step 5: Tap the Sticker icon in the top right.

Use Instagram Photo stickers on Android

Step 6: Tap the + icon or Photo stickers.

Tap on Photo to change the shape (Circle, Square, Heart, etc). Also, add stickers text to enter the name.

How to Put Two Pictures on One Instagram Story Page on Android

Step 7: Choose from Your stories or Close friends and tap on “>” icon in the bottom right.

Step 8: Select from Your story or Close Friends and click the Share to share 2 photos in one page.

Step 9: Tap the Done.

How to Put Multiple Pictures on One Instagram Story iPhone

You can put 2 pictures together or multiple at the same time on your iPhone or iPad using below given settings.

Step 1: Swipe right to open story page in your iPhone.

Step 2: Tap the Photo icon at the bottom left.

Step 3: Select the Pictures from camera roll or gallery you want to upload and tap on “>” icon at the bottom right.

How to Put Multiple Pictures on One Instagram Story iPhone

Step 4: Choose Your story or Close friends and tap on Share.

Also, share your Instagram story to your Facebook story on iPhone.

Step 5: Tap the Done.

How to Add Multiple Pictures to Instagram Story with Music on Android in 2023

Step 1: Log in your Instagram account in your device.

Step 2: Tap the + icon in the upper right corner.

Step 3: Tap the Story at the bottom.

Instagram Multiple Photos in One Post Android

Step 4: Long press photos to add multiple images, and tap on Next at the bottom right corner.

Step 5: Choose from Layout or Separate.

Tap on Emoji icon to search song for Instagram story

Step 6: Tap on the Emoji icon at the top right side.

Add music to Instagram story Android phone and tablet

Step 7: Tap on Music.

Step 8: Search for the music and tap on the Song.

Step 9: Tap on Done at the top right corner.

How to Add Multiple Photos to Instagram Story with Music

Step 10: Tap on the Next button at the bottom right corner.

Step 11: Tap on Share at the bottom.

Step 12: Tap on Done.

Step 13: Tap on Your story at the top left corner.

You can see your Instagram story with multiple photos and your favorite song.

How to Post Multiple Photos on Instagram With Different Sizes on PC or Mac

Step 1: Click here to open Instagram on your PC or laptop.

Step 2: Log in with your Instagram ID & Password or Login with your Facebook account.

Open Instagram on your PC

Step 3: Tap on the + icon at the top right side.

Select photos from computer

Step 4: You can drag photos & videos here or Select them from the Computer.

Tap on Next on PC

Step 5: After selecting the photos, tap on Next at the top right corner.

You can filter photos and adjust the brightness, contrast, temperature, etc.

Tap on Next in your laptop to filter Instagram photos

Step 6: Again, tap on Next.

Here, you can write a caption, add a location, tag a person, and other details.

How to Post Multiple Photos on Instagram With Different Sizes on PC or Mac

Step 7: Tap on Share at the top right corner.

Your post has been shared message appears on your desktop or laptop.

How to Post Multiple Photos on Instagram Android Phone

You can add up to 10 pictures at the same time from your phone.

Long press on your story in Instagram App Android


Step 1: Long press on the Your story at the top left corner of the screen.

How to Add Multiple Stories on Instagram


Step 2: Tap on Add to your story at the bottom left side.

Step 3: Choose multiple photos from your Gallery or Camera.

Step 4: Tap on Next button at the bottom right.

Step 5: Select Your story or Close friends and click on Next button in the bottom right.

Step 6: Choose Your story or Close friends and tap on Share.

Step 7: Tap on Done.

Now adding multiple photos to Instagram stories on Android devices are pretty straightforward. These added photos and videos to your story disappear after 24 hours automatically. You can also share a story as a direct message to other people.

How to Delete Uploaded Photo from your Instagram Story on Android

Step 1: Tap on Your story at the top left corner to open Instagram story you uploaded.

Delete uploaded Instagram story on Android

Step 2: Tap on Three vertical dots (More) at the bottom right corner of the photo.

Here you’ll see several options, including delete, save photo, send to, share as post, copy link, share to, and story settings.

Delete Instagram story on Android phone and tablet


Step 3: Tap on Delete.

You can see a pop-up message: Delete this photo?

How to Delete Uploaded Photo from your Instagram Story on Android

Step 4: Tap on Delete or Delete from both (If Instagram linked with your Facebook account).

Now, this photo won’t be able in your created Instagram story. You can restore unarchived stories for 24 hours or 30 days for archived stories from recently deleted in your activity. After that, it will be permanently deleted.

And that’s it. Did you find the above tutorial helpful in add more than one Instagram story on your Android and iPhone? Do you have any other Instagram tips you want to share with us? Let us know your thoughts about our article in below comment section.

Frequently Asked Questions:

How do i Add Multiple Photos to Instagram Story on One Page?

You can put multiple pics on Instagram story one page by Swipe screen right side to view Instagram story > Select a picture you want to add > Tap on Sticker icon at the top > Scroll down and tap on Photo sticker or ++ icon > Add photos you want in your page > Your stories.

How Many Pictures Can you Post on Instagram?

You can share up to 10 photos and videos on your Instagram post and story.

How do you Make Collage on Instagram Story?

To create collage Instagram story, swipe screen right side to view the story screen and tap on Layout icon. Here, you can see different collage you want to use for your Instagram story. Select the collage and choose a pictures and tap on Right arrow icon. Tap on > icon at the bottom right and tap on Share.

Read Also:

How To Unlock Samsung Galaxy S7 Edge without Password

Forgotten password or PIN or Pattern lock on Samsung Galaxy S7 and S7 edge? Here’s a complete guide to reset phone lock or unlock Samsung Galaxy S7 Edge without Password. You’ll unlock S7 without losing data to use your Samsung Find my mobile, or Google account, or Android device manager. Even if forgotten your Google account details, reset Samsung Galaxy S7 edge.

You will use find my device app to find lost or stolen Samsung device and change the screen lock or lock the screen in your Samsung Galaxy S7 and Galaxy S7 edge devices. Check out below given both methods to reset phone lock in the Galaxy S7 Edge device.

Read Also:

How to hard reset Galaxy S7 Edge using recovery mode

Fix Samsung Galaxy S7 Blank screen problem

How to improve battery life on Galaxy S7 and Galaxy S7 Edge

Fix Galaxy Note 8 randomly screen wake problem

How To Unlock Samsung Galaxy S7 When Forgot Pattern or Password

How to reset phone lock in Galaxy S7 Edge

To use the android device manager in the S7 edge, just need a Google account on your device.

Unlock Samsung Galaxy S7 Edge without Password using Samsung Find my mobile 

Step 1: First of all Sign in to Samsung Find my mobile service, if not then create a new Samsung account

Follow the on-screen instruction to create your Samsung account.

Step 2: Tap on Unlock my screen from the left sidebar

Step 3: Tap on Unlock

By default view, your device screen is already unlocked.

Step 4: Set a new password in your galaxy S7 device

You can easily reset forgot screen lock password on galaxy S7 edge using this method.

Unlock Galaxy S7 forgot PIN or Pattern using android device manager:

Reset screen lock password using Android Device Manager

Step 1: Open this android device manager in your desktop or laptop device

Step 2: Sign in with your Google account

Now you’ll see your device name on the desktop PC and three options including play sound, lock and erase.

Step 3: Tap on Lock

Step 4: Enter a new password & press Lock

Set a new screen lock password and your screen will unlock. Now unlock Galaxy S7 edge forgot password without losing data.

Factory Reset Galaxy S7 Without Password to unlock a phone

If you’ve forgotten your Google account details, follow the below-given steps to factory reset galaxy S7 without Google account.

Factory reset Galaxy S7 without password powered on

Step 1: Turn off your Galaxy S7 and Galaxy S7 edge

Step 2: Press and hold the power button, volume up, and home button until phone turn on and see the android recovery screen

Step 3: Press volume down button until wipe data/factory reset view, after that press power button

Step 4: Press volume down button until Yes select then press the power button to start the factory reset process on the Galaxy S7 edge

Step 5: Press volume down button up to reboot system now and press the power button to process

End the list of possible solutions. Do you have any other tips to reset phone lock in Galaxy S7 Edge? Share with us in below comment section. Don’t forget to check out our other Samsung Galaxy S7 tips and tricks.