How to Change Group Admin in WhatsApp Android

Here’s how to change WhatsApp group admin on Android devices. Admin can add up to 100 participants in one group and chat with at once. Only group admin can remove or add new participants in WhatsApp existing group. Only the WhatsApp group admin can add other participants as a group admin. Every WhatsApp group has one or more admins. If in the existing WhatsApp group admin leaves group then-new group admin set randomly from any of the group participants.

WhatsApp group chat is the best way to chat with friends and family without any pay. You can share an unlimited number of audio, videos, photo, and other information with your WhatsApp contacts or group. One of the biggest advantages of WhatsApp is its support almost all OS including Android, iOS, Windows Phone, BlackBerry, etc. It’s quite easy to change WhatsApp group admin on android phones and tablets. Follow the below-given steps to change WhatsApp group admin on Android devices.

Read Also:

How to Change WhatsApp Group Admin on Android

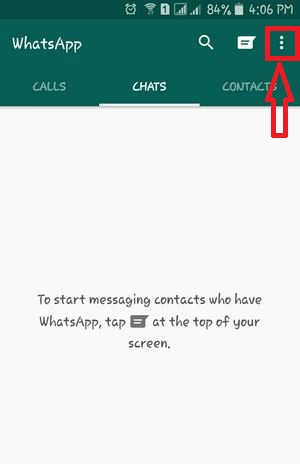
Step 1: Open WhatsApp on your Android phone or tablet.

WhatsApp Group Admin change using chat settings

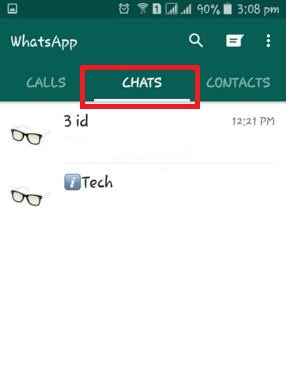
Step 2: Tap on the Chats tab.

Step 3: Tap on any WhatsApp group wants to add a new group admin.

Open WhatsApp group settings to change admin

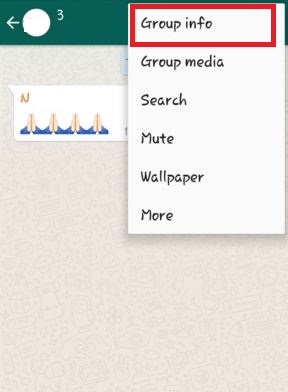
Step 4: Tap Three vertical dots (More) at the top right corner.
Edit group info on WhatsApp Android phone

Step 5: Choose Group info.

WhatsApp group settings to change Admin in WhatsApp Android

Step 6: Tap Group settings.

Here, you can see edit group info (Choose who can change this group’s subject, icon, and description), send messages (Choose who can send messages to this group), and Edit group admins.

Change group admin in WhatsApp Android

Step 7: Tap Edit group admins.

How to Change WhatsApp Group Admin on Android

Step 8: Tap any Participant and tap the Make group admin to add new admin on the WhatsApp group.

New group admin can easily remove the other WhatsApp group admin from group participants. That’s all. It’s easy to change or remove WhatsApp group admin from the existing group.

Alternative Way: Open WhatsApp app > Chats > Tap Group name > Tap Group profile name > Scroll down and tap & hold the participants to make a group admin

How to Remove WhatsApp Admin on Android

How to Remove WhatsApp Admin on Android

Open WhatsApp app > Chats > Tap Group name > Tap Group profile name > Scroll down and tap & hold any group admin you want to remove > Dismiss as admin

How to Stop Auto Download Group Media From Phone’s Gallery on Android

If your android device has limited storage, you can stop automatically downloaded media photos & videos from your phone’s gallery. By default show, newly downloaded media from a group chat in your phone internal storage. You can stop this automatically downloaded photos & videos from WhatsApp using the below settings.

Stop Auto Download Group Media From Phone's Gallery on Android Devices

Open WhatsApp app > Chats > Tap Group name > Three vertical dots at upper right > Group info > Media visibility > Select “No” > OK

It will save storage and speed up your device performance also.

Did you find the above process to change WhatsApp group admin on the android device is helpful? Please let us know! Comment below box and connect with us for daily updates!

How to Set Up Fingerprint on Samsung Galaxy A50

Add fingerprint in Samsung A50? This tutorial will help you to set up fingerprint on Samsung Galaxy A50. Galaxy A50 device has two biometrics security available, one is in-display fingerprint and another is face unlock. You can maximum add 3 fingerprints in your Samsung A50 devices. Several users reported fingerprint not registered or take more time to add fingerprint. Have you facing this problem?

Lock screen security is important for all users to secure him important data from unknown user or spammers or lost phone. You can find fingerprint under Biometrics and security settings in your galaxy A50. Also use fingerprint lock on WhatsApp app Android or iPhone devices. Let see complete process to enable and set up fingerprint on Samsung Galaxy A50 or Galaxy A70.

Read Also:

How to use full screen gesture in Galaxy A50

How to set up Face unlock on Pixel 4 and 4 XL

How to use motions and gestures on Samsung Galaxy A50

How to set up fingerprint on Samsung Galaxy A50 or Galaxy A70

You can add one or more fingerprint sensor on your Samsung galaxy A50 using below given settings.

Step 1: Swipe up from home screen to access app drawer

Step 2: Tap Settings app

Set up fingerprint recognition on galaxy A50

Step 3: Tap on Biometrics and security

Step 4: Tap on Fingerprints

If you set up fingerprint recognition on galaxy A50 first time, first of all set PIN or Password or Pattern lock security to lock your phone.

How to set up fingerprint on Samsung Galaxy A50

Step 5: Tap on “Add fingerprint +

Add fingerprint in Samsung A50

Step 6: Scan your fingerprint. Press your finger on the sensor, and then lift it off when the percentage goes up. Continue process until complete 100%.

You can anytime check added fingerprint on your Samsung A50. Also enable or disable below given two settings.

Fingerprint unlock

It will unlock your fingerprint. If you don’t want to use fingerprint recognition, turn off fingerprint unlock toggle.

Show icon when screen is off

Tap the screen when it’s off to show the fingerprint and other supported icon.

Also use your Samsung fingerprint sensor for Samsung pass to verify your identity when purchase from Samsung store and other supported apps.

Remove Fingerprint on Samsung Galaxy A50

Remove fingerprint security you already added in your phone using below settings.

Remove fingerprint on Samsung Galaxy A50

Settings > Biometrics and security > Fingerprint > Tap Fingerprint you want to delete > Remove at top right corner > Remove

Now delete fingerprint from your Samsung A50 device.

Disable Fingerprint on Galaxy A50

If you want to use Face recognition as default biometrics security, you need to turn off fingerprint sensor toggle to temporary disable fingerprint sensor on A50.

Settings > Lock screen > Screen lock type > Biometrics > Turn off Fingerprint toggle

Also select your preferred Biometric as face recognition or fingerprints. It’s easy to add or remove fingerprint sensor on Samsung A50.

And that’s all. We hope above given article useful to set up fingerprint on Samsung Galaxy A50. Do you still have any question? Tell us in below comment box. Don’t forget to check out our latest android tutorial.

How to Set Up Fingerprint Lock For WhatsApp on Android

Here’s how to enable fingerprint lock for WhatsApp on Android or Samsung devices. WhatsApp has launched a new fingerprint lock feature for more secure your WhatsApp app. To unlock WhatsApp with a fingerprint on Android device, make sure the WhatsApp app updated with the latest version. You can find a fingerprint lock feature under WhatsApp privacy settings in your android or Samsung devices. When enabled, you’ll need to use fingerprint to open WhatsApp.

You can still answer calls if WhatsApp is locked. Make sure to set up a fingerprint on Android or Samsung device to unlock your WhatsApp account. Also, unlock WhatsApp with Face ID on iPhone. Follow the below-given process to enable fingerprint lock for WhatsApp on Android devices.

Read Also:

How to Enable Fingerprint Lock For WhatsApp on Android or Samsung Galaxy

You can enable the WhatsApp fingerprint lock feature on Android phones using the below settings.

Step 1: Open the WhatsApp app in your android or Samsung devices.

Step 2: Tap Three vertical dots (Menu) at the top right corner.

Step 3: Select Settings.

Step 4: Tap on Account.

Step 5: Tap Privacy.

Enable fingerprint for WhatsApp on android

Step 6: Scroll down at the end of the page and tap Fingerprint lock.

By default turned off fingerprint lock on WhatsApp.

Enable the WhatsApp fingerprint lock feature

Step 7: Turn on “Unlock with fingerprint” toggle.

Lock WhatsApp on Samsung with Fingerprint

Step 8: Confirm Fingerprint to use a new fingerprint lock on the WhatsApp app.

Here you can see automatically lock option (Show below screenshot) for lock your WhatsApp account with a fingerprint when you close. If you want to instantly lock your WhatsApp account after close WhatsApp app, use immediately.

How to enable fingerprint lock for WhatsApp on Android

Step 9: Choose from Immediately/After 1 minute/After 30 minutes.

Close your WhatsApp app and open it again. Now enable fingerprint for WhatsApp on Android or iPhone.

Unlock WhatsApp with fingerprint on Android

Step 10: Touch the fingerprint sensor to unlock WhatsApp.

Also, enable or disable show content in notification toggle to preview sender and message text inside new message notifications in your android phone.

How to Lock WhatsApp on Samsung with Fingerprint or Face unlock

You need to enable fingerprint lock on your Samsung galaxy device to unlock WhatsApp with a fingerprint.

WhatsApp app > More > Settings > Account > Privacy > Fingerprint lock

Make sure to enable the fingerprint sensor in your Samsung device.

And that’s it. We hope the above-given method useful to enable fingerprint lock for WhatsApp on Android or Samsung. If you have any questions, tell us in below comment box.

How to Turn Auto Updates Off Instagram Android and iPhone (2023)

Do you want to stop update Instagram app automatically on your Android or iPhone devices? By default, automatically update apps on your Android devices. If you regularly update the Instagram app, you will receive the new and latest Instagram features. You need to turn auto updates off Instagram Android and iPhone devices to stop the new Instagram update. You can set app download preference and auto-update app settings on your Android phone using play store settings. Also, uninstall the app update if you’ve faced an app issue after updating the app. If you have iPhone, you can stop the update for all apps at once or manually check if available app updates.

Read More: How to Block Someone from Seeing Your Story on Instagram

How to Turn Auto Updates Off Instagram Android

Check out the below-given methods on your Android, iPhone, and other devices.

Turn Off Auto Update Instagram App Android in 2023

Step 1: Go to Settings.

Step 2: Tap on Apps.

Step 3: Tap on See all apps.

Step 4: Scroll down and tap Instagram.

Step 5: Scroll down at the end of the screen and tap on App details in the store section.

Step 6: Tap Three vertical dots (More) at the top right corner.

How to turn off Automatic Updates On Instagram Android 2020

Step 7: Un-check the box Enable auto-update.

Alternative Way:

Open the Play Store > Profile icon at the top right corner > Manage apps & device >Mange tab > Instagram > Three vertical dots at the top right corner > Uncheck the box Enable auto-update

Older Instagram Version (Android)

Step 1: Open the Instagram app on your Android phone.

instagram-profile-android-phone

Step 2: Tap on the Profile icon from the bottom right corner.

instagram-settings-on-android

Step 3: Tap Three vertical dots from the top right corner.

instagram-app-updates-android-phone

Step 4: Scroll down until settings and tap on App updates.

disable auto update instagram app

You can see the above screen on your device. By default Toggle on the Aauto-update Instagram app on your Android phone.

Step 5: Toggle off Auto-update Instagram.

You can see this message: These give you new Instagram features right away. Do you still want to turn them off?

Step 6: Click on Turn off want to disable Instagram auto-update apps.

Relevant:

How to Stop Auto-Update Apps (All Apps) on Android Phones

Step 1: Open the Play store on your Android phone.

Step 2: Tap the Profile icon at the top right corner.

Step 3: Tap Settings.

Step 4: Tap Auto-update apps in the Network preferences section.

How to Turn Auto Updates Off Instagram Android

Step 5: Choose Don’t auto-update apps and tap Done.

You need to check for app updates and update them manually.

Read More: How to Update Apps on Android

How to Turn Auto Updates Off iPhone

You can turn off auto update on your iPhone for all apps simultaneously.

Step 1: Go to Settings.

Step 2: Tap on the App store.

Step 3: Toggle off App updates.

If you want to update apps on iPhone using WiFi only, go to Settings > App store > Toggle off Automatic downloads in the Cellular data section.

Did you find the above process to turn off the auto-update Instagram app helpful? If you are facing any problems, just let us know in the below comment box, it would be a pleasure to help you. Feel free to share this Instagram trick with your friends!

FAQs:

Why won’t my Instagram update to the new version?

Several reasons for your Instagram not updating. Check your phone’s internet connection to download the app update. Try to clear the app cache on Instagram, check for system updates, make sure free up storage on your phone, or uninstall & reinstall the Instagram app. Check all the possible reasons that stop Instagram’s new updates on your Android or iPhone devices.

How do I Update Instagram App?

You can update the Instagram app automatically or manually on your phone. To manually check for Instagram app updates, Open the Play store > Profile icon at the top right corner > Manage apps & device > Manage tab > Updates available > Update.

How to Fix Android.Process.Media Has Stopped Error

One of the most common errors android users face is android.process.media has stopped. This android device error occurs at any time in your device. The reason behind occurs this error is firmware upgrade failed, media storage bug, download manager, or data synchronization. Another type of error message is “Unfortunately, the process android.process.media has stopped on your android device screen.

Don’t worry when you seeing these types of errors in your android device. Apply these possible solutions to fix android.process.media has stopped error in Samsung Galaxy or Android devices. Contact any mobile expert or customer care if none of the solutions worked for you.

Read Also:

How to Fix Android.Process.Media Has Stopped in Android Phone or Tablet

Fix android.process.media has stopped error

Clear the Cache & Data of Google Play Store & Google Play Services

Step 1: Go to “Settings” in your android devices.

Step 2: Under the device section, tap on “Apps”.

You can view a list of installing and system apps of your android phone or tablet devices.

Step 3: Scroll down unlit “Google play store” and tap on it.

Step 4: Tap “Storage”.

Clear cache and data of play store to fix error android

Step 5: Tap “Clear cache” and tap “Clear data”.

Clear the Cache of Google Play Services

Clear cache of Google play services to fix error android

Settings > Apps > Google Play services > Storage > Clear cache and clear data

Now check the problem is solved or not. If not resolve, try the below-given method in your devices.

Reset App Preferences

Step 1: Go to Settings.

Step 2: Tap Application manager or Apps.

Step 3: Tap Three vertical dots (More) at the top right side corner.

Step 4: Tap Reset app preferences.

Clear Media Storage Data

Step 1: Go to “Settings”.

Step 2: Under the device section, tap on “Apps”.

You can view a list of installed apps in your android devices.

Step 3: Scroll down until “media storage” and tap on it.

Step 4: Tap “Storage”.

Step 5: Tap “Clear data”.

If clear data of media storage not fix the issue, force stop media storage and restart your android device.

Stop Google Sync to Fix Android.Process.Media Has Stopped Error

Step 1: Go to “Settings”.

Step 2: Tap on “Accounts” under the personal section.

Step 3: Tap “Google”.

Disable all Google synchronization on android

Step 4: Disable all Google synchronization if enable.

Factory Reset Your Android

Step 1: Go to “Settings”.

Step 2: Tap “Backup & reset” under the personal section.

Here you can see back my data option to back up your important data before resetting your Android device.

Step 3: Tap “Factory data reset”.

Reset android phone to fix android.process.media stopped error

Step 4: Tap “Reset phone”.

If you set any pattern lock or PIN or Password or Fingerprint, confirm it to go the next step.

Step 5: Tap “Erase everything”.

It will erase all your important data such as photos, videos, and other internal storage data, downloaded apps, and more. I hope this solution fix android.process.media stopped error.

That’s all. We hope this makes clear how to fix android.process.media has stopped error in android phone. Do you know some other methods to fix this issue? Leave your feedback in below comment box.

How to fix unfortunately app has stopped error in android

While downloading an app from the play store and got a message of unfortunately app has stopped error in android phone or tablet. You can get this error in any android apps that look like: Unfortunately “App name” (Facebook, WhatsApp, Instagram) has stopped error message. But in this tutorial, I will show you a complete guide to fix unfortunately app has stopped working in android.

Sometimes Android users face problems while downloading or updating an app from the Google play store. Most of all this error occurs when you’re application downloading and suddenly force stopped that app. In an Android device, you can get regular app updates to fix small bugs. Let see some of the useful tricks to fix unfortunately app has stopped error in Android device.

Read This:

Fix file manage has stopped working on Android

How to fix error retrieving information from server

Fix Google Play Services has stopped

5 Methods to fix unfortunately app has stopped error in android phone or tablet

fix unfortunately app has stopped error in android

In this tutorial, you can see solutions to various app problems such as WhatsApp has stopped working or Facebook has stopped working and other app issues. Try below given possible solutions to fix the android app has stopped error.

1st Method: Restart your android device

One of the simple and basic solutions is restarting your android device. Sometimes restart your android device is fixed the bug of your device.

2nd Method: Clear the cache of App

Step 1: Go to “Settings

Step 2: Under the device section, touch “Apps

You can view a list of installed apps on the android phone.

Open File manager to fix error

Step 3: Scroll down until finding android app want to clear the cache and tap on it

Touch storage under file manager

Step 4: Touch “Storage

clear cache of file manager in android 7.0 device

Step 5: Tap “Clear cache

After clear cache particular app, restart your device. Now try to download an app from the play store. If not fix errors then try below method.

3rd Method: Uninstall App update to fix unfortunately app has stopped error in android

Step 1: Follow the above-given method step 1 to 3

Step 2: Tap “More” from top of the right side screen

uninstall updates of file manager android device

Step 3: Tap “Uninstall updates

You can see a message: Replace this app with the factory version? All application data will be removed.

Step 4: Tap “OK

Also, check app updates using the below settings. Update app will automatically fix your device small bugs.

Google Play Store > Menu > my apps & games > Update all

4th Method: Reset app preferences

Step 1: Go to “Settings

Step 2: Under the device section, tap on “Apps

Step 3: Tap “More

reset app preferences to fix app has stopped working in android

Step 4: Touch “Reset app preference

Step 5: Touch “Reset apps

It will reset all preferences for apps background data restrictions, app permission restrictions, disabled apps & it’s notifications, default applications and more actions. But you will not lose any app-related data in your device.

Reset app preferences Android 6.0 marshmallow & lollipop 5.1.1:

Settings > Applications > Application manager > More > Reset app preferences > Reset

5th Method: Factory reset your device to fix unfortunately app has stopped error in android

It will remove all your personal information and downloaded apps from your device. Before factory reset, back up your android phone data.

Step 1: Go to “Settings

Step 2: Under the personal section, tap on “Backup & reset

Step 3: Tap “Factory data reset

Factory reset andriod to fix app has stopped error android

Step 4: Touch “Reset phone

If set pattern lock or password in your device, confirm the pattern.

Step 5: Tap “Erase everything

That’s all. Did the above-given solutions fix the problem? Don’t forget to mention which method worked for you to fix unfortunately app has stopped error in android? If you find it helpful, share it with others.