How to Turn Off WhatsApp Vibration on Android Phone

Annoying by WhatsApp vibration, or WhatsApp vibration not working issue? Here’s how to turn off vibration on WhatsApp Android phone or tablet. Easy to enable or disable vibration for WhatsApp message notifications, group notifications, voice messages, or WhatsApp voice & video calls. You can set or customize the vibrate notification settings of WhatsApp from off, Default, Short and long. Also, turn off notification vibration on Android stock to disable vibration notifications in WhatsApp and other Apps.

Read Also:

How Do You Stop WhatsApp from Vibrating on Android Phones?

Check out the below given different ways to turn off vibration on WhatsApp Android phone or tablet.

Step 1: Open WhatsApp on your Android devices.

Tap on three dots from right corner

Step 2: Tap on Three vertical dots from the top right corner.

Select settings of WhatsApp

Step 3: Tap on Settings.

Tap on notifications under WhatsApp settings

Step 4: Tap on Notifications.

turn off vibration on WhatsApp android lollipop

Step 5: Tap on the Vibrate option in the Messages section.

You can see the below screen on your Android device. By default, select Default. So, automatically turn on vibrate on WhatsApp messages or calls,

How to turn off vibration on WhatsApp android lollipop

Step 6: Choose the Off to turn off WhatsApp message vibration.

How to Turn Off Notification Vibration on WhatsApp Android 12 or Android 11 Stock OS (Pixels)

Step 1: Go to Settings.

Step 2: Tap on Apps.

Step 3: Tap on See all apps.

Step 4: Tap on WhatsApp.

How to Turn Off WhatsApp Vibration on Android Devices

Step 5: Tap on Notifications.

How Do You Stop WhatsApp from Vibrating on Android

Step 6: Tap on Message notifications.

How to Turn Off Notification Vibration on WhatsApp Android

Step 7: Toggle off Vibration.

How to Disable Vibration for WhatsApp Group Notifications on Android 12/Android 11

Step 1: Go to Settings.

Step 2: Tap on Apps.

Step 3: Tap on See all apps.

Step 4: Tap on WhatsApp.

Step 5: Tap on Notifications.

Step 6: Tap on Group notifications.

How to Disable Vibration for WhatsApp Group Notifications on Android

Step 7: Toggle off Vibration.

How to Turn Off WhatsApp Group Vibration on Android

Turn Off WhatsApp Group Vibration

Open WhatsApp > Three vertical dots (More) > Settings > Notifications > Tap on Vibrate in Groups section > Choose off if you want to turn off

How to Enable or Disable WhatsApp Call Vibration on Android

Enable or Disable WhatsApp Call Vibration on Android

Open WhatsApp > Three vertical dots (More) > Settings > Notifications > Tap on Vibrate in Calls section at the end of the page > Choose off if you want to turn off

Above, you can see the turning off vibration on WhatsApp Android devices. Did you find the above process helpful? Don’t hesitate to let me know in the below comment box. It would be a pleasure to help you. Connect with us for daily updates.

How to Attach a Photo to Text Message in Android 14, 13, 12, 11, 10

Do you want to attach your picture or GIF to the messages on your stock Android devices? Here’s how to attach a photo to text message in Android 14, 13, 12, 11, and 10. You can send a picture in text using message settings on your Android or Samsung devices. Before sending a photo, allow MMS messaging on your Android. Also, send GIFs, stickers or phone gallery photos as MMS on your Android devices. You can share contacts, attach files and more on your latest Android devices. Also, you can set a schedule to automatically send text messages to your friends or other contacts on the latest Android version.

First, check that your phone supports Project Fi to send MMS on Android phones. Several users reported issues sending images using Android messages on the Google forums. Follow the below-given step-by-step process to attach a picture to a text message on Android 10 to Android 14 devices.

Check More:

How to Attach a Photo to Text Message in Android 14, 13, 12, 11, 10

You can send and receive photos, videos, audio files and more as multimedia messages on your Android or Samsung devices. Also, use your phone camera to take a picture or start a recording. Apply the below steps to send pictures to text messages on Android.

How to Send a Picture in a Text Message on Android Phones

Step 1: Open the Messages app on your Android.

Send MMS on Android 10

Step 2: Tap the Start Chat button at the bottom right corner.

Send picture in text message on Samsung A50

Step 3: Enter a name, phone number or email you want to send MMS.

Attach a picture to a text message on Android 10

Step 4: Tap the + icon.

Here, you can see Gallery, GIFs, Stickers, Files, Location, Google Assistant for ask, Voice, Share contact, Schedule send and attach a file.

Step 5: Select the Option from the list you want to send.

How to attach a picture to a text message on Android 10

Step 6: Tap the Send icon or MMS button.

It’s easy to send the picture as a text message on your Android devices.

Attach a Photo to a Text Message on Android (Android 10) from the Phone Gallery

Check out the settings below to send a picture as MMS on Android from your phone gallery.

Step 1: Open the Android messages app on your device.

Step 2: Tap the Start Chat button.

Send photo as text message on Android 10

Step 3: Tap the Camera icon button.

Step 4: Choose a photo from the gallery or take a selfie or picture using a camera.

Step 5: Tap the MMS button.

You can send a picture via email or text on any Android phone.

And that’s it. I hope this clarifies how to attach a picture to a text message on Android. Do you still have any questions? Tell us in the comment box below. Stay and connect with us for the latest updates.

Read Also:

How to Change Group Icon WhatsApp Android Samsung

Here’s how to change group icon WhatsApp Android phones and tablets in 2025. Any WhatsApp group participant can change the WhatsApp group profile picture and the WhatsApp group name or subject. You can edit the group name, description, add or remove group admins, and update the WhatsApp group information. Only the WhatsApp group admin can add or remove participants from the existing WhatsApp group. You can chat with up to 100 people at once in a WhatsApp group. A WhatsApp group has more than one (unlimited) admin.

Read Also:

How to Change WhatsApp Group Icon without Admin on Android Samsung 2025

Step 1: Open WhatsApp on your Android device, whether it’s a phone or tablet.

Step 2: Tap on any WhatsApp group for which you want to change the group icon.

Change WhatsApp Group Icon Android

Step 3: Tap on the WhatsApp group name.

Change WhatsApp group profile picture Android

Step 4: Tap on the WhatsApp group profile picture.

How to Change WhatsApp Group Icon without Admin


Step 5: Tap on the Pencil icon in the top right corner.

Now you can see the five options below on your Android device.

  1. Camera: Capture an image from your phone camera.
  2. Gallery: Choose a picture from the phone gallery.
  3. Emoji & stickers: Select an Emoji and the color you want to set.
  4. Search Web: Find or search icon on the Web.
  5. AI images: Create AI images to enter prompts

How to Change WhatsApp Group Icon on Android Devices

Step 6: We select a Gallery.

Selected WhatsApp group icon to change it


Step 7: Select a picture from the list, crop it, and tap “Done” in the bottom-right corner.

How to Change WhatsApp Group Name on Android

Step 1: Open the WhatsApp app.

Step 2: Tap any WhatsApp Group name.

WhatsApp group settings for edit subject name Android

Step 3: Tap the Three vertical dots at the top right corner.

Change Group Info WhatsApp Android

Step 4: Tap “Change group name” or “Group info”.

Edit group name on your Android devices

Step 5: Tap the Pencil icon.

How to Change Group Name on WhatsApp Android phone or tablet

Step 6: Enter the new name/subject and tap OK.

How to Add a Group Description on WhatsApp Android

In the latest WhatsApp version, open the WhatsApp app > Tap Any Group > tap the Group name > add group description > Enter the group description > OK.

For Older Version:

The group description is visible to participants and people invited to this group.

Step 1: Open the WhatsApp app.

Step 2: Tap WhatsApp Group name.

Step 3: Tap Three vertical dots at the top right corner.

Edit group info on your Android

Step 4: Tap Group info.

Whatsapp Group Discussion on your Android

Step 5: Tap Add a group description.

How to Add Group Description on WhatsApp Android Phone or tablet

Step 6: Enter the description and tap OK.

Above, you can see the best guide to changing the WhatsApp group icon on Android phones and tablets. If you have any issues, then post a comment in the box below.

How to Reset Note 9 to Factory Settings

Here’s how to reset the galaxy Note 9 device. You can soft reset and hard reset galaxy Note 9 using hardware buttons. This reset Note 9 will remove all your phone data such as Google & Samsung account, photos, videos, music, and other personal data. So before performing a master reset on Note 9, back up data safely to other devices or desktop PC.

This hard reset or factory reset Note 9 helpful to fix several issues such as Note 9 frozen or unresponsive, won’t turn on, blank screen, touch screen not working, a battery won’t charge and more. If you forgot pattern lock or password in your Note 9 & another device, master reset helpful to unlock galaxy note 9 without a password. Follow the below-given step by step process to reset Galaxy Note 9.

Read Also:

How to Hard Reset and Soft Reset Note 9

How to reset Galaxy Note 9

First of all, lest see how to soft reset on Galaxy Note 9 devices.

Step 1: Press & hold the power button until your phone power off & power on again.

Step 2: If you’re device powered off. Press the power button for 4-5 seconds to power on.

This soft reset Note 9 will improve your device performance and fix small bugs.

Hard Reset Note 9 using hardware keys

Step 1: Turn off your Galaxy Note 9.

Step 2: Press and hold the Power button, Volume up, and Bixby key at the same time.

When the Samsung logo appears on your device, release the power key on your phone. After a few seconds, you can see the android system recovery menu on your phone. Here you can see different galaxy Note 9 recovery mode options such as reboot system, apply update from ADB, wipe data/factory reset, wipe cache partition and more.

Step 3: Press the volume down button until move wipe data/factory reset and press the power button to select it.

Step 4: Press the volume down button until Yes select, then press the power button to start the reset process on your Note 9.

Step 5: Press the volume down button until move reboot system now and press the power button to restart galaxy Note 9.

Now wait until restart your Samsung Note 9 device and you can see reset Note 9 settings & device looks like buy new.

And that’s all. Did you find the above tutorial helpful to reset Galaxy Note 9? If you have any questions, tell us in below comment box. Stay and connect with us for the latest updates.

Fix Slow Internet on Samsung Galaxy S8 and S8 Plus

Facing the issue of internet connection slow on Samsung Galaxy S8 and S8 Plus? Here’s the tip to fix slow internet on Samsung Galaxy S8 plus. Sometimes suddenly slow internet speed on galaxy S8 if using mobile data or WiFi connection also. When trying to open any page, it won’t load that page correctly and taken more time. It will indicate internet speed slow down on your Galaxy S8+ device. There are several reasons for slow internet speed issues such as poor network signal, low device memory, network congestion, poor Wi-Fi network, system software update, and more. Check out each one listed below methods to fix slow internet on Samsung galaxy S8 and galaxy S8 plus.

Read Also:

How to Fix Slow Internet on Samsung Galaxy S8 and Galaxy S8 plus

Fix slow internet on Samsung galaxy S8 plus phone

Reason for the Samsung Galaxy S8 and Galaxy S8 plus slow internet speed

  • Poor network signal
  • More apps running in the background
  • The outdated browser requires an update
  • Exceeding the data speed limit
  • Check system software update
  • Low device memory

If not fix internet issues on S8+ using the above-given methods, check out the below solution to fix the Galaxy S8 slow internet connection problem.

Turn Off WiFi

This is the easiest trick to fix slow internet issues on the Galaxy S8 plus. Turn off Wi-Fi on your galaxy S8 using the below settings.

Settings > Connections > Wi-Fi > Switch off

After a few seconds again turn on Wi-Fi and check fix issue or not.

Turn Airplane Mode On & Off if Poor Network

Swipe down the notification panel from the top of the screen > Tap Airplane mode > Tap again after 20-30 seconds

Now, check your phone network signal. If you still facing network issues, find the nearby place that good network signal.

Clear System Cache on Galaxy S8 to fix slow internet on Samsung Galaxy S8

Step 1: Turn off your Galaxy S8 and Galaxy S8 plus.

Step 2: Press and hold the power button, volume up buttons and Bixby key at the same time until phone turn on and see the android recovery screen

Step 3: Press the volume down button until wipe data/factory reset view, after that press power button.

Step 4: Press the volume down button until Yes select then press the power button to start the reset process on Galaxy S8+.

Step 5: Press the volume down button up to reboot system now and press the power button.

All data of your galaxy S8 device are safe such as photos, videos, and other media files. If still not solve internet slow issue on Samsung Galaxy S8, try a below-given trick.

Factory Reset Samsung Galaxy S8 using phone settings

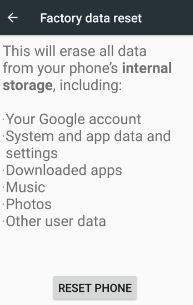
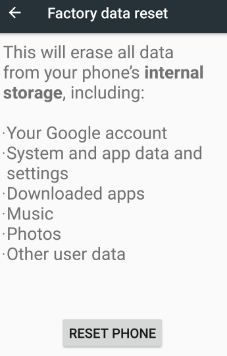
A factory data reset Galaxy S8 helps to fix various problems such as app crashing or freezing, touchscreen problem, can’t make or receive calls, call dropping, galaxy S8 won’t sync and more. It will erase all your phone data including Google Account, third party apps, photos & videos, system and app data, etc. Before factory reset galaxy S8, back up & restore your galaxy S8 data.

Step 1: Go to Settings in your galaxy S8.

Step 2: Tap on Backup and reset.

Step 3: Tap on Factory data reset.

Step 4: Tap on Reset.

Unlock the screen to enter a password or pattern lock.

Step 5: Touch Delete all.

End the list of possible solutions to fix slow internet on Samsung galaxy S8 and galaxy S8 plus. Do you have any other trips you want to share? Let us know in below comment box.
How to Change Status on WhatsApp Android

Suppose you are a WhatsApp user and know how to change your status on WhatsApp Android devices, so it takes a few minutes to change the WahtsApp status photo or videos. You can create, edit, and delete WhatsApp status on Android or iPhone devices. You can add multiple pictures to WhatsApp status or story also. Also, check the contacts who viewed your WhatsApp status. Your status update will disappear after 24 hours. You need to disable read receipts under privacy settings to view someone’s WhatsApp status without knowing them on Android.

But if you have new Android devices or don’t have a WhatsApp application, you can download the latest version in the app store. After installing the WhatsApp messaging app, you can change your current WhatsApp status and add your profile picture and name.

Don’t Miss: How to Download WhatsApp Status (Photos & Videos) Without Any App on Android

How Do I Change My Status on WhatsApp Mobile?

Let’s see the steps to update WhatsApp status on Android devices.

How Do you Put a Status on WhatsApp Android

Step 1: Open WhatsApp and tap on the Status tab.

Open WhatsApp to create status

Step 2: Tap on My Status.

Add multiple photos to WhatsApp Android

Step 3: Select photos from the gallery or camera photos and tap the Right arrow icon.

You can add text, emoji, and stickers to your WhatsApp Status.

Create WhatsApp Status on Android

Step 4: Tap the Send button.

Where is WhatsApp Status on Android?

Open WhatsApp > Status tab > My Status

How to Write Text in a WhatsApp Status Android in 2022

Step 1: Open WhatsApp App on your Android phone.

Step 2: Tap the Status tab.

Add text on WhatsApp Status Android

Step 3: Tap the Pencil icon at the bottom right.

How to Write Text Status on WhatsApp Android

Step 4: Type a Status.

You can change the text style, color of the background, add emojis, and more.

Step 5: Tap the Send button.

How to Check Who Viewed My WhatsApp Status on Android

Step 1: Open WhatsApp and tap on Status.

Step 2: Tap on the My Status tab.

How to Change Your Status on WhatsApp Android

Step 3: Tap the Eye icon at the bottom middle.

How to Check View Can See Your WhatsApp Status Android

Step 4: You can see the list of people who viewed your WhatsApp status.

How to Delete WhatsApp Status (Story) You Uploaded on Android

Step 1: Open WhatsApp App on your Android phone.

Step 2: Tap the Status tab.

Edit and delete WhatsApps status Android

Step 3: Tap Three vertical dots in front of My Status.

Check View Can See Your WhatsApp Status

Step 4: Tap Three vertical dots of status you want to remove from the WhatsApp story.

Delete WhatsApp status from your WP Android

Step 5: Tap on Delete.

Delete this status update? It will also be deleted for everyone who received it.

How to Delete WhatsApp Status or Story You Uploaded

Step 6: Tap again Delete.

How to Change Who Can See My WhatsApp Status Updates on Android – WhatsApp Status Privacy Settings

Here you can see steps to show or hide status on WhatsApp Android device. To change settings, go to WhatsApp > Status tab > More > Status privacy. You can see below given three options for set WhatsApp status privacy.

How to Change Who Can See My WhatsApp Status Updates on Android phone

My Contacts: Only your phonebook added contacts see your WhatsApp status updates.

My Contacts exception: Select contact from a list you don’t want to show your status updates.

Only share with: Select contacts you want to share your WhatsApp status update.

Select the option from the above list you want.

And that’s all. Do you still have any questions related change the WhatsApp status on Android devices? Tell us in below comment section.