How To Change Lock Screen Wallpaper Android 8.1

Here’s how to change lock screen wallpaper Android 8.1 and 8.0. Set the wallpaper on the Android 8.1 lock screen and home screen by default. You will change the wallpaper in Android Oreo using display settings. The Android Oreo device includes several wallpaper categories, such as live earth wallpaper, live data, a new element, sky-high, Art, Earth, Landscape, Cityscape, Life, texture, and solid colours. Choose from your phone gallery also. You can use the Android 8.0 Oreo home setting to change the home screen and lock screen wallpaper in Android Oreo 8.0. Also, set automatically change wallpaper in Android Oreo 8.1 devices such as Google Pixel, Pixel XL, Nexus 6P, Nexus 5X, etc. This wallpaper will download via only Wi-Fi on your device. Below are the two methods to change the lock screen and home screen wallpaper in Android Oreo devices.

Read Also:

How To Change Lock Screen Wallpaper Android 8.1

You can set wallpaper in Android 8.0 Oreo using the home screen and display settings. Below, you can see both methods with a step-by-step guide.

1st Method: Change Android Oreo Lock Screen Wallpaper 

Step 1: Press and hold the blank space in the home screen on Google Pixel and Pixel XL.

You can see wallpapers, widgets and settings options.

Step 2: Tap on Wallpapers.

Step 3: Select from the Home screen or lock screen to change the wallpaper.

You can see various options for setting home and lock screen wallpaper in Android Oreo 8.0 devices.

Select wallpaper category to set android O wallpaper

Step 4: Tap any Category and select wallpaper to set on your Android device.

Set wallpaper in android Oreo home screen and lock screen

Step 5: Tap Set wallpaper from the top right side.

Change wallpaper in android Oreo 8.0

Step 6: Set wallpaper for the Home screen, Lock screen, or Both.

You can also download and install Android 8.0 Oreo wallpaper on your Pixel, Nexus, LG, Samsung Galaxy, and other supported Android O devices.

2nd Method: Set a Different Wallpaper for the Lock and Home Screen Android Oreo 8.1

Step 1: Go to Settings on your Android Oreo devices.

Step 2: Tap Display.

Step 3: Tap Wallpaper.

Step 4: Tap the Category you want to select for the wallpaper.

Set home screen wallpaper in android Oreo using gallery photos

If you want to set wallpaper from your Android Oreo’s gallery, tap My Photo.

Step 5: Tap Wallpaper.

Step 6: Tap Set wallpaper.

Step 7: Choose from the Home screen, Lock screen, or Both.

That’s all about changing the Android Oreo wallpaper on the home screen and lock screen. Live wallpaper consumes more battery life, so always set a simple wallpaper on your Android device.

Automatically Change Wallpaper in Android Oreo 8.1

automatically change wallpaper in android Oreo

Settings > Display > Wallpapers > Category> Daily wallpaper > Continue > Set wallpaper > Home screen/home screen and lock screen.

Change the Wallpaper on Android 9 Pie

Long press on the blank space in your device home screen > Wallpapers > Select Picture from phone gallery or default wallpapers > Set wallpaper > Home screen/Lock screen/Home screen & Lock screen.

Set a Picture on the Android Lock Screen

Long press on the blank space in your device’s home screen > Styles & Wallpapers > Select Picture from phone gallery or default wallpapers > Set wallpaper > Home screen/Lock screen/Home screen & Lock screen.

I hope you liked this little tip on changing the wallpaper on Android Oreo 8.0 and 8.1 devices. If you have any other wallpaper and theme tricks for Android Oreo, share them with us in the comment box below.

Related:

How to Download Android 8.0 Oreo OTA Update For All Pixel Phones and Nexus

You will be able to download the Android 8.0 Oreo OTA update for Pixel and Nexus devices using factory images. Finally, Google has announced Android 8.0 is named “Oreo”. But many users facing issues when trying to download the update. Any idea when will your Pixel get an Android 8.0 Oreo OTA update?

To download the factory image for Pixel and Nexus device visit at Google Developers websites. Also, download a system image and flash it to your pixel device. Flashing a factory image will remove all data and third-party apps from your device so backup & restore your pixel data. You can download the Android 8.0 Oreo OTA update for Pixel and Nexus device using Android 8.0 Oreo Factory Images.

Read Also:

How to Download Android 8.0 Oreo OTA Update For Pixel, Pixel XL, Nexus 6p and Nexus 5X

Download Android 8.0 Oreo OTA update for Pixel and Nexus

Android 8.0 or Android Oreo has finally launched by Google. You can download the Android 8.0 Oreo update for your Pixel and Nexus device. But the OTA update will come to Pixel and Nexus smartphones. First of all Google Pixel and Pixel XL will be able to download and update the latest version of Android called Android 8.0/Android Oreo.

Android Beta users will receive the final version of the update. You can download the system image and flash manually in your pixel and Nexus devices.

Everything About Android 8.0/Android Oreo Features

  • Adaptive notification dots
  • Android instant apps
  • Lock screen and notification changes
  • Picture in picture mode
  • Notification channels
  • Auto-sizing Textview
  • Easy text selection
  • Autofill framework
  • Limit background apps
  • Add shortcut & widgets from within your app
  • App overlay & multi-display support

Don’t Miss This:

I hope this little tip helps to download the Android 8.0 Oreo OTA update for Pixel, Pixel XL, Nexus 6p, and Nexus 5X device. Let us know your thoughts related android 8.0 Oreo update in the below given comment box. Stay connected with us for the latest Android 8.0 Oreo tips.

How to Fix Black Screen of Death Issue on Samsung S8 and S8 Plus

Annoying by Samsung Galaxy S8 blank screen of death problem? A basic solution to fix Samsung blank screen issue is to check your galaxy S8 device screen is not damaged or cracked. If using a screen protector or case then remove it and check the fixed issue. While continuously playing games or watching movies, your Galaxy S8 and Galaxy S8 plus is hot so sometimes suddenly phone screen not working or unresponsive touch screen on Galaxy S8 phone. Other problems related to this type of issue are flickering, flashing, and being stuck on the Samsung logo on the devices. Try below given possible solutions from our sides to fix Samsung phone blank screen issue Samsung Galaxy S8 plus.

Related:

How to Fix Samsung Galaxy S8 Blank Screen of Death Problem

Samsung galaxy S8 blank screen problem

Forced Reboot

Press & hold the power and volume down button at the same time until the Samsung logo appears on the screen. If the system crash issue, your phone starts using this method. If you still facing the issue, apply the below method.

Put your phone in the Charger – Discharge battery

I know your device has a black screen, but you’ll guess when completely discharge your phone battery. After discharge, connect your phone with its original charge and wait until 45-50 minutes. Now, press & hold the volume down and power button together until the screen wake app or Samsung logo appears on the screen.

Remove SD Card

Power off your Samsung device and remove the SD card. Then restart your Samsung device and check fix issue or not.

Activate Safe Mode to Fix Samsung Black Screen 

Step 1: Long press the power button in your S8 until the power off button appears.

Step 2: Long press the Power off button until view Reboot to safe mode.

Step 3: Tap on OK to boot into safe mode Galaxy S8.

Step 4: You can see the Safe mode icon on the bottom left corner of the screen.

Check your phone can work without any issue. It means downloaded apps causing the problem in your Samsung. Restart your phone to exit safe mode and delete recently downloaded apps one by one until finding the app that causing the issue. If you still facing problems in safe mode, check for hardware or OS-related issue.

Factory Reset Samsung S8 if Boot into recovery mode

It will remove all your phone data. Make sure to back up & restore your important data before performing below given factory reset or hard reset your Samsung Galaxy devices.

Step 1: Make sure to Turn off your Galaxy S8 and S8 Plus devices.

Step 2: Press and hold the power button, volume up buttons, and Bixby key at the same time until the phone turns on and Android recovery screen view.

Step 3: Press the volume down button until highlighting Wipe data/Factory reset view, after that press the power button.

Step 4: Press the volume down button until Yes select then press the power button to start the reset process on galaxy S8 plus and galaxy S8.

Step 5: Press the volume down button up to the Reboot system now and press the power button.

If none of the methods worked for you, contact the service provider and replace it if under the warranty.

That’s all.  Did these solutions fix the Samsung Galaxy S8 blank screen problem for you? If you have any trouble related to this trick, let us know in below comment box. Stay connected with us for the latest galaxy S8 and galaxy S8 plus trick.

How To Change Lock Screen Notification On Android Oreo 8.1

Here’s how to change lock screen notification on Android Oreo 8.1. Customize lock screen in android Oreo devices. By default set show all notification content in your android devices. You can also hide sensitive notification content from the lock screen if important for you. If you don’t wont to show notification content on the lock screen, choose “Don’t show a notification at all” from options. In Android Oreo 8.0 device supported two moves gestures to quickly check your notification without unlocking your device.

We already discuss customize lock screen shortcuts in Android 8.0 Oreo devices. There are two ways to change notification info on lock screen in Android 8.1 devices. Whenever you get notifications, a notification pops up show on lock screen in your device. Follow the below-given step by step guide to hide lock screen notification on Android Oreo 8.0.

Read This:

2 Ways To Hide Notifications Lock Screen Android 8.1 Oreo

In the Android Oreo 8.0 notification dot feature, you can see different colors dot icon in apps which indicate you missed notifications of that particular apps. Check out below given two methods to change lock screen notification on Android Oreo devices such as Pixel, Pixel XL, Nexus 6P, Nexus 5X, LG, etc.

How to Disable Lock Screen Notification on Android Oreo 8.1 Using Apps & Notification

Step 1: Go to Settings in your Android 8.0.

Step 2: Tap Apps & notifications.

Step 3: Tap Notifications.

Lock screen notification settings in android 8.0

Step 4: Tap On the lock screen.

By default set show all notification content on lock screen in your Android devices.

Change lock screen notification on android Oreo

Step 5: Choose from Show all notification content/Hide notification content/Don’t show notifications at all.

How to Change Notification Info on Lock Screen Android 8.0

Step 1: Go to Settings in your android 8.0 Oreo.

Step 2: Tap Apps & notifications.

Step 3: Tap App info.

Step 4: Tap App wants to hide notification from the lock screen.

Step 5: Tap App notifications.

hide Lock screen notification info in android Oreo

Step 6: Tap On the lock screen.

Step 7: Choose from the given options.

You can easily show/hide notification content in the android Oreo lock screen. Different android device has slightly different settings to change lock screen notifications.

Read Also:

Use Gesture to Quickly Show Lock Screen Notifications on Android Oreo 8.0 & 8.1

Settings > System > Language & input > Advanced > Moves section – Android 8.0

Settings > System > Gestures – Android 8.1

Double-tap to check phone

Double-tap on your screen to quickly check the notification you received without unlocking your Android Oreo 8.0 devices.

Lift to check phone

Just pick up your device to quickly check your notifications.

I hope this little tip helps to change lock screen notification on android Oreo 8.0. Let me know in below comment box if you have any kind of trouble. Stay connected with us for daily android Oreo tips.

How to Deactivate Facebook Account Using Android App Without Permanently Delete

Simple and easy ways to delete or deactivate the Facebook account in the Android app without permanently delete. You can temporarily deactivate or automatically reactivate your account in 1 to 7 days. You can reactivate a Facebook account in android at any time by logging in with your email and password. When deactivating your Facebook account, it will disable your profile and remove your name and photo from most things you’ve shared on Facebook. Some of the information may still be visible to others, such as your name in their friend’s list and messages you sent. Also, delete all Facebook pages and groups created by you.

Facebook is one of the most used instant messaging apps on a smartphone such as Android, iPhone, Blackberry, and more. Using this android app for Facebook, you can stay in touch with your friends and family. Follow the below-given steps to temporarily deactivate the Facebook Messenger app on the Android phone.

Read Also:

How to Deactivate the Facebook Account & Facebook Messenger in Android

Let see the one by one method to deactivate your Facebook messenger account and Facebook App account on your Android devices.

Temporary Deactivate Facebook Messenger 2020 on Android

Step 1: Open the Facebook messenger app in your Android devices.

Open Facebook messenger app on your Android

Step 2: Tap the Profile icon at the top right corner.

Facebook messenger account settings for deactivating account

Step 3: Scroll down and tap Account settings under the Account section.

Deactivate the Facebook messenger account in the android app

Step 4: Tap Personal information under the account settings.

Temporarily deactivate the Facebook messenger App Android

Step 5: Tap Manage Account.

Temporary deactivate Facebook messenger on Android

Step 6: Tap Deactivate.

How to Deactivate Facebook Account Without Permanently Delete Using Android App

Step 7: Enter your Password and tap Continue.

Using Facebook App

Step 1: Open Facebook app in your android phone or tablet & log in.

Tap on Settings in facebook app

Step 2: Tap on Three horizontal lines.

Tap on account settings

Step 3: Under the help & settings category, tap on Account Settings.

Tap on security setting

Step 4: Tap on Security.

deactivate facebook account in android

Step 5: Tap on Deactivate.

When you tap on deactivate, you can see this message: For your security, please re-enter your password to continue.

Enter facebook log in password

Step 6: Enter facebook login password in-box & tap on Continue.

Now you can see the message: Are you sure you want to deactivate your account?

How to deactivate facebook account in android app

Step 7: Choose from the given options to let us know why you are deactivating the Facebook account.

How to deactivate facebook account in android

Step 8: Tap on Deactivate.

automatically reactivate your facebook account

You can see the above screen on your android mobile or tablet. Now deactivate the Facebook account in the android app.

Did you find the above process to deactivate the Facebook account in the android app useful? If you’re having problems implementing this, don’t hesitate to let me know on the below comment box and connect with us for daily updates!

How to Fix Google Contacts Not Syncing Android 12/11/10

Are you feeling frustrated about syncing contacts? Here is the solution to fix Google contacts not syncing Android 12/11/10. You can easily apply this solution to solve the issue using the latest Android version. In the article, you will get all the necessary steps to fix your Android device’s solutions. With the help of the Sync feature in your device, all the data can automatically be stored on your Google Accounts like Apps, contacts, calendars, and much more.

How to Fix Google Contacts Not Syncing Android Phones and Tablets

Check out the methods below to fix contact not syncing from Google on Android devices.

Restart your Phone

Step 1: Long-press the power button to view the power menu.

Reboot your Pixel to fix not syncing with Google Contacts Android

Step 2: Tap on Restart.

Turn Airplane Mode On & Off

Turn Airplane Mode On and Off to Fix Google Contacts Not Syncing Android Devices

Swipe down the notification panel at the top and tap on Airplane mode to turn it off and on.

Enable/Disable Contact Sync on Android 12 and Android 11

Step 1: Go to Settings in your Android.

Step 2: Tap the Passwords & accounts.

Step 3: Tap on your Google account.

Android Oreo contact storage app settings

Step 4: Tap the Account sync.

How to fix Google contacts not syncing on android Oreo

Step 5: Toggle off Contacts.

Again, enable contacts in your Google account and check to fix the contact sync problem on your Android device. Also, turn off auto-sync on Android devices using the below settings.

How to Turn Off Auto Sync on Android 12/Android 11

Turn off auto-sync on android Oreo 8.0

Settings > Passwords & accounts > At the end of the page, toggle off Automatically Sync app data

Remove Google Plus Profile URL to Fix Google Contacts Not Syncing Android Phone

In the android central forum, a user said the contact sync issue occurred when you added your Google Plus contact directly. When adding a contact directly, the profile URL for that person in Google contacts is a web link for their Google+ profile. Now open the Google contact list and remove the profile URL from the list.

Check Contact App Update

Open Play Store > Tap Profile icon at the top right > Manage apps & device > Manage tab > Tap Update on Contact app if available update

Clear Cache & Data of Contact Storage on Android 12/11/10

Step 1: Go to Settings on your Android phone.

Step 2: Tap the Apps.

Step 3: Tap the See all apps.

Step 4: Tap the Three vertical dots (More) at the top right corner.
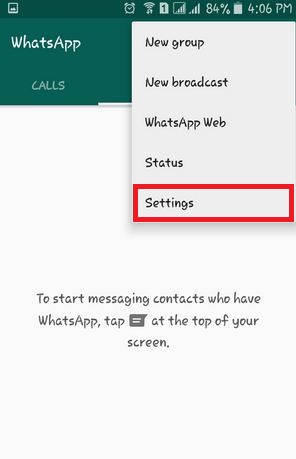
Step 5: Tap on the Show system.

Android Oreo contact storage app settings

Step 6: Scroll down to Contact storage and tap on it.

Step 7: Tap the Storage & cache.

Step 8: Tap the Clear cache.

Can’t sync Google contacts in Oreo

Step 9: Tap the Clear data or Clear storage to fix the Google contacts sync issue.

You’ll see this message on the screen: Delete app data?

Step 10: Tap the OK.

It will permanently delete all of these contacts’ app data, including accounts, settings, and all other app data in your Android devices.

Disable Data Saver on Android

Disable Data Saver to fix Fix Google Contacts Not Syncing Android 12

Settings > Network & internet > Data saver > Toggle off Use Data Saver

Remove your Google Account & Add it Again

Step 1: Go to Settings.

Step 2: Scroll down and tap on Passwords & accounts.

Step 3: Tap on the Google account you want to remove.

Remove your Google Account to Fix Google Contacts Not Syncing Android 12 Device

Step 4: Tap on Remove account.

Fix Google Contacts Not Syncing Android Phones and Tablets

Step 5: Tap again on Remove account.

After removing account, you need to add it again by going to Settings > Passwords & accounts > Add account > Google > Enter your email or phone > Next > Enter password > Next.

Read Also:

Here is the end of all the possible solutions to fix Google contacts not syncing Android. If we missed anything above, please provide your thoughts in the comment section and check our other Android tips and tricks.