How to Fix Can’t Send MMS on Samsung Galaxy S20 Ultra/S20 Plus/S20/S10 Plus/S10/S10e

Irritating by can’t send or receive picture messages (MMS) on Samsung Galaxy? In this tutorial, I’ll explain possible ways to fix can’t send MMS on Samsung Galaxy S20 Ultra/S20 Plus/S20/S10 Plus/S10/S10e. Make sure to set up or enable MMS in your Samsung One UI. Also, mobile data must be turned on. Sometimes you can’t send MMS to a specific contact. Poor network signal also causes the MMS not working problem on your Samsung phone.

If you recently switched from iPhone to Samsung Galaxy devices and forgot to deactivate iMessage, this Samsung not send or receive text messages issue occurs. You can switch texting from iMessage to android anytime. If you no longer use your iPhone, you must enter your mobile number to deregister from iMessage. Check out below given possible methods to fix can’t send or receive a picture on Samsung Galaxy S10+/S10/S20+/S20/S20 Ultra.

How do I Fix Samsung Galaxy S20 Not Sending Picture Messages?

How to fix can’t send or receive picture on Samsung Galaxy S10

Apply each one listed below given troubleshooting steps to fix unable to send or receive text messages on Galaxy S10 plus and galaxy S10.

Reboot your Samsung

The long-press the power button and tap restart to reboot your S10. After restarting your device, open messaging apps and try to send the picture as a message, and check to fix the Galaxy S10 MMS issue.

Install the Google Messages App or Textra to Fix Samsung S20/S10 Not Sending or Receiving MMS 

Uninstall or change the default messages app. Also, install the Google messages app or Textra to fix the Samsung MMS issue.

Turning On WiFi Calling

Phone app > Three vertical dots (Menu) > Settings > Wi-Fi calling

Enable/Disable Mobile Data to fix Galaxy S20 MMS issues

Make sure to disable mobile data on your device.

Swipe down the notification panel twice at the top > Tap on Mobile data to toggle it on or off 

Clear Message App Cache to Fix Can’t Send MMS on Samsung Galaxy S10+/S10/S20+/S20 Ultra/S20

Step 1: Open the app drawer and tap the Settings app.

Step 2: Tap on apps.

Step 3: Find the Messages app and open it.

Step 4: Tap on Storage.

Step 5: Tap on Clear cache.

If a clear app cache can’t fix the MMS not sending on Samsung, try clearing app data (Delete all app data) on your phone.

To Clear App Data: Settings > Apps > Messages app > Storage > Clear data/Cleat storage > OK

Now reboot your Galaxy, and try to send pictures as messages on your Samsung Galaxy.

Remove SIM card and Re-Insert

If you have used a SIM card, remove the SIM card and restart your device. After restarting, re-insert SIM correctly on your phone. Also, check if your carrier supports SMS or MMS messaging.

Check Network Signal

Sometimes poor network signal is the reason for can’t send or receive MMS on the Galaxy device. Turn on Airplane mode for 05-10 seconds, and then after turn it off and check the network available.

Swipe down the notification panel at the top > Airplane mode

If you can’t fix the issue, find a nearby place where you get a network to send a picture message on Galaxy.

Check your Samsung Message Plan

Ensure your message plan or phone balance sends or receives a message on Samsung Galaxy.

Reset Network Settings

Step 1: Go to Settings on your Samsung devices.

Step 2: Tap on General Management.

Step 3: Tap on Reset.

Step 4: Tap on Reset network settings.

Step 5: Tap Reset settings.

Enter the screen lock to continue the process.

Step 6: Tap Reset settings again.

You can also try to add MMS to the APN settings under APN type in your Samsung Galaxy.

Reset APN Settings

It will reset the default Internet and MMS settings on your Samsung phone.

Settings > Connections > Mobile network > Access point names > Three vertical dots at the top right corner > Reset to default > Reset

Wipe Cache your Samsung

To wipe your Samsung devices’ cache, you must enter recovery mode. It will wipe all data on your device, free up space, and improve your phone’s performance. No need to back up your phone data.

Contact your Carrier

Contact your carrier service provider and check whether your MMS services are working or configured on your Samsung devices.

Factory Reset Samsung Phone

This Samsung factory reset will delete all your phone’s data to factory default settings. Back up and restore your data before applying it.

Send Photos using Email/WhatsApp or other Messages Apps

If none of the above-given methods worked for you, you can send pictures using your Email and share them on WhatsApp/Instagram and other messaging apps.

Frequently Asked Question:

Why won’t my MMS Messages Download on my Samsung S20?

Make sure mobile data is turned on to download MMS messages. Restart your Samsung S20 by long-press the power button and tap on Restart in the power menu. Again, tap on Restart to reboot your phone. Now, try to download MMS. Also, poor network signal causes can’t send or receive MMS issues on your Samsung Galaxy devices.

Read Also:

Have you been experiencing this issue on your Samsung Galaxy? End the list of possible solutions to fix can’t send or receive a picture on Samsung Galaxy S10/S10+/S10e/S20 Ultra/S20+/S20. Do you have any other tips you want to share? Let us know in the comments.

How to Fix MMS Not Sending Samsung Galaxy S9 and S9 Plus

Frustrating by can’t send or receive pictures on Samsung Galaxy? Several users reported they could send text messages, but MMS not sending Samsung Galaxy S9 and Galaxy S9 Plus. Sometimes picture messages are delivered but not received by other people. They are also facing the problem of being unable to send pictures via text to specific contacts. You can use Wi-Fi or mobile data to send picture messages on your Samsung Galaxy. One of the most common reasons for not sending MMS is carrier issues or properly not setting up picture messaging. If you have changed DNS settings with your carriers, you must reset DNS settings to fix the MMS issue on Samsung Galaxy devices. Here are the possible solutions to fix Galaxy S9 that can’t send picture messages or the MMS picture not sending issues.

Why Won’t my Samsung Galaxy Send Pictures?

How to fix Galaxy S9 can't send pictures messages


Try below given one by one possible way to fix can’t send and receive picture messages on Samsung Galaxy S9 and Galaxy S9 plus.

Restart your Samsung Galaxy

Press & hold the power button and tap restart to restart your Samsung device. Now, try to send a picture message from Samsung S9 and S9 Plus. If you can’t send or receive, try the below-given methods.

Turn on Dara Roaming 

If you want to send or receive an MMS abroad, turn on data roaming on your Samsung One UI.

Settings > Connections > Mobile network > Toggle on Data roaming

Try Sending MMS to another Person

If you’re having issues sending MMS to a specific contact, try to send another person to check if there is an error on the receiver side.

How do I Enable MMS on my Samsung Galaxy S9 & S9 Plus?

You can check out to send MMS from Samsung galaxy S9 and galaxy S9 plus. Check this to fix the issue.

Turned off Advanced Messaging on your Samsung Galaxy

By default, turn on Advanced messaging on your Samsung S9 and S9 Plus.

Settings > Connection > More connection settings > Toogle on Advance calling and Messaging

Clear Messages Cache & Data to fix Galaxy S9 Can’t Send Pictures

Step 1: Swipe down the notification bar and tap the Settings icon.

Step 2: Tap on Apps.

Step 3: Tap on the Messages app from the list.

Step 4: Tap on Storage in the usage section.

Step 5: Tap on Clear cache.

Step 6: Tap on Clear data (Delete app’s data permanently).

Step 7: Tap on OK.

Now reboot your galaxy and try to send pictures. If none of the above solutions fix Samsung galaxy won’t send MMS, then try below given the last method.

Reset your Samsung Network Settings

Step 1: Go to Settings on your Samsung devices.

Step 2: Tap on General Management.

Step 3: Tap on Reset.

Step 4: Tap on Reset network settings.

Step 5: Tap Reset settings.

Enter the screen lock to continue the process.

Step 6: Tap Reset settings again.

Wipe Cache Partition On Samsung Galaxy 

Step 1: Switch off your Samsung Galaxy devices.

Step 2: Press and hold the Volume up, Bixby key, and Power button simultaneously.

When the Samsung logo appears on the screen, release the power key in your device. After a few seconds, the android system recovery views your phone views.

Step 3: Press the volume down button until the Wipe data/factory reset the view. After that, press the power button to select it.

Step 4: Press the volume down button until Yes select, then press the power button to start the wipe cache or clear cache process on the Samsung galaxy.

Step 5: Press the volume down button to the Reboot system now and press the power button to restart your galaxy.

Now try to send or receive MMS on your Galaxy device. And check fix problems or not.

Use the Google Messages App or Textra to send MMS on your Samsung One UI

If you still have a problem, uninstall the Samsung messages app and install the Android messages app or Textra to send MMS via text on your Samsung S9 & S9+.

Why are my MMS Pictures Not Sending?

Make sure the network is available and turn on Wi-Fi or mobile data in your Samsung Galaxy devices. You can’t send MMS or receive MMS messages on your device due to poor network signal also.

Mobile data: Swipe down the notification panel at the top and tap on the Mobile Data icon or Settings > Connections > Mobile network

Wi-Fi: Swipe down the notification panel at the top and tap on the Wi-Fi icon or Settings > Connections > Toggle on Wi-Fi

Read Also:

And that’s all. End the list of possible solutions to fix Galaxy S9 can’t send pictures. Do you have any other ways to fix this MMS problem? Please share with us in below comment box.

How to Fix Samsung Note 8 Speaker Volume Low

Annoying by the phone speaker volume suddenly low Samsung Galaxy Note 8? You can face different Note 8 issues during phone calls, such as low speaker call volume, dropping calls, Samsung Note 8 ear speaker low, people not being able to hear your voice on calls, Samsung Note 8 can’t hear caller unless on speaker etc. Here are solutions to fix the low call volume on Samsung Galaxy Note 8. Set phone sound settings and adjust the volume in your Galaxy Note 8. When an extremely low call volume problem occurs, check the clogged speaker grill and clean it using a toothbrush. Sometimes, people can’t hear your voice because of a bad network connection or hardware issue. You can check using the microphone, while the Samsung Note 8 speaker volume low issues. Check out the below-given troubleshooting methods to fix Samsung Galaxy Note 8 call volume too low problem.

Read More:

How to Fix Samsung Galaxy Note 8 Speaker Volume Low or Call Volume to Low

Fix low call volume on Samsung Galaxy Note 8

Below are several tips to fix Samsung phone volume too low issues.

Restart your Samsung Phone

Restarting your phone will fix minor bugs or connectivity issues. To restart your Samsung phone, long-press the power button and tap Restart in the power menu. Tap Restart to reboot your phone.

Use a Toothbrush to Clean the Note 8 Speakers

You will try to clean the speaker grill with an electric toothbrush to fix volume issues.

Note 8 Volume Boost or Increase the Call Volume

First, check your Samsung in-call volume settings and increase the volume on your Samsung phone.

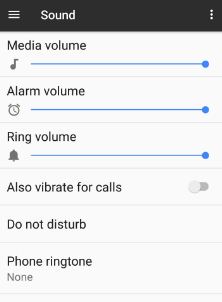
Settings > Sounds & vibration > Adjust the call Volume.

Remove the Case & Cover if Blocking the Speaker

Remove the phone case and cover, call, and check the volume issue.

Check Microphone Issue  

Make sure nothing is in front of a microphone or faulted microphone.

Check Network Signal Strength to Fix Call Volume Too Low Issue

Sometimes, you can’t hear a voice due to a poor network signal, or call dropping issue occurs. Find a nearby location with good network signals and try to reach it.

Check System Update

Ensure your Samsung device is running with the latest software version. Go to Settings > Software update > Download and install.

Turn Off Noise Reduction

Settings > Accessibility > Hearing > Toggle off Noise reduction.

Clear App Cache Phone App

Settings > Apps > Find Phone app and open it > Storage > Clear cache.

If clearing the cache won’t work, try to clear the data of the phone app. After that reboot, your phone and check solve the call volume issue on Samsung Note 8.

Read More: How to Clear the App Cache on Android

Enable Safe Mode on Note 8

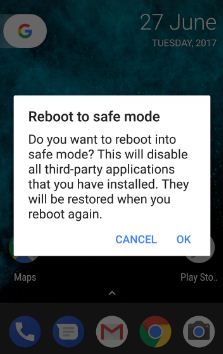
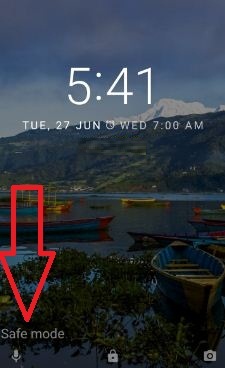
Enter your Samsung into safe mode to check whether your Galaxy Note 8 call volume works perfectly. Fixing the low call volume problem in safe mode means any third-party downloaded apps causing this issue. Now delete one by one recently downloaded apps and check to fix low-quality call sound issues. If none of the above-given tips solve the problem, reset your Samsung Note device.

Reset the Galaxy Note 8 to Fix Samsung Note 8 Speaker Volume Low

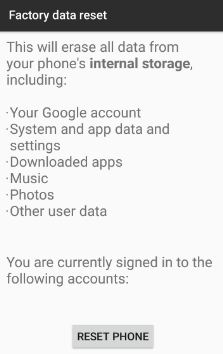
It will delete all your phone data. Back up your data before factory resetting your Samsung Galaxy Note device.

Step 1: Go to Settings.

Step 2: Tap on Backup & reset.

Step 3: Tap on Factory data reset.

Step 4: Tap on Reset device.

Step 5: Tap Delete All.

It will reset all your Samsung Galaxy Note 8 internal storage and other data. If this does not solve your phone’s low call volume issue, hard reset the Samsung Galaxy Note 8.

Do you know other handy tips to fix low call volume on Samsung Galaxy Note 8? Don’t forget to mention which method worked for you. Please stay connected with us via Facebook and Twitter.

Related:

How to Remove Pattern Lock in Samsung A50

Change the lock screen security on Samsung Galaxy A50? Here’s how to remove pattern lock in Samsung A50 and A70. You can use swipe, Password, PIN number, Pattern lock and other Biometric security (Face unlock & In-display Fingerprint) to lock screen in Samsung A50 & secure your phone data. Also, hide pattern lock on your A50. To set new lock screen security, you need to remove the current lock type using lock screen settings.

The password is the high security to secure your phone data from other people. If you don’t want to set security, set swipe (Swipe the screen to unlock the phone) as a galaxy A50 screen lock type. Also set your secure lock settings, such as Auto-lock and lock instantly with power key. Follow the below-given step by step process to delete or remove pattern lock in Samsung A50 device.

Don’t Miss This:

How to change the lock screen wallpaper on Samsung Galaxy A50

How to reset forgot password on Galaxy S10 Plus

How to change lock screen password on Android 10

How to use Samsung A50 Smart lock

How to remove pattern lock in Samsung A50

You can delete pattern lock and set up a new screen lock type on galaxy A50 using the below settings.

Step 1: Swipe up from the bottom of the screen to open the app drawer

Step 2: Tap Settings gear icon

Step 3: Scroll down and tap Lock screen

Step 4: Tap Screen lock type

Enter your current pattern lock to continue the process.

How to remove pattern lock in Samsung A50

Step 5: Choose from Swipe, PIN, Password, None or Biometrics security

Step 6: Here we choose Password

Step 7: Set password for A50 screen lock and tap Next

Step 8: Re-enter your password and tap Confirm

Now locks your Samsung galaxy A50 and you can see remove the pattern lock and set a password as new screen lock type. To unlock your device, you need to enter a new password you set. Remember this Samsung A50 screen lock type. If you forgot it, you’ll need to reset your phone and all data will be erased.

Set lock screen stories in Samsung Galaxy A50

By default, you’re Samsung A50 lock screen show amazing wallpapers and exciting content. It will discover new stories every time you check your phone. You can see different types of lock screen stories available, tap Set as lock screen at bottom of the screen to set new lock screen stories on galaxy A50.

Settings > Lock screen > Lock screen stories

If you don’t like stories, you can turn off lock screen stories in Samsung A50 anytime.

And that’s all. I hope this little tutorial useful to remove pattern lock in Samsung A50. Do you still have any questions? Tell us in below comment box. Stay and connect with us for the latest updates.

How to fix Galaxy S9 Won’t Turn On After Charging

Frustrating by Samsung Galaxy S9 and Galaxy S9 Plus won’t power on or screen just went black? Sometimes Galaxy S9 and Galaxy S9 plus do not respond due to fully charging your devices. After fully charging, it won’t power on when to restart your device and black screen view on the Galaxy S9 plus. Let’s see handy ways to fix Galaxy S9 won’t turn on after charging or dropping.

There are several reasons your galaxy S9 plus won’t turn on, such as faulted charger, damaged power outlet or wall outlet, overheating issue, and more. Always use the original charger to charge your Samsung Galaxy devices. Check out the below-given possible solutions to fix Galaxy S9 that won’t turn on after charging.

Read Also:

How to Fix Galaxy S9 Won’t Power On after Charging or Dropping

First, try to hold all buttons until the phone shuts down and check the fixed issue.

How to fix galaxy S9 wont turn on after charging

Plugin the Charger 

First of all, check your phone charge if you see a battery icon on your galaxy S9 & S9 plus device while connecting to the charger. Charge your phone for 30-40 minutes. And check whether Galaxy S9 power is on or not.

Check the Wall Outlet

Sometimes if the wall outlet is faulted or power does not reach, your galaxy S9 plus & galaxy S9 won’t charge. Try another wall outlet and check if they fix the problems or not.

Turn On Safe mode to fix Galaxy S9 Won’t Turn On After Charging or Dropping

To find a third-party app causing an issue, enable safe mode Galaxy S9 & Galaxy S9 Plus devices using the below settings.

Step 1: Turn off your Galaxy S9 & S9 plus device.

Step 2: Press & hold the power button. When the Samsung logo appears on the screen, release the power button.

After releasing the power button, press & hold the volume down button in your S9, continue holding the volume down button until restarting your device.

Step 3: You can see the safe mode icon on the bottom left side.

You will see all third-party apps hidden from your device. Now check your Galaxy S9 & S9 plus working without any issues. If you can’t find any problem, it means any third-party app is causing this problem. Remove one by one recently downloaded app and check to fix the issue or not. Restart your Samsung Galaxy S9 & S9 plus device to exit safe mode.

If you found any specific app-related problem on your Galaxy S9 & S9 Plus device, clear the app cache on galaxy S9 & S9 plus using the below settings.

Clear App Cache on Galaxy S9 & Galaxy S9 Plus

Settings > Apps > Select the app > Storage > Clear cache

Factory Reset or Master Reset Galaxy S9 & S9 Plus

It will remove all your phone’s personal and other data. So back up your important data safely to other devices and perform the below-given steps.

Step 1: Turn off your Samsung Galaxy S9 & S9 plus.

Step 2: Press and hold the Volume up, home key and Power button simultaneously.

When the Samsung logo sees, release the power key in your device. After a few seconds, the android system recovery menu display on your galaxy S9 & S9 plus.

Step 3: Press the volume down button until wipe data/factory reset view, after that press the power button.

Step 4: Press the volume down button until Yes is selected, then press the power button to start the reset process on Galaxy S9 & S9 plus

Step 5: Press volume down button up to reboot system now, and press the power button to restart your Galaxy S9 & S9 plus

And that’s it. Have you been experiencing this issue on your Galaxy S9 & S9 plus? Let us know in the comment if you have any more tips to fix Galaxy S9 that won’t be turning on after charging issue.

How to Fix Bluetooth Connection Issue on Samsung Galaxy Note 9

Here’s how to fix Samsung Galaxy Note 9 Bluetooth keeps disconnecting or won’t pair issues. After updating my Note 9 to ONE UI 2.0 users have been experiencing Bluetooth connection issues. All new phones have Wi-Fi, Bluetooth and a network-related problem occur. There are several different types of Bluetooth problems that occur such as galaxy Note 9 won’t pair with Bluetooth or Wear OS or Bluetooth accessory isn’t connecting to galaxy Note 9 or Galaxy Note 9 can’t pair with a car or can’t make phone calls in car and more.

One of the best solutions to first you should try is to restart your Note 9 device. After that try to connect with Bluetooth pair you want to connect and check to solve Bluetooth problems or not. Also, ask you’re Google Assistant or Bixby about Bluetooth isn’t working. Check out below given troubleshoots methods to fix the Bluetooth connectivity issue on galaxy Note 9.

Read Also:

How to Fix Bluetooth Pairing Problem on Galaxy Note 9

How to fix Bluetooth connection problem on galaxy Note 9

Here I’ll show you four different methods to fix Samsung Galaxy Note 9 Bluetooth problems.

Turn Bluetooth off and then on again

First of all turn off Bluetooth in your galaxy Note 9. Now again connect your Galaxy Note 9 via Bluetooth.

Settings > Connected device > Bluetooth > Turned on OR Swipe down notification panel > Tap Bluetooth

Now try to connect with other devices and check to fix Bluetooth issues or not.

Make sure the device paired and connected

Check your device paired with other devices you want to connect. If already connected but Bluetooth not working on Galaxy Note 9, clear connected paired device and again add it on your device.

Settings > Connected device > Bluetooth > Tap paired device > Settings > Forget

Now again try to connect your Note 9 with pair you want to connect.

Cleared all Bluetooth devices to fix Galaxy Note 9 Bluetooth won’t connect to my car 

To fix this Bluetooth can’t pair with a car issue, cleared all Bluetooth devices from your car’s Bluetooth and phone’s Bluetooth also. After clear all devices, refresh the device list, then pair Note 9 Bluetooth with a car.

Connect pair phone

Settings > Connected device > Bluetooth > Three vertical dots (More) > Refresh > Car’s name

Pair from your car

Open car’s Bluetooth > tap your phone’s Bluetooth name > Confirm PIN if asked > Accept  

If your device can’t pair with other accessories, refresh the accessory list. Sometimes needs a passcode, try 1234 or 0000 to connect with your device. You’ll enjoy music by Bluetooth with a car and make or get phone calls by Bluetooth also.

Clear the Bluetooth app cache on Galaxy Note 9

If none of the above-given methods worked for you, try to clear cache Bluetooth on Samsung Note 9 using apps settings.

Settings > Apps > Three vertical dots > System apps > Bluetooth > Storage > Clear cache

Reset network settings to fix Bluetooth connection problem on Galaxy Note 9

Settings > Network & internet > Three vertical dots > Reset Wi-Fi, mobile & Bluetooth > Reset settings

Now reset all Wi-Fi, Bluetooth and mobile data connected password from your Samsung Galaxy Note 9. Again connect your password or other details to use in your device. If none of the methods worked for you, you need to factory reset your Samsung Note 9. Before performing Note 9 factory reset, back up your important data.

And that’s all. Have you been ever facing Bluetooth problems on Galaxy Note 9? Do you know some other methods to fix this Bluetooth connection problem on Galaxy Note 9 issue? Share with us in below comment box.