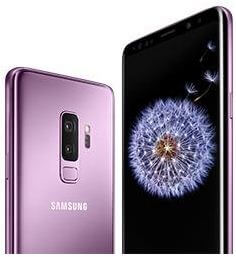
How to clear cache partition on galaxy S9 and galaxy S9 plus

Here’s the complete process to wipe cache or clear cache partition on galaxy S9 and galaxy S9 plus Oreo devices. This wipe cache partition on galaxy S9 & S9+ device will fix several issues such as blank screen, touch screen sensitivity not working, S9 won’t turn on after charging, S9 app freezing or crashing and more.

If any individually app related problem, clear app cache galaxy S9 plus and galaxy S9 devices. Before clear system cache S9, factory reset your device to fix issue. If not fix problem, then clear cache partition on galaxy S9 and galaxy S9 plus using below steps.

You Might Like:

How to fix battery drain issue on galaxy S9 & S9 plus

Fix low call volume on galaxy S9 & S9+

How to clear cache partition on galaxy S9 and galaxy S9 plus

How to clear cache partition on galaxy S9 and galaxy S9 plus

To wipe cache partition on galaxy S9 plus and galaxy S9 device, make sure turn off your device. Now follow below given step by step process to wipe cache data on Samsung S9 & S9 plus.

Step 1: Turn off your Samsung galaxy S9 & S9 plus

Step 2: Press and hold the Volume up, Bixby key and Power button at same time

When Samsung logo appears on screen, release power key in your device. After few seconds, android system recovery menu on your galaxy S9 & S9 plus.

Step 3: Press volume down button until factory reset/wipe data view, after that press power button to select it

Step 4: Press volume down button until Yes select then press power button to start wipe cache or clear cache process on galaxy S9 & S9 plus

Step 5: Press volume down button up to reboot system now and press power button to restart your galaxy S9 & S9 plus

Now restart your galaxy S9 & S9 devices and you can see your device performance improves.

If you found any particular app related issue, clear app cache on galaxy S9 & S9 plus using below settings.

Clear app cache on galaxy S9 and galaxy S9 plus

Step 1: Go to settings in your galaxy S9 & S9 plus

Step 2: Tap on Apps

Step 3: Select app from list

Step 4: Tap on storage

Step 5: Tap on clear cache

Step 6: After clear app cache, tap on Clear data

If clear cache can’t fix issue, enable safe mode on galaxy S9 & S9+ to find third party app that causing issue in your devices.

And that’s it. We hope it makes clear how to clear cache partition on galaxy S9 and galaxy S9 plus. If you have any kind of trouble, tell us in below comment box. Stay and connected with us for latest updates.

How to fix Galaxy S9 black screen problem

Are you frustrating by Galaxy S9 and galaxy S9 plus screen not turning on or black screen? Here’s the possible solution to fix galaxy S9 black screen problem. Sometimes while making or receiving call on your S9 device and screen unresponsive or black. To fix this issue, check battery, hardware damage, any third party app causing any issue or replacement.

Have you been ever facing this black screen or black pixels issues on your Samsung galaxy Oreo devices? Which are the methods you used for fix problem? When this type of error occurs, your galaxy S9 device screen will look only black and you can’t see any display. Follow below given both methods to fix galaxy S9 black screen problem.

Read Also:

How to fix galaxy S9 & galaxy S9 plus keep restarting

Fix Google Pixel 2 randomly turns off and won’t turn on

How to fix Galaxy S9 black screen problem: Galaxy S9 plus

How to fix galaxy S9 black screen problem

One of the simplest solutions is restart your S9 device and check fix issue or not. Check out below given possible ways to fix galaxy S9 and galaxy S9 plus black screen issue.

1st Method: Turn on safe mode on galaxy S9 & S9 plus

Find third party app causing issue in your galaxy S9 & S9 plus, enable safe mode to fix it.

Step 1: Power off your galaxy S9 & S9 plus device

Step 2: Press & hold the power button, when Samsung logo appears on the screen, release the power button

After releasing power button, press & hold the volume down button in your galaxy S9. Continue hold the volume down button until restarting your device

Step 3: You can see safe mode icon in bottom left side

You will see all third party apps remove temporary from your galaxy S9 device. Now check your galaxy S9 & S9 plus black screen issue occur or not. If you can’t find any issue, it means any third party downloaded app causing this problem. Reboot your galaxy S9 & S9 plus device to exit safe mode. Now remove one by one downloaded third party app and check fix galaxy S9 issue or not.

If you can’t restart your device follow below given method to enter your galaxy S9 into recovery mode and wipe cache partition on galaxy S9 plus and galaxy S9 Oreo.

2nd Method: Wipe cache partition on galaxy S9 & S9 plus to fix galaxy S9 black screen problem

Step 1: Turn off your Samsung galaxy S9 & S9 plus

Step 2: Press and hold the Volume up, Bixby key and Power button at same time

When Samsung logo appears on screen, release power key in your device. After few seconds, android system recovery menu on your galaxy S9 & S9 plus.

Step 3: Press volume down button until factory reset/wipe data view, after that press power button to select it

Step 4: Press volume down button until Yes select then press power button to start wipe cache or clear cache process on galaxy S9 & S9 plus

Step 5: Press volume down button up to reboot system now and press power button to restart your galaxy S9 & S9 plus

And that’s end of list. If you know any other ways to fix galaxy S9 black screen problem, let me know in the below comment section. Don’t miss out to check our other galaxy S8 tips.

How to Fix Dropping Calls on Galaxy S10 Plus/Galaxy S10/Galaxy S10e/Galaxy S9 Plus/Galaxy S9

Annoying by the call dropping on Samsung Galaxy? Sometimes when you make or receive a phone call and suddenly drop a call or can’t hear a voice. The main reasons behind dropping calls on Samsung Galaxy are poor network connection, signal loss, or carrier problems (AT&T, Sprint, T-mobile, Verizon Wireless). Several Samsung users are also facing call issues like the inability to make or receive a phone call, dropping voice calls, low call volume, etc. Here’s the list of possible solutions to fix dropping calls on Galaxy S10 Plus/Galaxy S10/Galaxy S10e/Galaxy S9 Plus/Galaxy S9.

How do I Fix Samsung Phone Keeps Cutting Out During Calls?

How to fix call dropping problem on galaxy S9 and galaxy S9 plus

Restart your Samsung Galaxy Plus

Power off your Galaxy. After 10 seconds, powered on again. Now make a call and check to fix the dropping call issue.

Check Network Signal to Fix Samsung Galaxy S9 Dropping Calls

You can’t hear the voice of incoming or outgoing calls if there is poor network signal strength. To fix poor sound call quality on Samsung galaxy, find a nearby place with a good network signal.

Turn Airplane Mode On & Off

Swipe down the notification panel from the top and tap on Airplane mode to enable it. After 10 seconds, tap it to turn off Airplane mode. Now, make a phone call.

Check Software Updates

Check any system updates available on your phone. It will fix critical bugs and improves the performance of your Galaxy device.

Step 1: Go to Settings.

Step 2: Scroll down and tap the Software update.

Step 3: Tap the Download and install.

Remove & Re-Insert SIM Card

Remove the SIM card and reboot your Samsung phone. After restart, re-insert the SIM card to check the SIM issue.

Make sure to Turn Off DND Mode

Swipe down the notification panel at the top and tap on Do not disturb to turn it on & off.

Activate Safe Mode on Samsung Galaxy S9/S9 Plus/S10 Plus/S10

Step 1: Tap and hold the Power key until the Power menu views the screen.

Step 2: Long-press the Power off until viewing the Reboot to safe mode message on the screen.

Step 3: Tap on OK.

You can see hide (Disable) all downloaded apps from your device. Now make a phone call and check for any issues. If you can’t find any call problem in safe mode, it means any downloaded app is causing this problem. Restart your Samsung device to turn off safe mode. Now remove one by one downloaded apps and check to fix a dropping call problem.

Disable HD Calling to Fix Voice Call Dropping on Samsung Galaxy S9 Plus/S10 Plus/S10/S9/S10e

Step 1: Go to Settings.

Step 2: Click on Connections.

Step 3: Click on Advanced calling.

Step 4: Click on HD voice and video calling.

Step 5: Toggle off and Click on OK.

Reset All Network Settings on Samsung S9/S9 Plus

It will reset all network settings (Saved WiFi networks, Bluetooth pairs, Mobile data, etc.) in your Samsung devices.

Step 1: Go to Settings.

Step 2: Scroll down and click on General Management.

Step 3: Click on Reset.

Step 4: Click on Reset network settings.

Step 5: Click on Reset settings.

Step 6: Click on Reset.

Factory Reset your Samsung Galaxy S9

If none of the methods solve your Samsung call dropping problem, try to factory reset your phone. It will delete all your phone data and reset to factory default settings.

Frequently Asked Question: Back up your data before performing a factory data reset.

Why Can’t I Make a Phone Calls on my Samsung S9 Plus?

You can’t make phone calls or voice calls if you activate a call barring in your Samsung Galaxy. To turn off call barring, open the phone app and tap on the menu at the top right corner. Now, tap on settings and tap on more settings. Here, tap on call barring and tap on voice call. Make sure to toggle on the All outgoing calls button in your Samsung.

How do I Clear the Cache on my Samsung Galaxy S10?

To clear specific app cache on the Samsung Galaxy S10 series, go to Settings and tap on apps. Select the app you want to clear cache and tap on Storage. Now, tap on Clear cache to remove temporary app data. To clear all app cache on Samsung, you must perform a wipe cache partition.

Read Also:

The list of possible solutions ends here. Don’t forget to mention which method worked for you to fix call dropping problem on Galaxy S9 and Galaxy S9 plus. Do you have any other tips you want to share? Hit the comments and let us know.

How to Fix Sound Issue on Samsung Galaxy S9 And S9 Plus

Irritate by Samsung Galaxy S9 plus sound issues? If you faced can‘t hear phone calls, Samsung S9 speaker issue, or notification sound issue on the Galaxy S9 plus. Let see some quick tricks to fix Samsung Galaxy S9 no sound issue. There are several reasons for galaxy S9 sound not working such as low volume, silent mode, poor network signal, hardware issue, damage speakers and more.

Sometimes while listening to music and suddenly drop sound or no sound in Samsung Galaxy devices. Have you been ever facing this media-sound not working or speaker not working issue on your galaxy devices? Check out each one listed below possible solutions to fix sound not working on Galaxy S9 and Galaxy S9 plus.

Read Also:

How to fix sound not working on Galaxy S9 and Galaxy S9 Plus

How to fix sound not working on Galaxy S9 and Galaxy S9 plus

Restart your Galaxy S9 & S9 plus

Switch off your Samsung Galaxy S9 and Galaxy S9 plus and after 10-15 seconds switch on again. Now make a call or listening song and check to fix no sound problem or not.

Check galaxy S9 volume is full

Check volume settings on your galaxy S9 and galaxy S9 plus devices. Make sure volume is full in your device.

Settings > Device > Sound > Adjust volume settings

Check network signal strength to fix sound not working on Galaxy S9 and Galaxy S9 plus

If network signal is poor in your galaxy S9 & S9 plus, you can’t hear a clear voice for the incoming or outgoing calls. To fix poor sound call quality on galaxy S9 plus, find a nearby place that good signal.

Check Microphone or Wired headset damage

If use wired headset or microphone and getting this poor sound from speaker issue, check below.

Wired headset: Check wired headset is properly inserted into the headset jack. Remove Galaxy S9 case and check fix problems or not.

Microphone: Check nothing is in front of the microphone that causing too low call volume on Samsung Galaxy S9 & S9 plus.

Activate safe mode and check Galaxy S9 Plus speaker problem occur

Step 1: Power off your Galaxy S9 & S9 plus device.

Step 2: Press & hold the power button, when the Samsung logo appears on the screen, release the power button.

After releasing the power button, press & hold the volume down button in your galaxy S9. Continue holding the volume down button until restarting your device.

Step 3: You can see safe mode icon in the bottom left side

After enabled safe mode in your galaxy S9 & S9 plus, hide all third party downloaded apps in your devices. Now make a phone call and check your galaxy S9 no sound issue solved or not. If not found any problem, it means any third party app causing this problem. Now exit safe mode and remove one by one downloaded third party apps and check fix issue or not.

Read Also: How to turn on safe mode on Galaxy Note 8

Factory Reset Galaxy S9 and Galaxy S9 plus

It will remove your entire phone’s internal storage data such as Google account, Samsung account, System & app data, downloaded apps, music, photos and more. So Backup and restore important data in your device before factory reset galaxy S9 & galaxy S9 plus.

Step 1: Go to Settings in your galaxy S9 & S9 plus.

Step 2: Tap on Backup & reset.

Step 3: Tap on Factory data reset.

Step 4: Tap on Reset Phone.

Step 5: Tap on Erase everything.

Now restart your galaxy S9 and galaxy S9 plus devices and check to fix galaxy S9 speaker not working or no sound issue.

Do you know some other effective methods to fix sound not working on Galaxy S9 and Galaxy S9 plus? Share with us in below comment box. We are waiting for your feedback on this problem.

How to fix overheating issue on Galaxy S9 and Galaxy S9 plus

Is your Samsung galaxy S9 getting hot while charging or overheating issue? Check out this possible ways to fix overheating issue on galaxy S9 and galaxy S9 plus Oreo devices. There are several reasons for your galaxy S9 overheating such as constant playing games or videos, apps running in background, remove galaxy S9 case, turn on GPS services and more.

Several galaxy S8 and galaxy S7 users are facing both overheating and battery draining problem also. We already discussed about improve battery life on galaxy S9 & S9 plus devices. Follow below given step by step process to fix overheating issue on galaxy S9 and galaxy S9 plus Oreo devices.

You May Like:

How to fix Galaxy Note 8 won’t charge issue

Fix Galaxy S9 and Galaxy S9 plus can’t send or receive messages

How to fix overheating issue on galaxy S9 and galaxy S9 plus Oreo

First of all check out below step to keep away your galaxy S9 & Galaxy S9 plus overheat or warm issue.

  • Remove galaxy S9 case or cover that warm your device while charging
  • Don’t use any apps that overheat your S9
  • Keep away your galaxy S9 & S9 plus from excessive heat
  • Turn off background apps that is unnecessary
  • Avoid playing continue games

After check above trick, follow below steps to fix Samsung galaxy S9 overheating issue.

How to fix overheating issue on galaxy S9 and galaxy S9 plus

 1st Way: Restart your Galaxy S9 & S9 plus

Power off your Samsung galaxy S9 and galaxy S9 plus and after 10-15 seconds again powered on. Now play games or watch video and check galaxy S9 plus warm or not.

2nd Way: Use Original charger to charge & Original Battery

Always use original charger to charge your Galaxy S9 and Galaxy S9 plus device. Avoid your Galaxy S9 plus devices with faulty charger or cables. Don’t use defective battery in your device.

3rd Way: Enable safe mode on galaxy S9 to fix overheating issue on galaxy S9 and galaxy S9 plus

Check This: How to turn on safe mode on Galaxy Note 8

After turn on safe mode in your galaxy S9 & S9 plus, hide all downloaded apps in your devices. Now check your galaxy S9 plus overheating or warm, if not found any problem, it means any third party app causing this issue. Now exit safe mode and remove one by one installed third party apps and check fix issue or not.

4th Way: Factory data reset galaxy S9 and galaxy S9 plus

It will delete all your phone personal and other data. Now Backup and restore important data in your device before factory reset galaxy S9 & galaxy S9 plus.

Step 1: Go to Settings in your galaxy S9 & S9 plus

Step 2: Tap on Backup & reset

Step 3: Tap on Factory data reset

Step 4: Tap on Reset Phone

Step 5: Tap on Erase everything

Now restart your Samsung galaxy S9 and galaxy S9 plus devices and check fix galaxy S9 warm or overheating issue or not.

And that’s it. End the list of possible solutions to fix overheating issue on galaxy S9 and galaxy S9 plus. Do you have any other tips you want to share? Let me know in the comment section.

How to Fix Galaxy S9 Plus Can’t Send or Receive Text Messages

Annoying by can’t send or receive text messages on Samsung Galaxy S9 and S9 plus? Here’s the possible solution to fix Galaxy S9 Plus won’t send text messages to one contact or group text. One of the main reasons behind text messages not sending is bad network signal strength. If you recently switched from iPhone to Galaxy S9 & S9 plus device and forgot to deactivate iMessage then also facing this Samsung Galaxy S9 not send or receive text messages problem.

You can switch texting from iMessage to android using this. If you no longer use the iPhone, you just need to enter your phone number to deregister from iMessage. Follow the below-given troubleshooting methods to fix Galaxy S9 can’t send or receive text messages.

Read Also:

How to Fix Can’t Send or Receive Text Messages on Samsung Galaxy S9 and S9 Plus

How to fix cant send or receive text messages galaxy S9 Plus

Check out each one listed below methods to fix unable to send or receive text messages on Galaxy S9 plus and galaxy S9.

Restart your device

Power off your Galaxy S9 & S9 plus and after 15-20 seconds power on again & send a message to someone and check fix issue.

Check your phone signal strength

Poor network signal strength is reason for can’t send or receive text messages. Turn Aeroplane mode on & off in your S9 plus devices.

Swipe down the notification panel from top of the screen > Aeroplane mode

After 10 seconds disable it & check fix network signal issue. If not fix issue, find nearby place where your Galaxy S9 devices have a good network signal.

Remove the SIM card

Remove the SIM card from your device and restart your phone. After a restart, re-insert the SIM card to slot and try to send a message to contact and check to fix the issue. Also, try your SIM card to another phone and send a message.

Clear the Messages App Cache

Step 1: Go to Settings.

Step 2: Tap Apps.

Step 3: Tap See all apps.

Step 4: Find the Messages app and tap on it.

Step 5: Tap Storage/Storage & cache.

Step 6: Tap Clear cache (Remove temporary data).

Step 7: Tap Clear data/Clear storage (It will remove all app data).

Reset Network Settings

Step 1: Go to Settings.

Step 2: Scroll down and tap General management.

Step 3: Tap Reset.

Step 4: Tap Reset network settings.

Step 5: Tap Reset settings.

Enter your lock screen PIN or Password.

Step 6: Tap again Reset settings.

It will remove saved WiFi passwords and Bluetooth connection only from your device. Now, restart your phone and send messages to other people and check to fix the issue.

Factory Reset/Hard Reset Galaxy S9 & S9 Plus

Step 1: Turn off your Samsung Galaxy S9 & S9 plus.

Step 2: Press and hold the Volume up, home key, and Power button at the same time.

When the Samsung logo see, release the power key in your device. After few seconds, android system recovery menu display on your galaxy S9 & S9 plus.

Step 3: Press the volume down button until wipe data/factory reset view, after that press power button.

Step 4: Press the volume down button until Yes select then press the power button to start the reset process.

Step 5: Press the volume down button up to the reboot system now and press the power button to restart your S9 plus.

And that’s it. Did you find the above-given methods helpful to fix cant send or receive text messages galaxy S9 and galaxy S9 plus? If you have any other tricks, share with us in below comment box.