How to change lock screen notifications Galaxy S9 and S9 Plus

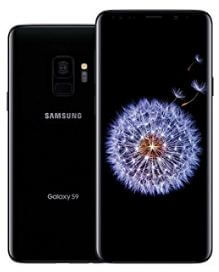
Let see the process to change lock screen notifications Galaxy S9 and Galaxy S9 plus Oreo devices. You can show/hide lock screen notifications in galaxy S9 plus & S9. By default show all notification content in your Samsung galaxy S9 and S9 plus devices. You can see other two options, one is hide sensitive notification content and another is don’t show notification at all.

Whenever you get notification in your galaxy S9, lock screen wake up and you can see the message. But if you have any personal contact messages, you’ll hide notification on lock screen in your galaxy S9 & S9 plus devices. In android Oreo 8.1 & 8.0 devices, you can individually change app lock screen notifications also. Follow below given step by step process to change lock screen notifications galaxy S9 and galaxy S9 Plus.

You Might like:

How to disable lock screen notifications android Nougat 7.0 & 7.1.2

How to change lock screen shortcuts on Galaxy Note 8

How to turn on lock screen notifications on OnePlus 5/5T

How to change lock screen notifications galaxy S9 and galaxy S9 Plus Oreo

Check out below given steps to show/hide lock screen content on Samsung galaxy S9 and galaxy S9 plus devices.

Step 1: Go to settings in your galaxy Note 8

Step 2: Tap on lock screen & security

Step 3: Tap on notifications

Step 4: Tap on the lock screen

Here you can see show content on lock screen/hide sensitive notification content/don’t show notifications at all options. By default show notifications on lock screen galaxy S9 & S9 plus devices.

How to change lock screen notifications galaxy S9 and galaxy S9 Plus

Step 5: Choose hide sensitive content notification to hide notifications

Now hide notification content from lock screen in your galaxy S9 & S9 plus devices. You can easily change lock screen notifications on Galaxy S9 plus and S9.

If you want to hide some specific app or game notifications on lock screen, you’ll individually disable lock screen notifications on galaxy S9 plus and galaxy S9 Oreo.

Step 1: Go to Settings in your S9 & S9 plus

Step 2: Tap on Lock screen & security

Step 3: Tap on Notifications

Step 4: Select app want to hide content

Step 5: Choose Disable lock screen notifications

In android Oreo devices, you want block individually app all notifications from your device. You can’t see any types of notification of that app in your android Oreo devices.

Block individually app all notifications in android Oreo 8.1 & 8.0:

Block individually app all notifications in android Oreo

Settings > Apps & notifications > See all apps > Select app > App notifications > Disable notification

And that’s it. It’s quite easy to change lock screen notifications galaxy S9 and galaxy S9 Plus Oreo. If you have any question, leave it below comment section. Stay and connected with us for latest Galaxy S9 & S9 updates.

How to Fix Samsung Galaxy S9 Keeps Freezing and Restarting

Annoying by apps crashing or unresponsive screen when opening apps on Galaxy S9 and Galaxy S9 plus? Here’s the possible solution to fix Samsung Galaxy S9 that keeps freezing and restarting again & again an issue. There are several reasons for your Galaxy S9 and Galaxy S9 plus freezing, such as whole storage, app update, system update, etc. Suppose you found any particular app-related issues, clear app cache & data in Galaxy S9 and Galaxy S9 Plus devices. Also, enable safe mode on Galaxy S9 Plus and Galaxy S9 to find third-party apps that cause this issue. Check out each one listed below, given possible ways to fix Samsung Galaxy S9 keeps freezing and restarting.

Read Also:  

How to fix Samsung Galaxy S9 Keeps Crashing and Freezing: Galaxy S9 Plus

How to fix Samsung galaxy S9 keeps freezing and restarting

Apply below given different ways to fix Galaxy S9 and Galaxy S9 Plus keep freezing and restarting issues.

Restart your Galaxy S9 & Galaxy S9 Plus

Restart your Galaxy S9 & Galaxy S9 plus devices. Now check to fix the app freezing issue or not.

Internal Storage is Full

If the internal storage is full on your Samsung Galaxy S9 & S9 plus, remove unnecessary files from your galaxy devices.

Settings > Device > Storage > Remove files not use

Check for App Updates to fix Samsung Galaxy S9 Keeps Freezing and Restarting

If a particular app is freezing or crashing problem, first of all, check any app update available in your S9. You can individually update the app and multiple update apps using the settings below on your devices.

Google Play Store > Three horizontal lines at upper left corner > My apps & games > Update

If not available update, clear app cache & data in your Galaxy S9 and Galaxy S9 Plus devices.

Clear App Cache & Data on Galaxy S9 and Galaxy S9 plus

Step 1: Go to Settings in your Galaxy S9 & S9 Plus.

Step 2: Tap on Apps.

Step 3: Select the app you want to clear the cache & data.

Step 4: Tap on Storage.

Step 5: Tap on Clear cache.

If the clear cache does not fixes the issue, clear app data in Galaxy S9 Plus and Galaxy S9.

Step 6: Tap on clear data

Now check to fix the freezing issue on your Galaxy S9 series.

Force Stop App in Samsung Galaxy S9 & S9 Plus

Settings > Apps > Tap on any app want to force stop > Force stop > OK

Turn On Safe Mode on Galaxy S9 to fix Samsung Galaxy S9 Keeps Freezing and Restarting

Click here to activate safe mode on your Samsung S9 and S9+. After enabling safe mode in your Galaxy S9 & S9 plus, hide all third-party apps in your Samsung Galaxy devices. Now check if your Galaxy S9 is freezing. If not find any issue, it means any third-party downloaded app is causing this app to crash or freezing issue. Restart your device to exit safe mode on Samsung S9+/S9. Now, remove recently installed third-party apps one by one until fixing the problem.

Read Also: How to turn on safe mode on Galaxy Note 8

Factory Reset Galaxy S9 Plus and Galaxy S9

It will remove all your phone data. Now Back up and restore data in your device before factory reset galaxy S9 plus & galaxy S9.

Step 1: Go to Settings in your Galaxy S9 & S9 Plus.

Step 2: Tap on Backup & reset.

Step 3: Tap on Factory data reset.

Step 4: Tap on Reset Phone.

Step 5: Tap on Erase everything.

Now restart your Samsung Galaxy S9 and Galaxy S9 Plus devices and check whether to fix the issue or not.

End the list of possible solutions to fix Samsung Galaxy S9 that keeps freezing and restarting. If you know any other ways to fix the Galaxy S9 and Galaxy S9 Plus freezing problem, let me know in below comment section.

How to improve battery life on Galaxy S9 and Galaxy S9 plus

Want to extend or improve battery life on Galaxy S9 and galaxy S9 plus Oreo? There are several ways to extend battery life on galaxy S9 plus and galaxy S9 device such as turn off always-on display, remove live wallpaper, lower screen brightness, stop unnecessary running background apps, screen time out time, turn on power saving mode and more.

Samsung galaxy S9 and S9 plus have awesome features such as Intelligent scan, super slow motion recording, camera, AR emoji and more. But in most of all devices have some features that consuming more battery compare to other functions. So check out below given 6 different methods to increase or improve battery life on Galaxy S9 and galaxy S9 plus.

Read Also:

How to stop app background activity on android Oreo 8.0 & 8.1

How to play YouTube video in background on Google Pixel

How to increase or improve battery life on Galaxy S9 and galaxy S9 plus Oreo

How to improve battery life on Galaxy S9 and galaxy S9 plus Oreo


Check out each one listed below given six ways to fix battery drain issue on galaxy S9 and galaxy S9 plus devices.

1st Way: Adjust screen brightness

Swipe down notification bar > Brightness slider > Slide left to decrease

 Set screen brightness lower on your Samsung galaxy S9 and S9 plus device. It will quickly drain battery life in your galaxy devices.

2nd Way: Set Lower screen timeout to improve battery life on Galaxy S9 and galaxy S9 plus

Swipe down notification bar > Settings gear icon > Display > Screen timeout   

Set screen timeout in galaxy S9 and galaxy S9 plus device. If set more than a 1 minute, lower screen timeout. Now set screen timeout at 15 seconds or 30 seconds to save battery life on galaxy S9 Plus and galaxy S9 Oreo.

3rd Way: Disable Wi-Fi or Bluetooth and other services while not use

To extend battery life on galaxy S9 and galaxy S9 plus, you can turn off GPS location, Wi-Fi, Bluetooth, and other services not used. Also force stop unnecessary running apps background processes in your galaxy S9 plus & S9 devices.

4th Way: Remove live wallpaper to improve battery life on Galaxy S9 and galaxy S9 plus

Tap & hold empty area on your S9 screen > wallpapers & themes > my wallpapers > choose wallpapers

If set live wallpaper on home or lock screen in your galaxy S9 and galaxy S9 plus devices, remove it to increase battery life on galaxy S9 plus. While live wallpaper active, it will quickly battery drain in your device. You can change wallpaper on galaxy S9 and galaxy S9 plus using below settings.

5th Way: Turn on power saving mode or ultra power saving mode on galaxy S9 & galaxy S9 plus

Swipe down notification bar > Settings gear icon > Device maintenance > battery > enable power saver mode on galaxy S9 plus & galaxy S9

6th Way: Disable auto-sync on galaxy S9 and galaxy S9 plus

If enable auto-sync in your galaxy S9 device, it will allow apps to download and update several data such as email, contacts, calendar and other data related with your account. So it will drain more battery in your device.

Swipe down notification bar > Settings gear icon > clouds & accounts > accounts > menu > turn off auto sync > OK

And that’s it. End the list of possible solutions to improve battery life on Galaxy S9 and galaxy S9 plus. Do you know any other tricks to extend battery life on galaxy S9 plus & galaxy S9? Share with us in below comment box.

How to use Intelligent scan on galaxy S9 and galaxy S9 Plus

Samsung galaxy S9 and galaxy S9 has several awesome features including AR Emoji, Super slow motion video recording, Intelligent scan for security, improve camera, Augmented reality and more. In this article, I’ll show you how to use Intelligent scan on galaxy S9 and galaxy S9 Plus Oreo devices.

This new galaxy S9 and galaxy S9 plus Intelligent scan technology combines both Iris scanning and face recognition. You’ll quickly unlock you galaxy S9 & S9 plus using this feature. Also easily identify your face on low light, bright sunlight, with or without prescription glasses or bearded or clean-shaven. Let see complete guide to enable and use Intelligent scan on galaxy S9 and galaxy S9 Plus Oreo devices.

Read This:

How to fix facial recognition not working Note 8

How to set up facial recognition on android Oreo 8.0 & 8.1

How to enable and use Intelligent scan on galaxy S9 and galaxy S9 Plus

In galaxy S9 and galaxy S9 lock screen security, you can use Iris scanner, face recognition, Fingerprint, pattern lock, password or PIN number. When Intelligent scan not working on galaxy S9 & S9 plus, use PIN number or Pattern lock.

Step 1: Go to settings in your Galaxy S9 & S9 Plus

Step 2: Tap on Lock screen and security

Step 3: Tap on Intelligent scan under Biometrics section

Intelligent scan improves accuracy and security by using both face and Iris scanning.

Step 4: Tap on face and Iris data

Here you can add or remove face and Iris data in galaxy S9 and S9 plus. Also use Intelligent scan to verify your identity in Internet and other supported apps. Also enable/disable Intelligent scan unlock using this settings.

Set up face recognition on galaxy S9 and galaxy S9 Plus

How to use Intelligent scan on galaxy S9 and galaxy S9 Plus

This facial recognition is less secure than Iris scanning, Fingerprint, Pattern lock, PIN or Password. Someone who looks like you could unlock your Galaxy S9 & S9 plus. Check out below given steps to set up and use face recognition on galaxy S9 Plus and galaxy S9 Oreo devices.

Step 1: Go to settings in your galaxy S9 & S9 plus

Step 2: Tap on lock screen & security

Step 3: Tap on Face recognition under phone security section

Step 4: Create PIN number/Password/ Pattern lock

Now follow onscreen instruction to enable and set up face recognition.

Step 5: Hold your galaxy S9 & S9 plus in front of your face and make sure your face inside the circle on screen to scan face.

Step 6: To activate face recognition, turn on toggle button

Now your Samsung galaxy S9 & S9 plus quickly unlock when see your face. It’s easy to set up and use face recognition galaxy S9 plus and galaxy S9.

How to set up Fingerprint scanner on Galaxy S9 and Galaxy S9 plus

Step 1: Go to settings in your Galaxy S9 & S9 plus

Step 2: Tap on lock screen & security

You will see Iris scanner, face recognition and Fingerprint sensor options.

Step 3: Tap on Fingerprint sensor

Step 4: Follow on screen instruction

Step 5: Create Pattern, PIN number or Password

Step 6: Now place your finger on the fingerprint sensor several times until show 100% completed.

Now set up fingerprint sensor on galaxy S9 & S9 plus is finished.

Step 7: Tap Add to add more fingerprints on Galaxy S9 & S9 plus device

You can also remove fingerprint sensor in your galaxy S9 and galaxy S9 plus devices.

And that’s it. We hope it makes clear to use Intelligent scan on galaxy S9 and galaxy S9 Plus Oreo. Do you have any other galaxy S9 tips? Share with us in below comment section. Stay and connected with us for latest galaxy S9 updates.

How to customize always on display Galaxy S9 and Galaxy S9 Plus

Samsung Galaxy S9 and Galaxy S9 plus device have several awesome features such as improve camera, AR emoji, super slow motion recording, intelligent scan, latest Oreo version and more. In this tutorial, I’ll show you step by step process to customize always on display galaxy S9 and galaxy S9 Plus devices.

By default turn on always on display in Galaxy S9 and S9 plus Oreo. This always on display feature is useful to show notification related info on home screen, date and battery life on your galaxy S9 devices. You can also choose content to show on screen from different clock of information for stand by screen in your galaxy S9 plus device.

If enable always on display, it will consume battery life in galaxy S9 and galaxy S9 plus devices. Follow below given complete guide to enable and customize always on display galaxy S9 and galaxy S9 Plus.

You Might Like:

How to turn on Wi-Fi calling on Galaxy S8 and galaxy S8 Plus

How to set up fingerprint sensor on galaxy S9 and galaxy S9 Plus

How to customize always on display galaxy S9 and galaxy S9 Plus Oreo

How to customize always on display galaxy S9 and galaxy S9 Plus Oreo


Check out below given both methods to enable /disable always on display on galaxy S9 & S9 plus and customize it.

1st Method: Enable/Disable Galaxy S9 & galaxy S9 plus always on display using phone settings

Step 1: Go to settings in your Samsung galaxy S9 & S9 plus devices

Step 2: Tap on Lock screen and security

Step 3: Tap on always on display

By default set show always in your galaxy S9 and other Samsung galaxy device.

Step 4: Turn off toggle button always on display

Now your Galaxy S9 & S9 plus device screen turned off. You can’t see any notifications or other details in your devices lock screen. After enable always on display on galaxy S9, wake up screen when you receive notifications.

2nd Way: Turn off always on display on Galaxy S9 & S9 plus using notification panel

Step 1: Scroll down notification panel from any screen and tap on Settings gear icon

Step 2: Select lock screen & security

By default enable always on display in your galaxy S9 Plus and galaxy S9.

Step 3: Turn off toggle button of always on display

And that’s it. I hope this tutorial helpful to customize always on display galaxy S9 and galaxy S9 Plus. If you have any question, share with us in below comment box. We’ll respond as soon as possible. Stay and connect with us for latest Galaxy S9 and galaxy S9 plus updates.
How to change Google chrome theme on PC

Here’s the complete guide to customize or change Google chrome theme on PC. By default set theme on your Google chrome/Mozilla Firefox or other browser. After long time use this chrome theme, several users annoying. You can set Google chrome theme under appearance settings in your PC or android devices. In Chrome appearance settings, you can see theme, font size & customize fonts, page zoom and show home button settings.

In Chrome web store, you can see several chrome themes such as dark & black themes, minimalist themes, pretty patterns, sunshine, forest and more. Have you been ever change Google chrome background theme in your Windows 10/8/7? Follow below given step by step processes to change Google chrome theme on PC or laptop.

Read More:

How to use Autofill in Google chrome browser

How to fix Chrome bookmarks not syncing  

How to customize or change Google chrome theme on PC or Laptop

Step 1: Open Google chrome browser in your desktop PC or laptop

Open chrome settings menu in Windows 7 PC

Step 2: Tap on Three vertical dots at upper right side corner

Google Chrome settings options

Step 3: Select Settings

Customize Chrome theme in Windows 10

Step 4: Tap on Themes under appearance section

How to change Google chrome theme on PC

Now see Google chrome web store with several types of category themes in your desktop PC or laptop devices.

Step 5: Select theme you want to set in your Google chrome browser

Change chrome theme in desktop PC

Step 6: Tap on Add to chrome at upper right corner

Now change theme on Google chrome browser in your desktop or laptop devices. Your chrome browser border and background changed.

How to remove Google chrome theme in PC or laptop

Step 1: Open chrome browser in your PC or laptop

Step 2: Tap on Three vertical dots at top right side

Step 3: Select Settings

Remove Google chrome theme in PC or laptop

Step 4: Tap on Reset to default under themes in appearance section

Now you Google chrome browser look like as first time you install in your devices.

And that’s it. I hope this tutorial helpful to remove or change Google chrome theme on desktop. If you know any other ways to change theme on Chrome browser, share with us in below comment box. Stay and connected with us for latest technology tips.