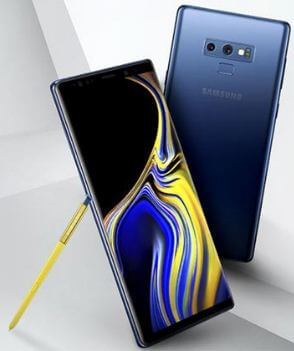
How to Change Default Storage Location of New Contacts on Galaxy Note 9

By default set storage location in your Samsung Galaxy Note 9. Want to set SD card as default storage on Galaxy Note 9? Here’s how to change the default storage location on Note 9 contacts. You can change the default location of storing contacts on your Galaxy Note 9 using a contacts app. After change storage location, you can easily transfer data from your phone storage to SD card. You can save new contacts to Google account, Samsung account, phone, and SD card options (If inserted) for the default storage location.

After inserted SD card, you can easily move contacts, apps to SD card on Samsung Note 9. Follow the below-given step by step process to change the default storage location on Note 9 contacts.

Read Also:

How to Change Default Storage Location on Note 9 Contacts

How to change default storage location on Note 9 contacts

You’ll also move apps or files from internal storage to SD card on Galaxy Note 9 after inserted SD card on the device.

Step 1: Open the Contact app in your Samsung Note 9.

Step 2: Tap Three vertical dots (More) at the upper right corner.

Step 3: Select Manage contacts.

Here you can see Merge contacts, Import/Export contacts, Sync contacts, and default storage location options.

Step 4: Tap Default storage location

Step 5: Choose from the Samsung account/Google/Phone/SD card to select where your contacts will be saved.

Also, add an account if you want to change the default contact storage location on the galaxy Note 9. After change Note 9 storage location for contacts, automatically new add contact will add to the new default storage location.

More:

How to Move Files from Internal Storage to SD Card on Galaxy Note 9

If inserted SD card on your galaxy note 9, you can easily move files, photos & videos, apps from phone storage to SD card.

Step 1: Open Gallery or My files on your Note 9.

Step 2: Select photos, video, audio, or other data you want to transfer.

Step 3: Tap Three vertical dots (Menu) at the upper right corner.

Step 4: Select Move.

Step 5: Tap the SD card.

Step 6: Tap Done.

Now transfer photos, videos, or other files to the SD card on your Samsung Galaxy Note 9.

And that’s all. I hope this tutorial helpful to change the default storage location on Note 9 contacts. If you have any questions, tell us in below comment box. Stay and connect with us for the latest updates.

How to Change the Display Color Mode on Pixel 3, 3 XL, 3a, 3a XL

Want to change color mode on Pixel 3 and Pixel 3 XL? Here’s how to change the display color mode on Google Pixel 3 XL, Pixel 3, Pixel 3a and Pixel 3a XL. By default Pixel 3 XL color mode set as automatic. You can set color mode from Boosted/Natural/Saturated. Also, switch Google Pixel 3 automatic color mode to other screen display mode using display settings. So you’ll apply your favorite mode using RGB color mode that shows your device screen accurate.

Read Also:

How to Set or Change the Color on Pixel 3 and Pixel 3 XL

Now set your Google Pixel 3 and Pixel 3 XL color as bright, vivid and look natural using below given settings.

Step 1: Swipe down the notification shade and tap the Settings gear icon.

Step 2: Tap Display.

In Pixel 3 and Pixel 3 XL display settings, you can see brightness level, Night light, Adaptive brightness, Wallpaper, sleep, auto-rotate screen, colors, font size & display size, and more settings.

Step 3: Tap Advanced.

Step 4: Tap Colours.

By default display color set as automatic in your Pixel 3 and Pixel 3 XL device.

Step 5: Choose from the available options to set the Pixel 3 XL color mode.

It will slightly change your Google Pixel 3 & Pixel 3 XL display color looks.

Change the color mode on Pixel 3a and Pixel 3a XL (Android 10)

How to Change the Display Color Mode on Pixel 3, 3 XL, 3a, 3a XL

Settings > Display > Advanced > Colors > Choose from Natural/Boosted/Adaptive

How to enable Picture color mode on Pixel 3 and Pixel 3 XL

If you want to use sRGB color mode on your android 9 Pie devices, check out below given settings. Make sure to enable developer options on Pixel 3 and Pixel 3 XL.

Step 1: Swipe down the notification panel and tap the Settings gear icon.

Step 2: Scroll down up to the end of the page and tap System.

Step 3: Tap Advanced.

Step 4: Tap Developer options.

Step 5: Scroll down and find Picture color mode.

By default turn off sRGB mode in your Google Pixel 3 and other Pixel devices.

How to change color mode on Google Pixel 3 XL

Step 6: Turn on the toggle Picture color mode.

Now change your Google Pixel 3 device display screen color.

And that’s it. I hope this tutorial helpful to change color mode on Google Pixel 3 XL and Google Pixel 3. If you have any questions, tell us in below comment box. Stay and connect with us for latest updates.

How to Block Incoming Calls and Text Messages on Galaxy Note 9

Are you annoying by private number calls or unknown callers on Samsung Galaxy Note 9? A sometimes unknown person send messages or call again & again even we don’t know. Due to this spamming call, we irritate several times. So check out this tutorial on how to block a number on galaxy Note 9 that irritates you by making phone calls or messages. When you block someone on Note 9, you won’t receive calls or texts from blocked numbers. You can add a private number, unknown number, and other phone contact and block spam calls on Note 9.

Read Also:

How to Block a Number on Samsung Galaxy Note 9

How to block numbers on Galaxy Note 9

You can block and manage calls on Samsung note 9 using call settings. Also, add a number to the reject list if you don’t want to receive calls or ignore contact in your phone.

Step 1: Open the Phone app in your Samsung Note 9.

Step 2: Tap Three vertical dots (More) at the upper right corner.

Step 3: Select Settings.

Here you can see Note 9 call settings such as answering and ending calls, block numbers, call alerts, show caller information, show calls in a pop-up, ringtone & keyboard tone, and more settings.

Step 4: Tap Block numbers under the call settings section.

Step 5: Tap + Plus icon or tap contact icon to select a number from the contact list.

Step 6: Enter a private number or unknown number you want to block text messages or calls.

Step 7: Tap Block or toggle on block unknown calls.

Now you can’t receive blocked number messages and calls on your device. It will automatically ignore that number calls or text messages and forwarded calls to voicemail.

How to Unblock a Number on Galaxy Note 9

If you accidentally add the wrong mobile number on a block list, you’ll unblock it easily using below given settings in your Samsung note 9.

Phone app > Three vertical dots > Settings > Block numbers > Tap the “-” icon of the number or contact you want to unblock > Unblock unknown calls

And that’s all. I hope this little tip helpful to block numbers on Galaxy Note 9. If you have any questions, tell us in below comment box. Stay and connect with us for the latest updates.

How to Answering And Ending Calls on Samsung Galaxy Note 10 Plus, Note 10, Note 9

Want to change Samsung answer phone settings on galaxy Note 9? You can enable automatic answering to automatically answer incoming calls after 2 seconds while a headset or Bluetooth device is covered. Find and use answering and ending calls on Galaxy note 9 under call settings. Here you’ll see options for answer calls and end calls on your device. Also, use volume up key to answering calls and power key to end calls on galaxy Note 9. Follow the below-given step by step process to enable answering and ending calls on Galaxy note 9.

Read Also:

How to Turn on Answering and Ending Calls on Galaxy Note 9

How to answering and ending calls on Galaxy Note 9

To change galaxy Note 9 answering calls and end call style, apply below-given settings on your phone.

Step 1: Open the Phone app in your galaxy Note 9.

Step 2: Tap Three vertical dots (More) at the upper right corner.

Step 3: Select settings.

Here you can see galaxy Note 9 call settings such as hide contacts without number, block numbers, answering and ending calls, show caller information, the show calls in a pop-up, call alerts, ringtone & keyboard tone and more settings.

Step 4: Tap answering and ending calls.

Here you can see answer calls and end calls options.

Answer calls

You can use the volume up key to answering all incoming calls in your device. Turn on press volume up to answer call toggle button to use this setting.

Enable automatic answering to automatically answer incoming calls after 2 seconds while using a Bluetooth or headset in your device.

End calls

Press power key to end calls on galaxy Note 9. Turn on toggle to activate this setting in your device.

Enable Tap on Answer Call on Samsung Galaxy S10, S10 Plus, and S9 Plus

You can answer a call without swiping on Samsung Galaxy S10, S10 Plus, and S9 Plus

Settings > Accessibility > Interaction & dexterity > Assistant menu (If disable then enable it) > Toggle on “Single tap to swipe”

How to block a number on Galaxy Note 9

Annoying by the unknown number on your Samsung Note 9? This will block the number of phone calls and text messages from your device. Let see step to Samsung galaxy note 9 block calls.

Open phone app > Three vertical dots (More) > Settings > Block calls under call settings section > Add a number > Block

Now block calls on galaxy note 9 devices. To unblock calls on Note 9, open blocked contact list using the same settings and tap on it and unblock it on your phone.

And that’s all. We hope this makes it clear how to enable answering and ending calls on Galaxy note 9. Do you have any other Note 9 tips & tricks you want to share? Tell us in below comment box.

How to Enable Easy Screen Turn On Galaxy Note 9

Here’s how to enable easy screen turn on Galaxy Note 9. This feature is useful to quickly turn on Galaxy Note 9’s screen without touching it when putting your phone on the device surface and move your hand on the sensor. You can find this screen turn on automatically feature under dexterity and interaction settings. Also, turn on Samsung Note 9 screen mode using this tutorial.

When activating the easy screen mode, put your phone on a stable surface with the screen facing up. After the screen has turned off, move your hand on the sensor. The screen will turn back on. Follow the below-given step by step process to enable easy screen turn on Galaxy Note 9.

Read Also:

How to Enable or Disable Easy Screen Turn On Samsung Galaxy Note 9

How to enable easy screen turn on Galaxy Note 9

When enabling Note 9 easy screen, turn on the screen without having to press hard keys. Apply below given settings.

Step 1: Swipe down notification panel and tap Settings gear icon.

Step 2: Tap Accessibility.

Step 3: Tap Dexterity and interaction.

Here you can see universal switch, assistant menu, easy screen turn on, touch & hold delay, click after pointer stops and interaction control.

Step 4: Tap Easy screen turn on.

Step 5: Turn on toggle from upper right side of the screen.

Now, you’ll quickly turn on screen to just put your device on the surface and move your hand to above the sensor.

How to Turn On Easy Mode on Galaxy Note 9

Galaxy Note 9 easy mode feature is to convert your device to a simple layout and make screen icons bigger on the home screen. Just switch standard mode to easy mode in your Samsung Note 9.

Step 1: Go to Settings in your Note 9.

Step 2: Tap Display

Step 3: Tap Easy mode.

By default standard mode selected in your Samsung Galaxy Note 9 and other devices.  Any customization you’ve made to the home screen will be discarded, and the screen zoom will be set to the minimum.

Step 4: Choose Easy mode.

Step 5: Tap Apply from the upper right corner.

Now go to the home screen and you can see change home screen layout at simple and bigger on-screen apps or other items in your Samsung Note 9.

And that’s all. Do you still have a question about enable easy screen turn on Galaxy Note 9? If you have any questions, tell us in below comment box. Don’t forget to share with others if you found it helpful.

How to Set Up and Use Bixby on Samsung Galaxy Note 9

Let see how to set up and use Bixby on Galaxy Note 9. Bixby 2.0 is an intelligent voice service with Samsung’s AI technology that helps you to use your Note 9 more conveniently. Pressing and holding the Bixby key to launch Bixby on your Samsung Galaxy Note 9. After set up Bixby 2.0 on Note 9, just say “Hi, Bixby”. Now you can access all Bixby features in your Samsung Note 9. Also, see Bixby voice settings in your galaxy Note 9 device. Anytime enable or disable Bixby button on Galaxy Note 9.

You can use Bixby to play music, get the latest trending news, find near hotels, set an alarm, ask questions, make phone calls, and more. Let see how to customize Bixby on Samsung Note 9.

Read Also:

How to Customize Bixby Settings on Galaxy Note 9: Bixby 2.0
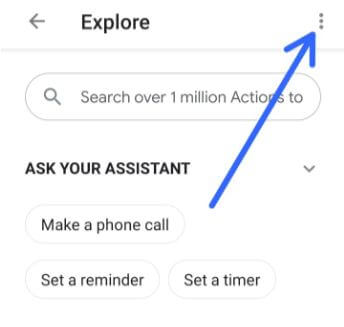
How to use Bixby on Galaxy Note 9

You’ll use Bixby on Note 9 to making calls, ask questions, searching for places, add an event or reminder, translate language, send messages and more settings. You can’t disable Bixby 2.0 on the Samsung Galaxy Note 9 device. By default Bixby vision is built into your phone gallery, camera and Samsung internet so you can easily identify object on your phone. Let see Bixby voice settings for galaxy Note 9.

Use Bixby Voice on Galaxy Note 9

To quickly access Bixby on Galaxy Note 9 without pressing a Bixby key, enable voice wake-up in your device using below given settings.

Step 1: Press the Bixby key in your Note 9 to access Bixby Home.

Step 2: Tap Three vertical dots (More) at the upper right corner.

Step 3: Select Settings.

Step 4: Toggle on Bixby voice

You can see below given Bixby voice settings in your Samsung Note 9. Here you can see Language and voice style, Voice response, automatic listening, Voice wake up, use a phone with locked and Auto-update Bixby’s voice.

Step 5: Tap Voice wake up.

Step 6: Toggle on wake with “Hi, Bixby”

Now, just say Hi, Bixby from any screen to access Bixby on your Samsung Galaxy Note 9 device.

Voice Wake-Up Settings for Bixby 2.0

Use when phone speaker playing: Use your voice to wake up Bixby when the phone speaker is playing a ringtone, an alarm, or media

Wake up sensitivity: Set Bixby wake-up sensitivity as low or medium or large. Higher sensitivity could cause unintentional Bixby wake-ups.

Improve voice wake-up accuracy: Record your voice again in places you usually use Bixby. The more recording you make, the more accurate Bixby will get.

Delete voice wake-up recording: Delete recording your recorder in your device.

It’s quite easy to use Bixby on Galaxy Note 9. If you don’t want to use Bixby on your device, disable Bixby on Galaxy Note 9. But it’s “Not possible to completely disable Bixby button on Note 9”. You’ll disable voice wake-up using above given settings or turn off Bixby home on Note 9 using below given settings.

Relevant:

How to Disable Bixby Home on Galaxy Note 9

Step 1: Tap & hold the blank space on your Note 9 home screen.

Step 2: Swiping screen the right side up to see Bixby home.

Step 3: Turn off toggle Bixby home.

Now that’s all. We hope this makes it clear how to use Bixby on Galaxy Note 9. Do you have any other Bixby 2.0 tips for galaxy Note 9 you want to share? Tell us in below comment box.