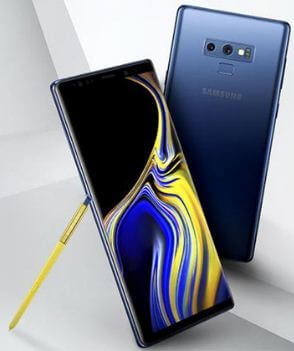
How to Change Icon Size in Galaxy Note 9/Galaxy Note 8

Here’s how to change icon size on Galaxy Note 9/Galaxy Note 8. Using home screen settings, you can increase or decrease icon size on Samsung Galaxy Note. To change the app icon size on Samsung Note, open home screen grid settings and set the font size you want to use on your Samsung device. You can see the home and app screen grid sizes on your Samsung Galaxy devices. Also, use display settings to change font size and style on Samsung Galaxy Note 9/Galaxy Note 8. You can’t individually change the icon size on Android devices.

How to Increase or Decrease Icon Size on Samsung Galaxy Note

How to change icon size on Galaxy Note 9

Set app icon size in your Samsung Note and other devices by default. Check out the settings and change the home screen grid and app screen grid size on Samsung Note.

Note: Change your Samsung device’s home and apps screen grid size, which will also change the app sizes. Depending on which phone you use.

How to Change Home Screen Grid Size on Samsung Galaxy Note

Step 1: Long press on the blank space on the Samsung Note home screen.

You can see wallpapers, themes, widgets, and home screen settings here.

Step 2: Tap on Home screen settings.

You can see the home screen layout, home screen grid, app screen grid, and App icon badge, Add new apps to the home screen, quick open the notification panel, and hide apps.

Step 3: Tap the Home screen grid.

Step 4: Choose from 4×5, 4×6, 5×5, and 5×6.

Step 5: Tap on Apply on the top right side.

Now back to the home screen, and you can see the change app icon size on your Samsung Note device. Also, change the app screen grid size on your device.

How to Change App Screen Grid Size on Galaxy Note

Long press the blank space on the home screen > Home screen settings > App screen grid > Choose from 4×6 and 5×6 > Apply

How to Change Font Size and Font Style in Samsung Note

Step 1: Go to Settings in your Note.

Step 2: Tap on Display.

Step 3: Tap on Font & screen zoom.

Here you can change font size, font style, and screen zoom in your Samsung Note phone.

Step 4: Tap on Font size and set font from Small/Large/Largest.

Step 5: Tap on Font style and choose font style from Arial/Helvetica/Times new roman/Courier new and more.

Now change fonts on your Samsung Note.

Step 6: Tap on Screen zoom and set the screen as small or large as you want on your device.

It will make your galaxy Note screen smaller or larger. Some apps on your screen may also change position.

Frequently Asked Question:

How Do I Change the Icon Size on my Samsung?

To change the icon size on your Samsung, you need to change the home screen and app screen grid size. To change the home screen grid, long-press on the blank area on the home screen > Settings > Home screen grid > Select the size > Apply. To change the app screen grid, long-press on the blank area on the home screen > Settings > Apps screen grid > Select the size > Apply.

How do You Change App Icons on Note 9?

To change the app icons on Note 9, Long-press the blank space on the home screen > Themes > Icons tab > Select the icon pack you want to use > Download > Apply.

And that’s all. We hope this makes it clear how to change icon size on Galaxy Note 9. Do you have any other Note 9 tips you want to share? Tell us in below comment box. Stay and connect with us for the latest updates.

How to Allow Unknown Sources on Galaxy Note 10, Note 9, Note 8

Want to allow installation of unknown sources apps on your Samsung Galaxy Note 9? Here’s how to enable unknown sources on Galaxy Note 9. To install third-party apps on your Galaxy Note 9, make sure to enable install unknown apps in your device. When you install an unknown source apk file or third party apps on your phone, first of all, you’ll need to allow permission to access phone data.

You can enable/disable install unknown apps on galaxy note 9 under Biometrics and security settings. By default turn off this feature in your device. Follow the below-given step by step process to enable unknown sources on Galaxy Note 9.

Read Also:

How to Enable Unknown Sources on Samsung Galaxy Note 9

How to enable unknown sources on Galaxy Note 9

Enable Unknown Sources on Samsung Galaxy Note 10+

Step 1: Go to settings in your device

Step 2: Tap on Biometrics and security

Step 3: Tap on Install unknown apps.

Step 4: Select the app from a list.

Step 5: Toggle on Allow from this source

Enable or Disable Unknown Sources on Samsung Note 9

Step 1: Swipe down the notification panel and tap the Settings gear icon.

Step 2: Tap Biometrics and security.

Here you can see Face recognition, Iris scanner, Fingerprint scanner, Find my mobile, Install unknown apps, screen transition effect and more.

Step 3: Tap Install unknown apps.

A list of install apps appears on your Samsung Note 9 screen.

Step 4: Tap app you want to allow 3rd party apps.

To install apk in android phone, you agree that you are responsible for any damage to your phone or loss of data. You can see a message of “Your browser required special permissions to install the app or game”.

Step 5: Turn on toggle to “allow from this source”.

If you don’t want to give 3rd party apps to access your phone data, turn off toggle to disable it in your Samsung galaxy devices.

Related:

Turn on Unknown sources on Samsung Galaxy Note 8

Step 1: Go to settings in your Samsung Note 8.

Step 2: Scroll down and tap Lock screen and security.

Step 3: Toggle on Unknown sources.

How to turn on screen transition effect on Galaxy Note 9

Show a transition effect when you use biometrics to unlock your phone.

Settings > Biometrics & security > Screen transition effect

And that’s all. I hope this little tutorial useful to enable unknown sources on Galaxy Note 9. If you have any kind of trouble, tell us in below comment box. Stay and connect with us for the latest updates.

How to Change Screensaver on Galaxy Note 9

Here’s how to change the screensaver on Galaxy Note 9. By default set screen saver on your Samsung Galaxy Note 9. You can see screensaver on Note 9 after turn off the screen while your phone charging. Enable/disable screen saver on Samsung Note 9 using display settings. Also, choose colors or choose photos or videos from Note 9 gallery.

There are different types of screensaver available in your devices such as Flames free, Jumpgate free, photo frame, photo table, and more settings. Follow the below-given step by step process to change the screensaver on Samsung Note 9.

Read Also:

How to Set or Change Screensaver on Samsung Galaxy Note 9

How to change screensaver on Galaxy Note 9

You can add or remove screensaver on Samsung Note 9 using display settings. Let see the complete guide.

Step 1: Swipe down the notification panel and tap the Settings gear icon.

Step 2: Tap Display settings.

In Samsung Note 9 display settings, you can see auto-brightness, Blue light filter, Screen mode, Screen resolution, font size & style, Navigation bar, Block accidental touches, Screensaver, Status bar, and more settings.

Step 3: Tap Screensaver at the end of the page.

Step 4: Turn on toggle to use a screensaver.

Step 5: Choose from options you want to apply to your device.

Step 6: After select option, tap Preview to see how screensaver in your phone looks.

Step 7: Tap the Back button.

Now you’ll see screensaver on Note 9 while your phone is charging and screens turn off.

How to Remove Screensaver on Samsung Note 9

Screensaver use more battery power compare to wallpaper in your Samsung Galaxy Note 9 and other devices. If you don’t want to use a screensaver on note 9, turn off toggle in your device.

Settings > Display > Screen saver at end of the page > Toggle off

How to Enable Block Accidental Touches on Galaxy Note 9

This feature is useful to prevent the screen from detecting touch input while your phone is in a dark place such as a pocket or bag.

Settings > Display > Toggle on Block accidental touches

And that’s all. Do you still have a question about change screensaver on Galaxy Note 9? If you have any questions, tell us in below comment box. Stay and connect with us for the latest updates.

How to Display Name and Number on the Lock Screen on Galaxy Note 9

Want to add contact information on Galaxy Note 9 always-on display and lock screen? Here’s how to change the lock screen name on Samsung Galaxy Note 9. You can display your phone number, name, or email address on the lock screen and always-on display. To put your name or mobile number on Note 9’s lock screen, go to contact information under lock screen settings in your device. Here you can customize contact information for lock screen & always-on display.

Read Also:

How to Change Lock Screen Name on Samsung Galaxy Note 9

How to change lock screen name on Galaxy Note 9

You can individually set phone number or name on AOD and lock screen in your Samsung Note 9 phone. Check out below the given complete guide.

Step 1: Swipe down the notification panel and tap the Settings gear icon.

Step 2: Tap Lock screen.

In Galaxy Note 9 lock screen settings, you can see Screen lock type, Smart lock, Always-on display, Clock style, Facewidgets, Contact information, Lock screen notification, and more settings.

Step 3: Tap Contact information.

Step 4: Enter the name or phone number you want to show on the lock screen.

Step 5: Choose from the Lock screen and Always-on display/Lock screen /Always-on display.

Step 6: Tap Done.

Now go back to lock screen in your Samsung Galaxy Note 9. You can see added name or number on the lock screen or always-on display. Also using this lock screen setting, you can change always on display clock style on galaxy Note 9.

Relevant:

How to Change Always on Display Clock Style on Note 9

Step 1: Swipe down the notification panel and tap the Settings gear icon.

Step 2: Tap Lock screen.

Step 3: Tap Clock style under the clock and information.

Here you can see the Always-on display and lock screen tab. Now set clock style and color in your device.

Step 4: Select the Always-on display.

Step 5: Tap Clock style at the bottom of the screen and choose the clock you want to set an always-on display.

Now go to lock screen and you can see change clock style in your android device. To change the lock screen clock style, just tap the lock screen tab and select clock style.

And that’s all. Do you still have a question about the change lock screen name on Galaxy Note 9? If you have any kind of trouble, tell us in below comment box. Stay and connect with us for the latest updates.
How to Enable Android Messages Dark Mode

Do you want to turn on messages dark mode on your Android devices? In this tutorial, I’ll show you the steps to enable Android messages dark mode. Using message app settings, you can use a system-wide theme or manually turn on dark mode on your messages app. Different devices have slightly different settings to turn on dark mode (Dark Theme) on your messages app, like Google Messages app, Samsung Messages app, etc.

Read More:

How to Enable Android Messages Dark Mode

If you use the latest Google messages app, follow the settings below.

Turn On Google Messages Dark Mode on Android

Step 1: Open the Google Messages app on your phone.

How to Enable Dark Mode in Android Messages App

Step 2: Tap the Profile icon at the top right corner or Three horizontal lines at the top left corner.

Step 3: Tap Messages Settings.

How to Enable Google Messages Dark Mode on Android, Samsung, OnePlus

Step 4: Tap Choose theme.

How to Enable Dark Mode in Android Messages

Step 5: Choose a Dark.

Other options are light or system default (Automatically set the theme as your device theme).

How to Turn Off Dark Mode on Google Messages

Open the Google Message app > Profile icon at the top right corner > Messages settings > Choose theme > Choose a Light or System default (Ensure the System default theme is set as Light Mode).

How to Turn On RCS Messages or RCS Chats on Google Messages

How to Turn On RCS Messages on Google Messages App Android

Open the Google Message app > Profile icon at the top right corner > Messages settings > RCS Chats > Toggle on RCS Chats.

How to Turn On Dark Mode on Messages App (Older Version)

Follow the below settings to make messages dark mode on your Android devices.

Step 1: Open the Messages app on your Android devices.

Android messages app settings for Pixel Pie

Step 2: Tap the Profile icon at the top right corner or Three vertical dots (Menu) in the upper right corner.

Here you can see blocked contacts, Messages for the web, Enable dark mode, settings, and more options. By default, turn off dark mode on your device.

Use dark theme on android messages app

You can see the above screenshot when turned off dark theme in your messages app.

How to enable dark mode on android messages

Step 3: Select Enable Dark Mode.

Enable dark mode on android messages

Step 4: You can see the above-given screen when turning on dark theme messages app.

This new material dark theme for Android messages will be used to read in dim light and quickly look at your screen. If you don’t want to use dark mode on Android messages, again follow the above-given process to turn off dark mode on Android messages.

How to Enable Samsung Messages Dark Mode

Samsung devices use the system-wide dark theme option. Pull down the notification shade at the top and tap on Dark mode in the quick settings tiles to activate it.

OR

Settings > Display > Choose a Dark Theme.

Read More: How to Enable Dark Theme in Google Pixel

How to Turn Off Dark Mode Android Messages

How to disable dark mode on android messages

Messages app > Three vertical dots (Menu) > Disable dark mode.

OR

Open the Messages app > Three horizontal lines at the top left > Choose Theme > Light.

It’s easy to enable/disable dark mode on Android messages on your Android devices.

How to Access Google Messages to the Web on a Computer/Laptop

Step 1: Open the Messages app on your Android devices.

Step 2: Tap the Profile icon at the top right corner or Three horizontal lines at the top left corner.

How to Access Google Messages to the Web on a Computer

Step 3: Tap Device pairing.

Step 4: Open https://messages.google.com/web on your computer.

Step 5: Tap the QR code scanner with your phone and scan the QR code shown on your PC or Laptop.

Now, you can access your Android phone messages on your PC, like WhatsApp web.

And that’s all. We hope this clarifies how to enable dark mode on Android messages. If you have trouble, let us know in the comment box below.

Related:

How to Check Time Spent on YouTube Android

Want to know how much time do you spend on YouTube? Now YouTube added new features that useful to shows how much time you spend watching videos today, yesterday, or last week in your Android or iPhone devices. This YouTube time watched features for Android or iOS is working the same as Digital wellbeing. This feature is useful to see your daily average watch time and how long you’ve watched YouTube videos in your device. Let see how to check the time spent on YouTube Android phone. Also, use the Digital Wellbeing feature to set screen time and set an app time limit to reduce app data usage in your Android devices.

In YouTube time watched for android settings, you can also see settings for time to take a break reminder, autoplay next video, Scheduled digest and disable sounds & vibration settings. YouTube also added incognito mode and dark mode features. Follow the below-given step by step process to check time on YouTube mobile device.

Read Also:

How to Check Time Spent on YouTube Android Phone or Tablet

To use YouTube time watched feature on Android or iOS, make sure YouTube app updated to latest version. Check out below given settings to show how much time you spend watching videos on the YouTube app in android.

Step 1: Open the YouTube app in your Android device.

Open YouTube profile in your android devices

Step 2: Tap the Profile icon at the upper right corner.

Use YouTube time watched feature on android

Step 3: Tap Time watched.

How to check time spent on YouTube android

Now you can see “YouTube time watched stats” that tell you how many hours you spend watching YouTube videos, YouTube music apps, and other YouTube activities on android. Also check time spent yesterday, last week, and daily average in android phone.

How to Manage YouTube Time on Android device

YouTube time watched feature on android

In this YouTube time watched for android settings, you can see below given four settings.

Remind me to take a break

Select time you want to automatically stop YouTube video in your android phone or tablet while watching YouTube videos or enjoy YouTube music.

Autoplay next video

To automatically play the next video on YouTube, enable this setting in your YouTube time.

Scheduled digest

Get all your notifications as a daily digest. Customize the delivery time you want to set on your phone.

Disable sounds & vibrations

If you want to silence notifications during watching YouTube videos, set start time and end time to turn off sounds & vibration in your android phone.

How to Watch Time Spend on YouTube Android 9 Pie

If you have android 9 Pie devices and install Digital wellbeing feature on your device, you can see individually apps time spend on daily or hourly on your phone. After installing Digital wellbeing beta, follow the below-given step by step guide to watch YouTube time spent on your android device.

How to watch time spend on YouTube android 9 Pie

Settings > Digital wellbeing > Dashboard > Show all apps > YouTube 

And that’s all. Do you still have a question about check time spent on YouTube android phones? Do you have any other YouTube tips you want to share? Tell us in below comment box.

Watch YouTube Video Here