How to Enable Ambient Display in Pixel 3 and Pixel 3 XL

Here’s how to enable and turn off Ambient display in Pixel 3 XL and Pixel 3. Ambient display feature is useful to wake up screen on Pixel 3 and Pixel 3 XL when you receive new notifications. You can view the sender’s name on the lock screen without unlocking your device, so if important messages then check it first. Pixel Always-on display or Ambient display settings, you can see double-tap to check phone and lift to check phone settings for view notifications icons and other info on your device lock screen without unlocking it. You can turn on or turn off Ambient display on Pixel 3 XL and Pixel 3 under display settings.

Read Also:

How to Turn on or Turn Off Ambient Display Pixel 3 and Pixel 3 XL

You can see weather information on the lock screen using these ambient display features. Let see a complete guide to enable/disable ambient display on Pixel 3 and Pixel 3 XL.

Step 1: Swipe down notification shade twice and tap the Settings gear icon.

Step 2: Tap Display.

In Google Pixel 3 and Pixel 3 XL display settings, you can see brightness level, Night light, Adaptive brightness, Wallpaper, Device theme, and advanced settings.

Google Pixel 3 display settings

Step 3: Tap Advanced.

Disable ambient display on Pixel 3 and Pixel 3 XL

Step 4: Scroll down at end of the page and tap Ambient display.

You can see below given two options in your Google Pixel 3 to when to show notification on your device.

Double-tap to check phone

Google Pixel 3 Always on display

To quickly show notifications, time and other information from Google Pixel 3 lock screen, enable double-tap to check notification without unlocking your device. After activating this setting, just double-tap your Pixel 3 screen to show notifications.

Lift to check phone

Turn off Ambient display on Pixel 3 Pie 9

Turn on a lift to check the phone on Pixel 3 and Pixel 3 XL to show notification on the lock screen to just pick up your phone.

How to turn on Ambient display Pixel 3 Pie

Step 5: Turn on toggle New notifications to wake up screen when receiving notifications on Pixel 3 & Pixel 3 XL.

If you don’t want to wake up screen when new notifications arrive on your phone, turn off Ambient display on Pixel 3 XL and Pixel 3.

And that’s all. I hope this tutorial helpful to turn on Ambient display Pixel 3 and Pixel 3 XL. If you have any questions, tell us in below comment box. Stay and connect with us for the latest updates.

How to Add or Embed YouTube Video to WordPress Blog Post

Want to add a YouTube video in WordPress blog post? Here’s how to embed a YouTube Video to WordPress blog in 2020. One of the easiest ways is simply to put the YouTube video link to the text on your WordPress post to open video. To improve user engagement on your Website, embed videos on your WordPress blog related to content. You can easily embed YouTube videos in WordPress post to put a video URL into the text. Also, use a visual editor to quickly embed video and you can see a video on your post.

Read Also:

How to Add YouTube Video to WordPress Post

You can use the WordPress video Plugin to add YouTube videos to WordPress blog post. But using this tutorial, you can easily embed a YouTube video in a WordPress site. Check out below given settings.

1st Way:

Step 1: Sign in your WordPress admin account.

Step 2: Tap on Posts from the left side menubar.

Step 3: Find the post and tap Edit.

Step 4: Tap on Add media.

Step 5: Tap Insert from URL (Show below given screenshot).

How to Add or Embed YouTube Video to WordPress Blog Post

Step 6: Paste the link and enter the link text you want to set.

Step 7: Tap Insert into post at the bottom right corner.

2nd Way:

Step 1: Open the YouTube app on your PC with your login.

Make a sure uploaded video to YouTube you want to embed in WordPress blog.

Step 2: After login your YouTube account, open the uploaded videos list.

Step 3: Open the video you want to insert a video to a WordPress site.

Step 4: Tap Share from the below video.

Here you have two choices, one is “copy link” and another is “Embed” YouTube video. Also, add time for video starting and share YouTube links directly to Facebook, Twitter, Google+, Reddit, LinkedIn, and other social media sites.

How to add YouTube Video to WordPress Post

Copy link: Paste this link to the text in the WordPress site. From my point of view, this is the best option to post YouTube videos on WordPress.

Embed YouTube video in WordPress post

Embed: This is an iframe code, so it puts a load on your post.  So take more time to compare to link to open post.

Step 5: Now choose from copy link or Embed.

Step 6: Now open WordPress login panel and sign in with your ID and password.

Step 7: Now open post you want to add a YouTube link or embed a video.

Step 8: If copy video link, then simply Paste a link to text and click the update button

Embed YouTube video in WordPress blog post

Step 9: If copy Embed code, tap text on WordPress post (Show above given screenshot).

Step 10: Now paste code on header or footer or any other place you want and tap the update button to embed YouTube video in WordPress article

Add YouTube Video to WordPress Post

Step 11: You can see the above-given video in a WordPress blog post after paste code.

And that’s all. We hope this makes it clear how to add YouTube Video to WordPress Post. Do you have any other tips you want to share? Tell us in below comment box.

How to Make a GIF on Samsung Galaxy Note 9

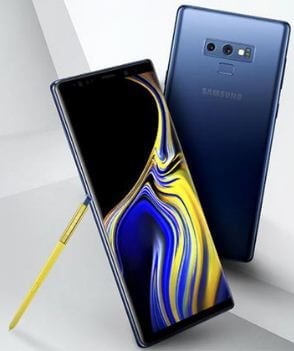
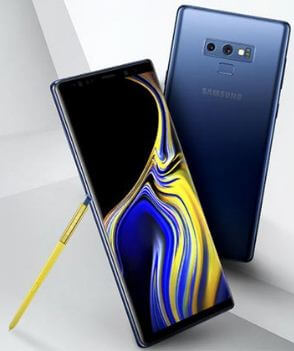
Do you want to make a GIF on Samsung Note 9 using S Pen? Here’s how to create a GIF on Galaxy Note 9 using the camera app in your device. You can easily make animated GIFs using the camera on Samsung Note 9. Just hold the camera button to make a GIF image on the galaxy Note 9 device. Also, make a GIF using S Pen in your Note 9. This is one of the easiest ways to capture GIFs.

Samsung Galaxy Note 9 has improved camera with Bluetooth supported S Pen and awesome flaw detection features. You can create your own GIF also in your Note 9, Note 8, and other devices. Follow the below-given step by step process to create GIFs on Samsung Galaxy using camera app settings.

Read Also:

How to Create a GIF on Samsung Galaxy Note 9 Using the Camera App & S Pen

How to create a GIF on Galaxy Note 9 Oreo


In Samsung Galaxy Note 9 camera settings, you can change camera storage location, use voice control to take selfie, save pictures in RAW & JPEG, Launch camera from Always-on display, place camera shutter button anywhere on the screen and more settings. But in this tutorial, I’ll show you a complete guide about Make a GIF on Note 9 using camera app.

Step 1: Open the Camera app in your Note 9.

Step 2: Tap Settings gear icon at the bottom left side.

Step 3: Tap Hold camera button under the common camera section.

By default “take burst shot” when you hold the camera button on your Samsung Galaxy Note 9. Here you can see Take picture/Take burst shot/Create GIF options.

Step 5: Choose Create GIF.

Step 6: Open the camera app in your Note 9.

Step 7: Hold shutter button and move your device to make a GIF Note 9.

Step 8: Release the shutter button to stop.

You can find this created GIF on your galaxy Note 9 internal storage.

Step 9: Open Note 9 gallery and tap camera folder.

Step 10: Tap the GIF image you created.

How to Make GIFs Using S Pen on Galaxy Note 9

You can easily create Animated GIFs from videos or photos using S Pen in your galaxy Note 9.

Step 1: Detach the S Pen on your Note 9.

Step 2: Tap Smart Select.

Step 3: Choose Animation from the upper side.

Step 4: Select area using S Pen you want to make GIFs.

Step 5: Tap Record.

Step 6: After finished, select Save at the bottom left side.

You can also directly share GIFs with your friends or other social media.

And that’s it. I hope this tutorial helpful to create a GIF on Galaxy Note 9 using the Camera app. If you have any questions, tell us in below comment box. Stay and connect with us for the latest updates.
How to Change Google Background in PC, Laptop

By default, set Google Chrome wallpaper background as white on your PC or Laptop devices. If you have the latest updates in Chrome browser, you can easily change Google background or customize Chrome using color & theme, and background settings. Here’s how to change background on Google Chrome with your own picture or default wallpaper on your PC. You can change Google wallpaper random in Chrome from different categories such as Art, Seascapes, Landscapes, Solid colors, Earth, Life, Textures, and more. Also, upload images from your computer or laptop device and change the Google background images.

How to Change your Google Background in Chrome on a Desktop or Laptop

By default, set Google backgrounds in chrome. You can easily change the background picture on Google Chrome using the below-given settings. Make sure Google Chrome is updated to the latest version. Apply the below-given settings to customize Chrome backgrounds on your laptop or PC.

How to Change Background of Google – Change Google Theme

You can set a light or black background for Google using this theme setting.

Step 1: Open the Google page in your Chrome, Mozilla Firefox, or other browsers.

Black background for Google

Step 2: Tap on Settings at the bottom right corner.

How to Change Background of Google

Step 3: Tap on the Dark theme to turn it on or off.

How to Change the Background on Google Chrome Theme

Step 1: Open the Chrome browser on your PC or Laptop.

How to Change the Background on Google Chrome Theme

Step 2: Tap on Customize chrome or Pencil icon (Already change the background wallpaper) at the bottom right corner.

Step 3: Tap the Background.

You can see several background options here.

How to Change Google Background in PC and Laptop

Step 4: Choose from Upload from device, Classic chrome (Reset to default Theme), or Default wallpapers for chrome.

Step 5: Select the Wallpaper and Click on Done.

How to Change the Background of Google Chrome using Theme Settings

You can use Chrome Google web store to change Chrome theme.

Step 1: Open the Chrome browser on your Laptop or desktop.

Step 2: Tap on More (Three vertical dots) button in the top right corner.

Step 3: Tap on Settings.

Appearance menu Chrome

Step 4: Tap the Appearance at the left side menu.

Theme Settings Chrome

Step 5: Tap the Theme.

How to Change the Background of Google Chrome using Theme Settings

Step 6: Select the Theme you want to download to your PC.

Step 7: Click the Add to Chrome.

Step 8: Wait until complete the downloading. After that, open the new tab to view how looks your new chrome theme.

How to Delete Theme on Chrome you Set as Background

How to Delete Theme on Chrome

If you don’t want to use this theme, you can uninstall theme by going to Chrome browser > Pencil icon at the bottom right > Color & theme > Uninstall > Done.

How to Change Chrome Color for Tabs

Step 1: Open Google chrome on your PC and Laptop.

Step 2: Tap the Customize chrome or Pencil icon at the bottom right corner.

How to Change Chrome Color for Tabs

Step 3: Tap the Color and theme tab and choose a Color, and tap on Done.

You can see the changes in color for the chrome tabs. When you open a new tab, you can see these changes.

Change Chrome Color

Alternative way: Open the Chrome browser > Tap on your Account in the top right corner > Pencil icon > Pick a theme color you want to set. 

How to Change Homepage on Chrome

You can set home page in Chrome browser using the below settings. Also, set Google as home page.

Step 1: Open the Google Chrome browser on your PC or Laptop.

Step 2: Tap on Three vertical dots (More) at the top right corner.

Step 3: Tap the Settings.

On Startup Settings in Chrome

Step 4: Tap on the On Startup.

How to Change Homepage on Chrome

Step 5: Choose Open a specific page or set of pages.

You can add a new page (Add Google as a home page here) or use current pages (Choose from your list) when you open the Chrome browser on your PC or laptop.

How to Change Wallpaper on Chromebook

You can set wallpaper on Chromebook from your gallery using the below-given settings.

Step 1: Open the ChromeOS settings app.

Step 2: Tap the Device at the left side menu.

Step 3: Tap on Set your wallpaper and style in the personalization section.

Step 4: Choose from default wallpapers or go to the Downloads folder to choose your favorite wallpaper.

Step 5: Right-click on the photo and choose Set as wallpaper.

Now, you can see change your wallpaper on a Chromebook.

How to Change Chrome Background (Older Chrome Version)

Step 1: Open the Google Chrome browser on your desktop PC or laptop.

Set wallpaper on Google chrome background

Step 2: Tap the Settings gear icon from the bottom right corner (Shown above screenshot).

Here you can see Chrome background and upload in image options.

Change background picture on Google Chrome

Step 3: Tap Chrome background.

Here you can see different categories of wallpaper to set wallpaper on the Google chrome background on your PC or tablet.

Step 4: Select a category from a list you want to set wallpaper.

How to change Google chrome background image on PC

Step 5: Select wallpaper from the collection and tap Done.

Change Google chrome background image

Step 6: Now change the background wallpaper on the Google Chrome browser.

If you don’t like custom Google background categories wallpaper, also add new photos from your desktop PC or laptop and set a picture as the background on Chrome on your PC.

How to Set Google Chrome Background Wallpaper From a PC or Laptop

You can directly set a background image on Chrome from your desktop or laptop using the settings below.

Open Google chrome > Settings gear icon from bottom right corner > Upload an image > Double tap on the photo from your PC

Now, Change the Google background image in your Chrome browser.

How to Restore the Default Background on Google Chrome

Want to set a default background again on your Chrome browser? You can easily remove the Google chrome wallpaper and set the default chrome background image again using the settings below.

How to restore default background image on Google chrome

Open Google chrome > Settings gear icon from bottom right corner > Restore default background.

Now Google chrome background wallpaper is set the default at white background.

And that’s it. We hope this clarifies how to change the Google chrome background image on Desktop PC. If you have any questions, please tell us in below comment box.

Frequently Asked Questions:

Why is my Google Background Black?

Dark theme settings are enabled in your Google background. If you don’t want to use dark background on Google, open your Google page > Settings at the bottom right corner > Dark theme to turn the background dark or light you want to set.

Read Also:

How to Enable Quick Launch Camera on Galaxy Note 9

Here’s how to enable quick launch camera on Galaxy Note 9. When turning on quick launch camera note 9, open the camera by quickly pressing the power key twice in your device. This is one of the easiest methods to access Note 9 camera quickly using the power button.

Samsung Galaxy Note 9 has improved camera with Bluetooth supported S Pen that helpful to capture a photo or take a selfie, switch camera modes, and more settings. We use a camera app to open a camera on our devices. Follow the below-given step by step process to enable and use quick launch camera on Samsung Note 9.

Read Also:

How to Turn On And Use Quick Launch Camera on Galaxy Note 9

How to enable quick launch camera on Galaxy Note 9

You can find this quick launch camera under advanced feature settings in your Samsung Galaxy Note 9 (Oreo 8.1) device.

Step 1: Swipe down the notification panel and tap the Settings gear icon.

Step 2: Tap Advanced features.

Here you can see S Pen, Smart stay, One-handed mode, Finger sensor gestures, quick launch camera, Multi-window, Dual Messenger, Send SOS message, Video enhancer, Touch sensitivity, smart capture, and more settings.

Step 3: Tap the Quick launch camera.

By default turn off toggle in your android device.

Step 4: Toggle on Quick launch camera.

Now, quickly pressing the power button two times continuously to quickly open the camera from any screen in your Samsung Note 9.

Alternative Way: Settings > Lock Screen > Always-on display > Content to show > Home button > Double tap home button > Select Quick launch camera

Let see other useful Note 9 settings to quickly open the notification panel and use fingerprint sensors to open & close apps and other feature.

How to Quickly Open Notification Panels on Galaxy Note 9

Step 1: Tap & hold on the blank space in your galaxy Note 9 home screen.

Here you can see Wallpapers, themes, widgets, and home screen settings.

Step 2: Tap Home screen settings.

Step 3: Scroll down and Turn on toggle Quick open notification panel.

Now swipe down to quickly open the notification panel from the home screen in your Samsung Note 9 device.

How to Enable Finger Sensor Gestures on Galaxy Note 9

To quickly open & close apps and feature using the fingerprint sensor, turn on the toggle in your Note 9. You can find this setting under a finger sensor gesture on your phone.

Settings > Advanced features > Finger sensor gesture

How to Enable Palm Swipe to Capture on Galaxy Note 9

You can capture selfies using your palm after an open camera in your galaxy Note 9 device. Just open the camera and show a palm to take a picture on your phone.

Settings > Advanced features > Palm swipe to capture

And that’s all. We hope this tutorial helpful to enable a quick launch camera on galaxy Note 9. If you have any questions, tell us in below comment box. Stay and connect with us for the latest updates.
How to Reset Network Settings on Galaxy Note 9

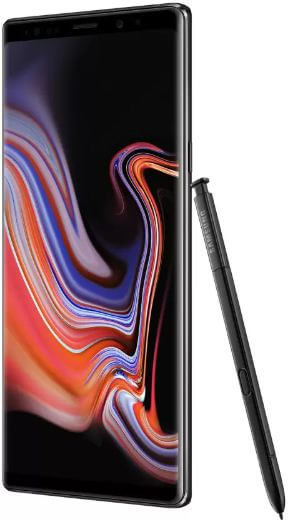
Here’s how to reset network settings on Samsung Galaxy Note 9. It will reset all network settings to their defaults including Mobile data, WiFi connection, Bluetooth, APN settings, and other network settings on your devices. This Note 9 network setting reset will useful to fix Wi-Fi or Bluetooth connectivity issues sometimes.

You can reset Note 9 settings also if facing Note 9 freezing or crashing, black screen and other problems. You can find reset settings under general management settings. We already discussed factory reset Samsung Note 9. Follow the below-given step by step process to reset settings on Galaxy Note 9.

Read Also:

Samsung Galaxy Note 9 Reset Network Settings

How to reset settings on Galaxy Note 9

Follow below settings to perform network settings on Samsung Note 9 that remove all network settings. Also factory reset or hard reset or master reset Note 9 to reset all settings.

Step 1: Swipe down the notification shade and tap the Settings gear icon.

Step 2: Find Genera management settings and open it.

Step 3: Tap Reset under the Reset section.

Here you can see Reset settings, reset network settings, factory data reset and auto restart on galaxy Note 9.

Step 4: Tap on Reset network settings.

Step 5: Select Reset settings.

Step 6: Tap on Reset settings once again.

Reset Settings on Note 9

Step 1: Swipe down the notification shade and tap the Settings gear icon.

Step 2: Find Genera management settings and open it.

Step 3: Tap Reset under Reset subheading.

Step 4: Tap Reset settings.

Step 5: Again Tap Reset settings.

Step 6: To confirm, tap Reset settings

Now restoring your Note 9 default settings.

How to Factory Reset Note 9 using phone settings

It will remove all phone data, make sure back up your important data before performing this action.

Step 1: Swipe down the notification shade and tap the Settings gear icon.

Step 2: Tap Reset under General management.

Step 3: Tap Factory data reset.

Step 4: Tap Reset phone.

Enter PIN number or Password if set to continue the process in your Note 9.

Step 5: Tap Delete all.

Now wait until Note 9 factory reset and restart your device. Now all your device settings set as default.

And that’s all. Did you find the above tutorial useful to reset settings on Galaxy Note 9? If you have any questions, tell us in below comment box.