How to Fix Android 9 Pie Gesture Control Problems After Update

Several Google Pixel, Pixel 2 users facing navigation gesture control problems after updated to Android Pie 9.0. You can manually enable/disable the android Pie gesture control system under system settings. Here’s how to fix Android 9 Pie gesture control problems after upgrading.

Android 9 Pie including several new features such as Adaptive battery & brightness, iPhone X style Gesture navigation, App actions, Digital wellbeing, overview selection, simulate a display with a cutout and more. After update Android Pie, Pixel users also facing different problems such has camera blank, fast battery charging, Bluetooth & Wi-Fi connectivity problem, etc. Apply the below-given method to fix Android 9 Pie gesture control problems.

Read More:

How to Fix Gesture Control Problems After Android 9 Pie Update: Google Pixel, Pixel 2 XL

How to fix Android 9 Pie gesture control problems

This iPhone X style gesture is useful to quickly open recent apps and app drawers from any screen in your Google Pixel, Pixel 2 and other supported devices. When turning on navigation gesture on android Pie 9.0, you can see the Pill (Horizontal line) icon at bottom of the screen.

Just swipe up the pill button to see recent apps list and switch apps in your Pie device. To see the Android 9 Pie app drawer, swipe up the pill button two times. If you are facing a problem with navigation gesture control on android 9 Pie, disable it using below given settings.

Step 1: Swipe down notification shade twice and tap the Settings gear icon.

Step 2: Scroll down at end of the page and tap System.

Android Pie gestures issues

Step 3: Tap Gestures.

In the Android Pie gestures list, you can see swipe fingerprint for notifications, jump to camera, flip to the camera, swipe up on home button, double-tap to check phone, lift to check phone and prevent ringing.

Problem on navigation gesture control on android 9 Pie

Step 4: Tap Swipe up on home button.

Step 5: Toggle off “Swipe up on Home button” (Show below screenshot).

Fix Android 9 Pie gesture control problems

Now you can see back, home and recent apps button instead of pill & back arrow button in your android 9 Pie devices.

And that’s all. I hope this little tip helpful to fix Android 9 Pie gesture control problems on Google Pixel, Pixel 2 XL. If you have any kind of trouble, tell us in below comment box.

How to Fix Fast Charging Issues After android 9 Pie update

Several Google Pixel & Pixel 2 users reported battery life problems after updated to android Pie 9.0 OS. Google confirmed to fix this android 9 Pie fast battery charging issues after the next system software update. You’ll use android 9 Pie’s new adaptive battery & adaptive brightness features to extend battery life. Let see the process to fix the phone not charging issues after the Android 9 Pie update.

Android 9 Pie update on Some Pixel, Pixel 2 and other users facing different problems such as camera issues, Android 9 Pie gesture control, fast battery charging, Wi-Fi & Bluetooth issues and more. But in this tutorial, I’ll show you possible solutions to fix fast charging issues after android 9 Pie update.

Read Also:

How to Fix Phone Not Charging Issues After Android 9 Pie update

Wait until system software update available for your Google Pixel, Pixel 2 XL and other devices. You can check for updates using this setting.

Check for system software update android Pie 9

Settings > System > Advanced > System update > Check for update

You can improve battery life on android 9 Pie using below given methods until receive system update to fix fast charging issues after android 9 Pie update.

Improve battery life on Android Pie 9.0

Android Pie 9.0 includes several new features that useful to save battery life such as Adaptive Battery, Adaptive brightness, Digital wellbeing for set app time limits and more.

Enable Adaptive battery Android Pie 9.0

How to fix fast charging issues after android 9 Pie update

Settings > Battery > Adaptive battery > Turn on toggle “Use adaptive battery”

It will useful to limit battery for apps that you temporary use. Also, restrict apps that have been using a battery in the background.

Enable Adaptive brightness Android Pie 9.0

Android 9 Pie fast battery charging issues

Settings > Display > Adaptive brightness

Automatically adjust the brightness level in your device for available light. If you don’t like this feature, you can manually set the brightness in your android Pie.

Read Also: Tips for Android Pie battery life extend

You can use battery saver, turn off phone vibration, use a dark theme and other settings to save battery life android 9 Pie devices.

Did you find the above methods useful to fix fast charging issues after android 9 Pie update? If you found it helpful, don’t forget to share it with others. Do you have any alternative tips to share with us? Tell us in below comment box.

How to Fix Camera Not Working After Android Pie Update

My Google Pixel first generation updated with the Android 9 Pie version. After upgrading to Android Pie facing several issues such as slow charging, the camera keeps stoping, call recording app not working, Gesture control issue and more. But in this tutorial, I’ll show you how to fix camera issues after Android Pie update.

We haven’t faced these types of problems on my Google Pixel 9.0 yet, so it may be possible to not all Pixel users facing this issue. If you have to face any android 9 Pie problems, report on the Pixel user community. Check out below given solutions to fix camera issues after Android 9 update.

Read Also:

How to Fix Camera Issues After Android 9 Pie Update

You can fix android Pie camera crashes or camera blank issues using below given methods. I hope one of the below ways fix your camera fatal error problem.

Check for system software update

Wait for the system software update for your Google Pixel and other devices. It will fix most of all android Pie issues on your Pixel devices. Follow below settings to check update is available on your phone.

Check for update android Pie 9

Settings > System > Advanced > System update > Check for update

If available then update your Pixel device to improve your device performance and fix small bugs.

Clear cache camera app to fix camera issues after Android Pie update

Step 1: Go to settings in your Android 9 Pie.

Step 2: Tap apps & notifications.

Step 3: Tap See all apps.

Fix android Pie camera crashes

Step 4: Select a Camera.

Camera blank issues

Step 5: Tap storage.

How to fix camera issues after android Pie update on Pixel

Step 6: Tap clear cache and after tap clear storage.

After clear camera app cache & storage, restart your android Pie 9.0. Now open the camera and check the fix camera issue in your device.

Make sure camera app updated to the latest version

Sometimes if the camera app not updated to the latest version, the camera app not working properly in android 9.0 Pie. So you can face camera crashes or camera blank issues.

Camera app not working properly android Pie

Play store > Three horizontal lines at upper left corner > My apps & games > Update all

If above-given methods can’t fix the camera problem after Android 9 Pie updates, wait until the next system software update for your Pixel devices. It’ll definitely fix this issue.

Check Camera App Permissions

Step 1: Go to settings.

Step 2: Tap on Apps & notifications or search Permission on the search bar at top of the screen.

Step 3: Tap on Permission.

Step 4: Tap on Camera.

Step 5: Make sure toggle on Camera.

We hope one of the above-given methods is useful to fix camera issues after android 9 Pie update on Pixel, Pixel 2 XL, Pixel 2, Pixel 3, 3 XL devices. Do you have any alternative methods? Share with us in below comment box.

How To Factory Reset An Android 9 Pie

Here’s how to factory reset Android 9 Pie devices. In this tutorial, I’ll show you two methods to factory data reset Android Pie 9.0, one is using phone settings and recovery mode settings. This Android Pie factory reset data settings will erase all your phone data including Google account, internal storage, Photos, videos, music, and other phone info. So back up your important data safely to other phones or PC after performing this action.

Read Also:

How To Factory Reset Android 9 Pie

You’ll use this Android 9 Pie factory reset settings to fix several problems such as phone won’t turn on, touch screen not working, black screen, Pixel 3 stuck on Google logo, unresponsive screen after falling in the water, shutting off randomly and more.

1st Method: Factory Data Reset Android 9 Using Phone Settings

It will delete all your phone data. Make sure back up & restore data safely in your Android 9 Pie before performing the below-given settings.

Step 1: Swipe down notification panel twice and tap the Settings gear icon.

Step 2: Tap the System at the end of the page.

Android Pie Advanced settings

Step 3: Tap Advanced.

Reset options on android 9 Pie

Step 4: Tap Reset options.

Factory reset Android 9 Pie

Step 5: Tap Erase all data (Factory reset).

Factory reset Android 9

Step 6: Tap Reset phone.

Step 7: Confirm your PIN or pattern lock or password to continue the process.

Reset android 9 Pie settings

Step 8: Tap Erase everything.

Now reset Pixel 3 settings as buy a new device. All third party apps uninstalled from your device and remove all accounts.

Factory Reset Android 10

Settings > System > Advanced > Reset options > Erase all data (Factory reset) > Erase all data > Erase all data

2nd Method: Factory Reset Android Pie 9 When the Phone is Locked

If you’re Android 9 Pie won’t turn on or any other problems, factory reset using recovery mode.

Step 1: Power off your Android 9 Pie.

Step 2: Press & hold the volume down button and the power button at the same time until your phone vibrates.

Now the Android system recovery screen is a view on your phone. By default start button show on your Android Pie device screen.

Step 3: Press the volume down button until view recovery mode.

Step 4: Press the power button to restart into recovery mode.

You can see the Android robot exclamation mark with a red triangle symbol with No command on your device.

Step 5: Press & hold the power button and press volume up button one time only and then release the only volume up button.

You can see Android 9 recovery mode options including reboot system now, reboot to bootloader, Apply update from ADB, Wipe data/factory reset, and more settings.

Step 6: Press the volume down button until Wipe data/factory reset.

Step 7: Press the Power button performs wipe cache partition or factory reset.

This message appears on the screen: Wipe all user data? By default selected No option.

Step 8: Press the volume down button to select Yes

Step 9: Press the power button to factory reset Android.

Wait until wipe cache data in your Android Pie 9.0 devices.

Step 10: Use the volume up button to move reboot system now

Step 11: Press the power button to reboot the system.

Now all your phone data will remove shortly. Wait until restart your Android Pie device.

And that’s all. We hope this makes it clear how to factory reset Android 9 Pie. If you have any kind of trouble, tell us in below comment box. We’ll respond as soon as possible.

How to Fix Not Receiving Texts in Google Pixel 4 XL/4/3 XL/3

Not receiving texts in Google Pixel? Feeling frustrated? Some people are facing this issue because they cannot send a text to someone from their google pixel phone. This seems a severe issue if someone is facing a problem with Google Pixel 4 XL/4/3 XL/3. You don’t need to worry about it in this article, you will get a permanent solution to fix the issue. The issue may be because of a poor network signal or some software problem, or maybe some settings in your phone.

After the system update, many people reported the issue of not receiving texts in Google Pixel 4 XL/4/3 XL/3. If you have transferred your phone from your iPhone to a Pixel device and forgot to deactivate iMessage, you will also face an issue with your Google pixel device. So if you are currently not using your iPhone, you can deregister from iMessage by entering your mobile number. You can switch texting from iMessage to Android. Below is the solution for you to solve the issue of not receiving text in Google Pixel 4 XL/4/3 XL/3.

How to Fix Not Receiving Text Google Pixel and MMS Issue

If you are frustrated, try the below method to fix the problem.

Restart you Pixel

Long-press the power button to view the power menu and tap on Restart to reboot your Pixel. Now, send or receive a message and check to fix the issue.

Make Sure Enable SMS on your Pixel

Step 1: Open the Google Messages app on your Pixel.

Step 2: Tap on the Profile icon in the top right corner.

Step 3: Tap on Message settings.

Step 4: Tap on Notifications.

Step 5: Tap on Behaviour, sound, and more.

Fix Pixel 3 Not Sending Texts Messages and MMS issue

Step 6: Make sure to toggle on Incoming messages.

Turn Airplane Mode On & Off

How to Fix Google Pixel Not Sending Texts Messages

Swipe down the notification panel twice and tap on Aeroplane mode in the quick settings tile to enable it. After 5-10 seconds, again tap on it to disable it. Now, open the messages app and try sending SMS on your Pixels.

Remove SIM and Re-insert SIM to Fix Not Receiving Texts in Google Pixel

Check properly inserted SIM cards in your device. Remove your SIM card & restart your Pixel. After restarting the device, reinsert the SIM card again. It may be helpful to fix the can’t send or receive a text on Pixel.

Clear the Messages App Cache on Pixel

Step 1: Go to Settings on your Pixel.

Step 2: Tap on Apps.

Step 3: Tap on See all apps.

Step 4: Select the Messages app.

Step 5: Tap on Storage and cache.

Clear the cache of messaging app on Pixel 3 Pie

Step 6: Tap on Clear cache.

Now restart your device and check if Google Pixel 3 receives text messages.

Clear Messages App Data: Settings > Apps > See all apps > Messages > Storage & cache > Clear data > OK

Poor Network Signal

Make sure your Google Pixel is a good network signal. Search nearby places with good networks, so you can easily send or receive a text. If there is a poor network signal, it will delay sending SMS or MMS or sometimes fail to deliver messages.

Reset Pixel Network Settings

It will reset all network settings, including Wi-Fi, mobile data, and Bluetooth. So if any Google Pixel 3 network-related issue, it will solve after performing the below-given settings.

Step 1: Go to Settings on your Pixel.

Step 2: Tap on System.

Step 3: Tap on Reset options.

You can see Reset Wi-Fi, mobile & Bluetooth, Reset app preferences and erase all data (Factory reset) options.

Fix Pixel 3 not receiving texts messages and MMS

Step 4: Tap on Reset Wi-Fi, mobile & Bluetooth.

Reset settings to fix not receiving text issue Pixel 3

Step 5: Tap on Reset settings.

Enter your device lock screen password to continue the process.

Reset network settings to fix Pixel 3 SMS issues

Step 6: Tap again to Reset settings.

Now, wait until you reset the network settings on your Google Pixel devices. Try sending or receiving text or group messages to other Android devices.

Don’t Miss:

Enable Safe Mode on Google Pixel

Step 1: Long press the power button until you see the Power menu on your Pixel devices.

Step 2: Touch and hold the Power off button until you see Reboot to safe mode.

Step 3: Press OK to reboot safe mode on Pixel.

It will take 20-30 seconds to reboot your device.

Step 4: You can see the Safe mode symbol at the bottom left corner.

Now check your Pixel phone to send or receive text messages. If you can send a text message, it means any third-party apps are causing this problem. Delete the one by one recently downloaded apps and after the app is deleted, check to fix the issue.

If none of the above methods fix Google Pixel not receiving texts or MMS issues, factory reset the Pixel device.

Factory Reset to Fix Not Receiving Texts in Google Pixel 4 XL/4/3 XL/3

Make sure to back up important data to your PC or another device. It will reset all phone settings and remove all your phone data, including Google accounts, internal storage, and other information.

Step 1: Swipe down the notification panel twice at the top of the screen and tap on Settings.

Step 2: Tap the System at the end of the page.

Step 3: Tap on Advanced.

Step 4: Tap on Reset options.

How to fix Pixel 3 not receiving texts messages

Step 5: Tap on Erase all data (Factory reset).

Step 6: Tap on Reset phone.

Step 7: Confirm your PIN, pattern lock, or password to continue the process.

Step 8: Tap on Erase everything.

Wait until you remove all your Google Pixel 3 data. Now try to send messages and check fix problems or not. If you still face these SMS or MMS issues, hard reset your Pixel using recovery mode.

Contact your Carrier

If you still face this issue, contact your carrier support to check if there is a carrier or SIM-related problem in your Google Pixels.

Frequently Asked Questions:

How do I Enable SMS in Google Pixels?

How to Fix Pixel 3 Not Receive Texts Messages

Ensure all incoming message notifications on your Pixels to get all SMS. Long-press the Google Messages app > Tap i icon > Notifications > Toggle on Incoming messages to enable SMS.

Why is Message Not Working on Pixel?

There are several reasons for SMS not working on Pixel, like missing app updates or the Messages app crashing or freezing issues. To fix this, you need to check for an app update to Play store > Profile icon at the top right > Manage apps & device > See details > Update.

How to Fix Not Receiving Text Messages on Google Pixel 4 XL

To clear cache for messages app, go to Settings > Apps > See all apps > Messages > Storage and cache > Clear cache.

Why is My Google Phone Not Getting Text Messages?

One of the main reasons for not getting text messages on your Google Pixel is the poor network connection. Also, check Aeroplane mode is turned off on your Pixel to activate all network-related activities. Check if individual contact-related problems receive an SMS.

Read Also:

Above are all the possible ways to fix Google Pixel 4 XL/4/3 XL/3 for sending and receiving texts. Mention in the comment section which method works best for you.

How to Disable Apps Notifications on Pixel 3 and Pixel 3 XL

Irritating by unnecessary apps notifications on Pixel 3 and Pixel 3 XL? You can easily turn off apps notifications in Pixel 3 from the lock screen or home screen. Also, individually disable apps notifications on Pixel 3. This is the same as block apps notifications on android phone. You can get several notifications from different apps in the daily routine on your phone. Sometimes because of persistent notifications of apps, you’ll need to stop notifications on your android devices such as Pixel 3, Pixel 3 XL, Google Pixel 2, Pixel 2 XL and other latest Android devices.

Read Also:

How to Turn Off App Notifications in Pixel 3 and Pixel 3 XL

Do you really want to turn off app notifications on Google Pixel 3 and Pixel 3 XL? If the annoying app is important for you, then you’ll need to hide lock screen notifications only. So you can’t disturb when receiving any notifications.

Show sensitive content only when unlocked on Pixel 3, 3 XL, 3a, 3a XL (Android 10)

How to Turn Off App Notifications in Pixel 3 and Pixel 3 XL

Settings > Display > Advanced > Lock Screen display > Lock screen under What to show section > Choose from Show all notification content/Show sensitive content only when unlocked/Don’t show notifications at all

Hide lock screen notification on Pixel 3 and 3 XL

Alternative Way: Settings > Apps & notification > Notifications > Notification on lock screen under Lock screen section > Choose from Show alerting and silent notifications/Show alerting notifications only/Don’t show notifications

Hide Sensitive notifications on Google Pixel 3a, 3a XL, 3 and 3 XL (Android 10)

By default show sensitive content when locked your Pixel devices. To stop notifications on Pixel 3 XL and other Pixel devices, apply below settings.

Hide Sensitive notifications on Google Pixel 3a, 3a XL, 3 and 3 XL

Settings > Apps & notification > Notifications > Toggle off Sensitive notifications

Hide lock screen notification on Pixel 3 and 3 XL (Android 9 Pie)

You can hide lock screen notifications of all apps on Google Pixel 3 and Pixel 3 XL.

Step 1: Swipe down the notification panel and tap the Settings gear icon.

Step 2: Scroll down and tap Security & location.

Change notifications android settings Pixel 3

Step 3: Tap Lock screen preferences under the Device security section.

Hide sensitive notifications content Pixel 3 Pie

Step 4: Tap On lock screen.

Now below given three options are available in your Google Pixel 3 lock screen notifications settings.

Hide lock screen notification on Pixel 3

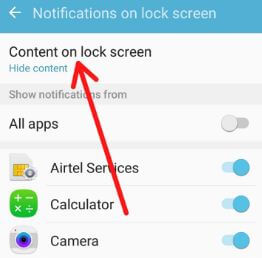
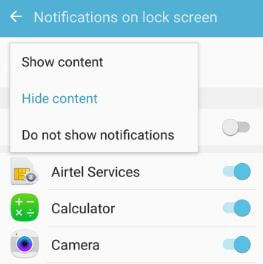
Show all notification content: By default set this lock screen notification settings. So when you receive any notification, you can see a message on the lock screen without unlocking. Just press any phone key to show notifications.

Hide sensitive content: It will hide sensitive notifications content from the lock screen in your Pixel 3 device.

Don’t show a notification at all: It will turn off apps notifications on the Pixel 3 lock screen.

Step 5: Choose Don’t show notifications at all.

Now you can’t show notifications until open particular app in your Google Pixel 3 and Pixel 3 XL device.

Disable or Block app notifications on Pixel 3 and Pixel 3 XL (Android 9 Pie)

When turning off app notifications in your device, your device is blocking this app’s notifications from appearing on your phone. To view this app message again, enable app notifications in your device. Follow below given a complete guide to turning off push notifications android 9 Pie devices.

Step 1: Go to settings in your Google Pixel 3.

Step 2: Tap Apps & notifications.

Disable apps notifications on Pixel 3 Pie

Step 3: Tap See all apps.

Step 4: Select the app you want to turn off notifications Facebook, Snapchat, etc.

Hide lock screen notifications only on Google Pixel 3 Pie

Step 5: Tap Notifications.

Unnecessary apps notifications on Pixel 3

By default show app notifications on your Pixel 3 and other android devices.

How to disable apps notifications on Pixel 3

Step 6: Turn off toggle “Show notifications”.

Now block app notifications on Pixel 3 & Pixel 3 XL. You can’t receive any app notifications from this app in your android device.

And that’s all. We hope this little tip useful to disable apps notifications on Pixel 3 and Pixel 3 XL. If you have any kind of trouble, tell us in below comment box. Stay and connect with us for the latest updates.