Last Updated on July 27, 2020 by Bestusefultips
Google Lens feature first introduced in the Google I/O event 2017. Let see how to enable Google Lens on Android phones. Google Lens is helpful to find relevant information about your device camera view. You can use Google Lens both Google apps and Google Assistant. Just open any screenshot or other photo taken by you and Google Lens automatically show you date and time taken by screenshot in your Android devices. Google’s Pixel 2 and Pixel 2 XL devices come with this Google Lens pre-installed. XDA senior member ZeevoX has explored a trick to enable Google Lens on Google photos app.
Check this way to install Google Lens in your android devices. Currently, Google Lens is still developing. In Google Pixel and Pixel XL device, when you get Google photo app update and it will automatically add this Google Lens feature. Let see how to enable Google Lens on Android phones.
Read Also:
- How to remove Google Now Feed in Android phone
- How to fix Google Lens Blur issue
- How to use Pixel 2 launcher on any Android devices
How to Enable Google Lens on Android Phones
To use Google Lens in Google Photos on Non-Pixel devices requires root access.
Step 1: Download the Google Lens flashable zip file in your Android device.
Step 2: Now boot your device into recovery mode.
Step 3: In recovery mode, go to the download directory and search Google Lens file and tap on it.
Step 4: Tap Install image.
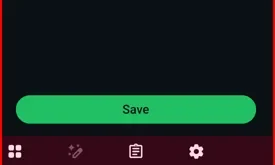
Step 5: Swipe button to confirm flash from below of the device screen.
Wait for the complete flash.
Step 6: Tap the Reboot system.
Now, enable Google Lens on rooted Android devices such as Nougat 7.0, Marshmallow 6.0 or Lollipop 5.1.1 devices. Just open Google photos app in your Android devices and tap on any photo want to apply Google Lens.
How to Use Google Lens on Any Android phone
Step 1: Open the Google Photos app in your Android devices.
Step 2: Tap Any photo want to use Google Lens.
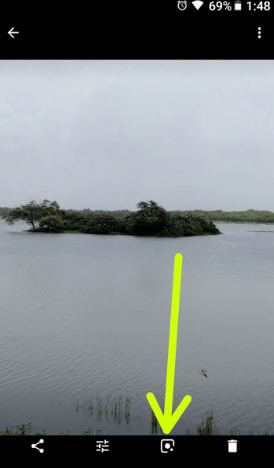
Step 3: Tap the Google Lens icon on the menu.
Step 4: Tap Get started.
When first time use Google Lens in your Android device, you can see get started.
Step 5: Open photo & tap Google Lens icon.
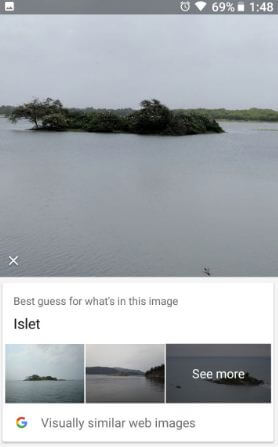
Now it will show you relevant information related to the selected photos in your android device.
Your Google lens activity is by default saved to your Google account if you have turned on web & app activity in your android device. If you don’t like activity, also delete Google lens activity in your android devices using below settings.
Google app > Menu > Settings > Search > Accounts & privacy > My activity > Select photo > More > Item view > Delete
When Google Lens did not identify photos, you’ll see a message of not seeing this clearly yet in your Android phones.
And that’s it. Is your Android device supported Google Lens feature? I hope this article helpful to enable Google Lens on Android devices. If you have any kind of trouble, tell us in below comment box. Don’t miss out to check our single Android 8.0 tips and tricks.