How to Block Unknown Callers Android 12, Android 11, Android 10

Annoying by an unknown caller number on your Android phone or tablet? Here’s how to block unknown callers on Android 12, Android 11, and Android 10 devices. You can restrict calls from private numbers to direct call logs. Make sure to toggle on Unknown in your blocked number’s settings to automatically block all the unknown numbers. When you block a number Android phone, you won’t receive any messages or phone calls from that number. Anytime block or unlock a number on Android devices using this tutorial.

Read Also: How to Clear Cache Android

How to Block Private Numbers on Android Phones

Below are the different methods to block an unknown caller on Android devices.

How to Block Calls from Unknown Numbers on Android 12 and Android 11

Step 1: Open the Phone app on your Android device.

Tap on Three vertical dots to Block Unknown Numbers from Call Logs

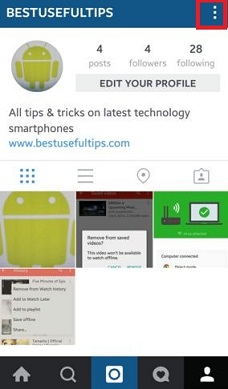
Step 2: Tap three vertical dots (More) in the upper right corner.

Go to Phone Settings block an unknown caller on Android

Step 3: Tap on Settings.

Block Unknown caller number on your Android

Step 4: Tap on Blocked numbers in the General section.

How to Block Unknown Callers Android 12, Android 11, Android 10

Step 5: Toggle on Unknown to block unidentified callers.

How to Block Private Numbers Android – Manually Add Phone Number

Step 1: Follow the above-given method in Steps 1 to 4.

How to Block Call from Unknown Number Android Device

Step 2: Click Add a number.

How to Block Private Numbers Android

Step 3: Enter the number and tap Block.

How to Block Unknown Numbers from Call Logs

Step 1: Open the Phone app and click on the Recents tab at the bottom middle.

How to Block Call from Unknown Number on Android

Step 2: Long-press any unknown number and tap the Block/report junk.

How to Block Private Numbers on Android Phones

Step 3: Click the Block.

How to Unblock Number on Android 12, Android 11, Android 10

How to Unblock Number on Android Phones and Tablets

Open Phone app > More (Three vertical dots) at the top right corner > Settings > Blocked numbers > × icon of blocked number > Unblock

How to Block a Number on at&t

Open Phone app > Menu icon at the top right > Settings > Blocked numbers > Add a number > Block

Read Also:

How to Block Spam Calls on Android 5.1.2 Using Phone Settings

Step 1: Open the Phone app.

Step 2: Tap on More at the top right side corner.

Tap on Settings

Step 3: Tap on Settings.

Tap on call rejection under call settings

Step 4: Tap on Call rejection under the Call settings section.

Tap on Auto reject list under auto reject

Step 5: Tap the Auto reject list under the Auto reject section.

Now, you have below four options to block numbers on Android 5.1.1 devices.

How to block numbers on Android lollipop 5.1

  1. Add phone number: Add a personal phone number or specific number to block or auto rejects it. If you want to add more than one number, tap on the “+” button and add the next number.
  2. Log: Add the number from your call log to block it.
  3. Contacts: Add a contact number from your contact list.
  4. Unknown: Turn on the toggle button of Unknown to auto-reject unknown number calls on your android device.

How to Block Unknown Numbers on Android Using Call Log Settings

Step 1: Open the Phone app.

Tap on Call log option under phone settings

Step 2: Tap on LOG.

Step 3: Tap any Contact from the call log to block the number or auto-reject the call.

Tap on more in the call log

Step 4: Tap on More at the top right corner.

Block numbers on android lollipop

Step 5: Tap on Add to block list.

How to Unblock a Number on Android 5.1 (Lollipop)

Step 1: Open the Phone app.

Step 2: Tap More at the top right corner.

Step 3: Select Settings.

Step 4: Tap Call rejection under the call settings section.

Step 5: Tap the Auto-reject list.

Step 6: Tap the blocked number to unblock it.

That’s all. Above, you can see a complete guide to blocking a number on Android devices. If you have any problem, comment in the box below.

Related:

How to Turn on WiFi in Windows 7 Laptop: Dell, Lenovo, Acer

This article explains how to connect WiFi in Windows 7 desktop or Dell laptop. If in your Windows PC or laptop has a problem to connect via any Wi-Fi network. Then first of all check the wireless connectivity settings enable or not on your Windows 7 or laptop. First of all, set up a wireless connection on your Windows PC. Using Wi-Fi, you can easily search or surfing the web on your Windows PC/laptop in the range of Wi-Fi. We have to use wifi networks at homes, offices, business places, Hotels, etc.

It’s simple to Turn on and add wifi network in Windows 7 or laptop. Wi-Fi is useful to directly connect the computer to another computer without an access point. You can also use wifi as wifi hotspot on your android mobile or tablet. Regularly update or change wifi password to secure against unknown users. Follow the below-given steps to turn on Wi-Fi in Windows 7 / Windows PC / laptop.

Read Also:

How to Enable or Disable WiFi in Windows 7 or Windows 10 PC

Step 1: Go to “Start Menu” on your Windows 7 PC/laptop.

Step 2: Tap on “Control Panel”.

Tap on Network and Internet

Step 3: Open the “Network and Internet” category.

Tap on Network and Sharing Network

Step 4: Tap on “Network & Sharing Center”.

How to turn on Wi-Fi in windows 7

Step 5: In the top left side, tap on “Change adapter settings”.

You can see the “Wireless Network Connection” is disabled.

How to turn on WiFi in windows 7 & WIndows PC


Step 6:  Right-click on the local area connection and “Enable” it to enable wifi in Window 7/Laptop.

Now your Windows PC connects to a Wi-Fi network of Network and Sharing Center.

Enable Wi-Fi on Windows 10 PC or Laptop

You can connect your nearby Wi-Fi network to easily access the internet with full speed on your Windows 10 desktop PC.

Step 1: Open Windows Settings in your Windows 10 Laptop or Desktop.

Step 2: Tap on Network and internet.

Step 3: Tap on Wi-Fi.

Step 4: Tap on Show available networks.

Step 5: Tap on Connects.

Also, enable connect automatically when in range.

Above you can see the complete process to turn on WiFi in Windows 7/Windows PC. Did you find the above process to turn on Wi-Fi in Windows PC helpful? Please let us know below comment box and connect with us for the daily latest technology updates!

How to Enable Battery Saver in Pixel 4 and Pixel 4 XL

Here’s how to set up battery saver in Pixel 4 and 4 XL running Android 10. Google Pixel 4 has a 2800 mAh smaller battery with a 90Hz refresh rate. Users are facing the Pixel 4 battery life problem. Different ways to get better battery life on Pixel 4 such as to enable battery saver, turn off the smooth display, Force stop the unnecessary app, disable Motion sense and more. You can always turn on battery saver if you’re running low on battery issues.

When enabling Pixel 4 battery saver mode, it will disable app background activity & high power features to improve battery life. Also, use an adaptive battery on Pixel 4 & 4 XL to limit app usage battery when you don’t use that app often. Follow below-given step by step process to enable battery saver mode in Google Pixel 4 and 4 XL.

Read Also:

How to Set Up Battery Saver Mode in Google Pixel 4 and 4 XL

You can turn on the battery saver on Pixel 4 XL and Pixel 4 using below-given battery settings.

Step 1: Swipe up from the home screen to access the app drawer in Pixel 4 & 4 XL.

Step 2: Tap Settings gear icon.

Step 3: Tap Battery.

Enable Pixel 4 battery saver mode

Step 4: Tap Battery saver.

Turn on battery saver on Pixel 4 XL and Pixel 4

Step 5: Tap Turn on now button.

You can see + icon (orange color) in the battery icon in the status bar on your Pixel device. Also, set a schedule to automatically activate battery saver mode on Google Pixel 4 XL and Pixel 4 using the below settings.

Automatically turn on battery saver on Pixel 4 XL and Pixel 4

Step 1: Go to settings.

Step 2: Tap Battery.

Step 3: Tap Battery saver.

Step 4: Tap Set a schedule.

You can see below the given three options (Show below given screenshot).

How to set up battery saver in Pixel 4 and Pixel 4 XL


No schedule: By default set “No schedule” option.

Based on your routine: Battery saver turns on if your battery is likely to run out before your next typical charge.

Based on percentage: Set percentage of battery you want to automatically turn on battery saver.

Set up battery saver in Pixel 4 XL

Step 5: Choose from No schedule/Based on routine/Based on percentage.

Battery saver turns off automatically when your phone is at 90% charged. To fix the Pixel 4 battery life problem, avoid heavy screen use, turn off location, turn off auto-sync and other methods.

And that’s it. We hope the above-given tutorial is useful to set up a battery saver in Pixel 4 and 4 XL. Do you still have any questions? Tell us in below comment box. Stay and connect with us for the latest updates.

How to Enable Battery Saver Mode in Android 8.0 Oreo

How to turn on battery saver mode in Android 8.0 Oreo. Battery saver mode is one of the effective tips to save battery life on android 8 Oreo. You can customize battery saver mode in Android 8.0 Oreo. Battery saver mode reduces your android 8.0’s performance, limits vibration & animation, locations services, background data limit, limit sync data such as message, photos, email, etc. Battery saver turns off automatically when your android phone is charging. Even you can set time to turn on battery mode automatically in android 8.0.

There are several amazing android 8.0 features and one of them to extend battery life is the background process limit. This android Oreo’s background process limit features a helpful set limit to the app background process. Follow the below-given step by step guide to enable battery saver mode in Android 8.0 Oreo.

Read This:

How to Turn on Battery Saver Mode in Android 8.0 Oreo

This tip will help you to save power in your device whenever your android 8.0 Oreo battery low problem. You can set a battery saver to enable automatically in your android devices.

Step 1: Tap on settings in your android 8.0 Oreo devices.

Step 2: Tap on Battery.

Battery usage by apps on android 8.0 Oreo

Here you can view individually use battery by the app for last full charge your android Oreo.

How to enable battery saver mode in android 8.0 Oreo phone


Step 3: Tap on Battery saver under power management (If you want to direct enable then turn on toggle).

Enable battery saver mode in android 8.0 Oreo

By default turn off battery saver on Android 8.0 Oreo.

Step 4: To turn battery saver on or off, switch on/off toggle button.

Enable battery saver in android 8.0 device

When turn on the toggle button, your android device top and bottom screen view as orange color.

Step 5: To turn on battery saver automatically, tap turn on automatically.

Turn on automatically battery saver mode on android Oreo

Step 6: Set turn on automatically battery saver at Never/at 5% battery/at 15% battery.

One of the main reasons to turn on battery saver mode is to save battery life in your android 8.0 devices. Also use power-saving mode and ultra power saving mode on android 8.0 Oreo to save battery power on your Pixel, Nexus, and other devices.

Enable show battery percentage on Android 8.0 Oreo

Settings > Battery > Power management > Enable battery percentage

Different android device has slightly different settings to turn on battery saver mode in your android devices.

For Android 6.0 Marshmallow, Lollipop 5.1.1 or lower version

Settings > Battery > Three vertical line from top right side corner > Battery saver

 That’s all. I hope the above-given steps help to enable battery saver mode in Android 8.0 Oreo devices. If you have any kind of trouble, let us know in below comment box. We will respond as soon as possible.

How to Change Language on Facebook Using Android App and Desktop (Updated)

Want to change the Facebook language on your Android phone and PC? Here’s how to change the language on Facebook using Android App and Desktop/Laptop. In Facebook, you can select your languages such as English, Africans, Bosanski, Cestina, Deutsch, English (UK), Espanol, Filipino, Francais, Galego, Hausa, Italiano, and more. Also, see the settings of automatically translate language and translate stories into your favorite language in Facebook language settings.

Facebook is one of the most used social networking apps to connect with your friends and share photos and videos. On your android phone browser (Chrome), you can change the language Facebook app using help & settings. In this tutorial, I will show you simple steps to change the Facebook language android device chrome browser or Facebook app.

Read Also:

How to Change Facebook Language on Android App and Desktop PC

Let see one by one method.

How to Change Facebook Language on Android App

Step 1: Open the Facebook app in your Android phone and log in to your account.

Change the default Facebook language using Android app

Step 2: Tap Three horizontal lines (Menu) at the top right corner.

Change Facebook Language on Android App

Step 3: Scroll down up to the end of the page and tap Settings & Privacy.

Change Language on Facebook Android App

Step 4: Tap Language.

By default, you can see the device language set.

How to Change Facebook Language Using Android App

Step 5: Choose a language from the list.

Wait until set the language you selected in your Facebook app Android phone or tablet.

Using a PC or Laptop

Step 1: Sign in your Facebook account on your PC or Laptop.

Change Facebook language using Computer or Laptop

Step 2: Tap Down triangle arrow to open the menu and tap Settings.

Language and region settings Facebook

Step 3: Tap Language & region from the left side menu bar.

Step 4: Tap Edit on Facebook language.

Change language on Facebook using PC or Laptop

Step 5: Choose a language from the drop-down box and tap Save changes.

Using the Chrome Browser in Android Phone

Step 1: Open the Chrome or other browsers on your android phone or tablet.

Step 2: Login your Facebook account.

Tap on three horizontal line facebook

Step 3: Tap on “Three horizontal lines” from the top of the right side.

Tap on language to change facebook language

Step 4: Tap on “Language” under the help & settings section.

You can see the list of all available languages on your Facebook apps.

How to change facebook language android phone

Step 5: Select or tap on any language from the above-given list want to set on your Facebook language.

Step 6: Click on your selected language you can see the below screen on your smartphone.

change facebook language android lollipop

You can see the language settings on your android phone such as story language, automatically translated language, etc.

Above you can see the simple steps to change Facebook language android phone or tablet device. Did you find the above-given process helpful? Don’t hesitate to let me know in the below comment box. It would be a pleasure to help you. Don’t forget to share this Facebook tricks with your friends on social networks.

How to Turn Off Sound on Facebook Messenger App on Android

Annoying of Facebook messenger app notification sound on your android device? Here’s how to turn off notification sound in the Facebook messenger app on your android phone or tablet. You can change notification sound tone, vibrate, notification previews, and disable Facebook notification sound using notifications & sounds settings. You can individually disable or mute the sound of Facebook Messenger contacts using particular user profile settings. Also, change “in-app sounds” to mute all Facebook messenger app sounds.

Facebook is top of the most used instant chat messenger app than any other social media apps such as WhatsApp, LinkedIn, Twitter, etc. Follow below-given steps to enable or disable Facebook messenger notification sound on Android.

Read Also:

How to Turn Off Notification Sound in Facebook Messenger App on Android

If you have the latest updated Facebook Messenger app (2020) on your Android devices, you can apply below given settings.

Mute Notification Sound in Facebook Messenger App Android

Step 1: Open the Facebook Messenger app on your android phone or tablet.

Tap Facebook messenger app Profile icon on your Android

Step 2: Tap on the Profile icon at the top left corner.

Notifications and sounds settings in FB Messenger App Android

Step 3: Tap Notifications and sounds under the preferences section.

Change notification sound tone Facebook Messenger App

Step 4: Toggle off “On“.

Mute Notification Sound in Facebook Messenger App Android

Step 5: Choose from 15 minutes/1 Hour/8 Hours/24 Hours for Mute notifications on Facebook Messenger App on your Android.

Individual Mute Notifications For Contacts on FB Messenger App

Step 1: Open the Facebook Messenger App.

Step 2: Tap Chats at the bottom left.

Step 3: Tap any contact/people.

Individually disable or mute the sound of Facebook Messenger

Step 4: Tap the “i” icon at the top right corner.

Disable FB messenger notifications for particular person

Step 4: Tap Notifications under the privacy section.

Mute conversation on Faebook Messenger App Android

Step 5: Tap Mute conversation.

Individual Mute Notifications For Contacts on FB Messenger App

Step 6: Choose from 15 minutes/1 Hour/8 Hours/24 Hours/Until I turn it back on and tap OK.

Disable Notification Sound on Facebook Messenger App

Step 1: Open the Facebook Messenger app on your android phone or tablet.

Step 2: Tap on the Profile icon at the top left corner.

Step 3: Tap Notifications and sounds under the preferences section.

Manage Notifications on Facebook Messenger App Android

Step 4: Tap Manage notifications.

Disable Notification Sound on Facebook Messenger App

Step 5: Toggle off Show notifications.

You can’t see the new notifications on your phone home and lock screen. Open the messenger to show the notification you received.

Alternative Way (Android 10): Settings > Apps & notifications > See all apps > Facebook messenger app > Notifications > Toggle off Show notifications

Change Notification Sound on Facebook Messenger App 2020

Step 1: Open the Facebook Messenger app on your android phone or tablet.

Step 2: Tap on the Profile icon at the top left corner.

Step 3: Tap Notifications and sounds under the preferences section.

How to Turn Off Sound on Facebook Messenger App Android

Step 4: Tap Notification sound.

Change Notification Sound on Facebook Messenger App Android

Step 5: Choose a Notification tone from the list.

Change Ringtone on Facebook Messenger App 2020

Change Ringtone on Facebook Messenger App Android

Open Facebook Messenger App > Profile icon at the top right corner > Notifications and sounds > Ringtone > Choose from the list

For Older Facebook Version

Step 1: Open the Facebook Messenger app on your android phone or tablet.

Tap on Settings on android phone

Step 2: Tap on Settings on the top of the right side corner.

You can see various options.

Tap on Notifications & Sound in settings

Step 3: Tap on Notifications & Sounds.

How to turn off notification sound in facebook messenger app

By default, enable sound in a Facebook messenger app on your phone.

Step 4: Uncheck the box of “Sound” to turn off/disable notification sound in the Facebook Messenger app Android.

Now all incoming or outgoing notification messages sound disable on your android phone or tablet. You can also change notification sound & enable/disable notification previews (Show name and message on the home screen when message receive) in the Facebook messenger app.

Change the Notification Sound on Facebook Messenger App

Open the Facebook Messenger app > Settings gear icon at the top left > Notifications & sounds > Notification sound > Select the sound

Change Call Ringtone on Facebook Messenger App

Open the Facebook Messenger app > Settings gear icon at the top left > Notifications & sounds > Free Call Ringtone > Select the ringtone

Above you can see the quick tip to turn off notification sound in the Facebook messenger app on Android phone or tablet. Did you find the above process helpful to enable or disable notification sound in facebook helpful? Don’t hesitate to let me know in below comment box. It would be a pleasure to help you and connect with us for daily latest technology updates!