How to Customize Navigation Bar on Android 8.0 Oreo

Here’s how to customize the navigation bar on Android 8.0 Oreo devices. You can easily customize your favorite navigation bar Oreo. This feature allows us to change the navigation bar on Android 8 Oreo with additional functionality. Also, use Android O launcher to make your device looks like Android 8.0 Oreo. In the Android 8.0 Oreo OS, lock screen shortcuts and navigation bar have removed from the System UI tuner settings. Sometimes users facing issues of Android Oreo Navbar not working on Android devices.

Android 8.0 Oreo with its great features such as Install unknown apps, Android Instant apps, Picture in picture mode, Background process limit, Smart text selection, Autofill API, Notification dots, and more.

Read This:

How to Customize Navigation Bar on Android 8.0 Oreo

Customize navigation bar on android 8.0 Oreo

Here you will see two different solutions to use the navigation bar on Android Oreo for both rooted and non-rooted android devices.

Customize Navigation Bar on Android 8.0 Oreo For Non-rooted Android devices

Step 1: Download android O Navbar app on your android device

Step 2: To enable developer options in your device go to Settings > About phone > Click build number 7 times

Now enable developer mode in your android device.

Step 3: Again go to Settings > Developer options.

Step 4: Scroll down in the debugging section and Enable USB debugging in your Android device.

Step 5: Download and install the ADB driver in your desktop PC or laptop device.

Step 6: Open the ADB installation folder and press SHIFT & right-click on the mouse at the same time and click on Open Command Window Here.

Step 7: In your PC command prompt will see, type command ADB devices and list of connected devices view on the screen.

Step 8: Now type ADB shell pm Grant xyz.paphonb.Systemuituner android.permission.WRITE_SECURE_SETTINGS and press enter button.

Step 9: Disconnect your phone with PC and open custom android 8.0 Oreo navbar and modify Navbar you like.

Now enable or install android O Navbar without root on android devices. You can change the layout, extra left button, and extra right button in navigation bar in android Oreo.

Customize Navbar in Android Oreo For Rooted Device

You can add extra functionality and buttons to changing the navigation bar. But let see how to get an android Oreo navigation bar on rooted android phones.

Step 1:  Download the Android Oreo navigation bar app from the above link and install it in your device.

Step 2: Open Android Oreo Navbar, click on next, and approve the root access when prompted.

If your android device is not compatible with the navigation bar, you will view this message: No navbar installed

Step 3: Open the Layout tab and select your favorite layout to want to set from different layouts.

Step 4: Also add an extra new button on the right or left side with a feature of you like most

I hope the above-given steps helpful to install the Android O Navigation bar in a rooted device.

And that’s all. Do you have other tips to customize the navigation bar on Android 8.0 Oreo? Share with us in below comment box. If you have any kind of trouble, let us know. We will respond as soon as possible.

How to export files from dropbox to android phone

Let see the perfect guide of how to export files from dropbox to android phone. Dropbox is one type of cloud storage for easily share files, photos, docs, and videos anywhere and the most advantage of use dropbox is never lost data. First of all, install Dropbox app on your android phone or tablets. You can upload your files or docs from your PC or laptop and transfer files to an android phone. Now you can easily access all uploaded files of your PC and save it on your android phone or tablet.

It is best for quickly transfer files from dropbox to android phones without an internet connection on your android mobile or tablet. You can download these export files to SD card or save on your android phone. This settings perfect works on the latest android lollipop 5.1.1 devices. Follow the below-given steps to export files from dropbox to android phone.

Read Also:

How to transfer contacts from Android device to PC

How to import contacts in Android 9 Pie from vcf files

How to hide lock screen notifications on Android Lollipop and KitKat

How to export files from dropbox to Android Lollipop 5.1.2 & KitKat 4.2

Step 1: Install the “Dropbox” app on your android phone and open it

Tap on files want to export SD card

Step 2: Tap on the “right side corner round button” of that file you want to export external SD card

Tap on Export option to transfer files

Step 3: You can see the above screen on your android device. Tap on the “Export” option

How to export files from dropbox to android phone

Step 4: You can see the above screen on your android device. Tap on “Save to device”

Export files from dropbox to android phone

Now save your files to your external SD card. If you don’t have an external SD card then tap on “Save” on your phone screen. Now go to device storage > download on your android phone and you can see the download files or document. You can also export folder to SD card using a dropbox app on your android device.

Import & Export contacts on Android Lollipop 5.1.2

Step 1: Open Contacts app in your device

Step 2: Tap Three vertical dots (More)

Step 3: Select Settings

Step 4: Tap Import/Export contacts

Step 5: Select Import or Export you want

Step 6: Import contacts from Device storage or SIM 2

Step 7: Export contacts to Device storage / SIM 1 / SIM 2

Follow above-given steps to export files from dropbox to android phone. If you have any trouble then share with us in the comment section below.

How to Use Split Screen In OnePlus 7 Pro, 7T Pro, 6T, 6, 5T

Did you found a split-screen in OnePlus 6? Let see how to enable and use a Split screen on OnePlus 6 and other latest devices. Split-screen view or multi-window mode feature is helpful to use two apps at the same time in your OnePlus 6 device. You can watch YouTube videos and chat with your friends on Snapchat or WhatsApp at the same time.

In some of the Android devices, press the recent apps button and hold the app want to use multi-window mode. Also, use Picture-in-picture mode to use two apps at the same time on the latest android devices. Have you tried the OnPlus 6 split-screen device? In this tutorial, I’ll show you how to use split screen on OnePlus 6 using buttons settings.

Don’t Miss This:

How to Open Multiple Apps on OnePlus 6 Oxygen OS

You can activate split screen on the latest OnePlus devices using below given settings.

Enable and Use Split Screen on OnePlus 7 Pro/7T Pro

Step 1: Open recent apps on your OnePlus 7 Pro.

Step 2: Swipe left the screen to find the app you want to use multi-task.
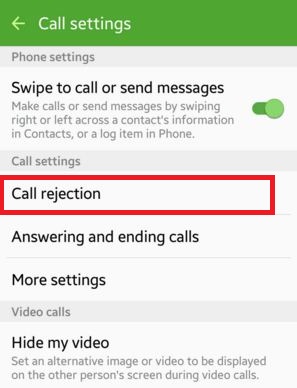
Step 3: Tap Three vertical dots on the app upper right corner.
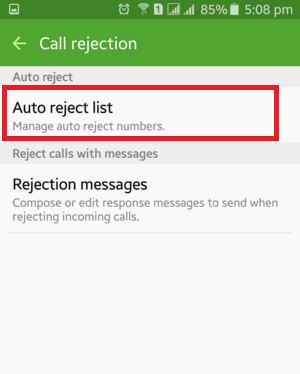
Step 4: Tap on the Split screen.

Note: Not all apps supported a split-screen view.

You can see the upper half of your OnePlus screen show selected app.

Step 5: Choose another app from the recent apps list.

Now, the second app appears at the bottom half of the screen in your latest OnePlus devices. Also, adjust the screen size to tap & hold the middle of the screen and move up or down you want to set.

Enable OnePlus 6 Multi-Window Mode

How to use Split screen on OnePlus 6

Step 1: Swipe down the notification shade and tap the Settings gear icon.

Step 2: Tap Buttons under customization.

Here you can see Navigation bar & gestures, swap buttons, home button, recent button, and back button settings.

Step 3: Scroll down at the end of the page and tap long press action under the back button section.

Step 4: Choose the open/close Split screen.

Step 5: Long press the recent apps button.

Now you can see the set app on the upper half of the screen in your device. Not all apps supported this split-screen mode feature.

Step 6: Select the app for the bottom half screen.

To adjust the split-screen display, long-press the slider in the middle of the screen and move up or down. Now enjoy this OnePlus 6 split screen multitasking features. You can surf the internet and listen to music at the same time and the other two activities also. To exit split screen OnePlus 6 Oxygen OS, long-press recent apps button on your phone. It’s quite easy to enable and use OnePlus 6 multi-window.

In Samsung Galaxy devices, you’ll use Dual messenger features to use two different social media accounts for the same app. Use two Whatsapp account in your Samsung galaxy devices.

And that’s all. Do you know any other methods to use Split screen on OnePlus 6? Share with us in below comment box. Don’t forget to share with others if you found this tutorial helpful. Stay and connect with us for the latest updates.

How to Hide Your Facebook Account From Public Search

Do you want to hide your Facebook account & profile pictures from public or friends’ search? Here’s how to block searches of your Facebook profile via phone number, Google search, and Email address. When you create a new Facebook account, you need to set up your Facebook profile including profile photo, Email, study, phone number, etc. Also, hide profile pictures on Facebook from the public on your Android or desktop/laptop. You can easily change this setting using Facebook privacy settings.

Facebook is one of the most used social networking apps to stay in touch with your friends and family. Follow below-given steps to hide Facebook profile pictures from the public when search Facebook profile using your mobile number or email id on the computer.

Read Also:

How to Hide Facebook Account and Profile Picture From Public or Friends

Let see one by one method.

Hide Your Facebook Account From Finding using Phone number & Email Address

Step 1: Login your Facebook account.

Tap on settings on facebook profile

Step 2: Tap on “Settings”.

Step 3: Click on “Privacy”.

Tap on privacy settings of facebook profile

You can see the above screen on your desktop or laptop device. See the settings of an email address and phone number you provided.

Step 4: Tap on the Edit of the email address privacy settings.

How to hide facebook profile picture from public

You can see the message of Who can look you up using the email address you provided?

Step 5: Select from the friends/everyone/Friends of friends.

Hide facebook profile picture from public

Step 6: Tap on the Edit of the Phone number privacy settings.

Step 7: Select from the friends/everyone/Friends of friends.

That’s it. Now if someone (Not your Facebook friends) finds your Facebook profile using your phone number or email id then it cannot see your account.

Hide Facebook Profile Picture using PC/Laptop

Step 1: Open the Facebook in your PC or Laptop.

Hide Your Facebook Account From Finding using Phone number & Email Address

Step 2: Tap your profile name from the top left corner.

Hiding Facebook account & profile pictures from public

Step 3: Tap Photos.

Step 4: Tap the Album button to see your uploaded profile picture.

Hide Facebook Account and Profile Picture From Public

Step 5: Select the picture you want to hide from other people.

Hide Facebook Profile Picture using computer

Step 6: Tap the Down triangle icon below your name (Show above given screenshot).

How to Hide Facebook Account From Public Search

Step 7: Choose Only Me if you want to hide your profile pictures from other Facebook people or friends.

Choose Who Can See You on Facebook App Using Android Phone

Open the Facebook app & log in > Tap Profile picture from the top left corner > Photos > Albums > Tap profile picture from a list you want to hide > Three horizontal dots at the top right corner > Edit privacy > Choose only me

Above you can see the steps to hide Facebook profile pictures from public or friends. Did you find the above process helpful? Don’t hesitate to let me know, would be a pleasure to help you and connect with us for daily latest updates!

How to Remove Phone Number From Facebook Messenger App on Android (Mobile)

Here’s how to add and remove your phone number from Facebook on Android devices. You can easily delete the existing Facebook phone number and add a new mobile number on Facebook using the Facebook messenger app on Android or iPhone devices. Set the settings to who can see your phone number on the Facebook account profile page such as Only me/Public/Friends or custom settings (only selected friends see the number) to hide your profile page details from Facebook account. Also, add more than one mobile number on your Facebook account. Also, change the phone number on Facebook messenger on Android using this setting.

Just set the profile page security option as “only me” is the better way to delete a number from the Facebook account. Using a mobile device you can easily add or remove the mobile numbers from Facebook messenger app Android.

Related:

How to Remove a Phone Number From Facebook on Mobile (Android)

Let see both methods to remove a phone number from the Facebook messenger app or Facebook app on your Android devices.

Add and Delete Phone Number From Facebook Messenger on Android

Step 1: Open the Facebook Messenger App on your Android devices.

Open FB messenger Profile on your Android

Step 2: Tap on the Profile icon at the top right corner.

Facebook messenger app account settings for delete a phone number on Android

Step 3: Scroll down and tap Account settings under the account section.

Remvoe Facebook messenger mobile number on Android

Step 4: Tap Personal information under the account settings.

Remove a Phone Number From Facebook on Mobile Android

Step 5: Tap Phone number.

Here you can remove or add a phone number.

How to Remove Phone Number From Facebook Messenger on Android

Step 6: Tap Remove.

Remove Phone Number From Facebook Messenger App

Step 7: Check the box I understand i could lose access to my account and tap Remove number.

Add and Delete Phone Number From Facebook Messenger on Android

Step 8: Enter the password and Tap Remove phone.

Now, remove the number from your phone. Also, add a new mobile number on the Facebook Messenger app here.

Add a new mobile number on the Facebook Messenger app

Step 9: Add a Mobile number and tap Add number.

How to Remove Phone Number From Facebook Messenger App on Android

Step 10: Enter confirmation code and tap Confirm.

Your phone number has been added to your account message appear on the screen.

Add new number on FB messenger App Android

Step 11: Tap Close.

Using Android Phone

Step 1: Log in to your Facebook account on your android or iPhone device.

tap on three horizontal raw on facebook

Step 2: Tap on “Three horizontal lines” on top of the right side corner.

Tap on your facebook profile page

Step 3: Tap on your “Facebook profile page”.

Tap on about page of your facebook profile

Step 4: Click on “About”.

Tap on contact info page on mobile

Step 5: Tap on “Contact info”.

Tap on edit to change contact info settings

Step 6: Tap on “Edit” to remove the phone number from the Facebook profile.

How to remove phone number from Facebook on mobile

Step 7: You can see the above screen on your android or iPhone device. Tap on “Remove mobile phones in account settings”.

Remove phone number from Facebook on mobile

Step 8: Tap on “Remove”.

Delete phone number from Facebook on android mobile

Step 9: Enter a Facebook account password to remove from the phone & press the “Remove phone”.

Step 10: Enter the Confirmation code sent to your mobile number.

That’s all. We hope the above-given step by step process is useful to remove a phone number from Facebook on mobile. If you have any kind of problems with implementing this, feel free to let us know on below comment box. We will respond as soon as possible. Connect with us for daily latest updates!

How to Set Up Call Forwarding on Android 10, 9 (Pie), 8.1 (Oreo)

Do you want to forward calls on your Android phones? In Android call forwarding settings, you can transfer calls when you are busy, unanswered or unreachable on your number. Also, stop call forwarding on Android devices anytime. Here’s how to set up call forwarding on Android 10, Android 9 (Pie), and Android 8.1 (Oreo).

In Android call settings, you can see calling accounts, fixed dialing numbers, call forwarding, and additional settings for caller ID and call waiting settings. Different Android device has slightly different settings to change call forwarding settings. Check out each step listed below to enable call forwarding on Android devices.

Read More: How to Turn On Call Waiting on Android 

How to Set Up Call Forwarding on Android Phone

Check out the below-given settings to activate call forwarding on Android devices.

How to Forward Calls on Android 10 and Android 9 (Pie)

Step 1: Open the Phone app on your latest Android devices.

Step 2: Tap Three vertical dots (Menu) in the upper right-side corner.

Step 3: Select Settings.

Step 4: Tap on Calls.

Step 5: Tap on Call Forwarding.

By default, turn off all Android call forwardings settings.

Step 6: Choose from Always Forward/When busy/When unanswered/When unreachable.

Step 7: Select from the above list and enter a mobile number or choose the contact from the list.

Step 8: Tap on TURN ON.

Now, your phone calls are forwarded to the number you enter.

How to Activate Call Waiting on Android 10 and Android 9

Phone app > More > Settings > Calls > Additional settings > Toggle on Call waiting.

Read Also: How to Make 3-Way Calls on Google Pixel

For Android 8.0 and 8.1 Oreo

Step 1: Open the Phone app on your devices.

Step 2: Tap Three vertical dots (Menu) in the upper right-side corner.

Contacts app settings in android 8.0 Oreo

Step 3: Select Settings.

Here you can see phone settings such as display options, quick response, calls, call blocking, voicemail, accessibility, caller ID & spam, and more.

Call settings in android Oreo

Step 4: Tap on Calls.

Call forwarding in android 8.0 Oreo

Step 5: Tap on Call forwarding.

Below are four options for your Android 8.0 & 8.1 devices.

Set call forwarding on android 8.1 Oreo

Always forward: Add the phone number you want to forward calls to this number.

When busy: When your phone call is active, forward it to another number.

When unanswered: If your phone calls are unanswered, forward them to this number.

When unreachable: If your phone calls are unavailable, forward the call to another number.

Step 6: Select from the above-given options you want to set.

Step 7: Enter a mobile number to forward calls when the number is busy.

How to use call forwarding in android 8.0 Oreo

Step 8: Tap on Turn on.

Read More: How to Activate Call Forwarding on Samsung Galaxy

How to Set Up a Call Forwarding on Android 5.1.2 (Lollipop) & Android 6.0 (Marshmallow)

Step 1: Open the Phone app.

Step 2: Tap on More at the top right side corner.

Step 3: Tap on Settings.

Step 4: Tap on More Settings under call settings.

If your Android device has two SIM cards, select SIM 1 or SIM 2.

Call forwarding in android lollipop device

Step 5: Select Call forwarding.

Step 6: Tap on a Voice call or video call.

Here you can see the Always Forward, when busy, when unanswered, and when unreachable settings for forwarding calls in Android devices.

And that’s it. I hope this tutorial is helpful to use call forwarding on Android phones. If you have any trouble, please tell us in below comment box. Don’t forget to check out our latest Android tips and tricks.

Read More: