How to Hide Caller ID Samsung A50

Make your number private on Samsung Galaxy A50? Here’s how to hide caller ID Samsung A50, A70, A30, A20, and other galaxy devices. Turned off caller ID and spam protection on your Galaxy A50 by default. You can turn this feature on or off in settings at any time. Useful to identify spam and scam callers. It will show you the names and profile picture of callers and message senders who aren’t in your contacts list.

The caller ID and spam protection feature identifier’s phone numbers that aren’t stored in your contacts and alerts you when an incoming call may be spam. This feature supported for all incoming & outgoing calls, except while roaming.

Read Also:

How to Show or Hide Caller ID Samsung A50

You can easily hide the number on Samsung A50 or private number Samsung galaxy using the below settings.

Step 1: Open the Phone app in your Galaxy A50.

Step 2: Tap Three vertical dots (More) at the upper right corner side of the screen.

Step 3: Touch Settings.

By default disable this setting. Turn this feature on or off at any time using this article.

How to Hide Caller ID Samsung A50

Step 4: Turn on Caller ID and Spam protection toggle.

It will use Hiya to show you the caller’s name and photo of callers and message senders in your device even aren’t in your phonebook. You can also enable share name and number so other people can see your phone number and name when you call or message them.

Step 5: Turn on Share name and number toggle.

Stop Using Caller ID & Spam Protection on Galaxy A50, A70, A30, A20

If you don’t want to use caller ID & Spam protection on your A50, disable it using the below steps.

Step 1: Open the Phone app.

Step 2: Tap Three vertical dots.

Step 3: Select Settings.

Step 4: Tap Caller ID and Spam protection.

Step 5: Tap Three vertical dots (More).

Stop Using Caller ID & Spam Protection on Galaxy A50

Step 6: Touch Stop using service.

This pop-up screen appears: Stop using caller ID and spam protection?

Step 7: Tap Stop using service.

If you are annoyed by an unknown number of spam calls, block phone numbers on your Samsung galaxy A50 and other devices.

And that’s all. We hope this makes it clear how to hide caller ID Samsung A50 and Galaxy A70. Do you still have any questions? Tell us in below comment box. Don’t forget to share this article with others if you found it useful.

How to turn off auto update in Windows 7

How to turn off auto update in Windows 7 PC. When the internet is turned on in our Windows PC, it can automatically check for Windows updates and install them using your selected Windows Settings options. You have four options to choose Windows update settings including install update automatically, download updates but choose whether to install them, check for system updates but choose whether to download & install them and never check for updates. Choose from the above-given update settings in your Windows 7 or other Windows PC.

Sometimes turn on auto update in Windows PC useful to improved reliability, operating speed, smoothly work, security against unknown spammers, etc. You have also allowed other users to install updates on this Windows computer / PC to tickmark checkbox below update settings option in Windows 7. Follow below-given steps to turn off auto update in Windows 7 / Windows PC.

Check Also:

How to upgrade Windows 7 to Windows 10 Pro free

How to uninstall apps on Windows 10

How to pause update in Windows 10 for 35 days

How to turn on Wi-Fi in Windows 7

How to turn off auto update in Windows 7 or Windows PC

Step 1: Click on the “Start” button on your Windows 7 PC

Step 2: Tap on “Control Panel”

Tap on system and security

Step 3: Tap on “System and security” category

Tap on Windows update on Windows 7

Step 4: Tap on “Windows update”

turn off auto update in Windows 7

Step 5:  Tap on “Change Settings” from the top left side corner sidebar

How to turn off auto update in Windows 7

Step 6: You can see the above screen on your Windows 7 / Windows PC. Choose the “Never check for updates” to turn off auto update in Windows 7 /Windows PC

Step 7: Press “OK”

Install updates in Windows 7

You have also allowed other users to install updates on this Windows computer / PC to tick mark the checkbox of “allow all users to install updates on this computer” under update settings in Windows 7.

Did you find the above process helpful to turn off auto update in Windows 7 or Windows PC? Don’t hesitate to let me know, would be a pleasure to help you.

How to Change Font Size in Google Messages on Android

Do you want to change the text message font size on Android devices? In this tutorial, I’ll show you how to change font size in Google Messages on Android. You can increase or decrease the font size in your text messaging app by pinching outward or inward on the Google Messages screen.

How to Change Font Size on Google Messages on Any Android Device in 2026

Check out the below-given two methods to Google Messages change font size. The steps below are for the Google Pixel 10 device running Android 16.

How to Change Font Size Google Messages App for Individual Conversations

Step 1: Open the Google Messages app on your Android device.

Step 2: Open any Message or Conversation from the list.

Change Font Size on Google Messages App

Step 3: Pinch outward to increase the font size.

Step 4: Pinch inwards to decrease the font size.

Note: Different Android devices have slightly different settings, depending on your phone model and Android version.

Change Google Messages Font Size using Display Settings

When you increase or decrease the font size on your Android device, it changes the text size across your entire phone.

Step 1: Open the App drawer in your Android device.

Step 2: Tap the Settings app.

Step 3: Scroll down until Display & touch.

Step 4: In the appearance section, tap the Display size and text.

How to Change Font Size in Google Messages on Android

Step 5: Increase or decrease the font size in your Google Messages app.

Note: When you change the display size, everything on your Android phone changes; app icons and text will get bigger or smaller.

Read More: How to Change Text Message Sound on Android for Google Messages App

How to Change Font Size on Samsung One UI 8 using Display Settings

Step 1: Go to Settings.

Step 2: Tap on Display.

Step 3: Tap Font size and style.

How to Change Font Size (Google Messages) on Samsung One UI 8 using Display Settings

Step 4: Adjust the font size on your Messages app on your Samsung Galaxy device.

And that’s all. Easy to change the text message size on your Android phone. Which method do you use to change the font size on your phone? Please tell us in the comments below.

How to Turn Off WhatsApp Notifications on Android

By default show notifications on the lock & home screen when you receive any notifications on your WhatsApp Android or iPhone. Sometimes irritate if you gettings continuos message notifications. This tutorial explains to you how to mute or disable WhatsApp notifications on Android phones or tablets. You can individually disable notification of contacts or block all notifications at once on WhatsApp Android devices. If you don’t want to turn off notifications, you can mute WhatsApp notifications for 8 hours/1 week/1 year. Also, you can mute group notifications on WhatsApp Android phone.

Read Also:

How to Turn Off WhatsApp Notifications on Android

If you have the latest updated app, you can apply below settings to manage WhatsApp notification settings in your latest Android (Android 10) devices.

How to Turn Off Notifications on WhatsApp Android in 2020

Step 1: Go to Settings in your Android devices.

Mute WhatsApp notifications using Apps & notification settings Android

Step 2: Tap Apps & notifications.

Manage WhatsApp notification settings

Step 3: Tap See all apps.

Disable WhatsApp notifications on Android

Step 4: Scroll down and tap WhatsApp.

Turn Off Notifications on WhatsApp Android

Step 5: Tap Notifications.

How to Turn Off WhatsApp Notifications on Android

Step 6: Toggle off Show notifications.

Now, your phone is blocking this app’s notifications from appearing on your phone.

How to Mute WhatsApp Group Notifications or Individual Notification on Android

Step 1: Open the WhatsApp app in your device.

Step 2: Tap any Group or Contact.

Step 3: Tap Three vertical dots at the top right corner.

Mute Notifications on WhatsApp Android

Step 4: Tap Mute notifications.

How to Mute WhatsApp Group Notifications

Step 5: Choose from 8 hours/1 week/1 year and tap OK.

Also, check or uncheck the box if you want to show notifications even mute.

For Older Android Version (Lollipop 5.1.2 & 6.0)

Step 1:  Open “Settings” on your android devices.

Tap On Applications under device section

Step 2: Tap on “Applications” under the device section.

Tap on Application Manager

Step 3: Tap on “Applications Manager”.

Tap On Downlaoad to see app

Step 4: Tap on the “Download” tab.

Tap WhatsApp to show notifiation

Step 4: Tap on the “WhatsApp” application.

Step 5: Uncheck the “Show notifications” option to disable or turn off WhatsApp notifications on Android (Lollipop 5.1.1) devices.

How to turn off WhatsApp notifications on android lollipop (5.1.1)

After unchecking the checkbox, you can see the above screen on your phone and this message: If you turn off notification for this app, you may miss important alerts and updates.

Step 6: Press “OK”.

Now all incoming WhatsApp messages or group message notifications are not displayed on your android phone or tablet home screen. That’s all.

Above you can see steps for turn off WhatsApp notifications on android. If you have known other simple ways to disable WhatsApp notifications on your android device then please share with us.

How to Screenshot on Android 10

This tutorial teaches you how to screenshot on Android 10. There are three different ways to capture screenshots on Android 10. You can snap any webpage, any screen or other phone settings on your phone. One of the most common methods for Android or Samsung devices is to touch & hold the power button and volume down button simultaneously to take a screenshot. You can find screenshots saved under the phone gallery in your Android, Samsung Galaxy and other devices.

Also, use Google Assistant to take a screenshot or take a selfie on your devices. Apply the methods below to take a screenshot on Android 10 smartphones and tablets.

Check More:

How to Screenshot on Android 10

Is it possible to take screenshots without the power button on Android 10? Check out the methods below on your Android devices.

Use the Power and Volume Down Buttons

Step 1: Open the webpage or screen you want to capture screen.

Step 2: Touch & hold the power button & volume down button at the same time.

You can edit or share a screenshot without opening it from the phone gallery on your Android phone.

Take a Screenshot on Android 10 using the Power menu

Android 10 added a new screenshot option in the Power menu for quick screenshots.

Step 1: Open the Page or Screen.

Step 2: Long press the Power key.

How to capture screenshot on Android 10

Step 3: Tap Screenshot.

You can find a screenshot in your phone gallery.

Use Google Assistant   

Make sure to enable screenshots at Google Assistant on your Android devices.

Step 1: Long-press the home button or say OK Google to launch the Google Assistant on your Android device.

Step 2: Say, take a screenshot.

Please wait until it automatically takes a screenshot on your device.

And that’s it. Are you satisfied with our solutions to capture a screenshot on Android 10? If you have any other ideas, you can share them with us in the comments. Stay and connect with us for the latest updates.

Read Also:

How to Check Mobile Data on Galaxy A50

Here’s how to check mobile data on Galaxy A50. We access the internet on our devices using the mobile network. You can set apps to always use mobile data, even when your phone is connecting to a Wi-Fi network. Also easily check mobile data usage by specific apps on Samsung A50 using connection settings. Enable or disable apps toggle you always use cellular data.
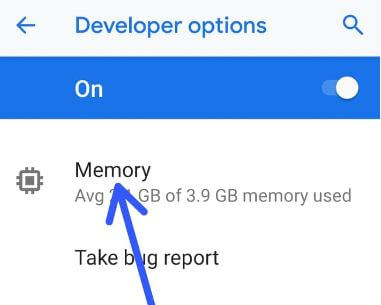
You can turn on mobile data on Samsung galaxy A50 & A70 to surf the web and other activities. Check data usage on Samsung and find an app that using more data. Also set data limit usage on Samsung Galaxy A50 to automatically mobile data will be turned off when reaching the limit. Follow the below-given step by step process to check mobile data on Galaxy A50.

Don’t Miss This:

How to enable and use full-screen gestures in Galaxy A50

How to set data limit in Windows 10

How to restrict background data on Pixel 3 & 3 XL

How to check mobile data on Galaxy A50

Follow the below steps to check data usage on Samsung Galaxy A50 And Galaxy A70 devices.

Step 1: Swipe up from the bottom of the screen to open the app drawer

Step 2: Tap Connection

Step 3: Tap Data usage

Here you can see Data usage, Mobile data, Mobile data only apps, Mobile data usage, and Billing cycle & data warning.

Check data usage on Samsung Galaxy A50

Step 4: Tap Mobile data usage

How to check mobile data on Galaxy A50

Step 5: List of apps appear with usage data

Data usage is measured by your device. This may be different from your service provider’s measurements.

Turn on mobile data on Galaxy A50

To use the internet connection, enable mobile data on Samsung A50 using below given settings.

Settings > Connection > Data usage > Mobile data

Set data limit on Samsung Galaxy A50

By default turned off data limit on Samsung A50. You need to set a data usage limit to reduce data usage on Samsung Galaxy A50 and A70 if using more data.

Step 1: Open Settings app

Step 2: Touch Connection

Step 3: Tap on Data usage

Step 4: Tap on Billing cycle and data warning

Step 5: Turn on set data limit toggle

Step 6: Tap on Data limit

Step 7: Enter data limit in GB/MB you want to set and tap OK

Also set data warning and billing cycle using this Samsung A50 data usage setting in your device.

Check Wi-Fi data usage on Samsung Galaxy A50

You can check for Wi-Fi usage on your Samsung Galaxy A50 and A70 devices.

Settings > Connection > Data usage > Wi-Fi > Wi-Fi data usage

Find the app that usage more Wi-Fi data and turn off the usage of mobile data in the background in your device.

And that’s it. I hope this little tip is useful to check mobile data on Galaxy A50. Do you still have any questions regarding this article? Tell us in below comment box. Stay and connect with us for the latest updates.