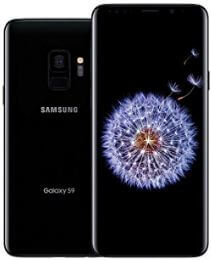
How to change camera storage to SD card Galaxy S9 and S9 plus

By default all taken photos and video storage to camera storage location. Sometimes full the internal memory due to this issue. But in this tutorial, I’ll show you complete guide to change camera storage to SD card galaxy S9 and galaxy S9 plus. You can insert microSD card in galaxy S9 and galaxy S9 plus Oreo devices. So you can easily make microSD card as default storage on Samsung S9.

After inserted SD card on galaxy S9, you can change camera storage location using camera settings. And move files from internal storage to SD card in galaxy S9 plus and galaxy S9 devices. Follow below given step by step process to change camera storage to SD card galaxy S9 and S9 plus.

You Might Like This:

Best camera settings for Galaxy S9 and Galaxy S9 Plus

How to move files to secure folder on Galaxy Note 8

How to enable emergency mode on Galaxy S9 and S9 Plus

How to change camera storage to SD card galaxy S9 and galaxy S9 plus

How to change camera storage to SD card Galaxy S9 and S9 plus

By default all photos, videos and downloaded files stored on internal memory. Using this settings, you can switch you want. First of all insert microSD in your Samsung S9 and S9 plus and follow below settings.

Step 1: Open camera app in your galaxy S9 & S9 plus

Step 2: Tap on Settings gear icon

Step 3: Scroll down up to storage location and tap on it

By default set internal storage.

Step 4: Select SD card

Now save photos to the microSD card in your galaxy S9 and galaxy S9 plus devices.

Let see other useful galaxy S9 camera setting.

How to capture selfie on Galaxy S9 Plus and Galaxy S9

Step 1: Open camera app in your galaxy S9 & S9 plus

By default Auto mode selected.

Step 2: Tap on Settings gear icon

Here you can see galaxy S9 & S9 plus rear and front camera settings.

Step 3: Tap on Shooting methods under front camera section

Here you can see three shooting methods to capture selfie on galaxy S9 and S9 plus devices.

Tap screen: Open the camera and touch the screen to take selfies in galaxy S9 plus and S9.

Show palm: Make sure turn on show palm in your S9 & S9 plus. To take palm selfie on galaxy S9 and galaxy S9 plus, show your palm to the camera to automatically take a picture.

Heart rate sensor: Tap on heart rate sensor to capture selfie on Samsung S9 & S9 plus devices.

I hope this tutorial helpful to change camera storage to SD card galaxy S9 and S9 plus. If you have any kind of question, tell us in below comment box. Don’t forget to check out our other galaxy S9 and S9 plus tips.

How to use emergency SOS Galaxy S9 and Galaxy S9 plus

Learn how to enable and use emergency SOS galaxy S9 and galaxy S9 plus Oreo devices. By default turn off emergency SOS mode on galaxy S9 and S9 plus. This Samsung galaxy S9 and galaxy S9 plus send SOS message feature help users to send the nearly location and display notes to emergency contact you added. Sometimes this Samsung emergency SOS message is not working because of poor network connectivity.

You can turn on emergency mode on galaxy S9 and S9 plus under advanced feature settings. First of all set up it and use emergency SOS galaxy S9 and galaxy S9 plus Oreo devices. If you are in an emergency situation, quickly press the power button 3 times to send a quick alert to your emergency contacts.

You May Like This:

How to enable DND mode on galaxy S9 and galaxy S9 Plus

How to enable and use Game launcher on galaxy S9 and S9 Plus

How to use Edge panel on galaxy S9 and galaxy S9 Plus

How to enable and use emergency SOS galaxy S9 and galaxy S9 plus Oreo

How to use emergency SOS galaxy S9 and galaxy S9 plus

Follow below given step by step process to enable/disable emergency mode on galaxy S9 and galaxy S9 plus devices.

Step 1: Scroll down notification panel and tap on Settings gear icon

Step 2: Tap on Advanced features

Step 3: Scroll down up to Send SOS message and tap on it

By default turn off send SOS messages on galaxy S9 and galaxy S9 plus devices.

Step 4: Turn on Send SOS messages toggle button

Step 5: Choose terms & conditions and tap on Agree at bottom right corner

You can see pop up screen with this message: Send SOS messages

But remember one thing of this emergency SOS, to send SOS messages, at least one recipient needs to be added in contact list. Now use emergency SOS galaxy S9 and galaxy S9 plus devices.

Step 6: Tap on Add

Step 7: Choose from Add recipient/ create contact/select from contact

Step 8: Enter emergency contact Name and number and tap on Save button

You can add or delete emergency contact also.

Step 9: Now tap on back button

You can see below given two options in Samsun galaxy S9 send SOS messages settings.

Attach pictures:

Attach photos taken using the front and rear cameras in your Samsung S9 & S9 plus.

Attach audio recording:

You can attach a 5 second audio recording to send emergency contact you added.

And that’s it. I hope this tutorial helpful to enable and use emergency SOS galaxy S9 and galaxy S9 plus. If you have any kind of trouble, tell us in below comment box. Don’t forget to share with others, if you found it helpful.

Best camera settings for Galaxy S9 and Galaxy S9 plus

Samsung galaxy S9 and galaxy S9 plus has awesome camera features and several modes. One of my favorite camera settings for galaxy S9 and galaxy S9 plus are Super slow motion camera and AR Emoji. In other Samsung galaxy S9 camera mode, you can see live focus, panorama, food, Pro mode, Hyperlapse, Auto and more.

You can set front and rear camera settings for galaxy S9 and galaxy S9 plus Oreo devices. Also use three shooting methods to take selfie on galaxy S9 and S9 plus. Check out each one listed below top best camera settings for galaxy S9 and galaxy S9 plus Oreo.

You Might Like This:

How to enable full screen camera shots in Galaxy S9 & S9 plus

How to enable/disable camera flash notification galaxy S9 & S9 plus

Top best camera settings for galaxy S9 and galaxy S9 plus Oreo

In this Samsung Galaxy S9 plus and galaxy S9 camera tutorial, I’ll show you all camera modes and front & rear camera settings.

Galaxy S9 and Galaxy S9 Plus camera modes settings

Step 1: Open Camera app in your galaxy S9 & S9 plus

By default, you can see auto mode select in your device. Just swipe left or right to change S9 camera mode settings. List of below given camera mode options view in your device.

Auto:

It will automatically set the color and exposure of each shot you take.

Pro:

Take control of your photos. You can manually set the exposure, shutter speed, color tone and ISO sensitivity in galaxy S9 & S9 plus.

Panorama:

Take horizontal or vertical panoramas in your galaxy S9 & S9 plus.

Food:

It will helpful to emphasize the vivid colors in your favorite foods.

Live focus:

You can take artistic pictures by adjusting the depth of field in your galaxy S9 & S9 plus.

Super slow motion:

Taken action video and enjoy video using this super slow motion feature.

Read Also : How to record super slow motion video on galaxy S9 and S9 plus

Hyperlapse:

capture changes that happen slowly in smooth time lapse videos.

AR Emoji:

Create your own emoji on your galaxy S9 and S9 plus.

Slow motion:

You can record videos at a high frame rate which can be played in slow motion.

Galaxy S9 and Galaxy S9 Plus front and read camera settings

Step 1: Open Camera app in your galaxy S9 & S9 plus

Step 2: Tap on Settings gear icon

You can see below given galaxy S9 plus and galaxy S9 front and rear camera settings.

Galaxy S9 & S9 plus Rear camera settings:

Best camera settings for galaxy S9 and galaxy S9 plus

Picture Size:

By default galaxy S9 and S9 plus picture size set as 4:3 (12 MP) resolution.

Video size:

By default galaxy S9 and S9 plus video size set as FHD 1920×1080 resolution.

Read More: How to change video size on galaxy S9 and S9 plus

Timer:

Set timer in your device.

HDR (Rich tone):

By default set HDR set as Auto.

Tracking AF:

Focus on and track a subject selected on the preview screen.

Super slow-mo:

Choose from single-take or multi-take for record super slow-mo video in galaxy S9 plus and galaxy S9 devices.

Galaxy S9 plus & Galaxy S9 front camera settings:

Picture Size:

By default galaxy S9 and S9 plus front camera picture size set as 4:3 (8 MP) resolution.

Video size:

By default galaxy S9 and S9 plus front camera video size set as FHD 1920×1080 resolution.

Timer:

Set timer in your device.

HDR (Rich tone):

By default set HDR set as Auto.

Shooting methods:

You can see three different galaxy S9 & S9 plus shootings methods to take pictures in your device.

Face shape correction:

You can take natural selfies when turn off this.

In other camera settings for galaxy S9 and galaxy S9 plus, you can see video stabilization, location tags, quickly launch camera to press power button from home screen, motion photos and more. You can change galaxy S9 camera mode swipe settings also.

And that’s all. We hope this camera settings for galaxy S9 and galaxy S9 plus helpful for you. Do you know any other useful galaxy S9 camera tutorial we missed above? Share with us in below comment box.

Best Google Pixel Camera Settings

Google Pixel has the world’s top best camera. You’ll take the best photos and videos with your Google Pixel, Pixel XL, Pixel 2, and Pixel 2 XL devices. But in this tutorial, I’ll show you the top best Google Pixel camera settings. You can see awesome camera mode on Google Pixel (8.1 and 8.0 Oreo) including slow motion, Panorama, Portrait mode, photosphere, Lens Blur, AR Stickers, HDR+, Autoflash, and settings.

If your Google Pixel updated to the latest version 8.1, you can see save location, Gestures, Grid type, and show dirty lens warning options. In Google Pixel and other Pixel device has unlimited storage for photo and videos. Check out below given the best camera settings for your Google Pixel and Pixel XL.

Read Also:

Best Google Pixel Camera Settings You Should Know

Using this Google Pixel camera tutorial, you can change the photo and video settings such as front and back camera photo & video resolution, burst settings, video stabilization, and more.

Step 1: Open the Camera app in your Google Pixel Oreo 8.1.0.

Make sure the camera app updates the latest version.

Google Pixel camera

Step 2: Tap on Three vertical dots (Menu) at the upper left side corner.

Here you can see slow motion, panorama, photosphere, Lens blur, AR Stickers, and settings.

Google Pixel camera settings

Step 3: Select Settings.

In Google Pixel camera settings, below given three sections view.

General

Best Google Pixel camera settings

Save location

By default disable this option. Enable save location for photos and videos in Google Pixel devices.

Gestures

You can use volume key to shutter/zoom photos or videos in your Google Pixel devices.

Grid type

By default turn off Grid type. You can choose Grid type from the Off/3×3/4×4/Golden ratio.

Google Pixel Camera Photo Settings

Back camera photo resolution

Change Google Pixel back camera photo resolution from 12.3 megapixels/7.7 megapixels/1.9 megapixels/8.3 megapixels/4.1 megapixels/0.9 megapixels.

Front camera photo resolution

Change Google Pixel front camera photo resolution from 8.0 megapixels/5.0 megapixels/3.1 megapixels/4.1 megapixels/0.9 megapixels/0.2 megapixels.

Burst settings

Enable/disable auto-generate creations in your Google Pixel and other Pixel devices.

Panorama resolution

Change panorama resolution on Pixel camera you want from High/Normal/Low (Fastest)

Google Pixel Camera Advanced Settings

You can enable show dirty lens warning. It will display a warning when the lens may be too dirty to take high-quality photos. Wiping off the lens may help.

Google Pixel Camera Video Settings

Google Pixel camera video settings

Back camera video resolution

Change Google Pixel back camera video resolution from UHD 4K (30 fps)/HD 1080p/HD 720p.

Front camera video resolution

Change Google Pixel front camera video resolution from HD 1080p/HD 720p/SD 480p.

Video stabilization

Enable/disable video stabilization in your Google Pixel Oreo 8.1 & 8.0 devices.

And that’s all. I hope you will enjoy the best Google Pixel camera settings. Do you know any other Google Pixel camera tutorial? Share with us in below comment box. Don’t forget to check out our other Google Pixel tips.

How to Fix Notification Badge Icon Not Working on Galaxy S9 and S9 Plus

You can see a notification badge icon on apps whenever you receive any notification on your devices. But several users reported a notification badge icon not showing on Galaxy S9 Plus and Galaxy S9 devices. Sometimes you can’t see bubble icon on apps even receive notification from social media apps such as WhatsApp or Instagram and more. Have you been ever experiencing this issue on your Samsung Galaxy devices?

One of the simplest solutions for the fix notification badge icon not showing on galaxy S9 plus is wait for the system software update. You can try the below-given method to fix the notification badge icon not showing on Galaxy S9 Plus.

Read Also:

How to Fix Notification Badge Not Showing on Samsung Galaxy S9 Plus and S9

How to fix notification badge icon not showing on Galaxy S9 Plus

If you have to face this issue on your android Oreo devices, make sure to enable notification dots on your devices.

Enable Samsung Experience Home on Samsung Galaxy

Step 1: Swipe down the notification panel and tap on the Settings gear icon.

Step 2: Tap on Apps.

Step 3: Tap on Three vertical dots (Menu) at the upper right corner.

Here you can see default apps, apps permission, show system apps, special access and reset app preferences settings.

Step 4: Select special access.

Step 5: Tap on Notification access.

Step 6: Find Samsung experience home & tap on it.

Step 7: Tap on Allow to enable Samsung to experience home.

Now check notification badge icon show whenever you receive any app notification or email in your Samsung Galaxy S9 and Galaxy S9 Plus devices.

Boot your Phone in Safe Mode

Step 1: Switch off your Samsung Galaxy S9 & S9 plus device.

Step 2: Press & hold the power button, when the Samsung logo appears on the screen, release the power button.

After releasing the power button, press & hold the volume down button in your S9 & S9+. Continue holding the volume down button until restarting your S9 device

Step 3: Now safe mode symbol view in the bottom left corner.

You can see all third party downloaded apps temporarily hidden from your devices. Now check to fix galaxy S9 & S9 plus app icon badge not working issue. If you can’t found any issue, it means any third-party app causing the issue in your galaxy S9. Find that app and remove it from your device.

To turn off safe mode on galaxy S9 & galaxy S9 plus, restart your device.

Check system software update

First of all check any system update available in your galaxy S9 and galaxy S9 plus.

Settings > Software update > download updates

You can also set automatically schedule software update on galaxy S9 and galaxy S9 plus.

Reset phone settings

If none of the methods worked for you, you will try reset phone settings to factory default phone settings.

Check out each one listed above methods to fix the notification badge icon not showing on Galaxy S9 Plus and Galaxy S9. Do you have any tips you want to share? Tell us in below comment box.

How to Adjust Keyboard Size on Samsung Galaxy S9 And S9 Plus

Want to make keyboard bigger or small on galaxy S9 and S9 plus? Here’s the complete guide to change keyboard size on galaxy S9 and galaxy S9 plus. You can change Samsung keyboard size under Language & input settings. In galaxy S9 keyboard size and layout settings, you can set keyboard size, show or hide number keys and alternative characters.

We already discussed change default keyboard on galaxy S9 and galaxy S9 plus (Compatible with Galaxy S8 & S8 plus). You can change the keyboard size on Samsung S9 and S9 plus for comfortable to type. When increase keyboard size on S9, keyboard numbers, and letters size not change. Follow the below-given step by step process to increase the size of the keyboard on Samsung Galaxy S9 and S9 plus.

Read More:

How to Change the Keyboard Size on Samsung Galaxy S9 and S9 plus

Check out below given two methods to change keyboard size on galaxy S9 and galaxy S9 plus.

1st Method: Make keyboard bigger on Samsung S9 using language & input settings

Step 1: Swipe down the notification panel and tap on the Settings gear icon.

Step 2: Tap on Language and input.

Here you can view several settings including keyboards, speech, mouse, input assistance and more.

How to adjust keyboard size on Galaxy S9 and Galaxy S9 plus

Step 3: Tap on the Default keyboard.

You can see Gboard, Samsung keyboard, Google voice typing, and Samsung keyboard Neural Beta.

Step 4: Select the Samsung keyboard.

Step 5: Tap on Keyboard layout and feedback.

Step 6: Tap on Keyboard size and layout.

You can see number keys, alternative characters, and keyboard size.

Step 7: Drag the handle on the sides of the keyboard to set Galaxy S9 keyboard size

Step 8: Tap on Done.

2nd Method: Quickly Change Samsung Keyboard Size

Step 1: Open any messenger app in your galaxy S9 & S9 plus.

Step 2: Tap on the Keyboard icon at bottom right side corner.

By default set Samsung keyboard on your Galaxy S9 and S9 plus.

Step 3: Select the settings icon on the Samsung keyboard.

Step 4: Now follow above given method 1 steps 5 to 8

Now set the galaxy S9 keyboard size you want in your device. You can easily change keyboard settings and reset default keyboard settings using the above methods.

And that’s it. I hope this little tip helpful to adjust keyboard size on galaxy S9 and galaxy S9 plus. If you have any questions, tell us in below comment box. Stay and connect with us for the best galaxy S9 and S9 plus tips.