How to extend battery life on nougat 7.0 & 7.1

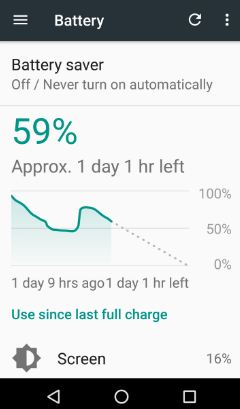
Are you annoying on your android nougat battery life? We daily use web surfing, playing games, use social network apps to chat and other activity in our smartphone. So quickly drop battery in phone. Here are some of the quick tips to extend battery life on nougat 7.0 & 7.1 and other android phones. One of the best features to improve battery life on android nougat is enable data saver mode on your device. Also include other useful tips to save battery life of your android phone.

You can use battery saver on android nougat to stop unnecessary background apps & data, reduce device performance, sync not update automatically and more. Follow below given most useful tips to extend battery life on nougat 7.0 & 7.1 devices such as Moto G4 plus, Nexus 6P / 6, LG V20, Samsung galaxy S7 & S7 edge and more.

Don’t miss this:

How to save battery life in Android Oreo 8.0

How to improve battery life on Pixel and Pixel XL

How to use Doze mode in Android Nougat  

How to fix battery drain issues on Android 8.0

5 Essential tips to extend battery life on nougat 7.0 & 7.1

  1. Turn down the screen brightness when not use or sleeping and set a shorter screen timeout on your android phone.
  2. Turn off GPS, Wi-Fi, and Bluetooth when you’re not using them.
  3. Use battery saver mode to solve battery problems on android phone.
  4. Turn off auto syncing for all accounts on your device. So you can not receive notifications when updates available and you’ll manually sync to get new emails on your smartphone when need.
  5. If in your android nougat and other devices, use auto-upload features of photos or videos then it will take more time to upload on your device. You can set to upload photos or videos over Wi-Fi only and only when your phone is charging.

extend battery life on nougat

When your android phone battery is low, avoid below battery intensive tips:

  • Recording or watching videos
  • Listening to music
  • Taking picture or selfie
  • Playing game
  • Live wallpaper or animated wallpaper
  • Screen saver

I hope above given tips is helpful to extend battery life on nougat 7.0 & 7.1. Don’t forget to share this tricks with your friends on social network. Stay connects with us for daily updates!

How to Record Slow Motion Video Google Pixel and Pixel XL

Here’s how to record slow-motion videos in Google Pixel and Pixel XL. You can make a slow motion video of 120FPS or 240FPS size. Also, capture 4K videos in Google Pixel & Pixel XL on various resolutions UHD 4K/HD 1080p/HD 720p. You can shoot videos in slow motion of rainfalls, running & walking videos, playing games, and more activities videos in your Pixel devices. Also, capture amazing photos & slow-motion videos of water drops, birds flying, and more. You can set a grid, flash OFF/ON and set weather effect also such as cloudy/sunny/Fluorescent or tungsten in your devices.

Related Tips:

How to Record Slow Motion Videos in Google Pixel and Pixel XL

Step 1: Launch the camera app in your Google pixel & pixel XL device.

Step 2: Tap “Three horizontal lines” at top of the left side corner.

You can see a list of various options such as slow motion video, Panorama, photosphere, lens blur, and other camera settings.

record slow motion videos in Google Pixel phone

Step 3: Tap on “Slow motion”.

Start Recording slow motion video on pixel XL

Step 4: Touch the middle button to start recording slow motion video on Pixel (120 FPS/240 FPS).

Stop slow motion video on Google pixel

Step 5: After completed record videos, touch the stop button (Red Button).

Record 4K Video (Ultra High Resolution) on Google Pixel Running Android 10

Step 1: Open the Camera app in your Google Pixel running Android 10.

Step 2: Swipe the bottom from the blank screen in the camera app and tap the Settings gear icon.

How to Record Slow Motion Video Google Pixel and Pixel XL

Step 3: Toggle on Ultra-high resolution video (4K) toggle under the video section.

Let see other useful camera feature of Google Pixel and Pixel XL phone.

Jump to Camera

You can access the camera from any screen in Pixel. Press the power button twice to directly jump into the camera app in your Google Pixel phone. Now you can capture a photo or video even your pixel device screen is off.

Flip Camera

While using a camera app, simply double twist your wrist to change between the front and rear-facing camera without touching the screen.

Switch between photos & video

Swipe left in the camera to start capturing video and swipe right again to capture photos.

That’s all about Pixel & Pixel XL camera settings.

I hope this little tip help to record slow motion videos in Google Pixel and Pixel XL phone. Do let us know you liked this tutorial?. If you are facing any problem, let us know in below comment box.

How to Set Up a VPN on Android Oreo 8.0

Here’s how to set up and use a VPN on Android 8.0 and 8.1 Oreo devices. VPN stands for Virtual Private Network that works as secure privacy between two or more device. Also, protect your data while web-surfing with VPN. Also, use the best VPN services and VPN apps for Android phones such as ExpressVPN. When set up the details in your device, it will ask for given permission to see all your internet activity for the app in your Android Oreo 8.1, Nougat 7.1.2, Marshmallow 6.0, and other devices.

Read Also:

How to Set Up a VPN on Android Oreo 8.0

Step 1: Go to Settings in your Android Oreo device.

Step 2: Tap Network & Internet.

VPN settings in android Oreo under Network & internet

Step 3: Tap VPN.

Use VPN in android Oreo devices

Step 4: Tap + icon at the top right corner.

You can see the below-given VPN settings in android Oreo 8.0 devices.

Name: Enter your VPN name.

Type: Choose the connection type. By default set PPTP VPN in your android phone. You can see other options such as L2TP/IPSec PSK/L2TP/IPSec RSA/IPSec Xauth PSK/IPSec Xauth RSA/IPSec Hybrid RSA.

Server address: Enter the server address provided by your VPN service.

VPN Settings in android 8.0 Oreo

Now tick marks the Show advanced options box and you will see below options in your Oreo devices.

DNS settings: In android Oreo DNS settings, enter DNS search domains and DNS servers provided by your VPN service. You won’t need to enter anything here.

Forwarding routes: You won’t need to enter anything here. Your VPN service provides the company to add it manually.


Set up a VPN on android Oreo 8.0

Username: Enter the username provided by your VPN service.

Password: Enter the password provided by your VPN service.

Now tick mark Always-on VPN in Android Oreo, if your device has settings for it. After completing all settings, tap Save.

And that’s all. Did you find the above tutorial on how to set up a VPN on android Oreo 8.0 is useful?. If you have any kind of trouble, tell us in below comment section. Stay connected with us for daily latest Android Oreo 8.0 tips and tricks.

Android device screen not working

Android phone or tablet’s screen isn’t working. You can see flashing, black screen, flickering, dead pixels and other error on phone screen. Also problem of touch screen not working, unresponsive touch screen, can’t unlock screen and more. Try these possible troubleshooting steps on your android phone or android tablet. After follow each solution, check the fix android device screen not working.

Read this:

Fix Android phone not ringing when someone calling

How to fix camera issues after Android 9 Pie update

How to fix Pixel 3 freezing and crashing issues

How to find lost phone location android device

My android device screen not working issues

Apply below given possible different methods to fix android device screen not working issues.

Method 1:

First of all check your device screen isn’t cracked or damaged

Method 2: Remove screen protector or case 

Remove your phone case, cover or screen protector use and check screen.

Method 3: Make sure that your android phone screen is clean

Method 4: Restart your device

Sometimes this solution fixes an issue on your android phone or android tablet. After this, if you’re android phone touchscreen is still unresponsive, try below step.

Method 5: Check an app as causing the problem

Reboot your android phone “safe mode. When safe mode on, touch the screen. If your phone screen works in safe mode, a downloaded app is causing the issue. Restart your device to exit the safe mode. Uninstall the recently downloaded apps one by one your phone. After remove the app that causing problem, reinstall the other uninstalled apps. If your screen doesn’t work is safe mode, continue the next step to fix android device screen not working.

Method 6: Turn off developer mode

It could be causing problem on your android phone or table touchscreen not working. If hidden developer option on your device follow below settings:

Settings > about phone > Tap 7 times on “build number”

Now enable developer mode on your phone.

Turn off developer mode android 7.0 nougat phone

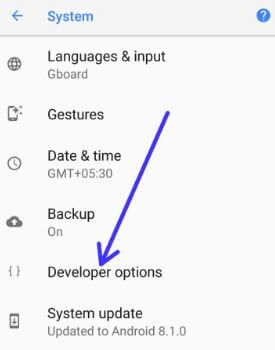
Settings > System > Developer options > Turn off

Method 7 : Test the affected part to fix android device screen not working issues

If the android phone touch screen not working only sometimes or only specific part of the screen. You can check this using notification shade. Try to swipe down notification panel from top of your screen.

Android device screen not working

First touch the top left corner of the screen. Now slowly drag your finger to the bottom right side corner without lifting. Try to move finger slowly before reaching the opposite corner of the screen. If perfectly drag the notification shade all the way to the bottom of the screen, problem isn’t caused by a specific area on screen. If notification shade releases while you’re still dragging your finger across the screen, visit your device manufacturer.

Method 8: Factory data reset Android 7.0 Nougat

Before hard reset your android pixel, Nexus and other device, backup your phone data.

Hard reset android nougat 7.0

Settings > Personal > Backup & reset > factory data reset > Reset phone / Reset tablet > Erase everything

Wipe cache partition on pixel Moto G4 plus

If your phone screen doesn’t work correctly, after try above given troubleshooting steps, last option to fix this issue is wipe cache partition on pixel, nexus and other devices.

The list of possible solutions ends here. Don’t forget to mention which method worked for you to fix Android device screen not working. Share this trick with friends on social network.

How to Change Country in YouTube App Android

Here’s how to set or change the location of YouTube content on Android phones. You can create a new video, upload a high-quality video, banned/hide inappropriate content, and other useful YouTube settings. You can change the content shown to you based on your country location. Also, enable limit mobile data usage on YouTube so only stream HD video when Wi-Fi available on your Android devices.

It’s easy to change content location settings using YouTube general settings. In YouTube notifications settings, you can notify via push and email when comments and other activity on your YouTube channel or videos. Also, turn on restricted mode to hide videos that include unworthy content that should help you ignore the most inappropriate content on your android phone. In this tutorial, I will show you step by step process to change content location YouTube android mobile.

Read Also:

How to Change Content Location YouTube Android Phone

Step 1: Open “Apps” on your Android phone.

Step 2: Tap on “YouTube” app.

You can see the below screen on your smartphone.

youtube-profile-settings-android-lollipop

Step 3: Tap on “Three vertical dots” from the top of the right corner.

youtube-settings-android-phone

Step 4: Click on “Settings”.

You can see the various below options.

general-settings-onyoutube-android

Step 5: Tap on “General”.

change content location Youtube android

Step 6: Tap on “Content location” under the general section.

You can see the list of all given country or region.

change-youtube-content-location-android

Step 7: Choose the country from the above-given list want to set YouTube content location on your Android phone.

Now change location settings on your smartphone. You can also save videos offline, view & remove videos offline, and show offline videos when Wi-Fi or mobile data network not available on your device.

Did you find the above process to change content location YouTube Android helpful? If you notice there is something wrong or missing, feel free to let us know on the below comment box. It would be a pleasure to help you. Stay connected with us for daily updates.

How to Show Battery Percentage On Google Pixel 3a and Pixel 3a XL

Here’s how to display battery percentage in Pixel 3a and 3a XL. You need to enable battery percentage to show battery percentage on Google Pixel 3a status bar. You can find this option under battery settings. Google Pixel 3a battery settings include battery saver, adaptive battery and battery percentage options. When turning on battery percentage toggle, you can see a sign (%) of battery percentage beside the battery icon on your Pixel 3a and 3a XL status bar.

You can show or hide the battery and see a time you should use your phone and after that switch off your device. Use battery saver mode on Pixel 3a XL and Pixel 3a to extend battery life. Follow the below-given step by step process to enable or disable battery percentage in Pixel 3a, 3a XL.

Read Also:

How to Display Battery Percentage in Pixel 3a and Pixel 3a XL

You can show the battery percentage in the status bar on Google Pixel 3a, 3a XL, and other Pixel devices using below give two methods.

1st Method: Google Pixel 3a Show battery percentage in the status bar

Step 1: Swipe down the notification shade from the top and tap the Battery icon or Battery saver.

How to display battery percentage in Pixel 3a and 3a XL

Step 2: Turn on Battery percentage toggle.

Now you can see percentage sign beside a battery symbol on your device status bar. If you don’t want to show Pixel 3a battery percentage, turn off toggle.

2nd Method: Display battery percentage in the status bar on Pixel 3a using battery settings

Step 1: Swipe up from the bottom of the home screen to open the app drawer.

Step 2: Tap the Settings app.

Step 3: Tap Battery.

Step 4: Turn on the toggle battery percentage.

If you’re device facing battery draining problem, you can improve battery life to restrict app background data, turn on battery saver, reduce sleep time, turn off auto-sync and more settings.

Show battery percentage on Ambient Display Google Pixel 3a XL and Pixel 3a

Make sure to enable always-on display on your Google Pixel 3a and other devices to show time, battery percentage, notification icons, and other information.

Settings > Display > Lock screen display > Turn Always on toggle on

Do let us know whether you liked this tutorial to display battery percentage in Pixel 3a and 3a XL? Let me know in the comments section if you have any questions. Don’t forget to share this article on your social network if you fount it useful.