How To Change Instagram Password Android

Do you forget Instagram password on your Android or Samsung phones? Here’s how to reset Instagram password on Android devices. You can use your Instagram username, email address, or phone number to Instagram password reset on Android. It’s easy to change Instagram password Android if you already know the old password. You can reset it with your Facebook account, also. Make sure to link your Facebook account with your Instagram account. If you don’t want to remember your password, you can save Instagram login info using Google Autofill services to log into your account automatically.

You can use Instagram account settings to change or edit your profile name, website name, and description. Only people you approve of on Instagram can see your photos, videos, and other details.

Read Also:

How To Reset Forgot Password Instagram Android Device 

You can Instagram change password without the old password using the below-given settings.

How to Change Instagram Password Android Using Phone Number or Username or Email

Step 1: Open the Instagram app on your Android device.

Step 2: Tap on Get help logging in or tap forgot password if older Android version.

Step 3: Enter your username, email, or phone number linked to your account and tap Next.

Forgot Instagram password on Android or Samsung

Step 4: Tap on Send an email/Send an SMS, or tap Log in with Facebook.

How To Change Instagram Password Android

Step 5: Open your Email and tap Log in as your account or Reset your password.

How To Reset Forgot Password Instagram Android Device 

Step 6: Enter a password & confirm the password and tap on Reset password.

Now, reset your Instagram forgot password on your Android devices. You can see the login screen of your account.

How to Use Facebook for Instagram Reset Password

Step 1: Open the Instagram app and enter the wrong password.

You can see this message when you enter the wrong password: Forgotten password for your account?

How to Use Facebook for Instagram Reset Password

Step 2: Tap on Use Facebook.

Reset Instagram Password on Android using Facebook Account

Step 3: Log in to your Facebook account linked with your Instagram account.

You can see Instagram login to the linked account automatically on your device. Also, ask you to save the password to Google if you don’t want to remember it next time.

How to Change Password on Instagram Using Current Password

Step 1: Log in to your Instagram account.

Step 2: Tap on the Profile icon at the bottom right corner.

You can see your Instagram account details.

Step 3: Tap on Three Horizontal Lines at the top right corner.

Step 4: Select Settings.

Security settings to Instagram change password

Step 5: Tap the Security.

How to Change your Instagram Password using Username on Android

Step 6: Tap the Password.

How to Change Password on Instagram Using Current Password

Step 5: Enter the current password, new password and again enter a new password and tap the Right arrow icon at the top right to update your password.

Now, change the password on Instagram Android phone and tablet devices. Log out the account and log in with a new Instagram password. If you forgot your password, reset it using your Facebook account or email address linked to an Instagram account.

How to Find Your Instagram Password on Android

If you forgot your Instagram password but are still logged in, you can quickly check if your password is saved on your device. If you saved your ig password when you first signed in, you could easily find your Instagram account password using the settings below.

Step 1: Open the Google app on your device or go to Settings > Google.

Step 2: Tap on Autofill in services on this device section.

Step 3: Tap on Autofill with Google.

Step 4: Tap the Passwords.

You can see the list of auto-save passwords here.

Step 5: Tap on the Instagram.

How to Find your Instagram Password on Android using Google Auto Fill

Step 6: Tap the Eye icon to view the saved password.

How to Change Email on Instagram Android

Step 1: Sign in to your Instagram account.

Step 2: Tap the Profile page at the bottom right.

Step 3: Tap on Edit profile.

Step 4: Tap the Personal Information settings.

Step 5: Tap on your Email address.

Change Email on Instagram Android device

Step 6: Enter the Email address and tap the Right arrow icon at the top right corner.

How to Change Email on Instagram App Android

Step 7: Enter the Log-in code and tap the Next to change ig email.

Did you find the above process to change passwords on Instagram Android phones helpful? Don’t hesitate to let me know in the below comment box. It would be a pleasure to help you. Don’t forget to share this Instagram trick with your friends!

Related:

How To Sync Google Account on Android [Updated]

Here’s how to Sync Google account on Android, Samsung Galaxy, OnePlus, and other devices. By default, turn on Gmail sync on your Android devices. This email sync will automatically back up your phone’s data like contacts, docs, Drive, calendar, Google News, etc. You don’t need to back up your phone when syncing your Google account. It will consume your phone battery in the background while taking a backup. Let’s see how to enable or disable Gmail sync on Android and Samsung devices.

Read More: How to Fix Google Contacts Not Sync on Android

How To Turn On Gmail Sync Android 13, Andorid 12, and Android 11

Follow the below-given different methods to sync your Google account.

How to Sync Google Account on Android

Step 1: Go to Settings.

Step 2: Scroll down and tap Passwords & Accounts.

Sync your Google account on Samsung Galaxy

Step 3: Tap on your Gmail account.

How To Turn On Gmail Sync Android

Step 4: Tap Account Sync.

How To Sync Google Account on Android

Step 5: Toggle on the button you want to sync data or Tap Three vertical dots at the top right corner > Sync now (Sync all enabled data).

How to Stop Gmail from Syncing using Gmail App

Step 1: Open the Gmail app.

Step 2: Tap Three horizontal lines at the top left corner.

Step 3: Tap Settings at the end.

Step 4: Tap on your Google account.

Turn sync Gmail off on your Android

Step 5: Scroll down and uncheck the box Sync Gmail in the data usage section.

This pop-up message view: Turn sync Gmail off?

How to Stop Gmail from Syncing using Gmail App

Step 6: Tap OK to unsync your Google account.

You can set the mail days to sync automatically to your Google Sync account.

Alternative: Gmail app > Three horizontal lines at the top left corner > Settings > Three vertical dots at the top right corner > Manage accounts > Gmail account > Account sync > Toggle off Button.

Read More: How to Clear Search History Google on Android

How to Enable or Disable Google Apps Sync on Android 13, Android 12, Android 11

How to Enable or Disable Google Apps Sync on Android

Settings > Passwords & accounts > Toggle Automatically sync app data on/off.

How do I Sync my Email on Android 10 and Android 9 (Pie)

You can enable or disable Gmail Sync on Android 10 and 9 Pie using the below-given settings.

Step 1: Go to Settings on your Android phone.

Step 2: Tap Accounts.

Step 3: Tap your Email account name. You can sync Gmail, Contacts, Calendars, Docs, Drive, Chrome, Google News, and more.

Step 4: Toggle on or off if you want to sync data from a list.

Read More: How to Backup Photos with Google Photos

For Android 5.1.2 (Lollipop) and Android 6.1 (Marshmallow)

Step 1: Open the Gmail app on your Android  device

click on three horizontal line in gmail app

Step 2: Tap on Three horizontal lines from the top left corner.

scroll down until settings and tap on it

Step 3: Scroll down until you see Settings and tap on it.

tap on your gmail account

Step 4: Tap on your Gmail account id.

By default, turn on Gmail sync Android device.turn off Gmail sync android lollipop

But some of the devices disabled sync Gmail.

How to turn on Gmail sync android lollipop 5.1.1

Step 5: Under the Data Usage section, check the box Sync Gmail on your Android phone or tablet.

gmail sync mail days time

You can set the mail days to sync on your Gmail account or PC. Using Gmail sync on your Android phone or tablet, you can easily sync email if lost accidentally.

Above, you can see the steps to enable/turn on Gmail sync on Android devices. If you have any questions regarding the above steps, please let us know in the comment box below. Share this article on your social network.

Read Also:

How To Clear History in Chrome: Android, iPhone, PC

Here’s how to clear history in Chrome browser for Android, iPhone, and desktop. Google Chrome history includes your daily search sites, visited pages, downloaded files, cookies from a website, saved passwords, etc. You can clear browsing data at once or delete individuals from your device. Deleting search history from a device will remove it from all your synced devices. Let’s see the steps to delete search history on your Google Chrome browser.

Read More: How to Screen Record on Chromebook

How to Clear Search History on Chrome 2023

You can clear your browsing history on Chrome on your Android device using the below-given settings.

Clear History in Chrome on your Android (Android 13, Android 12, and Android 11)

Step 1: Open the Chrome browser on your latest Android devices.

Step 2: Tap Three vertical dots at the top right corner.

View Chrome History on Android Phone

Step 3: Tap History.

Clear History in Chrome on your Android

Step 4: Tap Clear browsing data.

You can see the Basic and Advanced tabs here.

Essential: It includes browsing history, cookies & site data, and cached images and files.

Advanced: Add another three options, including saved passwords, auto-fill form data, and site settings.

How To Clear History in Chrome

Step 5: Select the time range from the Last hour, Last 24 hours, Last 7 days, Last 4 weeks, or All time and tap Clear data.

How to Clear Search History on Chrome Android

Alternative Way: Open Google Chrome > Three vertical dots at the upper right corner > Settings > Privacy and security in basics section > Clear browsing data > Choose Basic or Advanced > Clear data.

Clear Google Chrome History on iPhone

Step 1: Open the Chrome browser on your iPhone.

Step 2: Tap Three horizontal dots at the bottom right corner.

Step 3: Tap History.

Step 4: Tap Clear browsing data in the bottom left.

You can see different options here:

  • Browsing history
  • Cookies, site data,
  • Cached images and files
  • Saved password
  • Autofill data

Clear Google Chrome History on iPhone

Step 5: Select the time range you want to remove your browsing history iPhone from the Last hour, Last 24 hours, Last 7 days, Last 4 weeks, or All time and tap Clear browsing data.

Step 6: Tap again on Clear browsing data.

Clear History in Chrome Desktop or Laptop

Step 1: Open the Google Chrome browser on your PC.

Step 2: Tap Three vertical dots at the top right corner.

Step 3: Tap History.

Clear Browsing Data on Chrome Desktop

Step 4: Tap Clear browsing data from the left side menu.

You can see the Basic and Advanced sections here.

Basic: Browsing history, Cookies & other site data, and cached images and files.

Advanced: It includes browsing history, download history, Cookies & other site data, cached images & files, passwords & other sign-in data, Autofill form data, site settings, hosted app data, etc.

Clear History in Chrome Desktop or Laptop

Step 5: Select the option you want to delete search history and choose a time range Last hour, Last 24 hours, Last 7 days, Last 4 weeks, or All time and tap Clear data.

How to Clear History in Chrome Desktop using privacy and security settings

Alternative Way: Open Chrome > More at the top right corner > Settings > Privacy and security at the left side menu > Clear browsing data > Select the options and set the time range to delete history > Clear data.

Read More:

For Android Lollipop (5.1.1), Marshmallow (6.1), and Nougat (7.1.2)

Step 1: Open the Chrome browser on your device.

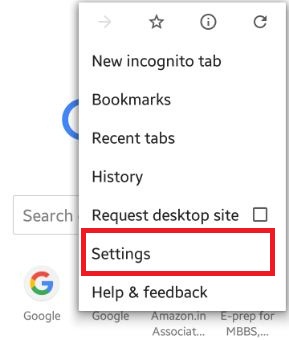
Step 2: Tap on Three vertical dots from the top right corner.

Click on settings option

Step 3: Tap on Settings.

Under advanced option tap on privacy

Step 4: Scroll down until you see Privacy under the advanced section & tap on it.

Step 5: Scroll down up to the end of the page, you can see the below button of Clear browsing data.

clear search history chrome android phone

Step 6: Click on Clear browsing data.

You can see the list of various options, including browsing history, cookies & site data, saved passwords, and autofill data options. By default, checkmark the browsing history, cache, cookies, and site data. Now tick the box you want to clear the search history for Chrome Android phone or tablet device.

How to clear search history chrome android phone

Step 7: Click on Clear.

Now clear your search history on the Google Chrome browser on your Android phone or tablet.

Delete All Searches History on Chrome Android (Android Lollipop (5.1.2), Marshmallow (6.0), and Nougat (7.1.2))

You can clear cache and cookies on Chrome search history using the below settings on your Android phone.

clear browsing history on chrome in android

Open Chrome app > Three vertical dots > History > Clear browsing data > Clear.

Did you find the above steps to clear the search history on the Chrome browser helpful? Don’t hesitate to let me know in the below comment box. It would be a pleasure to help you.

Read Also:

How To Change your Instagram Username on Android, iPhone, and PC

Do you want to change your Instagram username and display name? Here’s how to change your Instagram username on Android, iPhone, and PC (Web Browser). You can quickly change your username on Instagram using the mobile app. Ensure to follow the guidelines to change the name, including the name under the 30 characters, containing only letters, numbers, underscores, & periods (No spaces or other symbols), etc. Changing your Instagram username also changes the URL of your account. There is no limit to change username on IG.

Do you know how to change Instagram nickname? You can create an Instagram username you want or search for different usernames for Instagram, like the best boys username, nickname, or short name, and search for the other Instagram new names.

Read More: How to Clear Instagram Cache

What is the Username on Instagram?

You can see your username at the top of your Instagram account. Any person tags you with the @ symbol + your username. Changing the Insta username does not change the display name.

How To Change Instagram Username on an Android Phone or Tablet

Apply the below-given method to set the Insta username on your devices.

Change the Instagram Username on Android Phone using a Mobile App 

Step 1: Open the Instagram app and sign in with your email ID and password.

Tap Profile icon on your Instagram account Android device

Step 2: Tap the Profile icon at the bottom right corner.

Change your Instagram username using the mobile app

Step 3: Tap Edit profile.

How To Change Instagram Name on Android

Step 4: Tap Username and enter the name you want to set.

How To Change Instagram Username

Step 5: Tap the Right arrow icon at the top right corner.

You can change your username to the previous one for another 14 days.

How to Change Name (Nickname) on Instagram Using a Mobile App

Step 1: Follow the above given method in steps 1 to 3.

Step 2: Tap Name and enter the Instagram name you want to set.

Step 3: Tap the Right Arrow icon at the upper right.

You can only change your name twice within 14 days.

Change your Instagram Username using a PC or Laptop

Step 1: Open Instagram.com on your PC or browser and log in with your account.

Step 2: Tap the Profil icon at the upper right side.

Step 3: Tap Edit profile.

Change your Instagram Username using a PC or Laptop

Step 4: Now change the Instagram Name and Username tab you want.

Step 5: Tap on Submit at the bottom.

Read More: How to Fix Unknown Network Errors Occurred on Instagram

How to Change Your Username on Instagram iPhone

Step 1: Open the Instagram app on your iPhone.

Step 2: Tap the Profile icon at the bottom right corner.

Step 3: Tap on Edit profile.

Step 4: Tap on the Username icon and enter the name you want to set.

How to Set New Username for Instagram iPhone

Step 5: Tap Done at the top right side.

How To View Instagram Name Tag on Android (Older Version)

Step 1: Log in to your Instagram account on your PC.

Step 2: Tap the Profil icon at the upper right side.

Step 3: Tap the Settings gear icon.

Step 4: Tap Nametag.

People can scan your nametag with the Instagram camera to easily follow you. Download and print your nametag, then stick it on your products, posters, and more.

Did you find the above helpful article for changing your Instagram username on an Android phone or tablet? Share this Instagram trick with your friends on social networks. Don’t hesitate to let me know in the comment box. It would be a pleasure to help you.

Related:

How to Change Gmail Notification Sound Android

Are you annoyed by the default sound notification Gmail app? Here’s how to change Gmail notification sound on Android, Samsung, and other devices. In your Gmail account, You can daily receive different categories of messages such as primary, promotions, updates, forums, etc. To change the default notifications sound settings, ensure to enable label notifications on your Android phone or tablet. Also, set email notification sound as alerting or silent (Without Sound) using apps & notification settings on your Android phones. You can manage label notifications and vibrate settings on your Gmail app. You can set different notification sounds for different apps like Facebook, Instagram, WhatsApp, etc.

Read More: How to Change Notification Sound for Google Message App Android

Gmail Notifications Sound Change Android

Apply the below-given different methods to set custom notification sound on the Gmail app.

Gmail Notification Sound Change on Android 13, Android 12, and Android 11 using Gmail App

Step 1: Open the Gmail app.

Step 2: Tap Three horizontal lines at the top left corner.

Step 3: Scroll down and tap Settings.

Tap on your Google account to change notification sound Email

Step 4: Tap on your Google account.

Gmail Notifications Sound Change Android

Step 5: Tap Notification sounds in the Notifications section.

Notification Sound Gmail App Android

Step 6: Tap the Notification sound in the Email section.

Note: Different Android device has slightly different settings to change mail notification sound.

Step 7: Choose a Sound from your phone and tap on Done.

How to Change Gmail Notification Sound Android

Step 8: Tap Done.

Change Gmail Notification Sound using Apps Settings on the Mobile

Step 1: Go to Settings.

Step 2: Tap Apps.

Step 3: Tap See all apps.

Step 4: Tap Gmail.

Tap on Notifications to view Gmail Notifications Settings Android

Step 5: Tap Notifications.

Change Gmail Notification Sound using Apps Settings on the Mobile

Step 6: Tap All notifications or Email to change the notification tone.

Gmail Notification Sound Change on Android

Step 7: Tap Sound.

Change mail notification sound Android Phone

Step 8: Choose a Sound from the list, and tap Save at the top right corner.

Read More:

Change Gmail Notification Sound Android 10 and Android 9 (Pie) using Apps & Notification

You can change the notification sound for Gmail on your Android 10 and Android 9 (Pie) using the settings below.

Step 1: Go to Settings

Step 2: Tap Apps & notifications

Step 3: Tap See all apps

Step 4: Find the Gmail app and tap on it.

Step 5: Tap Notifications.

Step 6: Tap Email.

Step 7: Tap Sound.

Step 8: Select a Sound you want to use and tap OK.

Turn Off Gmail Notifications on Android Phone 

Turn Off Gmail Notifications on Android Phone 

Settings > Apps > See all apps > Gmail > Notifications > Toggle off All Gmail notifications.

 For Android 5.1.2 (Lollipop) and 6.0 (Marshmallow)

Step 1: Open the Gmail app on your device.

Tap on three horizontal line in Gmail app

Step 2:  Tap on Three horizontal lines from the top left-side corner.

Click on settings options from list

Step 3: Scroll down until you see Settings & tap on it.

tap on your gmail account id

Step 4: Tap on your Gmail account id.

Now check if the Notifications is enabled or not, if disabled, then allow notifications.

Tap on Inbox sound and vibrate option

Step 5: Tap on Inbox sound & vibrate under the notifications section.

Now check whether the Label notification is enabled.

change gmail app notifications sound android

Step 6: Click on Sound to change the Gmail app notifications sound Android Phone or tablet.

How to change gmail app notifications sound android phone

Step 7: By default, set notification sound, Choose your favorite ringtone from the above-given list.

If you have any concerns or questions regarding changing the Gmail app notifications sound Android phone or tablet, don’t hesitate to let me know in below comment box, would be a pleasure to help you. Connect with us for daily updates!!

Read This:

How To Turn Off Gmail Notifications

Annoying by continuously getting Gmail notifications on Android, Samsung, and Google Chrome? Here’s how to turn off Gmail notifications. By default, your phone ring or vibrate when you receive any new email. If you don’t want to disable all Gmail notifications, you can only set notifications for high priority. Also, show or hide all notification content from your phone’s lock screen or status bar.

You can mute or turn off any app notifications on your Android devices using specific app settings. Let’s see how to disable or change Gmail notification settings on the latest Android phones.

Read Also: How to Change Gmail Notification Sound Android

How To Turn Off Gmail Notifications on Android Phone or Tablet

Check out the below-given different methods for turning off Gmail notifications on the latest Android devices.

How to Turn Off Gmail Notifications Android 13, Android 12, and Android 11 using Gmail App on Mobile

Step 1: Open the Gmail app.

Step 2: Tap Three horizontal lines at the top left corner.

Step 3: Scroll down and tap Settings.

Step 4: Tap on your Google account.

How To Turn Off Gmail Notifications on Android Phone

Step 5: Tap Notifications in the Notifications section.

How To Turn Off Gmail Notifications

Step 6: Choose None.

Turn Off Gmail Notifications Android Phones

Alternative Way: Gmail app > Three horizontal lines (Menu) at the top left corner > Settings > General settings > Manage notifications > Toggle off All Gmail notifications.

Turn Off Gmail Notification using Apps Settings

Step 1: Go to Settings

Step 2: Tap on Apps & notifications

Step 3: Tap on See all apps

Step 4: Find the Gmail app and open it.

Disable Gmail Notifications using App Settings Android

Step 5: Tap Notifications.

Turn Off Gmail Notification using Apps Settings

Step 6: Toggle off All Gmail notifications.

Now, you can’t see any notifications on your phone lock screen and status bar. To view the received email, you need to open your Gmail account.

Read More: How to Turn Off Pop-up Notifications Android

Enable Desktop Gmail Notifications in Chrome Browser

By default, disabled mail notifications on your PC or laptop. You can enable Gmail notifications on desktops using the below settings on your Google Chrome browser.

Step 1: Open Gmail.com on your desktop and sign in with your account.

See All Settings in Gmail on PC Chrome

Step 2: Tap the Settings gear icon at the top right and tap See all settings.

You can see below given three options here.

New mail notifications on: You can see notifications when any new message arrives in your inbox or primary tab.

Important mail notifications on: View the notification when an important message arrives in your inbox.

Mail notifications off (By default set)

Enable Gmail Desktop Notifications in Chrome Browser

Step 3: Tap the “Click here to enable desktop notifications for Gmail”.

Turn On Gmail Notifications

Settings > Apps > See all apps > Gmail > Toggle on All Gmail notifications

Enable or Disable Email Notifications on Android 10 and Android 9 (Pie)

By default, you can get Gmail notifications on your mobile phone when receiving any new email. You can turn off email notifications on Android using the below settings.

Settings > Apps & notifications > See all apps > Find Gmail and tap on it > Notifications > Turn off Show notifications toggle

Now your Android device is blocking Email notifications from appearing on your device.

How to Silence Gmail Notifications on Android 10 and Android 9 (Pie)

You can change the notification sound for the Gmail app using the given settings on your latest android devices.

Settings > Apps & notifications > See all apps > Find Gmail and tap on it > Notifications > Email > Alerting (Gets your attention with sound or vibration)/Silent (Get Email notifications without sound or vibration) 

Read More: How to Snooze Notifications on Android

How to Change the Notification Sound Gmail App Android

Settings > Apps & notifications > See all apps > Find Gmail and tap on it > Notifications > Email > Advanced > Sound > Choose notification sound from list > Save

How to Turn Off TikTok Notifications on Android

To stop receiving TikTok notifications, you need to disable them using app settings. You can turn off any app notifications annoying you using the below settings.

Settings > Apps > See all apps > TikTok (Select the App you want to disable notifications) > Notifications > Toggle off Show all notifications

For Android 5.1.1 (Lollipop) and Android 6.0 (Marshmallow)

Step 1: Log in with your Gmail account on your device.

Tap on three horizontal line from top left side corner

Step 2: Tap on Three horizontal lines at the top left corner.

Click on settings option from list

Step 3: Scroll down until and tap Settings.

You can see the below screen on your Android phone or tablet.

Tap on your gmail account id

Step 4: Tap on your Gmail account id.

turn on Gmail notification sound android

You can see, by default enable Notifications on your Android phone or tablet.

How to turn off Gmail notification sound android lollipop

Step 5: Uncheck the box Notifications to disable Gmail notifications on Android devices.

To enable Gmail notifications, check the notification box again to view all email notifications.Set gmail label notifications android

Also, set label notifications sound, vibrate, and set sound or vibrate when each new message arrives on your Gmail account.

Above, you can see the steps to turn off Gmail notification sound on Android devices. Did you find the above process helpful? Do you still have any questions? Tell us in below comment box.

Read Also: