How to Fix WhatsApp Not Working Android

Why is my WhatsApp not working issues occurs on Android and Samsung Galaxy devices? When I am using WhatsApp on my Android device, I suddenly display the message that WhatsApp isn’t responding. Restart your Android device to check to fix WhatsApp is not working problem. Some users also have problems with WhatsApp not working correctly or WhatsApp not connecting issues on Android phones or tablets. WhatsApp is one of the most used instant messaging apps. Daily, millions or more users use WhatsApp status and share photos or videos with others. Also, several users facing the Web WhatsApp not working issues. To fix whats wrong with WhatsApp on your Android devices, follow the below-given possible solutions.

Read Also:

How to Fix WhatsApp is Not Working on Android

WhatsApp is not responding  

There are several reasons for WhatsApp not working on Android, such as internet issues, denied permissions, WhatsApp app crashing, etc. You can download WhatsApp from app store.

Why is WhatsApp not working today?

If WhatsApp is down due to server problems, this issue occurs on a particular day. If only your device WhatsApp is not working, you’ll try the below-given solutions to fix the issue.

When Will WhatsApp Work Again?

Apply below given possible solutions one by one to fix your WhatsApp not working today in India.

Check your Internet Connection & Router to Fix WhatsApp Network Problem

Make sure your device connects to the data WiFi network or turn on mobile data. If using WiFi, check router & power outlet are working fine. Unplug the router and remove the power cord. After 10-15 seconds, again connect your router and start it and check WiFi is working. Try to connect your WiFi with another device to check your internet issue or your phone problem.

Check WhatsApp App Update to Latest Version

Step 1: Open the Play store app on your Android device.

Tap on Profile icon of your Google account Android

Step 2: Tap on the Profile icon at the top right corner.

Manage apps and device in account settings on Play store

Step 3: Tap on Manage apps and device.

Check WhatsApp App Update

Step 4: Tap on See details.

Step 5: Tap on Update all or Tap on Update of WhatsApp.

Check for Software Update

Sometimes, your device will cause different issues due to software bugs or updates. Check if an update is available, and update your Android devices.

When Will WhatsApp Work Again

Settings > System > System update > Check for update 

Download and install the system update if available.

Check WhatsApp App Permissions

Check WhatsApp App Permissions

Settings > Apps > See all apps > WhatsApp > Permissions > Make sure all permission allowed

Clear WhatsApp App Cache & Data to Fix WhatsApp Stopped Working Issues

Step 1: Open the app drawer and tap on the Settings app.

Step 2: Tap on Apps.

Step 3: Tap on See all apps.

Step 4: Scroll down until you view WhatsApp and tap on it.

WhatsApp Storage and cache settings on Android


Step 5: Tap on Storage and cache.

Clear WhatsApp App Cache & Data to Fix WhatsApp App Crashing or Freezing issue


Step 6: Tap on Clear cache.

WhatsApp Not Responding on Android

Step 7: Tap on Clear storage (Clear Data).

The WhatsApp app’s data is permanently deleted, including settings, files, and other app data.

WhatsApp Not Working on Android


Step 8: Tap on OK.

Restart your phone and check to fix the Whatsapp problem.

Force Stop WhatsApp 

Step 1: Follow the above-given method in Steps 1 to 4.

Force Stop WhatsApp Android

Step 2: Tap on Force stop.

force stop WhatsApp on Android


Step 3: Tap on OK.

Disable/Enable Background Data WhatsApp

How to Fix WhatsApp Not Working Android Phones and Tablets

Settings > Apps > See all apps > WhatsApp > Mobile data & Wi-Fi > Toggle Background data On & Off

Manage WhatsApp Storage

Step 1: Open the WhatsApp app.

Step 2: Tap on More (Three vertical dots) at the top right corner.

Step 3: Tap on Settings.

WhatsApp storage and data settings on Android

Step 4: Tap on Storage and data.

Manage storage in WhatsApp Android

Step 5: Tap on Manage storage.

Make sure WhatsApp storage is not full.

Uninstall WhatsApp on Android

Step 1: Go to Settings.

Step 2: Tap on Apps.

Step 3: Tap on See all apps.

Step 4: Scroll down and tap on WhatsApp

Uninstall WhatsApp on Android devices

Step 5: Tap on Uninstall.

This message is viewed on the screen: Do you want to uninstall this app?

Check the box if you want to back up your WhatsApp app data when installing it again.

How to Fix WhatsApp Not Responding on Android

Step 6: Tap on OK.

Now again, install WhatsApp on your device.

How to Fix WhatsApp Not Opening PC or Laptop

If you’re WhatsApp web not working or you can’t the scan QR code on WhatsApp, apply the below given possible solutions.

  • Make sure internet connection is active.
  • Check WhatsApp app updated with the latest version.
  • Make sure use the latest version of Google Chrome, Microsoft Edge, Opera, Firefox or Safari.
  • Check for block or limit connections to WhatsApp Web.

I hope the above-given troubleshooting steps fix WhatsApp not responding on Android devices. Which of the above-given solution worked for you? Tell us in below comment box.

Read Also:

How to Enable Fingerprint Authentication For Google Play

How to enable fingerprint authentication for Google play purchases such as apps, games, books, movies and more. Still this update, we use fingerprint to the lock screen only. Now, Google Play store support fingerprint authentication for app purchases. By default disable fingerprint authentication in play store. The fingerprint sensor will also useful to paid payment using android pay.

After enabling this feature, just press your thumb when payment using the Google Play store. Currently, most of all new devices support fingerprint technology such as Moto G4 Plus, Nexus 6P/6, LG V20, Pixel & Pixel XL and more.  Follow the below-given step by step guide to enable fingerprint authentication for Google Play purchases.

Read Also:

How to Set Up Fingerprint Authentication For Google Play Purchases

Step 1: Open “Google Play Store” in your android marshmallow and nougat device.

Tap more in Googla Play Store settings

Step 2: Tap “Three horizontal lines” from top of the left side corner.

Tap settings under Play Store

Step 3: Tap “Settings”.

You can see fingerprint authentications under the user controls section. By default disable fingerprint authentications for app purchases, show below screen.

fingerprint authentication for Google play purchases

Step 4: Check or uncheck the box of fingerprint authentications to activate or deactivate it.

Enter Google Password in app purchases

Step 5: Enter the password & press OK.

enable fingerprint authentication for Google play purchases

Now enable fingerprint authentications in your device. When you purchase any apps or games from Google Play store and payment then you must require fingerprint authentication.

You can also choose the option for all purchases through Google Play on your device using the below settings.

Require authentication for all purchases Google Play Store

Apps > Google Play Store > Menu > Settings > User controls > require authentication for purchases > All purchases through Google Play / Every 30 minutes / Never

Fingerprint authentication is always required for ages 12 and under.

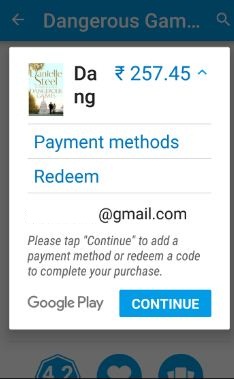
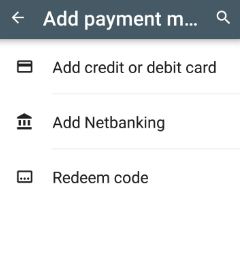
When you trying to buy any apps or games from the Google Play store in your device, you can choose payment methods from Credit or debit card / Net-banking or Redeem code.

Disable app purchases Android Marshmallow and Nougat 7.0

Google Play Store > Settings > Three horizontal line > Settings > User controls > require authentication for purchases > Never

Did you find the above steps helpful to enable fingerprint authentication for Google play purchases? If you have any kind of trouble, let us know on below comment box. It would be a pleasure to help you. Don’t forget to share it with others.

How to Set Up My Day on Google Assistant

Here’s how to use my day on Google Assistant. This Google Assistant My Day feature includes settings of weather, home & work location, meeting, routines, reminders, and news related information. Recently update my moto G4 plus to android nougat 7.0. This update has great features including multi-window mode, Doze mode, battery saver, Google Assistant, System UI tuner, and more. But in this tutorial, I will show you how to use Google Assistant My Day feature in your Android (7.0 & 7.1 Nougat) devices.

Related:

How to Use Google Assistant My Day Feature in Android Nougat 7.0 & 7.1, Marshmallow 6.0

After updating your device to nougat, first of all, enable Google Assistant in your nougat 7.0 device.

Google app > Menu > Settings > Google Assistant > Settings > Enable/disable Google Assistant

After enabling Google assistant in your device, follow the below-given steps.

Step 1: Tap & hold the home button to launch the Google Assistant.

Google Assistant settings nougat 7.0 phones

Step 2: Tap more & touch “Settings”.

You can see the Google Assistant settings.

My Day in Google Assistant settings

Step 3: Tap “My Day” under adjusting settings for all your Google Assistant devices.

You can view below My Day settings in your nougat device.

Google Assistant My Day feature

Weather:

Set Weather temperature as Fahrenheit in My Day

Here you can set whether temperature units as Fahrenheit/Celsius. By default set weather temperature as Fahrenheit.

 Work commute:

Home and work location in Assistant My Day feature

In this Google Assistant My Day feature, you can add home and work locations to ask your assistant about your work-related information.

Next meeting:

If you set a meeting date, time, and places then Google Assistant remembers you when a date is coming.

Reminders:

Set reminders for a birthday, anniversary, and other important things.

After setting all the above things, launch the assistant and said “tell me about my day” and Google Assistant will tell you about the weather, home & work location & address, next meeting, and reminders you set.

customize news in Google Assistant settings

This Google Assistant My Day setting, you can also customize news-related data at the ends with the My Day summary. Also set nothing additional at the My Day summary ends.

Google Assistant feature also useful to control your home device, add shopping list, use screen context, change Assistant language, block offensive words, add personal info such as add nickname Google Assistant call you (Record your own voice also), address and preferences.

How to Add Nickname in Google Assistant

How to add nickname in Google Assistant

Google app > Menu > Settings > Google Assistant > Settings > Personal info > Nickname > Pencil icon > Enter name the Assistant call you > OK

That’s all. Above you can see all the details of the Google Assistant My Day feature. If you find the above details helpful, please share it with your friends on a social network.

Fix Google Play Store Error Code 924: Can’t Update App

When updating apps in Google play store and suddenly seen message: can’t update the app, “Google Plays music” can’t be updated (Error code: 924). There are various reasons behind this error code 924 in Play Store. But the main reason for this error 924 is no internet connection in your android device, check Wi-Fi or cellular data is turned on.

Sometimes showing a message of unknown error code 919 during application installing or updating any app from Google Play store. Also, other Google Play store errors related with this such as Error 921, Error 927, Error 941 (Interruption when updating app), Error 963, Error 961 and more. Follow below given possible solution to solve error code 924 and other play store errors in your android phone or tablet devices.

Related:

How to Fix Error Code 924 in Google Play Store: Can’t Download App

Google play store error code 924

Follow below-given methods to fix error 924 code:

Check Internet connection

First of all, make sure your device is connected with Wi-Fi or mobile data network. After connected, try again to update the app in your device. This solution is fixing my Google play store can’t update the app issue.

Clear the Cache & Clear Data of Google Play Store App & Google Play Services

Step 1: Go to “Settings”.

Step 2: Under the device section, Touch “Apps”.

Step 3: Scroll down until you see the Google Play Store and open it.

Step 4: Tap “Storage”.

How to Clear the cache and data play store in android device

Step 5: Tap “Clear cache”.

Also, clear cache of Google play services in your android device:

clear cache of Google Play Services in android

Settings > Device > Apps > Google Play Services > Storage > Clear cache

Uninstall Google Play Store Update

Step 1: Go to “Settings”.

Step 2: Tap “Apps” under the device section.

Step 3: Tap the “Google play store” app.

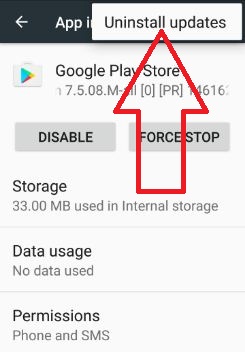
Step 4: Touch “More”.


Uninstall play store update to fix play store error 924

Step 5: Touch “Uninstall updates”.

Step 6: Tap “OK”.

Remove Google Account to fix Error 924 on Play Store

 Step 1: Go to “Settings”.

Step 2: Tap “Accounts” under Personal setting.

Step 3: Touch “Google”.

Step 4: Tap “More” from the top of the right side corner.

Google account Remove to fix error 924

Step 5: Tap “Remove account”.

Step 6: Again tap Remove account.

After removing Google account from your device, sign in again and try downloading or updating the app.


End the list of troubleshooting steps to fix Google Play Store Error code 924 when updating the app. If you find the above steps helpful, don’t forget to share it with your friends on a social network. Stay connected with us for the latest technology news.

How to Fix Google Maps Voice Not Working on Android [13 Ways]

Annoying by Google Maps not talking or giving voice directions on Android devices? Here’s how to fix Google maps voice not working on Android, Samsung, OnePlus, and other devices. Google Maps helps search nearby places with directions (Enable GPS) and find the route navigation with traffic updates. You can listen to the map’s voice when you start the navigation.

Several users use Google Maps voice to reach directions. You can change voice for Google maps to male/female using Google text-to-speech voice settings. Also, share or download offline Google Maps on your phone. Just enter your destination to view the step-by-step direction on Google maps. All this happens when Google maps voice navigation works correctly on your device. Follow the below-given possible solutions to fix Google maps voice navigation not working on Android.

Read More: How to Track a Lost Android phone using Google Maps

How to Fix Google Maps Not Talking Android

Follow the below given different methods on your Android phone or tablet devices.

Check your Phone Volume

Turn on Play Voice Over Bluetooth

Ensure your phone volume is not set as low by mistake or accidently pressing the mute button. Press the volume up button to increase the volume.

Check your Internet Connection

Check your Internet Connection

Ensure you enable mobile data or WiFi network on your phone. Swipe down the notification panel at the top and tap on Mobile data or WiFi to turn it on or off.

Make sure your Android Phone is Connected with Car’s Bluetooth

Make sure to enable Bluetooth on your phone and car.

Step 1: Pull down the notification panel at the top and long-press the Bluetooth icon.

Step 2: Turn on Bluetooth.

Step 3: Ensure you connect your Android device with Car’s Bluetooth.

Make Sure to Turn on Play Voice Over Bluetooth

Step 1: Open Google Maps on your Android.

Step 2: Tap on the Profile icon at the top right corner.

Step 3: Click on Settings.

Step 4: Scroll down and tap on Navigation Settings.

Fix Google Maps Voice Navigation Not Working Android

Step 5: Toggle on Play Voice over Bluetooth & Play voice during phone calls.

Unmute Google Maps Voice Navigation to Fix Google Maps Voice Not Working

Step 1: Open the Google Maps app.

You can download and install Google maps here.

Step 2: Search the location and tap on Start.

How to Fix Google Maps Voice Not Working on Android

Step 3: Tap the Sound icon on the right side while opening the route.

You can see the below option is your device.

Muted: It will mute Google Maps voice navigation.

Unmuted: It will unmute Google voice navigation.

Alerts only: Alert about the traffic of your destination places.

Google maps voice not working android

Step 4: Tap on Unmuted on your Android device.

Increase Navigation Guidance Volume

Step 1: Open the Google Maps app.

Step 2: Tap the Profile picture at the top right corner.

Step 3: Tap Settings.

Step 4: Select Navigation settings.

Increase Navigation Guidance Volume to Fix Google Maps Voice Not Working Issues

Step 5: Tap on Louder in Guidance volume.

How to Update Google Maps App

Step 1: Open the Play store app on your device.

Step 2: Tap on the Profile icon at the top right corner.

Step 3: Tap on Manage apps and device.

Step 4: Tap on See details.

How to Update Google Maps App on Android Phone

Step 5: Tap on Update in the Google maps app if the update is available.

Increase the Volume of Google Maps Voice Level (Older Android Versions)

Google Maps app > Three horizontal lines at the top left corner > Settings > Navigation settings > Voice level > Choose a Louder

Related:

Clear Cache Google Maps

Step 1: Go to Settings.

Step 2: Tap on Apps.

Step 3: Tap on See all apps.

Step 4: Scroll down and tap on Google Maps.

Step 5: Tap on Storage & cache (Latest Android).

Clear Google Maps App cache to fix Google Maps Voice Navigation Not Working on Android

Step 6: Tap on Clear Cache.

Also, clear data if the clear cache can’t fix the issue. But this clear data will remove all app data from your device, including Maps routes, settings, and more.

Samsung Galaxy: Settings > Apps > Google Maps > Storage > Clear cache.

Clear data Google Maps app Android Phones

Clear Google Maps Data: Settings > Apps > See all apps > Google Maps > Storage & cache > Clear storage > OK.

Force Stop Google Maps

Force Stop Google Maps App to fix Google Maps Not Talking Issue

Settings > Apps > See all apps > Google Maps > Force stop > OK.

Samsung Galaxy: Settings > Apps > Google Maps > Force stop > OK.

Uninstall Google Maps Update if Google Maps Voice Not Working After Updating the App

Uninstall App Update to fix Google Maps Not Talking Android

Settings > Apps > See all apps > Maps > Three vertical dots at the top right corner > Uninstall updates > OK.

Google Maps Voice Not Working in Car When Connected with Bluetooth

First, reset or remove all Bluetooth connections from your car and Android devices. After removing the Bluetooth connection, turn on Bluetooth and try to pair and check to fix the issue.

Step 1: Open the Google Maps app.

Step 2: Tap on the Profile icon in the upper right corner.

Step 3: Touch on Settings.

Step 4: Tap on Navigation settings.

Step 5: In your car, select Bluetooth & turn it on and start navigation.

Uninstall the Google Maps App and Re-install it

Uninstall the Google Maps app and re-install them again. It will remove all your Google Maps app data you search, your routine, offline maps, and other data.

Uninstall Google Maps app to fix Google Maps Voice Not Working in Car

Open Play store > Profile icon at the top right corner > Manage apps and device > See details > Tap on Google Maps app > Uninstall > Uninstall

After uninstalling the app, restart your phone, download it again, and check to fix the issue.

Read More: How to Use Find My Device Google

FAQs:

How do I Turn On Voice Directions On Google Maps Android?

How do I Turn On Voice Directions On Google Maps Android

To turn on voice directions on your Google maps Android, open the Google Maps app > Search the Place in the search bar > Directions > Start > Tap the Volume icon at the top > Tap on Unmuted to listen to the route.

How do I Change Voice Google Maps on Android?

How do I Change the Google Map Voice on Android Devices

You can use navigation settings to change your Android device’s Google map voice language. Open the Google Maps app > Profile icon at the top right > Settings > Navigation Settings > Voice Selection > Choose a Voice.

I hope the above-given steps fix Google maps voice not working on Android phones or tablets. If you have known any other solutions, please share them with us.

How to Adjust Google Assistant Settings on Android: Google Pixel

Here’s how to set up and customize Google Assistant on Android devices including Google Pixel, Samsung Galaxy, etc. After enabled Google assistant in the nougat device, you can open Google Assistant settings on your android devices. You can adjust home control, news, my day, shopping list, screen context, OK Google detection, voice and other important feature in android device.

Also, control data use by your assistant and manage personal information such as a nickname, addresses, and preferences in your android nougat 7.0 & 7.1 devices. Below you can see complete details of how to change Google assistant settings on your android device such as Moto G4 Plus, Nexus 6P/6, LG V20, Samsung Galaxy S7 & S7 edge, etc.

Related:

How to Customize Google Assistant settings on Pixel & Pixel XL

You can adjust Google Assistant settings using below 2 methods.

1st Way: Set up Google Assistant Settings on Android

Step 1: Tap & hold the home screen button on your device screen (From any screen).

Open Google Assistant settings in your device

Step 2: Tap the “More” button & Touch “Settings“.

Here you can adjust settings of your Google assistant such as home control, news, my day, shopping list, screen context and other.

2nd Way: Adjust Google Assistant settings using Google app

Step 1: Go to “Settings”.

Step 2: Under the personal section, tap on “Google”.

Step 3: Tap “Search” in services.

Step 4: Touch “Settings” in Google Assistant.

Below you can see details of Google assistant settings in your android nougat 7.0 devices.

Google Assistant settings in nougat 7.0

Home control:

Using this you can control your added device such as Nest, Philips Hue, Honeywell, WeMo, etc. You can also manage account settings using home control settings.

News:

customize news channel in Assistant

Simple Launch the Google Assistant and say the latest news about Google Pixel XL & Pixel device, you can see the source related to your questions. You can customize news, technology, business, sports, science, health, art & lifestyle and world related news channels source such as WSJ, CNN News, Bloomberg best, New York Times – The daily, Time’s the brief, TechCrunch, Mashable Tech, Gizmodo, HuffPost Business & tech, ESPN sports, BBC Global News, The Washington Post, etc.

My Day:

My day settings in Assistant

Simply launch the Google Assistant and say “tell me about my day”. Now assistant will show you weather temperature units in Fahrenheit (Also set Celsius), your home and work address if added, next meeting date and other reminders you set. Also, change settings of my day summary end with news of your favorite channel, you can customize it.

Shopping list:

Add a list of items you want to need, whenever you are going shopping check the added list item.

Adjust Google Assistant Settings For Pixel

Google Assistant:

Enable/disable Google assistant in moto G4 plus and other devices.

Use screen context in nougat phone

Enable screen context in the nougat device to Google to show the details of your device screen when you hold the home button or search by Google voice button.

Assistant language

change language in Google Assistant

Change the assistant language in pixel and pixel XL device. By default set English (US) as assistant language.

Tap & hold home screen button > More > Settings > Adjust settings for this device > Assistant language

“Ok Google” detection:

OK Google detection in Assistant settings

In this Google assistant setting, you can enable Ok Google any time that recognizes your voice even if the lock device or open any apps in your android device. Also, enable trusted voice, it will unlock your android phone when you say “Ok Google”. If your voice does not match then not unlock the device. By default enable assistant driving feature that useful to find location using Google Maps when driving car/bike and another vehicle. You can retrain the Ok Google voice model and delete the Ok Google voice model using this assistant setting.

Google Account settings

Personal information:

Add personal info in Assistant settings

Add home & work locations, add nickname that the assistant calls you, set weather temperature units preferences as Fahrenheit / Celsius and add email updates that connected with the latest news and features related to Google Assistant.

My Activity:

Control source related by your Assistant.

End the list of Google Assistant settings. If you find the above article helpful, don’t forget to share it with your friends on social networks.