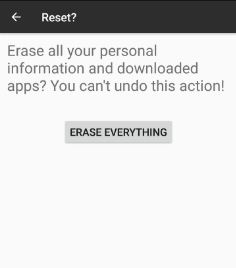
How to Unlock Google Pixel 6 Pro/6/5 XL/5/4 XL/4/4a Without Password/Pattern/PIN

Annoying by forgot pattern lock on Google Pixel 6 Pro/6, Pixel 5 XL/5, Pixel 4 XL/4, and Pixel 4a 5G devices? Here’s how to unlock Google Pixel without a password, pattern, or PIN. Three ways to reset forgot password on your Google Pixel devices include a factory reset Google Pixel using recovery mode, reset pattern lock with Google find my device, and using Android device manager. You can factory reset or hard reset your Google Pixel devices if you don’t have an internet connection.

How to Unlock Google Pixel Without Losing Data

Check out the below-given possible methods to unlock Google Pixel XL and Pixel if you forgot your PIN/Password or Pattern lock.

How Do You Unlock Google Pixel 6 Without PIN/Password/Pattern?

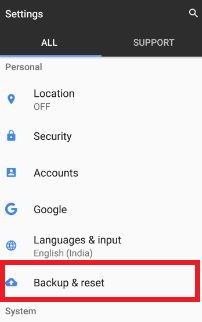
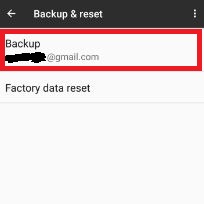
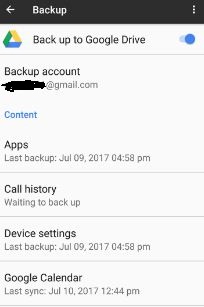
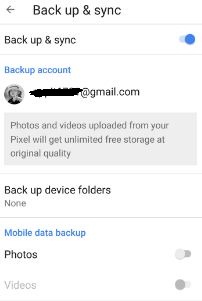
It will remove all your phone data. First of all, back up your data using your Google account.

Step 1: Make sure to Power off your Pixel devices.

Factory reset Pixels using recovery mode settings

Step 2: Press & hold the volume down button and the power button until you can see the Start on your Pixels.

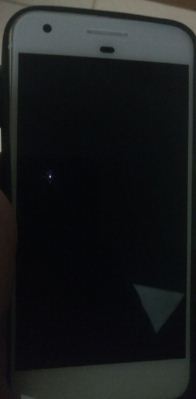
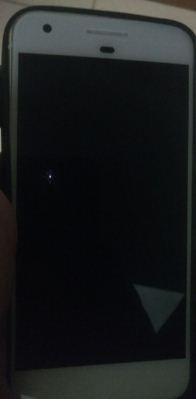
You can see the Android system recovery screen on Pixel. By default Start button show on your Pixels.

How to Unlock Google Pixel Without Losing Data using Recovery mode


Step 3: Press the volume down button until you view Recovery mode.

Step 4: Press the power button to restart into recovery mode.

You can see the above screen of the Android robot exclamation mark with a red triangle icon on your Google Pixels.

How to fix Forgot Pattern Lock on Google Pixel 6 Pro

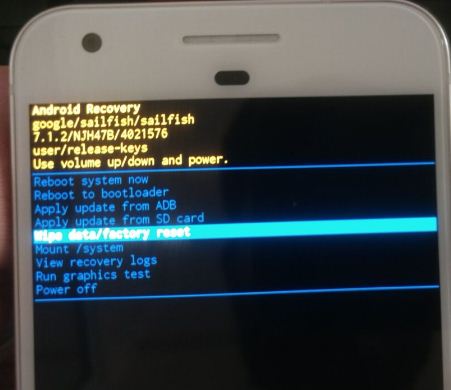
Step 5: Press & hold the power button and still press the volume up button once to view the Android recovery screen.

How to Unlock Google Pixel 6 Pro Without Password or Pattern or PIN

Step 6: Press the volume down button until the Wipe data/factory reset is highlighted.

Step 7: Press the Power button.

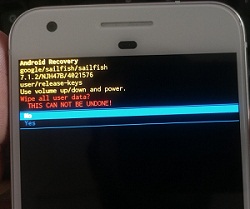
This pop-up message view on your Pixels: Wipe all user data? This cannot be undone!

How Do You Unlock Google Pixel 6 Without PIN

Step 8: Press the volume down button to highlight Factory data reset.

Step 9: Press the Power button to factory reset your Pixels.

Wait until complete the wipe cache data on Pixels.

Step 10: Press the Power button to reboot the system.

How Do you Unlock a Google Pixel if you Forgot your Password using Android Device Manager?

Step 1: Open the Android device manager on your desktop PC or laptop.

Step 2: Log in with your Gmail account.

You can show your devices list on the PC or laptop. Below given, three options are available.

Play sound: Your device will ring for 5 minutes, even if set to silent.

Secure device: Lock your Pixel device. Also, display a message or phone number on the lock screen.

Erase device: Erase all content from the device. You will no longer be able to locate it.

How Do you Unlock a Google Pixel if you Forgot your Password or PIN


Step 3: Tap on Erase device to reset the pattern lock.

Reset Forgot Password on Pixels Using Google Find My Device App


Step 4: Again, tap on Erase device.

Step 5: Sign in with your Google account to erase the device.

Now, your Pixel will reset, and you can set a new screen lock.

Reset Forgot Password on Pixel Using Google Find My Device App

Make sure to turn on location in your Pixel or other Android devices.

Step 1: Download the Google Find my device app from the play store & sign in with your Google account.

Use Google Find my device to Reset Forgot Password on Pixels


Step 2: Select your Phone from the list.

Step 3: Click on Erase device.

Step 4: Again, click on Erase device.

Step 5: Log in with your Gmail account to delete all Pixel data.

Use Google Find my device on Google Pixel 5 XL


Alternative Way: Settings > Security > Find my device > Toggle on Use find my device

Read Also:

Did you find the above solutions helpful if you forgot pattern lock on Google Pixel & Pixel XL? If you have any trouble, let us know in below comment box. Please stay connected with us for the latest Pixel tips and tricks.

How to fix Google Play Store error 944

Want to fix error 944 in Android when update apps from Google play store? Most of all this error generated due to internet connection problem or server is offline. You can show this error message: Update for “App name” could not be downloaded due to an error. (944) Most of all this types of play store errors automatically fix when internet start again. It’s quite easy to fix Google play store error 944 in android phone.

You can’t update apps from play store while this error 944 code occurs in android phone. To fix this error 944 in play store, clear the cache and clear data of Google play store, check internet connection, uninstall update of Google play store etc. Check out below given each solution to fix Google Play store error 944 in android phone.

Related Tips:

How to fix Google Play store error 501

Fix play store error 921

Fix Google play store error 927

How to fix Google Play Store error 944 in android phone

fix Google Play Store error 944 in android

1st Method: Check Internet connection

First of all make sure your android phone is connected with any Wi-Fi or mobile data network. If error on connect, try to use another internet and update apps. Sometimes poor internet connection is also problem to occur this play store error code 944 in android.

2nd Method: Google Play store servers offline

This is another reason to occur error 944 code. You can’t fix this issue. So wait for a few minutes or hours and try again to update app.

3rd Method: Clear the cache of Google Play Store to fix Google Play Store error 944

Step 1: Go to “Settings

Step 2: Under device section, tap on “Apps

Step 3: Scroll down until show Google Play Store and tap on it

Step 4: Tap “Storage

How to Clear the cache of play store to fix error 944

Step 5: Tap “Clear cache

Now trying to update apps from play store in your device. If not fix issue, try below given method.

4th Method: Uninstall updates of Google play store

Step 1: Go to “Settings

Step 2: Tap on “Apps” under device section

Step 3: Scroll down until show “Google play store” and tap on it

Step 4: Tap on “More

Uninstall updates of Google play store to fix error code 944

Step 5: Tap on “Uninstall updates

Step 6: Touch “OK

End the list of possible solution to fix Google Play Store error 944 in android phone. Did you find above process helpful? Let us know in below comment box. If you found it helpful, don’t forget to share with others. Don’t miss other Google Play Store tricks.
How to Set up Screen Lock on Google Pixel, Pixel XL

Change the lock screen on Google Pixel devices? Here’s how to Set up the screen lock or change pattern lock on Google Pixel, Pixel XL and other Pixel devices. You can see various security options to set as screen lock such as pattern lock/swipe/PIN/Password. Also, use Pixel Imprint on Google pixel to unlock your Google Pixel using a fingerprint sensor. But in this tutorial, I will show you steps to reset lock screen on Google Pixel 2 XL/Pixel2/Pixel, and Pixel XL 7.1.2.

The password is the strongest method to secure your Google Pixel and other android devices. In pattern lock, draw the pattern want to unlock your device. You can also hide pattern lock dots on Google Pixel, if not show dots while unlocking your device. Follow the below-given step by step guide to set up a pattern lock on Google Pixel and Pixel XL phone 7.1.2.

Related:

How to Change The Lock Screen on Google Pixel and Pixel XL 7.1.2

Step 1: Go to “Settings” on your Google Pixel & Pixel XL.

Step 2: Tap on “Security” under the personal section.

Tap screen lock under device security settings on pixel

Step 3: Under device security, tap “Screen lock”.

You can show a list of screen lock options.

Tap pattern to set up pattern lock on Google pixel

Step 4: Here we select the “Pattern”.

Step 5: Choose your pattern & press “Continue

Confirm pattern lock to set as lock screen

Step 6: Draw the pattern again to confirm it & press “Confirm”.

You can see below-given notifications options on your pixel device screen.

  1. Show all notification content
  2. Hide sensitive notification content
  3. Don’t show a notification at all

Step 7: Choose any one & tap “Done

set pattern lock on Google pixel and pixel XL

Now set a screen lock on Google pixel and pixel XL devices. By default pattern visible when drawing a pattern on your Google Pixel device. You can hide pattern lock dots on Google Pixel and Pixel XL using the below settings.

hide pattern lock dots on Google pixel and pixel XL phone

Settings > Personal > Security > Settings gear icon of screen lock > Toggle off make pattern visible

You can also remove or reset pattern lock in your Google Pixel devices.

How to Reset or Change Lock Screen Security on Google Pixel & Pixel XL

Settings > Personal > Security > Tap on screen lock > Choose from None/Swipe/PIN/Pattern/Password

How to Remove Pattern Lock on Google Pixel & Pixel XL

reset pattern lock in your Google pixel phone

Settings > Personal > Security > Tap on screen lock > Confirm pattern > none > Yes, Remove

Change the Lock screen on Google Pixel 3a/3a XL/4/4 XL running Android 10

Step 1: Open the app drawer and tap the Settings app.

Step 2: Scroll down and tap on Security.

Step 3: Tap Screen lock under the device security section.

Confirm your lock screen to change current screen lock on Pixel devices.

Step 4: Choose from None/Swipe/Pattern/PIN/Password.

Step 5: Follow the on-screen instruction to set up a new screen lock on Pixel devices.

That’s it. Did you find the above process helpful to set up a lock screen on Google Pixel and Pixel XL devices? If you have any kind of problem, let us know in below comment box. Stay connected with us for daily Google Pixel tips.

How to Add Fingerprints to Google Pixel and Pixel XL

Set up a fingerprint ID on your Pixel devices? Here’s how to add fingerprints on Google Pixel and Pixel XL. You can add multiple fingerprints and delete fingerprints anytime in your Pixel. Also, set Pixel lock screen security from Swipe, Pattern, PIN, or Password. You can see a circle on the backside of the Google Pixel & Pixel device is known as Pixel Imprint or Pixel fingerprint. This Pixel Imprint not only uses to unlock your Google Pixel devices but also helps to authorize purchases or sign in to certain apps. A fingerprint is less secure than a strong pattern lock or PIN or Password security.

Read Also:

How to Set Up Fingerprint on Google Pixel and Pixel XL

Step 1: Go to “Settings” on your Google Pixel & Pixel XL.

Step 2: Under the Personal section, tap on “Security”.

Here you can see screen lock options, it includes various screen lock security options like swipe or Pattern or PIN or Password.

Tap pixel Imprint under security settings

Step 3: Tap “Pixel Imprint”.

Step 4: Tap the “Next” button.

Now, choose a backup screen lock to use with Pixel Imprint from below given three options.

Pixel Imprint + Pattern//Pixel Imprint + PIN//Pixel Imprint + Password

Step 5: Select any one from the above-given options.

I have chosen “Pixel Imprint + Pattern”.

Step 6: Draw a pattern and tap “Continue”.

Confirm lock screen pattern on Google pixel

Step 7: Again draw a pattern and tap “Confirm

You can show below notifications options on your device when your Google Pixel is locked.

  1. Show all notification content
  2. Hide sensitive notification content
  3. Don’t show notification at all

Step 8: Choose any one from the above-given option & Tap “Done”.

Find the sensor of your Google Pixel device, you can find it back of your phone (Show below screen).

set up fingerprint on Google pixel and pixel XL phone

Step 9: Put your finger on the back of your phone sensor and lift after you fill a vibration.

Move your finger slightly to add all the different parts of your fingerprint. After complete setup, you can see Fingerprint added! Here you can see the “add another” option to add a new fingerprint.

Use fingerprint on Google pixel and pixel XL phone

Step 10: Tap “Done”.

You can unlock your Google Pixel phone using the back of your phone sensor within a second. Also, use Pixel Imprint or Pixel fingerprint to unlock certain apps or authorize payments. It’s quite easy to use and set up fingerprint on Google Pixel & Pixel XL devices.

How to Add a New Fingerprint on Google Pixel & Pixel XL

You can add up to 5 fingerprints on your Google Pixel, Nexus, and other devices.

How to add fingerprint on Google pixel & pixel XL

Settings > Security > Pixel Imprint > Confirm pattern lock > Add fingerprint > Put your finger on sensor and lift after vibrate until see 100%

How to Remove Fingerprint on Google Pixel & Pixel XL

Delete added fingerprint and again added using the above-given steps.

remove fingerprint on Google pixel & pixel XL 7.1.2 phone

Settings > Security > Pixel Imprint > Confirm pattern lock > Tap Trash icon of added fingerprint > Delete

How to Rename Fingerprint on Google Pixel & Pixel XL

rename fingerprint on Google pixel phone

Settings > Security > Pixel Imprint > Confirm pattern lock > Tap existing fingerprint > Enter the name > OK

That’s all about Google Pixel and Pixel XL phone security feature Pixel Imprint.

I hope you will enjoy viewing these steps to use and set up a fingerprint on Google Pixel and Pixel XL phone. Do let us know by leaving a comment below to you liked this tutorial or not. Stay connected with us for the latest Google Pixel tips.

How to use notification channel android O

Android O has several great features such as picture-in-picture mode, multi-display support, background limits, notification channels, Adaptive icons and more. In this tutorial, I will show you how to to use notification channel android O. In this notification channel feature, you can set app’s notifications by category wise. Different apps have different options to set individual notification on android O.

You can create notification channel for each different type channel. Also set separate notification channels for each group in messaging app. In notification snooze on android O, you can set options for notification as specific time at 15 minutes / 30 minutes or 1 hour. You can Set priority wise notifications of app.It’s quiet easy to use notification channel android O / android 8.0.

Related Android O Tips:

How to customize lock screen shortcut android O

How to update android nougat 7.1.2 to android O

Use notification channel android O: Notification Snooze

To show notification on android O, long press on app launcher icons in your android O OS. User manages notifications settings using a system UI in your android O supported device such as Google pixel & pixel XL, Nexus 6P, Nexus 6, Nexus C etc. You can change notification or block a notification channel anytime.

This group notification setting from certain apps is useful to easily management of app notification in your android O devices. If you can change the any of below given characteristics, it applies to the notification channel.

  • Importance
  • Sounds
  • Lights
  • Vibration
  • Show on lock screen
  • Override do not disturb (DND)

In your Google pixel and pixel XL 7.1.2 device, you can navigate to app notification settings using below settings.

Step 1: Scroll down notification bar from any screen on your android O devices

Step 2: Tap “Settings” gear icon

You can see various section under phone settings menu.

Step 3: Tap “Notifications” under system section

Step 4: Select any app want to change notifications settings

How to use notification channel android O device

You can block all notification, set priority wise notifications, show or hide lock screen notification of individual app, set silently notifications and more.

That’s all about how to use notification channel android O and set individual notification priority in your Google pixel and pixel XL devices.

Did you found above given article helpful? Let us know in below comment box. Let us know your thoughts about android O notification channel feature on below comment section. For more such smart android O tips, visit wordpress-221392-673273.cloudwaysapps.com

How to Clear Cache Partition Google Pixel and Pixel XL

Clear system cache or wipe cache partition on Google Pixel and Pixel XL devices. If your Google pixel apps crash or freezing and won’t turn on after charging. And you have already tried all possible solutions but not fix this issue. Now it’s time to try to clear cache partition Google Pixel and Pixel XL phone. Using this solution, you will fix all Google pixel bugs such as low call volume, restarting phone again & again and touch screen not working on Google pixel & pixel XL.

If you have a problem with a specific app, just clear the app cache on Google Pixel and Pixel XL running the latest android version devices. And another option is clear system cache on Google Pixel & Pixel XL, it will remove all your phone data. So before clear system cache in Google Pixel, back up your phone important data. Check out below given step by step guide to Google Pixel XL clear cache partition.

Related:

How to Clear Cache Partition on Google Pixel XL

Below you can show step by step process to clear system cache on Pixel XL & Pixel phone.

Step 1: Turn off your Google Pixel and Pixel XL Phone.

Step 2: Press & hold the volume down button and the power button at the same time until the phone vibrates.

Android system recovery mode on Google pixel

You can view the Android system recovery screen on Google pixel. By default start button show on Google Pixel & Pixel XL.

Recovery mode on Google pixel and pixel XL phone

Step 3: Press the volume down button until view recovery mode.

Step 4: Press the power button to restart into recovery mode.

android robot exclamation mark with red triangle symbol

You can see the above screen of the android robot exclamation mark with a red triangle symbol on your pixel phone.

Wipe cache partition on Google pixel and pixel XL

Step 5: Press & hold the power button and press the volume up button one time only to see the recovery mode. When the screen appears, press the volume down button until highlight wipe data/factory reset.

This message show on your Google Pixel & Pixel XL screen: Wipe all user data?

clear cache partition Google Pixel

Step 6: To confirm, press volume down buttons to scroll to Yes and press the power button to select it.

Clearing the cache may take 3-5 minutes.

Reboot system now on Google pixel and pixel XL phone

Step 7: Press the volume down buttons to scroll to reboot system now, press the power button to select it.

It’s quite difficult to clear the cache partition Google Pixel and Pixel XL device. Above given steps helpful while none of the other solutions fix your Google Pixel and Pixel XL issue.

How to Clear the Cache on Google Pixel & Pixel XL

clear app cache on Google pixel & pixel XL

Step 1: Go to Settings.

Step 2: Tap on Apps under Device section.

Step 3: Select the app from the list you want to clear the app cache.

Step 4: Tap on Storage.

Step 5: Tap on Clear cache.

That’s all. Do let us know you liked this tutorial or not. If you found this trick helpful to clear cache partition Google Pixel & Pixel XL, don’t forget to share with others. Stay connected with us for the latest Google Pixel & Pixel XL tips.