How to Set Up and Use Google Duo on Android

How to set up Google Duo on Android devices. You can change Google Duo’s settings in your Pixel and other Android devices using this tutorial. Google Duo is a high-quality video calling apps for Android and iOS users. Using this video calling app, you can easily make video calls to friends or family members in your contact list that use the Google Duo app. In this Duo app, video quality adjusts automatically.  Also, chat with your friends using this Duo app. Your calls are encrypted so only you and the caller person read or listen to your chats. This Google Duo video calling app is more flexible and compatible with most latest Android and iOS devices.

Read Also:

How to Set Up Google Duo on Pixel and Pixel XL

Here I will show you how to set up and use Google Duo on Google Pixel and Pixel XL devices. Also, manage Google Duo settings in your device.

Set up Google Duo on Pixel and Pixel XL

Step 1: Download the Google Duo app from the play store.

Step 2: Install the Google Duo app in your pixel device.

To use the Duo app, agree with Google’s terms and conditions in your device.

set up Google Duo on Pixel phone

Now give permission Duo to send & view SMS messages, Pictures & record video, record audio and access your contacts.

Pictures & record video: Take your picture to see whoever calls you and you can see that person.

Allow duo to send and receive messages on pixel

Record Audio: To hear your voice give permission to record audio.

Access Contacts: Check which of your contacts list use Google Duo and another contact invited by you.

Text message: Send text message to your contacts for invites to use the Google Duo app.

Verify your number to use Duo app in your pixel

Step 3: Enter your phone number.

Your device will receive a verification code as text message. If the message not works, try automated voice calls to get code and use the Duo app in your Google Pixel devices.

Allow Duo to access camera to make a video call on your Pixel device.

How to Enable Dark Mode in Google Duo App Pixel or Latest Android

How to Enable Dark Mode in Google Duo App Pixel

Open Google Duo app > Three vertical dots at the top right corner > Settings > Choose theme > Dark

How to Make a Call Using Google Duo on Pixel or Android

Step 1: Open the Google Duo app.

Tap contacts from bottom middle in your phone

Step 2: Tap on the Contacts button or search contacts.

You can view list of contacts use a Google Duo app and also view the list of contacts invite.

 Step 3: Tap on Contact and Duo will call the selected contact.

If the person you call has save your contact, they’ll see you while phone is ringing using Duo Knock Knock feature.

Tap on red button to end Duo call in pixel

Step 4: Tap on the Red button from the bottom center to end your call.

When receiving a call in your Google Duo, you’ll see caller looks if they have enabled knock-knock in the device. You can easily set up Google Duo on Pixel devices and make a high-quality video call using Wi-Fi.

How to Control Calls in Google Duo

While using the Duo app in your device, tap & hold the screen and you can see camera and Microphone button on the screen.

How to control calls in Google Duo app

Camera: Tap the camera button to switch the camera during a Duo call.

Microphone: Tap mute button to the above video preview to mute your microphone during a Duo call on Google Pixel XL.

How to Change Google Duo Settings on Pixel

Step 1: Open the Google Duo app.

Step 2: Tap on Three vertical dots from top of the right side corner & touch Settings.

You can view below screen in your Google Pixel and other Android devices.

Google Duo settings on Pixel phone

Knock Knock: By default enable Knock Knock in your device so you can see who’s calling you.

Limit mobile data usage: By default enable limit mobile data usage. When reaching the limit it will automatically stop videos.

Unregister phone number: Also unregister your Duo mobile number and you won’t be able to make or receive calls on Duo in your Pixel device.

How to Set Up and Use Google Duo on Pixel XL

In the latest Duo call settings, you can see new low light mode for automatically helps others see you better in low light and data saving mode to adjust the video quality to limit data usage. Also, you can enable add duo calls to the device’s call history.

How to Block a Number on Duo in your Google Pixel

Step 1: Open the Google Duo app.

Step 2: Tap on Three vertical dots from the top of the right side corner.

Step 3: Tap on Settings.

Step 4: Tap on Blocked Number or Blocked users.

How to block Number on Duo in your Google Pixel

Step 5: Tap the Contact icon from the top of the right side corner.

Step 6: Select Contact wants to block number on Duo.

To unblock a number, tap on contact already blocked and touch unblock in your Android device.

That’s all. Do let us know you liked this tutorial or not. If you find the above step helpful to set up Google Duo on Pixel and Pixel XL device, don’t forget to share it with others.

How to stop auto playing video in Google Chrome

Annoying of auto play video on YouTube or display advertisement in chrome browser? To stop auto playing video in Google chrome, find the video add and pressing the cross button to stop it. Every time facing this issue whenever open new videos in your browser or android phone. Let see how to stop auto play flash videos in Google chrome permanently.

You can stop auto-loading videos or disable auto play videos on your android phone to save data. Some of the users also facing this auto play video issue on Facebook, Instagram and other social networking apps.  Check out below given two methods to stop auto playing video in Google Chrome browser.

Don’t miss this:

How to watch YouTube video while browsing in android phone

Fix SSL connection error on Google Chrome browser

How to stop auto playing video in Google Chrome

Different browser has slightly different settings to stop auto playing flash and HTML 5 videos. Firefox users easily block or stop auto play flash video and HTML5 video in web browser without use of plug-in.

Stop auto play flash videos on Chrome using browser settings:

Step 1: Open Google Chrome in your desktop PC or Laptop

Step 2: Tap on Three vertical dots from top of the right side corner & touch Settings

Step 3: Scroll down until advanced settings & tap on it

Content settings in chrome under privacy and security settings

Step 4: Under privacy & security settings, tap on Content settings

List of section show on screen such as cookies, Plug-in, location, notifications, JavaScript, Flash, Popups and more.

Manage individual plugins settings in Google Chrome

Step 5: Tap on Plug-ins and choose Let me choose when to plug-in content

Now stop auto playing video in Google Chrome. Whenever playing any videos in your android device, it will ask you after video starts. You can also manage individual plugins (Show above screenshot) in your Google chrome browser.

After applied this settings in your Chrome browser, if facing problem of auto play videos on chrome then use extension to fix this issue. There are several extensions to fix problem but I recommended you to install Disable HTML5 Autoplay extension. Try below given method to stop auto play videos in Chrome.

Stop videos from playing automatically in Chrome using Extension:

Step 1: Open Google Chrome in your desktop PC or laptop

Step 2: Tap on Three vertical dots > more tools > Extension

Tap on Get more extension in chrome

Step 3: Tap on Get more extension

Extension list in Google Chrome

Step 4: In search field, type Disable HTML5 Autoplay

Step 5: Tap on Add to chrome button to install the extension


You can see this message: Add “Disable HTML5 Autoplay”?

stop auto playing video in Google Chrome

Step 6: Tap on Add extension

Step 7: Tap on Extension icon from top right side corner in your chrome browser

Stop videos from playing automatically in Chrome using Extension

Step 8: Tap on Disable Autoplay

Now in your Google chrome browser automatically stop autoplay flash videos and HTML5 videos on the web page.

That’s it. Did these solutions fix the problem for you? What other methods do you know to stop auto playing video in Google Chrome browser? Share with us in below comment box. For more smart tips, visit Internet page.

How to Download And Install Adobe Flash Player On Samsung Galaxy S8 and S8 Plus

Facing the issue of “this Plugin is not supported” while browsing the Internet on your Samsung Galaxy S8 and Galaxy S8 plus. It’s quite easy to download and install flash player on Samsung Galaxy S8 and S8 Plus, Galaxy S7 edge, and other latest Samsung devices. Adobe flash player is perfect to secure web browsing experience. There are several web browsers that support inbuilt flash players such as Dolphin, Mozilla, Puffin and more. It will allow you to watch High-quality flash videos and play SWF games.

If you would like to enjoy videos without any interrupt, need to install Adobe flash player on android phone. Dolphin browser is one of the best browsers which fully support flash player and also support sidebar, HTML/HTML 5 video player, fast loading speeds compare to other browsers and incognito browsing. Make sure to enable unknown sources option to install third-party APKs from the play store. Follow the below-given step by step guide to get Adobe flash player on any Samsung Galaxy devices.

Read Also:

How to Install Adobe Flash Player on Samsung Galaxy S8 And S8 plus

Install your favorite web browser from the above-given list to use flash player on Samsung Galaxy S8 and Galaxy S8 plus.

Step 1: Open Google Play Store and download the Dolphin browser here.

After downloading the browser, launch the dolphin browser in your galaxy S8 device.

Step 2: Open the Dolphin browser.

Step 3: Tap on the Dolphin icon from below the middle of the screen.

Tap settings gear icon in Dolphin browser

Step 4: Tap on the Settings gear icon.

Tap on falsh player under web content in dolphin browser

Step 5: Under web content, tap on Flash player.

By default turned off flash player on the dolphin browser.

How to Install flash player on galaxy S8 plus

Step 6: Choose Always on to enable flash player in the dolphin browser.

A webpage is required a flash player to play videos on Galaxy S8 plus

Step 7: While use flash player, you’ll download adobe flash APK file.

Make sure unknown sources box checked (Settings > personal > Security > Unknown sources) on your Samsung Galaxy device, follow the on-screen instruction to install flash player on galaxy S8 plus and use browser to play videos without any disturb.

Let see other useful settings to block videos from automatically loading in Chrome browser in your galaxy S8 plus, Galaxy S7 & S7 edge and another android 7.1.2 devices.

Stop auto-playing flash video in Google Chrome on Android

Open Chrome browser > More > Settings > Advanced > Site settings > Media > Autoplay

That’s all. Do you have any other tips to install flash player on galaxy S8 and galaxy S8 plus? Let us know your thought in the below comment box. For more such smart tips, visit wordpress-221392-673273.cloudwaysapps.com

How To Fix Sound Issue On Galaxy S7 Edge

Annoying by Samsung S7 Edge no sound during call received? This tutorial explains to you possible methods to fix Sound issue on Galaxy S7 Edge and S7 device. Different problems for sound issues such as Samsung S7 edge speaker not working, dropping a call, people can’t hear your voice, etc. Some of the Samsung users reported low call volume or poor sound call quality problems when calling. Because of poor network signal, you can’t hear a voice. Removed all voice recording apps and music players sometimes fix the issue.

You can check if any app third party app realted issues on your device. Also facing call audio works however media and video calls don’t work or volume is extremely low when plugged into AUX through my car. Some of the users uninstall Google Alarm app and close Spotify app solved the problem. In this tutorial, I will show you different troubleshooting methods to fix sound issue on galaxy S7 and Galaxy S7 edge.

Related S7:

Fix Samsung Galaxy S7 Won’t turn on

How to fix touchscreen not working on Galaxy S7 Edge

Fix Galaxy S7 freezing or unresponsive

How To Fix Sound Issue On Galaxy S7 Edge and Galaxy S7

fix Sound issue on galaxy S7 edge

Use Voicemail and increase the volume

You need to try making a quick call to my voice-mail and turn on the speaker and check to increase the call volume in your device.

Disable and Re-enable the UHQ upscaler to fix Samsung Galaxy S7 No sound issue 

You can enable upscaler using advanced sound settings.

Sound > Advanced sound settings > Sound quality and effects > UHQ upscaler

Turn Bluetooth on and off

Turning Bluetooth on in your device and unpaired everything you already connect or remove the paired list. Then Bluetooth off again and check to fix the issue.

Make sure your device volume is full

Check volume settings on your Galaxy S7 and Galaxy S7 edge devices.

Settings > Device > Sound > Adjust volume settings

Check network signal bar to fix sound issue on Galaxy S7 edge

If poor network signals in your galaxy S7 edge device, you can’t hear incoming call voice when use speakerphone or headset. To fix low sound quality calls on galaxy S7, find nearby areas that good signals.

Check Microphone or Wired headset not damage to fix No sound problem on S7 Edge

Wired headset: Check wired headset is properly inserted into the headset jack. If using a Galaxy S7 cases then remove it.

Microphone: Check nothing is in front of a microphone that causing to poor sound call quality on Samsung Galaxy S7 edge phone.

Enable safe mode on Galaxy S7 Edge 

First of all, turn off your Galaxy S7 device. If you know a particular app related issue, clear app cache in your device.

Step 1: Press and hold the power button on your Galaxy S7

Step 2: When Samsung logo appears, release the power button and press & hold the volume down button

Step 3: Continue holding down the volume down button until S7 restart

It will take 30-50 seconds to reboot your device.

Step 4: View “Safe modesymbol on below of the left side screen

Now check your galaxy S7 device is working perfectly or not. If not found any problem, it means any third party downloaded apps causing issues. Delete one by one recently installed app and find the app that causing the issue. Now check fix volume not working on galaxy S7 problem or not.

Factory reset Samsung Galaxy S7 Edge to fix sound issue on Galaxy S7 edge

It will reset all your personal data, Samsung account and third party downloaded apps. Before resetting your device, back up your android phone data.

Step 1: Go to “Settings

Step 2: Under the personal section, tap on “Backup & reset

Step 3: Tap Factory data reset

Step 4: Tap Reset Phone

Step 5: Tap Erase everything

That’s all. I hope the above given one of these methods fix sound issue on Galaxy S7 edge devices. Do you have any other trick you want to share with others? Stay connected with us for latest Galaxy S7 tricks.

How to Reduce Data Usage on Google Pixel XL and Pixel

Annoying by Google Pixel using a lot of data? Here you can check the methods to reduce mobile data usage on Google Pixel and Pixel XL. One of the main reasons for using more data on Google Pixel XL is the apps running in the background even we don’t use it. You can set data limit, disable account sync, and set photo and video upload quality medium to reduce data usage on your Google Pixel phone. Always try to update apps only via Wi-Fi if possible in your Pixel XL (7.1.2) devices. Also, turn on the data saver on the Android device to save battery life on Pixel XL. In Google Maps and Google play music app storing data locally in your Android device.

Read Also:

How to Reduce Mobile Data Usage on Google Pixel and Pixel XL

Try below given different ways to reduce Google Pixel data usage.

Stop App From Using Background Data on Pixel

Step 1: Go to Settings.

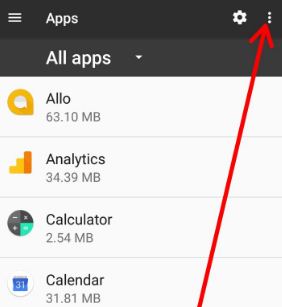
Step 2: Under the device section, tap on Apps.

Step 3: Select the app that wants to disable background data.

Step 4: Tap on Data usage.

reduce mobile data usage on Google Pixel XL

By default enabled mobile data usage in the background.

Step 5: Disable “Background data” toggle.

Turn on data saver on Pixel

To reduce Google Pixel data usage, data saver helpful to stop some of the apps from sending or receiving data in the background.

Step 1: Go to Settings in your Pixel.

Step 2: Under Wireless & networks, tap on Data usage.

Step 3: Tap on Data saver.

Turn on data saver on your Pixel and Pixel XL phone

Step 4: Enable data saver on Google Pixel and Pixel XL.

Turn on Google Chrome Data Saver on Android Phone

Step 1: Open Google Chrome app in your Pixel device.

Step 2: Tap on Three vertical dots from top of the right side corner.

Step 3: Touch Settings.

Step 4: Under the advanced section, tap on the Data saver.

Turn on data saver on Google chrome in your pixel

Step 5: Enable data saver on Chrome in Google Pixel.

Set Auto-Update Apps Over WiFi

When update apps or software using mobile data, it will consume more data and also download data slow compare to Wi-Fi. So if possible always try to update apps or system software using Wi-Fi only on your Google Pixel XL.

Set auto update apps over Wi-Fi on your pixel XL phone

Google Play Store > Three horizontal line > Settings > General > Auto-update apps > Auto-update apps over Wi-Fi only

Set Mobile Data Limit on Google Pixel and Pixel XL

You can also set a mobile data limit on your Google Pixel and Pixel XL using the below settings to limit data usage. When mobile data reach the limit, it will automatically stop.

Step 1: Go to Settings in your Pixel.

Step 2: Under Wireless & networks, tap on Data usage.

Step 3: Under the mobile section, tap on the Billing cycle.

By default turned off data limit on your pixel device.

Step 4: Turned on set data limit & press OK.

Step 5: Tap on Data limit.

Set data usage limit on Google Pixel phone

Step 6: Set data usage limit in MB/GB & tap on SET.

That’s all. Do you know some other tricks to reduce mobile data usage on Google Pixel and Pixel XL phone? Share with us in below comment box. Stay connected with us for the latest Android tricks.

How To Factory Reset A Google Pixel and Pixel XL

Irritate of Google Pixel and Pixel XL frozen or random reboots? Here are the two ways to perform a factory reset a Google Pixel and Pixel XL devices. Not any solutions fix this pixel issues. You can use recovery mode to hard reset on your Google Pixel and Pixel XL phone. Also, the factory reset Google Pixel XL using hardware keys if your Pixel phone locked or won’t turn on.

Below given solutions also useful if your Google Pixel crashing or touch screen not working in your Pixel device. If in your Pixel device any app-related problem occurs, you can fix any app problem to enable safe mode in your Pixel device. Follow the below-given step by step guide to factory data reset Google Pixel and Pixel XL if forgot password or pattern lock.

Read Also:

How To Perform a Factory Reset on Google Pixel and Pixel XL

Check out below given two methods to reset Google Pixel to factory settings. It will erase all your Pixel device information including Google account, photos & videos, music, third party apps, and more. So before factory reset or hard reset, backup your Google Pixel data.

Factory Reset Google Pixel Without Password

Step 1: Turn off your Google Pixel and Pixel XL.

Step 2: Press & hold the volume down button and the power button at the same time until the phone Android system recovery screen appear.

Android system recovery mode use in your pixel

By default Start button show on Google Pixel & Pixel XL.

Recovery mode on Google pixel and pixel XL phone

Step 3: Press the volume down button until view the Recovery mode.

Step 4: Press the power button to restart into recovery mode.

android robot exclamation symbol with red triangle in your pixel device

You can see the above screen of the Android robot exclamation mark with a red triangle symbol on your Pixel phone.

Factory reset Google Pixel and Pixel XL phone

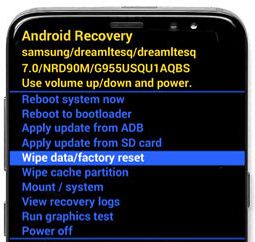
Step 5: Press & hold the power button and volume up buttons same time to scroll to wipe data/factory reset, press the power button to select it.

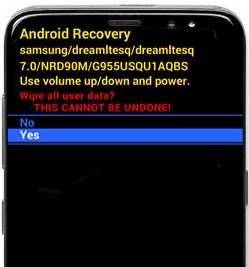
This message show on your Google pixel & pixel XL screen: Wipe all user data?

Wipe all user data on pixel XL phone

Step 6: To confirm, press volume down buttons to scroll to Yes and press the power button to select it.

Clearing the cache may take 3-5 minutes.

Reboot system now in your Google pixel XL devices

Step 7: Press the volume down buttons to scroll to reboot system now, press the power button to select it.

Factory Reset Google Pixel and Pixel XL When Phone Powered On

Step 1: Go to “Settings”.

Step 2: Under the personal section, tap on “Backup & reset”.

Here you can back up your pixel phone data using your Google account.

Step 3: Tap on “Factory data reset”.

factory Reset your Google pixel XL device

Step 4: Tap on “Reset Phone”.

If set Pattern lock/PIN/Password/Fingerprint, draw it to unlock your Google Pixel phone.

Factory data reset pixel if power on your pixel phone

Step 5: Tap on “Erase everything

Factory Data Reset Android 8.1 Oreo

Settings > System > Reset options > Erase all data (Factory reset) > Reset phone > Confirm your PIN or pattern lock or password > Erase everything 

Factory Reset Android 9 Pie

Settings > System > Advanced > Reset options > Erase all data (Factory reset) > Reset phone > Confirm your PIN or pattern lock or password > Erase everything 

Factory Reset Android 10

Settings > System > Advanced > Reset options > Erase all data (Factory reset) > Erase all data > Erase all data

That’s it. Do let us know you liked this factory reset Google Pixel and Pixel XL tutorial. If you have any problem, leave your feedback in below comment box. Stay connected with us for latest Google Pixel related news.