Best Android 8.0 Tips and Tricks

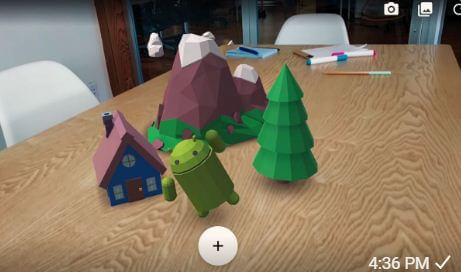
Google announced the latest android version Android 8.0 Oreo with its awesome features. Let see 10 handy Android 8.0 Oreo tips and tricks. This Android 8.0 features including Background process limit, Install unknown apps, Picture in picture mode, Android Instant apps, Adaptive icons, Autofill framework, Notification dots, Smart text selection, New emoji of 60 sets & download fonts style in Android Oreo and more. Some of the Google Pixel and Pixel XL devices getting OTA to update Android Oreo 8.0. So check in your Pixel and Pixel XL device.

Read Also:

10 Best Android 8.0 Oreo Tips and Tricks You Should Know

Best android 8.0 Oreo tips and tricks

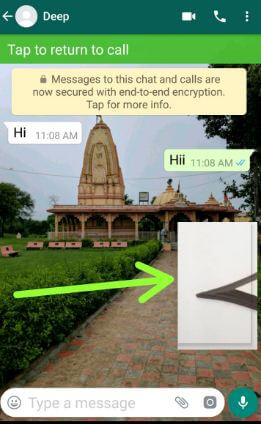
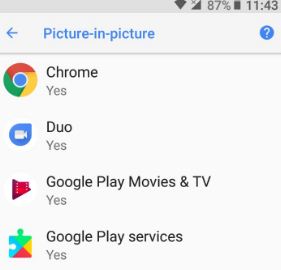
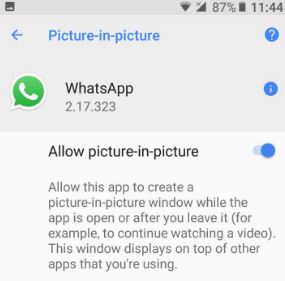
Picture-in-Picture mode

Use two apps at once in your android Oreo devices. Watch YouTube videos while chatting on Facebook or WhatsApp. This is one of the best android Oreo tricks.

Android instant apps

This Android 8.0 Oreo tips are useful when your android device has not available space and you want to install apps. Using Android instant apps feature access apps from anywhere without downloading from Google Play store. Users can access any apps with URLs also, just like a webpage.

Google Play Protect

Google Play protect is by default enable in all android devices. It will scan all play store apps to protect your device data and phone safe. It will find harmful apps and send notification about the app, sometimes directly remove apps if they find the app is risky for your device.

Background process limit

This is one of the best android 8.0 Oreo tips to save battery life on Android 8.0 Oreo. It will help to minimize the background process in the apps when not used. Automatically limit background activity in your Android Oreo devices.

Install Unknown apps

In android 8.0 Oreo devices, you will manually give permission to install a third-party application from several sources.

Autofill API

This is one of the best time saving Android 8.0 Oreo tips and tricks. Log in your any account or app without entering a password, just give permission to apps want to log in. Autofill remembers your login and password details.

Notification dots

This Android Oreo trick is helpful to see how many app notifications you missed to see. You can see different color notification dots in apps. Just press the notification dots to see what’s new in the notification.

Don’t Miss Android Oreo Tips and Tricks:

End the list of most useful Android 8.0 Oreo tips and tricks. If you have any handy android Oreo tips we missed, share with us in below comment box. Stay connected with us for the latest Android Oreo tips.

Fix Battery Draining Issue on Android 8.1 Oreo

Annoying of Android Oreo battery life problems? Here’s the solution to fix battery drain issue on Android 8.1 Oreo devices such as Pixel, Pixel XL, Nexus 6P, Nexus 5X, and other supported devices. There are several reasons to reduce battery life in your Android Oreo devices including App usage data, running background apps, live wallpaper & screen saver, Picture-in-picture mode, turn on the ambient display, and more.

Most of all devices facing battery life problems with the latest software update. To extend battery life on Android 8.0 Oreo, you will use background process limit, disable app background data individually, battery optimization, and enable battery saver in your devices. Try the below-given troubleshooting steps to save battery on Android Oreo 8.0 and 8.1.

Read Also:

How to Fix Battery Drain Issue on Android 8.0/8.1 Oreo

Follow the below-given tips to fix the Android 8.0 Oreo battery drain issue in your Nexus 6P, Nexus 5X, Pixel, and Pixel XL devices.

Manage Battery Usage on Your Android Oreo

You can see the usage of battery by individual apps using the below settings.

Fix battery drain issue on android 8.0 Oreo


Settings > Battery > More > Show full device usage

Now find the app that drains more battery and disable app background activity to save battery life on Android 8.0.

Turn Off Ambient Display

Ambient display function is useful to see a notification on your device lock screen without touch your phone. It will automatically wake up when any notifications received.

Turn off ambient display on android 8.0 Oreo

Settings > Display > Advanced > Ambient display

Enable Battery Saver Mode

Battery saver mode uses low power because it limits device functions such as reduce Android Oreo’s performance, limits vibration, GPS, and most background data. Also not sync app, email, messages unless you open.

Turn on battery saver on android O to fix battery drain issue

Settings > Battery > Power management > Toggle on “Battery saver”

You can also enable show battery percentage on Android 8.0 Oreo using below settings.

Settings > Battery > Power management > Enable battery percentage

Reduce Screen Time-out Time

You can control how long your android device stays awake when not in use. After a set time, your device screen turns off. To fix the Android 8.0 battery draining issue, choose 15 seconds/30 seconds.

Set display screen time out time to improve battery life on android O

Settings > Display > Advanced > Sleep

Background Data Limits to Fix Battery Drain Issue on Android 8.0 Oreo

Background data limit is one of the most useful features to allow force stop individual app background limits. It will automatically limit background data in your device and improve Android 8.0 Oreo battery life.

Clear the App Cache

Find the apps that use more data using the above given first method and clear app cache and its files to save battery life.

Clear cache on android Oreo 8.0

Settings > Storage > Other apps > Tap app want to clear the cache > Clear cache

Factory Reset Android 8.0 Oreo

It will erase all your Android data from your device internal storage including Google account, system & app data, photos, music, downloaded apps, and more. So before factory data reset Android, back up & restore Android phone data.

Settings > System > Reset > Factory data reset > Reset phone > Erase everything

And that’s all. End the list of the possible solutions to fix the battery drain issue on Android 8.0 Oreo devices. Do you have any alternative tips to fix the Android Oreo battery life issue? Share with us in the below comment box.

How to recover deleted photo from android phone

Accidentally deleted photos from android phone or tablet. There are several ways to recover deleted photo from android phone using Google Photo app, data recovery tool, Gmail account and various android photo recovery software. One of the simple and easy tricks to restore deleted photos and videos from android devices using Google Photo app.

There are various reasons to deleted photos & videos such as ROM flash, virus infected, corrupted SD card etc. You can also backup deleted photos from memory card and internal storage. Using USB debugging, recover lost photos from android phone. Check out below given two methods to recover deleted photo from android phone using app.

Read This: How to recover deleted WhatsApp chat on android phone

How to recover deleted photo from android phone using app

In this tutorial, I will show you two methods to retrieve lost photos and videos from android SD card, internal memory and other device storage. This tips definitely (100% working) backup and restore your lost photos and videos in your android phone.

1st Method: Recover deleted photo from android phone using app

If in your android phone or tablet turn on back up & sync, you can recover deleted photos and videos using Google photo app in your android device such as Pixel, Pixel XL, Samsung galaxy S7 & galaxy S7 edge, galaxy S8, galaxy S8 plus etc. All deleted photos or videos stored in trash for 60 days.

Restore deleted photos and videos using Google Photo app in android Nougat, marshmallow etc.

Step 1: Open Google Photo app in your android phone or tablet

Tap on more in Google Photo app in your android device

Step 2: Tap on three horizontal menu from top of the left side corner

Tap on Bin to see accidently deleted photos and videos on android

Step 3: Tap on Bin

Here you can see deleted photos and videos in your android device.

Step 4: Select photo or video you want to recover from your device (Show below image)

Restore deleted picture from android phone using Google Photo app

Step 5:  Tap on restore

Now selected photos or videos will be restored to your android phone or tablet device. You can find it under Google photo app. It’s very easy to recover deleted photo from android phone using Google Photo app.

2nd Method: Restore deleted picture from android phone using DiskDigger app

Step 1: First of all download DiskDigger photo recovery app from Google Play store in your android devices

Start basic photo scan to restore photos on android device

Step 2: Open app and touch start basic photo scan

It will scan deleted photos in your android phone or tablet. You can see list of accidentally deleted photos.

Scan recover files on android phone

When scan completed you can see this type of message: DiskDigger has found 2731 recoverable files

Restore deleted photos and videos on android using android app

Step 3: Select photos want to recover & tap on Recover

Here you will see three options to save deleted files such as Email, Dropbox, Google Drive etc. Also save photos to custom location or upload files to an FTP server.

Recover deleted photo from android phone using app

Step 4: Choose from above given options

And that’s all. Are you satisfied with our solutions? Do you have any other tips to recover deleted photo from android phone using app? Share with us in below comment box.

How to enable multi window mode on Samsung Galaxy Note 8

Have you ever used two apps at a same time on your galaxy Note 5 / Note 8? Let see how to use split screen view on galaxy Note 8 and Note 8. It’s quite easy to enable multi window mode on Samsung galaxy Note 8. Using split screen view, you can use two apps at same time in your galaxy note devices such as watching YouTube videos or movies and chat with your friends or facebook or WhatsApp. This is one of the perfect features to multitasking in your galaxy Note 8.

Samsung galaxy S8 Note comes with 6.3-inch infinity display with AMOLED touchscreen. So you can enjoy more entertainment such as playing games, watching movies or videos and more. Not all android applications supported this multi window or split screen feature. If you found app which not supported, you can see this message on screen: app may not work with split screen. Follow below given step by step guide to enable multi window mode on Samsung Galaxy Note 8.

Read This:

Fix Galaxy S8 and Galaxy S8 Split screen problem

Enable game launcher on Samsung galaxy S8

How to enable multi window mode on Samsung Galaxy Note 8

enable multi window mode on Samsung Galaxy Note 8

In daily routing we open various apps and these opened apps see on recent app screen in devices.

Step 1: Tap Recent apps button in your galaxy Note 8 and other devices

A list of recently opened apps view in your device screen.

Step 2: Tap on multi-window symbol located to the top left side in app window want to use as split screen

Now this app will open in the upper-half of the screen in your device.

Step 3: Select other app from lower-half of the screen to use both apps same time in your galaxy note 8

Now your Samsung galaxy Note 8 device is running multi window mode and you can use two apps at same time to quickly complete your task and save your time.

You can also resize Window size in your galaxy Note 8 and other devices. While use split screen on galaxy Note 8, touch on middle of both app and drag slider to up or down to resize window size in your Samsung galaxy devices.

Remember only multi-window icon show app supported split screen view in any Samsung galaxy devices. So can’t annoying if some android apps not use split screen.

That’s all. Do let us know you liked this tutorial to enable multi window mode on Samsung Galaxy Note 8. Let us know you thoughts in the below comment box. For more such smart and latest android tips, visit wordpress-221392-673273.cloudwaysapps.com

How to Enable or Disable Google Assistant on Google Pixel 6 Pro, Pixel 6, Pixel 6a, Pixel 5, Pixel 5a (5G), Pixel 4a (5G), Pixel 4 XL, and Pixel 4

Do you want to turn off Google Assistant on Google Pixel permanently devices? Here’s how to enable or disable Google Assistant on Google Pixel 6 Pro, Pixel 6, Pixel 6a 5G, Pixel 5, Pixel 5a (5G), Pixel 4a (5G), Pixel 4 XL, and Pixel 4. Sometimes users are irritated by Google Assistant when it does not understand their voice or suggestions. If you don’t want to turn off Google Assistant on Android or Pixels, you can change the default assistant to Alexa or Cortana. Google Assistant is helpful for quickly finding answers, searching & find a nearby location, making a phone call & send a message without typing, setting a reminder, translating text, and more useful features help in daily life.

How do I Turn Off Google Assistant Google Pixels (Android 12)?

There are different ways to disable Google Assistant on Android phones (Android 12 and Android 11).

How to Turn Off Google Assistant on Pixel Using Google App

Step 1: Swipe up from the bottom to access the app drawer and tap on Google App.

Tap profile icon on Google app in Pixels

Step 2: Tap the Profile icon in the upper right corner.

Open Google Assistant settings on Google App in Pixels

Step 3: Tap on Settings.

Turn Off Google Assistant Permanently on Google Pixels

Step 4: Tap on Google Assistant.

Open General settings in Google Assistant Pixels

Step 5: Scroll down and tap on General.

How to Enable or Disable Google Assistant on Pixels

Step 6: Toggle off the Google Assistant.

This pop-up view: Turn off Google Assistant?

How to Enable or Disable Google Assistant on Pixel 6 Pro, Pixel 6, Pixel 5, Pixel 5a (5G), Pixel 4a (5G)

Step 7: Tap the TURN OFF.

How to Turn Off Google Assistant using Google Feed on Google Pixel (Stock Android Phones)

Step 1: Swipe the screen right side to open the Google feed.

How to Turn Off Google Assistant using Google Feed on Stock Android

Step 2: Tap on the Profile icon at the top right corner.

Turn off Google Assistant on Google Pixel permanently

Step 3: Tap on Settings.

Step 4: Follow the above-given method in Steps 4 to 7.

How to Disable Google Assistant on Pixel Using Google Home App

Step 1: Swipe up from the bottom to open the app drawer and tap on the Google Home App.

Open Google home app to turn off assistant on Google Pixels

Step 2: Tap the Profile icon at the top right corner.

Change Google assistant settings on Google Pixels

Step 3: Tap the Assistant Settings.

Step 4: Follow the above-given 1st method Steps 5 to 7.

How to Turn Off Google Assistant using Phone’s Settings

How to Turn Off Google Assistant using Phone's Settings

Settings > Google > Settings for Google apps > Search, Assistant & Voice > Google assistant > General in All settings section > Toggle off Google Assistant

How to Change Default Voice Assistant on Pixels (Android 12) – Amazon Alexa/Cortana

By default Google Assistant is set as the default voice assistant on your Google Pixels. Click here to set Amazon Alexa as the default voice assistant on your Pixels devices.

How to Enable Google Assistant in Pixel (Android 12 Stock OS)

Step 1: Swipe from the left or right corner on the screen or Tap the Google Mic symbol on the Google search bar.

Turn On Google Assistant on Pixels

Step 2: Tap the TURN ON.

Now, activate Google assistant in your Pixels.

All Pixel Devices (Running Android 10/Android 11)

How to Disable Google Assistant on Pixel Devices

Tap on the Assistant icon at the bottom Google search bar > Tap Three horizontal lines at the bottom right corner > Tap profile icon > Scroll down and tap on General under the all settings section > Toggle off “Google Assistant ” > Turn off.

Don’t Miss:

Turn off Google Assistant on Pixel using Google Assistant Settings – Older Stock Android

Step 1: Touch and hold the home button to launch Google Assistant on your Pixel.

Launch Google Assistant on Pixel to tap & hold home screen

Step 2: Tap on Three vertical dots at the top right corner.

Settings in Google Assistant launch on android

Step 3: Tap on Settings.

Here you can view your account details and Google Assistant settings.

Tap on Pixel to disable Google Assistant in android

Step 4: Tap on your Device name under the devices section.

Various assistant settings include Google Assistant, screen context, Assistant language, OK Google detection, and voice settings.

Enable Google Assistant on your android phone

Currently, enabled Google Assistant on Android phones.

Step 5: Toggle off Google Assistant on your Pixel & other Android devices.

Launch the Google Assistant to tap & hold the home button and check Google Assistant off. You can see the below screen.

disable Google Assistant on Pixel XL phone

Tap on turn on to again use Google Assistant on your Android devices.

How to Disable Google Assistant on Pixel using Google News Feed

Step 1: Unlock your Pixel device and slide the screen right from the home screen.

Disable Google Assistant on android using Google News feed

Step 2: Tap on Three horizontal lines from the top left corner.

Step 3: Tap on Settings.

Tap on settings under Google Assistant section in pixel

Step 4: Tap on Settings under the Google Assistant section.

Step 5: Tap on the Device name you want to turn off assistant.

Step 6: Toggle off Google Assistant.

Turn off Google Assistant on Pixel Using Phone Settings 

Settings > Personal > Google > Services > Search > Google Assistant > Settings > Devices > Pixel/Android > Turn off Google Assistant  

Frequently Asked Question:

How do I Disable Google Assistant from Power Button Pixel 6?

To disable Google Assistant from the power button in Google Pixel 6, go to Settings > System > Gestures > Press and hold power button > Toggle off Hold for Assistant. You can see the power menu in your Pixel when you long-press the power button.

How do I Turn Off Hey Google Pixel 5?

To turn off Hey Google in your Pixel 5 and other Pixels (Running Android 12), open the Google apps > Profile icon at the top right corner > Settings > Google assistant > Hey Google & voice match > Toggle off Hey Google or OK Google.

How do I Turn Off Voice Assistant (Conversation Voice) in Google Pixel 6?

How do I Turn Off Voice Assistant in Google Pixel 6 and Pixel 6 Pro

If you’re annoyed by the Assistant voice, you can change it or turn it off using this setting. Go to open the Google apps > Profile icon at the top right corner > Settings > Google assistant > Assistant voice and sounds > Phone in speech output section > Choose None (Unless hands-free). Now, you can’t hear Google Assistant voice even launching on your Pixels.

And that’s it. I hope the above-given tips are helpful to disable Google Assistant on Pixel and Pixel XL. If you have any problems, let us know in below comment box. We will respond as soon as possible.

How to enter recovery mode on Samsung galaxy S8 plus

If you can’t update or restore your galaxy S8 device, enter recovery mode on Samsung galaxy S8 and galaxy S8 plus devices. There are several situations in your device to use recovery mode on galaxy S8 plus such as galaxy S8 screen is stuck for several minutes, black screen, touchscreen not working and more.

It’s quite easy to boot Samsung Galaxy S8 into recovery mode. In you galaxy S8 and galaxy S8 plus device slightly changed to use recovery mode, press the Bixby key instead of pressing the home button. You can also use custom recovery to flash on your galaxy S8 and galaxy S8 plus using various tools. Follow below given step by step guide to enter recovery mode on Samsung galaxy S8 and galaxy S8 plus.

Read This: Fix no LTE connection after update Galaxy S8 and Galaxy S8 plus

How to enter recovery mode on Samsung galaxy S8 and galaxy S8 plus

Step 1: Make sure your Samsung galaxy S8 and galaxy S8 plus phone is powered off

Step 2: Press & hold the volume up button, Bixby button and the power button at the same time until the phone vibrate.

You can view Android system recovery screen on galaxy S8 and galaxy S8 plus. By default start button show on your galaxy S8

Step 3: Press the volume down button until view recovery mode

Enter recovery mode on Samsung galaxy S8 plus

In galaxy S8 and galaxy S8 plus recovery mode various options includes such as reboot system, reboot to bootloader, wipe data / factory reset, Apply update from ADB, Apply from external storage, Wipe cache partition, View recovery log and power off.

Step 4: Press volume keys to navigate your option and select an option with power key

If you want to make your galaxy S8 device looks like a new phone, wipe cache partition galaxy S8 and galaxy S8 plus.

Factory reset your galaxy S8 and galaxy S8 plus when powered off:

If your galaxy S8 and galaxy S8 plus devices have any issues, you will try below given methods to fix it. But before hard reset your galaxy S8 plus, backup and restore your galaxy S8 phone data.

There are two methods to factory data reset your galaxy S8 plus. Check out below given method.

1st Method: factory reset your galaxy S8 phone

Step 1: Turn off your galaxy S8 and galaxy S8 plus device

Step 2: Press and hold the power button, volume up buttons and Bixby key at same time until phone turn on and see android recovery screen

Step 3: Press volume down button until wipe data / factory reset view, after that press power button

Step 4: Press volume down button until Yes select then press power button to start reset process on galaxy S8 and galaxy S8 plus

Step 5: Press volume down button up to reboot system now and press power button

It will fix your Samsung galaxy S8 and galaxy S8 plus issues.

2nd Method: Factory data reset Galaxy S8 using phone settings

Step 1: Go to settings in your galaxy S8

Step 2: Tap on backup and reset

Here you can backup your important data.

Step 3: Tap on factory data reset

Step 4: Tap on reset

Unlock the screen to enter password or pattern lock.

Step 5: Touch delete all

That’s all.

I hope this tips helps to enter recovery mode on Samsung galaxy S8 and galaxy S8 plus. If you are facing any issue, let us know in below comment box. We will respond as soon as possible.