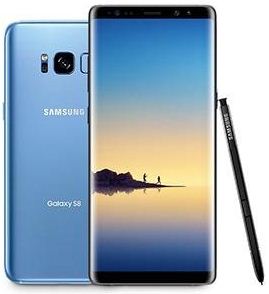
How to record slow motion video on Galaxy Note 8

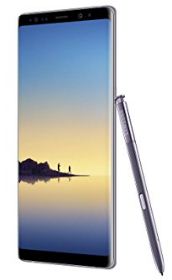
Samsung galaxy Note 8 comes with awesome features including 6.3 inch screen display, more RAM (6 GB RAM), S pen for live messages & make instant notes, sport dual camera, app pairing and more. But in this tutorial, I will show you step by step guide to record slow motion video on Galaxy Note 8. In slow motion video, slow down your running action and it looks stunning after completed video.

This Samsung galaxy Note 8 dual rear camera has optical image stabilization to take extraordinary photos and videos. Samsung galaxy Note 8 camera is support 2x optical zoom to take crisp and crystal clear photos. Also adjust background blur effect, focused on live photo and snap amazing photo even low light. You can see Food mode, Pro mode, Panorama, slow motion, hyper lapse, virtual shot and more. Check out below given step by step guide to record slow motion video on Galaxy Note 8 device.

You might like this:

How to enable multi-window mode in Samsung galaxy Note 8

10 best android 8.0 Oreo tips and tricks

How to record slow motion video on Galaxy Note 8

Step 1: Open camera app in your Samsung galaxy Note 8 devices

Step 2: Swipe down screen to open camera modes

Here you can view panorama, slow motion, Hyperlapse, Food and more options.

Step 3: Tap slow motion from list of options

Record slow motion video on Galaxy Note 8

Step 4: Press red button to record slow motion video on Galaxy Note 8

If you’re enjoy slow motion video in galaxy Note 8, capture video of flying birds, fire and water, steam train, playing games like cricket or football and more. These types of slow motion video are marvelous.

Samsung galaxy Note 8 Camera:

Pro mode: In galaxy Note 8 pro mode, you can edit white balance effect to your taken pictures.

Panorama: To use this Panorama feature moving your galaxy Note 8 camera from left to right side to capture awesome photo around you.

How to use panorama on Samsung galaxy Note 8:

Camera > camera modes > Panorama

Food mode: Put your food in the place where direct sunlight for delicious result.

And that’s all. I hope above given steps helpful to record slow motion video on Galaxy Note 8. If you have any kind of trouble, let us know in below comment box. Do you have any other Galaxy Note 8 tips want to share? Stay connected with us for latest android device tips and tricks.

How to Manage YouTube App Settings in Android

It’s quite easy to change YouTube settings on Android phones or tablets. In the YouTube app, you can upload your own YouTube videos, enable/disable notifications for new YouTube videos, limit mobile data usage, change video upload quality, and more. You will disable app notifications, disable auto-play YouTube video, change YouTube channel name, change the content location, and enable/disable restrict mode in Android phone.

Annoying of YouTube app notifications in android device? You will get notification from your subscribing channel after they uploaded new videos. Also, watch offline YouTube videos on Android devices. Check out below given several ideas to manage YouTube settings in Android Phones or tablets.

Read Also: How to play YouTube video in background in android phone

5 Handy Tips to Manage YouTube Settings in Android Phone or Tablet

Check out below given different settings for your YouTube App.

How to limit YouTube mobile data usage

It will limit mobile data usage in the YouTube app and set only stream HD video on the Wi-Fi network.

Step 1: Open the YouTube app in your android devices.

Step 2: Tap the Profile icon from the top right side corner.

Step 3: Tap Settings.

Step 4: Tap General.

Limit mobile data usage in YouTube app

Step 5: Toggle on limit mobile data usage.

How to manage YouTube Notifications

You can disable YouTube app notifications and manage YouTube settings in android such as notification sounds, YouTube subscription via push only / Email only or push and Email, activity on YouTube channel, recommended your favorite channel video, and more.

Step 1: Open the YouTube app.

Step 2: Tap the Profile icon from the top right side corner.

Step 3: Tap Settings.

Manage YouTube settings in android device

Step 4: Tap Notifications.

Disable YouTube app notifications in android devices

Step 5: Toggle off “Notifying on this device“.

How to Change YouTube Subscriptions Notification

YouTube subscriptions notify via push and email

YouTube > Profile icon > Settings > Notifications > Subscriptions: Notify me via > Push & email/push only/Email only

How to Disable YouTube Auto-play Videos

YouTube autoplay feature will automatically play the next YouTube videos in your android phone or tablet devices. You can disable auto-play video any time in your android devices using the below settings.

Step 1: Open the YouTube app.

Step 2: Tap the Profile icon from the top right side corner.

Step 3: Tap Settings.

Step 4: Tap in General.

Disable YouTube autoplay video in android phone

Step 5: Toggle off Autoplay.

How to Enable/Disable Restrict Mode

Restrict mode hides inappropriate content videos. Not 100% accurate, but hide the most inappropriate content.

Step 1: Open the YouTube app in Android phone.

Step 2: Tap Profile icon from the top right side corner.

Step 3: Tap Settings.

Step 4: Tap General.

By default disable restrict mode in your Android devices.

Enable restricted mode in YouTube app android device

Step 5: Toggle on Restrict mode.

How to Change Upload Network Preferences

Set YouTube upload network preferences only when your android device connected with the Wi-Fi network.

Step 1: Open the YouTube app.

Step 2: Tap the Profile icon from the top right side corner.

Step 3: Tap Settings.

Step 4: Tap General.

Step 5: Tap Uploads.

Change upload network preferences in YouTube app

Step 6: Choose Only when on Wi-Fi.

And that’s all. We hope it makes clear how to manage YouTube settings in Android phones or tablets. If you have any other YouTube tips we missed above, share with us in below comment box.

How to Reduce Mobile Data Usage on Android Oreo 8/8.1

Want to minimize data usage on Android Oreo? Let see some handy tips to reduce mobile data usage on Android Oreo 8.0/8.1 devices. Most of all cellular data lost due to background app services, location services, poor Wi-Fi connection, turned on auto-sync, auto-update apps, and more. Facebook and Instagram are some of the most consuming mobile data usage apps. You will disable auto-downloading apps and apps update settings in Android 8.0 Oreo. If possible then always try to set update apps and system software Wi-Fi only to reduce cellular data in Android 8.0 Oreo. First of all, show which apps use more mobile data usage in your Android 8.0 Oreo devices. After found that particular app, disable app background data in Android 8.0 Oreo to save mobile data.

Read Also:

Handy Tips to Reduce Mobile Data Usage on Android Oreo 8.0

Check out below given methods to manage mobile data usage in Oreo.

Turn off Mobile Data/Cellular Data When Not Use

Turn off cellular data when not use in your android 8.0 device.

Step 1: Go to Settings in your Android Oreo.

Step 2: Tap Network & Internet.

Step 3: Tap Data usage.

Reduce mobile data usage on android Oreo 8.0 device

Step 4: Disable mobile data usage in Oreo.

You can enable data saver in Android 8.0 Oreo to reduce data usage and limit the app’s background activity in your android devices. Also, allow the selected app to use mobile data in your Android 8.0 Oreo devices.

Restrict Background Data on Android 8

Some of the applications use mobile data in the background while not use. To find the app that uses more data and disable background data in your android devices.

Step 1: Go to Settings in the Oreo device.

Step 2: Tap Apps & notifications.

Step 3: Tap App wants to disable background data.

Step 4: Tap Data usage.

Disable app background data in android 8.0 Oreo

By default enabled background data, it means in background app using mobile data while not use the app.

Step 5: Disable background data.

Turn Off Auto-Sync in Oreo

Step 1: Go to Settings.

Step 2: Tap on Users & accounts.

Step 3: Scroll down up to the end of the page and Toggle off “Automatically sync data“.

Disable Location Services to Reduce Data Usage on Android Oreo

Step 1: Go to Settings in Android 8.0.

Step 2: Tap Security & location.

Step 3: Tap Location in the privacy section.

Turn off location services in android 8.0 Oreo

Step 4: Disable location services.

You can individually enable/disable location permission in Android Oreo 8.0 devices.

Disable Auto-download & Apps Updates Using Cellular Data

Step 1: Open Play Store in Android 8.0 Oreo.

Step 2: Tap Three horizontal lines.

Step 3: Tap Settings.

Step 4: Tap Auto-update apps.

Disable Auto-update apps in android Oreo to reduce cellular data

Step 5: Choose auto-update apps over Wi-Fi only.

Disable Auto-Download WhatsApp When Using Mobile Data

Reduce WhatsApp mobile data usage in Oreo

WhatsApp > More > Settings > Data usage > When using mobile data > Uncheck box if checked

Set low data usage during a WhatsApp call in Android Oreo:

WhatsApp > More > Settings > Data usage > Low data usage

Check out this: Reduce mobile data usage on Facebook on any android device

Use less cellular data on Instagram on Android

When setting less cellular data on Instagram, photos and videos may take a longer time to load or open in your Android devices.

Reduce cellular data usage in Instagram

Instagram > Profile icon > More > Settings > Cellular data use > Use less data

Change photo upload quality in Instagram

Instagram > Profile icon > More > Settings > Upload quality > Basic/Normal

And that’s all. End the list of possible solutions to reduce mobile data usage on Android Oreo 8.0 devices. Do you have any other tips you want to share? Let us know in below comment box. Stay connected with us for latest Android 8.0 tips and tricks.

How to Activate Android Oreo Easter Egg

Google announced the latest version Android 8.0 OS called Oreo. There are several new added Android Oreo features compare to Nougat 7.1.2 OS. In all previous versions, you can see the hidden Android easter egg game in your devices. But in Android Oreo, you can see the Octopus Easter egg. It’s almost the same as previous versions to activate the Android Oreo Easter egg. In Android O developer preview 4, new Easter egg introduces and looks like Octopus.

This Android 8.0 Oreo OTA update getting in Google Pixel and Pixel XL. In Lollipop, Marshmallow, and Nougat devices, you can play this hidden Easter egg game.

Read Also:

How to Activate Android Oreo Easter Egg in Google Pixel 2 and Pixel 2 XL

Step 1: Go to Settings in your Android Oreo 8.0 devices.

Step 2: Tap System.

Various Android Oreo system settings view including Language & input, Date & time, back up Oreo data, developer options, system UI tuner, system updates, and about phone.

Step 3: Tap About phone.

Step 4: Quickly tap 3-5 times in the Android version.

You will see the Android O logo on your device screen.

Android Oreo Logo

Step 5: Again quickly tap 3-5 times and long-press Android Oreo logo.

Activate Android Oreo Easter egg game

Step 6: Now launch and use the Android Oreo Easter egg called “Octopus”.

Drag the Octopus around the screen and enjoy the Octopus Easter egg in your Android 8.0 Oreo devices. You can see Octopus appears floating in your device screen. What are you thinking about this android Oreo Octopus Easter egg? Do you enjoy it?

Other hidden features in android Oreo OS are developer options, change app icon shape, background process limit, System UI tuner, and more. To change icon shape in Android 8.0 Oreo, make sure to enable developer options in your Android 8.0 devices.

And that’s all. We hope this makes it clear how to activate Android Oreo Easter egg in your Pixel, Pixel XL, and other supported Oreo devices. If you have any trouble, we invite you to leave comments in the below-given section. Share your thoughts related to the Android Oreo Easter egg in the comment. Stay connected with us for the latest Android 8.0 Oreo tips and tricks.

How to Set a Custom Ringtone Android 13, 12, 11, 10

Do you want to set a custom ringtone on your Android phones and tablets? Here’s how to set custom ringtone Android 13, 12, 11, 10, and older Android devices. You can add custom ringtones to your phone’s ringtone list and set it as the default ringtone. Download the songs, mp3 tones, or other audio files to your phone to change the ringtone on your Android phone. Also, set specific ringtones for contacts on Android devices. If you can’t add third-party downloaded songs to your ringtone list, you can use the file manager app to add that music file to your phone ringtone list.

Read More: How to Set a Custom Ringtone for Samsung Galaxy Tab A

How to Set a Custom Ringtone on Android 

Different Android devices have slightly different settings to set a custom ringtone.

Note: The steps may vary slightly depending on the specific version of Android running on your device.

Set a Custom Ringtone Android 13, Android 12, Android 11 Stock OS (Google Pixels)

Step 1: Go to Settings.

Open Sound and Vibration Settings to change your Ringtone Android

Step 2: Scroll down and tap Sound & Vibration.

How to Assign a Ringtone to Specific Contacts Android using Sound and vibration settings

Step 3: Tap the Phone ringtone.

You can see different categories of free ringtones for Android, like Natural elements, Classical harmonies, Material adventures, etc.

Set a Custom Ringtone Android Phone

Step 4: Tap My Sounds.

Add a Custom Ringtone in Android 

Step 5: Tap the + icon at the bottom right corner.

Set Android Custom Ringtone

Step 6: Choose an Audio file (MP3 or Songs) from your phone.

How to Set a Custom Ringtone Android 13, 12, 11, 10

Step 7: Select a ringtone and tap Save at the top right corner.

If you can’t manually add custom ringtones to your phone ringtone, follow this instruction to set a custom ringtone on your phone.

Set Android Custom Ringtone (Android 10)

Settings > Sound > Advanced > Phone ringtone > My sounds > Choose from available ringtones or tap the + icon to add a custom ringtone > Select the ringtone from the list > Save at the top right corner

Read More: How to Change Ringtone on Samsung Galaxy

For Android 8.1 (Oreo) and Android 9 (Pie)

You can add your ringtones, notification sound, and other custom ringtones to your Android contacts.

Step 1: Go to Settings on your Android devices.

Step 2: Tap Sound.

Set ringtone in android Oreo 8.0 device

Step 3: Tap the Phone ringtone.

Set custom ringtone in android Oreo 8.0

Step 4: Tap + Add ringtone.

Step 5: Select the Custom ringtone you want to add.

Step 6: Choose added ringtone & tap OK.

Now set the ringtone on your Android phone.

How to Set a Custom Ringtone Samsung Galaxy

Step 1: Go to Settings.

Step 2: Tap on Sound.

Step 3: Tap the Ringtone.

Step 4: Tap the + icon at the top right corner.

Step 5: Choose a Ringtone from your Samsung (Select the ringtone from Tracks, Albums, Artists, or Folders).

Step 6: Select a ringtone and tap Done in the upper right corner.

How to Set Ringtones for Contacts on Android Stock OS

Step 1: Open the Contact app on your phone.

Step 2: Tap Any contact you want to set a ringtone.

Step 3: Tap Three vertical dots (More) at the top right corner.

How to Set Ringtones for Contacts on Android Stock OS

Step 4: Tap Set ringtone.

Step 5: Tap Default category sound or My sounds to add a third-party ringtone.

Step 6: Add a Ringtone from the download tones or music file.

Step 7: Select a ringtone and tap Save at the top right corner.

Read More: How to Set Individual Ringtones For Contacts on Android

Set a Custom Notification Sound on Android

Set a Custom Notification Sound on Android

Settings > Sound & vibration > Default notification sound > My sounds > + icon at the bottom right corner > Select an audio file from your phone > Choose a ringtone > Save at the upper right corner.

Change Alarm Sound on Android

Change Alarm Sound on Android

Settings > Sound > Default alarm sound > My sounds > + icon at the bottom right corner > Select an audio file from your phone > Choose a ringtone > Save at the upper right corner.

And that’s all. I hope you enjoy this tip to set custom ringtones on Android devices. Do you have any suggestions want to share with us? If you have any trouble, let us know in your below comment box.

Related:

How to Set or Change Default Apps in Android 8.0

By default set apps in Android 8 Oreo and other devices. In Android 8.0 OS, system settings totally change compare to previous Nougat 7.1.2 version. Here I will show you step by step process to change default apps in android Oreo 8.0. You can change the SMS app, Phone app, browser app, phone app, music app, calendar app, and home app in your Android Oreo devices. If you don’t like default selected apps, use third-party apps. This set default apps options find under the apps & notification section in your Android 8 OS. You can includes Assist & voice input and opening links section. Also, change app notification settings in your Oreo devices.

Read Also:

How to Change Default Apps in Android Oreo 8.0

Step 1: Go to Settings in your Android Oreo devices.

Step 2: Tap Apps & notifications.

Tap advanced to open default apps in Oreo

Step 3: Tap Advanced.

Default apps in android Oreo 8.0

Step 4: Tap Default apps.

change default apps in android Oreo 8.0

Here, you can see browser app, phone app, home app, and message app. By default set chrome as a browser app, Pixel launcher as a home app, phone as a phone app, and Google messages as an SMS app. Different Android devices have slightly different settings.

Change Default Message App in Android Oreo 8

Open messages app > Three vertical lines > Settings > Default SMS app > Choose from list

In Android O’s default apps settings, also includes Assist & voice input and opening links options. This assistant app can useful to enhanced Google services. Some apps support both launcher and voice input services. And another option is opening links, you can enable/disable instant app using this setting.

How to Enable/Disable Instant App in Android 8 Oreo

Settings > Apps & notifications > Advanced > default apps > Opening links > Instant apps

Enable or Disable Notification Dots in Android 8 Oreo

Settings > Apps & notifications > App info > Tap app > App notifications > Enable/Disable notification dots

Settings > Apps & notifications > Notifications > Allow notification dots

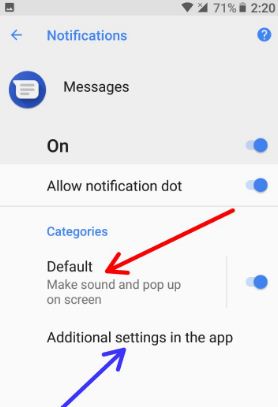
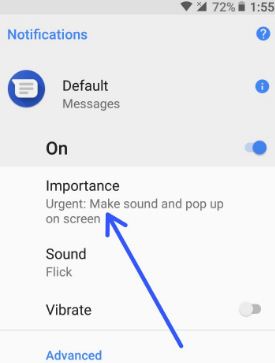
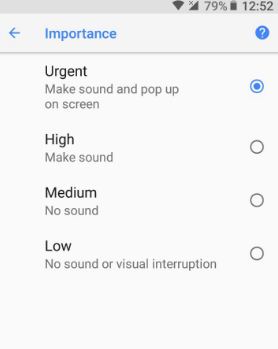
In this Android Oreo app notification setting, you can change lock screen notification content and enable blink light in Android Oreo 8.0 devices.

And that’s all about change default apps in Android Oreo 8.0 devices. If you have any kind of trouble, let us know in below comment box. We will respond as soon as possible. Stay connected with us for the latest Android 8.0 Oreo tips and tricks.