How to change background process limit in android 8.1

Running background activity in your android device is consuming more battery and sometimes slow down your android Oreo devices. To improve your Oreo performance, limit on what apps can work while running in the background. Here’s guide to change background process limit in android 8.1 and 8.0 devices such as Google Pixel XL, Pixel 2, Pixel 2 XL, Nexus 6P/5X and more.

You can change android O background limitation process using developer mode settings. By default set standard limit as background process limit in android Oreo devices. If you don’t want to set background execution limit, choose No background processes in Oreo. Follow below given step by step guide to change background process limit in android 8.1 and 8.0 Oreo devices.

Read:

How to use block visual disturbance on Google Pixel

How to use notification channel in android Oreo

How to change background process limit in android 8.1 and 8.0

First of all enable developer option in your android Oreo using below steps.

Step 1: Go to settings in your Oreo devices

Step 2: Tap on system

Step 3: Tap about phone

Step 4: Scroll down up to end of page and tap on Build number 7 times

You’ll see this message on screen: You are now a developer!

Let see steps to change android O background execution limit in your android phone.

Step 1: Go to settings

Step 2: Tap system

Step 3: Tap developer options

Several sections are available in your Oreo developer mode settings.

Android O background limitations

Step 4: Find apps section and tap on Background process limit option

By default set standard limit in your Oreo device.

How to change background process limit in android 8.1

Step 5: Choose from No background process/ At most, 1 process/ At most, 2 processes/ At most, 3 processes/ At most, 4 processes

It’s quite easy to set background process limitation in android Oreo devices. In developer mode, you can also see other useful options including USB debugging, inactive apps, memory used by apps, OEM unlocking, background running services, debug app, logger buffer size, windows animation scale, background check and more.

And that’s all. Did you find above tutorial helpful to change background process limit in android 8.1 Oreo? If you have any kind of trouble, tell us in below comment box. Don’t forget to check out our others android 8.1 tips.

How to enable full screen apps on LG V30

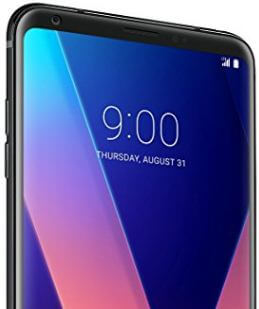
Wan to enjoy full screen in your LG V30 device? LG V30 device has a 6.0 inch OLED display with curved edges. You’ll enjoy games and movies in your device. Not all apps supported this full screen mode, several apps facing issue of running on the full screen on LG V30. You’ll enable full screen apps on LG V30 using App scaling.

You can adjust app scaling to how apps displayed in different aspect ratio such as 18:9/16:9/16.7:9 in your LG V30 device. Just select app scaling to adjust the screen size of apps in LG V30 device. Have you ever used full screen on YouTube in LG V30? Follow below given step by step guide to enable full screen apps on LG V30 device.

Also Read:

How to customize floating bar in LG V30

How to set up face recognition on LG V30

How to enable full screen apps on LG V30

How to enable full screen apps on LG V30

Step 1: Scroll down notification panel and tap on settings gear icon

Step 2: Tap on display settings

Step 3: Tap on App scaling under appearance section

Here you’ll see list of apps with screen size. Adjust the screen size of apps in LG V30. After set screen size, when again open app, it will changed in the new set size. By default most of all apps selected as full screen apps (18:9).

Step 4: Choose Full screen (18:9)

You’ll also choose from Compatibility (16:9) or Standard (16.7:9).

Step 5: Tap on OK

Now enjoy video and movies on your LG V30 full screen. Let see other useful LG V30 settings.

How to customize navigation buttons on LG V30

Step 1: Go to settings in your LG V30

Step 2: Tap on home touch buttons under display settings

Step 3: Tap on button combination

Now add new buttons or change the existing buttons places you want to change in your LG V30.

Step 4: Drag an icon to change home touch buttons in LG V30

You can maximum add up to 4 home touch buttons in your phone. Also change background color of navigation buttons on LG V30 device using below settings.

Settings > display > home touch buttons > color > Choose color > OK

Do you still have questions about enable full screen apps on LG V30 smartphone? Feel free to leave them in below comment section. What are your favorite features of LG V30?

How to Disable Apps Using Battery Notifications on Android Oreo 8.0/8.1

Irritated by constant battery usage notifications on Android Oreo 8.0? Here’s how to enable or disable android apps using battery notifications on Oreo devices.  In the latest Oreo device when the app uses more battery such as YouTube, Facebook, etc. You’ll see a notification about data in your status bar. So you will fix constant battery usage notification in Oreo. Just find apps consuming more battery life & running in the background and turn off it. Also, disable persistent notification in android 8.1 Oreo devices.

Android Oreo has several awesome features and one of them is notifications settings. In android Oreo 8.1 & 8.0, you can individually manage app notifications, change notification importance control, enable/disable display over other apps, and more. Follow the below-given step by step process to disable battery usage notification on android Oreo devices.

Read Also:

How to Disable Battery Usage Notification on Android Oreo 8.1 and 8.0

When appearing notification of app uses more battery then follow below settings in your android Oreo devices.

Disable Apps Are Using Battery Notification in Android 8.1 Oreo

Step 1: Unlock your Oreo device & swipe down the notification bar.

Step 2: Press & hold the Battery usage notification when available.

Step 3: Toggle off switch & press Done.

Now disabled battery usage notification in Oreo. You can’t see any battery usage notification on your Oreo device notification bar.

How to Enable Battery Usage Notification in Android 8.1 Oreo

Android Oreo comes with a new notification importance feature. So you can individually change notification importance control on android 8.0 Oreo app consuming battery as Urgent/High/Medium or Low.

Step 1: Go to Settings in your android 8.1 & 8.0 Oreo.

Step 2: Tap Apps & notifications.

Android 8.1 Oreo recently opened apps list

Step 3: Tap See all apps in 8.1 or App info in 8.0.

Step 4: Tap on Three vertical dots from the top right corner.

Show system apps in Android 8.1 Oreo

Step 5: Select the Show system.

Android System settings in 8.1 Oreo

Step 6: Scroll down and tap on the Android system.

Tap on app notifications in 8.1 Oreo device

Step 7: Tap App notifications.

A list of several categories is a view in android system notifications.

Disable battery usage notification on android Oreo 8.1

Step 8: Scroll down up to Apps Consuming battery under Other category section. By default disable in your android 8.1 Oreo devices.

Enable battery usage notification in android 8.1 Oreo

Step 9: Turn on apps consuming battery toggle.

Here you’ll also change notification importance control in android 8.1 Oreo. Tap on apps consuming battery to set importance level.

Set notification importance control in android Oreo app consuming battery

Step 10: Tap on Importance. By default set medium (No sound) as important in android system notifications.

Set importance notification control in 8.1 Oreo

Step 11: Choose from Urgent/High/Medium/Low.

To make sound and pop up notification on screen, choose the “Urgent“.

And that’s it. Did you find the above tutorial helpful to disable battery usage notification on android Oreo? If you have any kind of trouble, tell us in below comment box. We’ll respond as soon as possible. Don’t forget to share with others, if you found it helpful. Check out our other android 8.1 Oreo tips.

How to Disable Pop Up Notifications on Android Oreo 8

Annoying by pop up notifications on Android Oreo home screen when receiving new notifications? Sometimes more apps notifications are irritating you also. You can individually disable or stop pop up notifications on Android Oreo 8.0 and 8.1 devices. In daily routine life, we get several app notifications on screen in our devices. Different android device has slightly different settings to stop or turn off pop-up notifications on Android devices. You’ll also individually block app notifications in Android 8.0 & 8.1 Oreo if don’t appear particular app’s notifications.

Read Also:

How to Disable Pop Up Notifications of App in Android Oreo 8.1 & 8.0

Step 1: Go to Settings in your android 8.1 & 8.0 Oreo.

Step 2: Tap on Apps & notifications.

Step 3: Tap on See all apps.

Step 4: Tap on Any app you want to hide pop-up notifications.

Android 8.1 Oreo app notifications settings

Step 5: Tap on App notifications.

By default enabled app pop up notification, sound, and vibrate in your Oreo devices.

How to disable pop up notifications of app in android Oreo

Step 6: Toggle off “All interruptions”.

Now, when you receive that app notification in your Android devices. You can’t see a pop-up notification, any vibration, and sound in your device. You’ll hide pop-up notifications of any app in your devices such as Facebook, WhatsApp, YouTube, Twitter, Instagram, and more.

If you know any app want to show pop up on screen first, you can set that app importance level control as urgent in Android 8.1 Oreo using below settings.

Hide or Show App Pop Up Notification in Android 8.1 Oreo

Set app importance level control in android 8.1 Oreo

Settings > Apps & notifications > Notifications > App notifications > Tap app show pop up on screen > Tap any categories > Importance > Choose Urgent

Now whenever get notification from this app, your device makes sound and pop up on the screen. If you can’t see any notification on screen or block the app notification in Android Oreo, follow the below-given settings.

How to Block WhatsApp Notification in Android Oreo 8.1 & 8.0

How to block whatsApp notification in android Oreo

Settings > Apps & notifications > See all apps > Tap on any app you want to block > App notification > Toggle off “On”

And that’s it. Did you find the above tutorial helpful to disable pop up notifications of the app in Android Oreo? If you have any kind of problem, leave them in below comment box. Check out our other Android tips and tricks.

How to Fix Galaxy Note 8 Wireless Charging Stopped Working

Galaxy Note 8 wireless charger quickly charging your Note 8 without plugging it using a USB cable. Several users facing charging issues on Samsung Note 8. There are several reasons to Galaxy Note 8 won’t charge wirelessly such as charger fault, damage cable or adapter, thick case, and more. Here’s how to fix wireless charging not working on Samsung Galaxy Note 8.

Galaxy Note 8 has a non-removable 3300 mAh battery and Qi & PMA wireless charging pad for charging.  Sometimes Galaxy Note 8 wireless charging stopped working because of charger or wireless charger pad damaged.

Read:

How to Fix Wireless Charging Issue on Samsung Galaxy Note 8

fix wireless charging not working on Galaxy Note 8

Check out below given settings to fix the Note 8 wireless charging issue.

Restart your Galaxy Note 8

Tap & hold the power button and select the restart button to reboot your Note 8. After reboot, check to fix the issue.

Enable Fast Wireless Charging on Galaxy Note 8

Step 1: Go to Settings.

Step 2: Tap Device maintenance.

Step 3: Tap Battery.

Step 4: Tap Three vertical dots (More) at the top right corner.

Step 5: Tap Advanced settings.

Step 6: Toggle on Fast wireless charging.

Now, check your phone charge using a wireless charger.

Faulted Wireless Charger

In the market lot of wireless chargers available, check your Galaxy Note 8 with any other wireless charger. Always possible to use an original wireless charger to fix charging issues in your device.

Fit to charging Pad to fix wireless charging not working on Galaxy Note 8

Check your Note 8 perfect fit in charging Pad. Simply place your Note 8 to right on the center of it and start charging. Now, Galaxy Note 8 enables wireless charging. Make sure to charge for both pad and stand.

Remove case

We use cases to protect Note 8 from scratches, dust, and other damages. Sometimes a thick case can stop the wireless charging working. Also, slow down your device. Remove the case and check to charge your device.

Replace the Wireless charger

If none of the methods worked for you to fix galaxy Note 8 wireless charging has stopped working, find nearby Samsung store, and request a replacement if under warranty.

And that’s it. Did you find the above tutorial helpful to fix wireless charging not working on Galaxy Note 8? Do you have any other tips we missed above? Share with us in below comment box. Don’t forget to check out our other Galaxy Note 8 tips.

How to Get Pixel 2 Portrait Mode on Google Pixel, Nexus 6P & Other Android

Recently launched a new Pixel 2 Portrait mode app for other android devices. In this tutorial, I will show you how to get a Pixel 2 Portrait mode on Google Pixel, Nexus 6P, Nexus 5X, and other Non-pixel android devices. First of you’ll need to download the Pixel 2 Portrait mode app APK file in your Google Pixel and other Non-pixel devices. Senior XDA developer Charles Chow has officially found a method to use Pixel 2 portrait mode on any Android devices such as Google Pixel, Nexus 6P/5X, OnePlus 3T, Samsung Galaxy, Moto G, LG, Xiaomi Redmi, etc. Google Pixel 2 is the world’s top best camera. Google Pixel 2 camera settings, you can also see other features such as AR Stickers, Face retouching, Motion photos, and more.

Read Also:
How to Get Pixel 2 Portrait Mode on Google Pixel, Pixel XL, Nexus 6P/5X

Step 1: Download Camera NX V7.3 APK file in your Google Pixel & other devices.

Step 2: After completed download, open the file in your Pixel.

It will ask to install the application.

Install Pixel 2 Portrait mode app in your android devices

Step 3: Tap on Install at below right side corner.

Now allow Camera permission to take pictures & record video in your Google Pixel device.

Step 4: Open Camera NX app on your Google Pixel.

Pixel 2 camera settings

Step 5: Tap on Three horizontal lines at the top left side corner.

Pixel 2 Portrait mode app

Step 6: Tap on Portrait button.

How to get Pixel 2 Portrait mode on Google Pixel, Pixel XL

Now capture a photo with this new Pixel 2 Portrait mode app and enjoy it in your android device. It’s quite easy to get a Pixel 2 Portrait mode on any Android devices.

Did you find the above article helpful to get Pixel 2 Portrait mode on Google Pixel, Pixel XL, Nexus 6P/5X? If you have any kind of trouble, tell us in below comment box. We will respond as soon as possible. Don’t forget to check out our other Pixel 2 tips.