Android P supported devices list

Recently launched android P Beta for several devices such as Google Pixel, Google Pixel XL, Pixel 2, Pixel 2 XL and other non-pixel devices such as Nokia 7 plus, Oppo R15 Pro, Vivo X21UD, Sony Xperia XZ2, Xiomi Mi Mix 2S and more. First of all Google Pixel devices get android P 9.0 OS. Currently nothing is confirmed about which devices will get the android P update. Let see list of android P supported devices.

Android P 9.0 add several new features such as Gesture base navigation control, Adaptive brightness, Adaptive battery, simulate a display cutout/Notch, Digital Wellbeing, lock down, weather detail in ambient display and more. Check out below given settings to download and install android P beta in Android P supported devices.

Don’t Miss This:

How to change a simulate a display with a cutout in android P 9.0

Top best android P 9.0 features you should know

How to extend battery life in android P 9.0

List of Android P supported devices: Pixel and Non-Pixel phone

Android P supported devices list

You can download and install android P Beta on Google Pixel and other supported android P phones using Android Beta website.

Step 1: Open Android Beta page in your device

Step 2: List of Pixel and Non-pixel devices view that supported android P 9.0 Beta

Step 3: Check your device name is on list or not, if find your device then install Android P Beta

Step 4: Tap Get the Beta

Step 5: Sign in with your Google account in your device

You can see your Pixel or non-pixel device name.

Step 6: Tap + Opt in

Step 7: Now Tick mark the “I agree to the terms of the beta program” & tap Join Beta

Step 8: Now in your Google Pixel or other devices, go to Settings > system > System updates > Download and install

This Android P Beta version for Google Pixel device update size is 932.9 MB. This pre-released android P 9.0 version may contain errors and defects that can affect of your Google Pixel and other devices you install android P Beta.

Step 9: After completed download, system update installing in your Pixel and other devices.

Now enjoy android P Beta version 9.0 in your Google Pixel 2, Pixel 2 XL and other non pixel devices.

Android P Beta supported devices

Google Pixel devices: Google Pixel, Google Pixel XL, Pixel 2, Pixel 2 XL

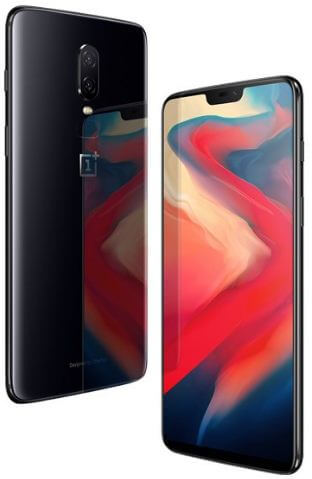
Non Pixel devices: Nokia 7 plus, Oppo R15 Pro, Vivo X21UD, Sony Xperia XZ2, Xiomi Mi Mix 2S, OnePlus 6

Currently several devices are available in market and running in android Oreo 8.1 OS. So it will be possible to get android P 9.0 OS also.

  • Samsung Galaxy S9 & S9 plus
  • Galaxy Note 8
  • Samsung Galaxy S8 & S8 plus
  • Samsung Galaxy A8 (2018)
  • Xiaomi Mi A1
  • OnePlus 5/5T
  • Honor 9
  • Moto G6/G6 Plus/G6 Play
  • Essential phone PH-1
  • Oppo R15 Pro
  • HTC U11 life
  • HTC U11
  • Sony Xperia XZ Pro
  • LG V30+/V30
  • LG G6
  • Huawei Mate 10/ Mate 10 pro
  • Huawei P20 & P20 Pro
  • Vivo V7 plus
  • Vivo X21

And that’s all. We hope this tutorial helpful to install android P beta in your devices. Let us know below comment if we missed other Android P supported devices name that confirmed.

How to Fix Battery Drain on Android Pie 9.0

Annoying by reducing battery drain on Android 9 Pie? Check out these solutions to improve battery life in Android 9 Pie. There are several reasons for battery draining so fast like unnecessary background running apps, live wallpaper, screen time out time, brightness, and more. Android Pie added new features to extend battery life such as Adaptive Battery, Dark theme/Dark mode, Adaptive brightness, standby apps, battery saver, and more. Battery life is one of the most important parts of any smartphone.

Read Also:

How to Improve Battery Life in Android Pie 9.0

Let see one by one method to increase battery life in Android Pie supported devices.

Adjust Screen Brightness

How to improve battery life in android P 9.0

Step 1: Swipe down the notification panel from any screen.

Step 2: Move slider left side to decrease screen brightness.

In Android Pie 9.0, you can see a new Adaptive brightness feature that will automatically adjust the screen brightness to environment. Also, manually set adaptive brightness if you want.

Read More: How to use Adaptive brightness in Android Pie 9.0

Decrease Sleep Time

Screen timeout time in android 9.0 P

Step 1: Go to Settings.

Step 2: Tap Display.

Step 3: Tap Advanced.

Step 4: Tap Sleep.

Step 5: Choose 15 seconds or 30 seconds.

Turn off Wi-Fi, Mobile data, GPS and other services while not use

Turn off Wi-Fi, mobile data, GPS, and other services while not use in your android or other devices. Mobile data reduce more battery power compare to the Wi-Fi network.

Remove Live Wallpaper If Use to Extend Battery Life in Android 9 Pie

Live wallpaper consuming more battery compared to other wallpaper. You can also check this to set a dark theme in Android Pie 9.0 to save maximum battery life.

Settings > Display > Wallpaper > Choose photo > Set wallpaper > Lock screen/Home screen/Both

Turn Off Ambient Display

Android P ambient display feature

While turned on ambient display in your android devices, your phone screen wake up whenever receives any notifications. It will consume little battery in your devices.

Settings > Display > Ambient display > Toggle off New notifications

Disable Vibration in Android Pie 9.0

Turn off vibration in android P 9.0

Turn off ring & notifications vibration and other touch vibration in your Android Pie devices.

Step 1: Go to Settings.

Step 2: Tap Accessibility.

Step 3: Tap Vibration under Interaction controls.

Step 4: Tap Ring & notification vibration and choose off.

Step 5: Now tap the Back button.

Step 6: Tap Touch vibration and choose off.

You can disable sounds and vibration in android P using below settings also.

Settings > Sound > Other sounds and vibrations > Touch vibrations (Haptic feedback)

Close All Recent Apps to Stop Background Running Apps

There are several apps we open and suddenly close them. Those entire apps are running in the background and reduce the battery life of your devices. So close all recent apps in your device.

Step 1: Tap the Recent apps button from any screen in your Android Pie 9.0.

Swipe screen right side to view recent apps list. You can’t close all apps at the same time in your Android Pie devices.

Step 2: Swipe screen right side until seeing “Clear all” and tap on it.

Turn Off auto-sync

Be default turned on auto-sync data in your Android devices. It will sync each account data manually to get the latest updates. So it will usage more battery and conserves data in your devices. To extend battery life in android P, turn off automatically data.

Step 1: Go to Settings.

Step 2: Tap Accounts.

Step 3: Toggle off Automatically sync data.

Enable Battery Saver

Turn on automatically battery saver in android P

You can turn on automatically battery saver in android P 9.0 devices to extend your battery life. Battery saver restricts apps and disables unnecessary functions in your device.

Settings > Battery > Battery saver > Turn on now

Android Pie also added a new battery improvement feature called Adaptive battery. This android Pie adaptive battery feature limit battery of apps that you don’t use.

Read More: How to use Adaptive battery in Android Pie 9.0

Restrict Background Data

Several apps can use the battery in the background in your android devices. To save battery, stop the app using a battery in the background. We already discussed restrict apps in Android 9 Pie devices.

And that’s all. End the list of possible solutions to improve battery life in Android Pie 9.0. If you know any other ways to extend battery life in Android 9.0 Pie, share with us in below comment box.

Watch YouTube Video Here

How to Disable Notifications Sounds and Vibration on YouTube Android

Annoying by phone vibrates when watching videos on YouTube app Android or iPhone? Recently YouTube added new features and one of them we discussed here’s how to disable notifications sounds and vibration YouTube Android phone. By default turned on “disable sounds and vibration” on YouTube app between 10:00 PM to 08:00 AM in your Android devices. You can customize the time to silent notifications on YouTube during the hours you set on your phone.

To turn off notification sounds and vibration on the YouTube app, go to YouTube notifications settings in your android devices. You can enable/disable notification while watching videos or listening to music on YouTube in the Android device.

Read Also:

How to Enable/Disable Notifications Sounds and Vibration on YouTube Android Devices

Let see a complete guide to change notification sounds and vibration settings on YouTube android devices.

Step 1: Open the YouTube app in your Android devices.

YouTube profile symbol in android devices

Step 2: Tap the Profile icon at the upper right corner.

YouTube settings in android

Step 3: Tap Settings.

YouTube notifications settings in android phone

Step 4: Tap Notifications.

Step 5: Scroll down up to end of the page and you can see by default turned on “Disable sounds & vibrations” (Show below screenshot)

YouTube Notifications sounds and vibration settings in android

Step 6: Tap Disable sounds & vibration.

You can see below the given screen in your device.

How to disable notifications sounds and vibration YouTube android

By default set time (10:00 PM to 08:00 AM) for disabling sounds and vibration on YouTube while watching videos in Android or iPhone devices. If you want to customize time then follow below given steps.

Customize time to silent notifications on YouTube android

Step 7: Tap Start time to set the time you want.

Step 8: Tap End time and set.

Step 9: Tap Done.

Now you can receive YouTube notifications silently even when disabling sounds and vibration in your android devices.

And that’s all. We hope this makes it clear how to disable notifications sounds and vibration YouTube android phone. If you have any kind of question, tell us in below comment box.

How to Enable Battery Saver in Android 9 Pie

To extend battery life, turn on battery saver in Android Pie 9.0. Android Pie battery saver feature disables some of the features and restricted apps unnecessary running in the background in your devices. You can also enable or disable turn on automatically battery saver in your android Pie 9.0 devices such as Google Pixel, Pixel XL, Pixel 2 and more supported devices.

In Android Pie, you can use the adaptive battery feature to limit battery for apps that you don’t use regularly. This android Pie adaptive battery will restrict apps and limits battery usage on your phone. Also, use advance battery usages to see individually app usage battery and background restriction. Follow the below-given step by step process to enable battery saver in Android 9 Pie.

Read Also:

How to Turn on Battery Saver Mode in Android Pie 9.0

You can find a battery saver feature under battery settings in your android Pie 9.0 devices.

Step 1: Swipe down the notification shade and tap the Settings icon.

Battery settings in android P

Step 2: Tap Battery.

Android P battery saver mode

Step 3: Tap Battery saver.

How to enable battery saver in android P 9.0

By default android Pie battery saver mode will turn on automatically at 15% or below charging in your phone. You can set a percentage of battery you want to automatically turn on battery saver mode in Android Pie 9.0.

Step 4: Enable/disable “Turn on automatically”.

Turn off automatically battery saver in android P

Step 5: Tap Turn on now.

If you don’t want to use battery saver automatically in your device, turn off the toggle button turn on automatically (Show above screen). You can use an adaptive battery feature to improve battery life in android 9.0.

Turn on battery saver mode in Android 10

Settings > Battery > Battery saver > Click on ‘Turn on Now”

How to Enable or Disable Adaptive Battery in Android 9 Pie

Step 1: Go to settings in your android Pie.

Step 2: Tap Battery.

Step 3: Tap the Adaptive battery.

Use Adaptive battery in android P OS

Step 4: By default turn on “Use adaptive battery”.

How to Show or hide battery percentage in Android 9 Pie status bar

By default show battery percentage Android 9.0 device. To turn off battery percentage android Pie 9.0, follow below settings.

Step 1: Go to settings in your android Pie.

Step 2: Tap Battery.

Hide battery percentage in android P status bar

You can show the battery percentage in the status bar on the Android 9 Pie device.

Step 3: Toggle off  Battery percentage to hide the battery percentage.

And that’s all. Did you still have a question about enable battery saver in android Pie 9.0? What are your favorite features of android P 9.0? Let us know in below comment box.

How to Turn On Screen Pinning in Android 9.0 and Android 10

By default, disabled screen pinning in Android devices. To pin an app screen, you must turn on screen pinning in Android 9.0 and Android 10 using security and location settings. While using screen pinning Android, you can use only a pin app on the screen in your device. You can use screen pinning using the recent apps list. It will lock the specific app screen you want from the list. This is one type of lock on any app screen; people can use only that screen. To unpin this screen, touch & hold back and home button on your Android devices.

Read More: How to Turn Off Pop-Up Notifications on Android

How to Turn On Screen Pinning in Android 9.0 and Android 10

Let’s see how to enable and use screen pinning on Android devices.

How to Enable Screen Pinning in Android 9.0 and Android 10

Step 1: Swipe down the notification panel and tap the Settings icon.

Step 2: Find Security & location and open it.

Disable screen pinning in android P

Step 3: Scroll down up to the end of the page and tap Screen pinning.

Turn off screen pinning in android P 9.0

By default, disable screen pinning on your Android devices.

Screen Pinning in android P

Step 4: Toggle on Screen pinning.

You can also enable the ask-for to unlock pattern before the unpinning screen in your Android 9.0 devices.

Step 5: Tap the Recent Apps button from any screen.

You can view a list of the most recently opened apps. Swipe the screen right to view apps on your Android devices.

Android P screen pinning use

Step 6: Tap the App icon you want to pin a screen.

How to enable screen pinning in android P 9.0

Step 7: Tap PIN.

If you first Pin an app on Android, you can see this message on the screen: Screen is pinned.

Enable screen pinning in android P 9.0

Step 8: Tap Got it.

You can only use a pinned app screen on your Android devices. Your device locks with a single app.

How to Unpin App on Android

Unpin screen in android P

To unpin the screen in Android, touch & hold back and overview buttons (Recent apps button).

How to Use Screen Pinning using Fully Gesture Navigation on Android 9 and Android 10

If you use gesture navigation control on your Android devices, you can’t see the back & recent apps buttons on your devices. You can see a pill icon (horizontal line) on your device (Shown below screenshot).

Android P Gesture navigation controls use for screen pinning

Step 1: Swipe up using a pill to open recent apps after enabling screen pinning.

Step 2: Tap the App icon you want to pin screen.

Step 3: Tap PIN.

Now follow the above-given method steps on your Android device.

And that’s all. We hope this makes it clear how to enable screen pinning in Android 9.0 and Android 10. Stay and connect with us for the latest Android Pie tips and tricks. If you have any issues, please tell us in below comment box.

Read Also:

How to Use New Features of WhatsApp Group on Android Phone

WhatsApp updated with new group features and group admin controls for Android or iPhone devices. To use this new WhatsApp group features, make sure your WhatsApp updated to the latest version (2.18.142). You can choose who can change the group’s subject, icon, and description using the edit group info option. Set only admin can send messages in the WhatsApp group using this new group setting. Also, add or remove group admin anytime in your Android devices.

WhatsApp messenger already launched add group discussion feature in Android or iOS devices. This group discussion is a view to participants of this group and people invited to this group. WhatsApp group admins get more controls such as remove admin permission, change group icon, subject & description.

Read Also:

WhatsApp New Group Features Android Phone  

Let see WhatsApp new group features for android smartphones.

How to Set Who Can Change the WhatsApp Group’s Subject, Icon, and Description

If you are a group admin, you can choose who can change the group’s subject, icon, and description using WhatsApp group settings in android devices.

Step 1: Open the WhatsApp app in your Android devices.

Step 2: Tap Group name you want to change settings.

Step 3: Tap Three vertical dots (Menu) at the upper right corner.

Group info of WhatsApp group

Step 4: Select Group info.

WhatsApp new group features android phone

Step 5: Tap Group settings.

WhatsApp new group features 2018

Step 6: Tap Edit group info.

By default select “All participants”.

WhatsApp new group features android

Step 7: Choose “Only Admins”.

Now only WhatsApp group admin can change WhatsApp group subject, icon, and description in your android devices.

How to WhatsApp Group Admin Restrict Participants From Sending Messages on Android in 2020

WhatsApp New Group Features Android to restrict messages

WhatsApp > Open Group > Menu > Group info > Group settings > Send Messages > Choose Only admins/All Participants

How to Add Group Admins on WhatsApp android

WhatsApp > Open Group > Tap Group name > Scroll down and tap the participants you want to Make admin > Make group admin

Note: This participant only removes from the admin list without removing from the group member.

How to Remove Group Admin on WhatsApp Android

WhatsApp > Open Group > Tap Group name > Tap the participants you want to remove admin > Tap Dismiss as admin

Alternative way: WhatsApp > Open Group > Menu > Group info > Group settings > Edit group admins > Tap the participants you want to remove admin > Tap Dismiss as admin

Catch up Group message @ button

WhatsApp groups add a new @ button at the bottom right side corner in your device. This catch up group message on WhatsApp features helpful to quickly reply message you missed without open individually chat message.

In the latest WhatsApp group features, you can’t add a participant to a group that already left from the WhatsApp group. You’ll wait to add it again.

And that’s all. I hope you will enjoy this WhatsApp new group features Android phones. Do you know any other WhatsApp group features we missed above? Share with us in below comment box.