How to Enable USB Debugging in OnePlus 6

Here’s how to enable USB debugging in OnePlus 6. By default disabled USB debugging OnePlus 6. To activate this feature, make sure to turn on developer mode in your OnePlus 6 and other devices.  This OnePlus 6 USB debugging feature is used to transfer data between your OnePlus 6 to PC or laptop devices. If you’ll use the fastboot and ADB command in your OnePlus 6 or other Android devices, your device needs to enable USB debugging mode. You can turn on USB debugging in OnePlus 6 under the debugging section in developer options.

Read Also:

How to Enable USB Debugging in OnePlus 6 Oxygen OS

How to enable USB debugging in OnePlus 6

First of all turn on developer options in your OnePlus 6 using the below-given settings.

Step 1: Go to Settings.

Step 2: Scroll down at the end and tap on About phone.

Step 3: Scroll down and tap on the build number 7 times until viewing the message of You are now a developer!

Step 4: Tap back and you can see the new Developer options.

How to Activate USB Debugging in OnePlus 6/OnePlus 6 Avengers edition

Step 1: Go to Settings > System > Developer options.

In OnePlus 6 developer mode settings, you can see memory usage by apps, OEM unlocking, Windows animation scale, debug app, Bluetooth audio codec, background process limit, and more.

Step 2: Scroll down up to the debugging section and tap on USB debugging. By default turned off the USB debugging toggle button.

You can see this pop-up message on your device: Allow USB debugging?

Step 3: Tap OK.

This OnePlus 6 USB debugging feature is intended for development purposes only. You can use this debugging setting to transfer files between OnePlus 6 to computer or laptop devices. Now enable debug mode on OnePlus 6 when your device connected to the USB port.

And that’s all. Did you found the above tutorial helpful to enable USB debugging in OnePlus 6? If you have any questions, tell us in below comment box. Stay and connect with us for the latest OnePlus 6 tutorial.

How to Enable Developer Options on OnePlus 11 and OnePlus 11R

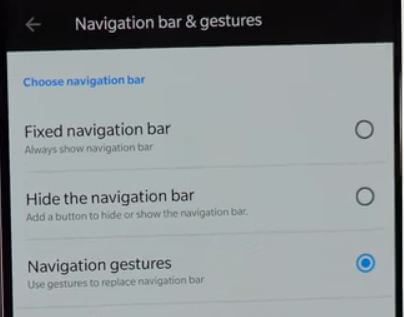
Here’s how to enable developer options on OnePlus 11 and OnePlus 11R 5G devices. By default, you have hidden developer mode in your OnePlus devices. You can activate developer mode in the OnePlus 11 series using system settings. In the OnePlus developer options settings, you can see OEM unlocking, running services, Night mode, quick settings developer tiles, USB debugging, logger buffer size, USB configuration, Windows animation scale, background process limit, and more. OnePlus has added several new features such as Notch, OLED display, Navigation gestures & hide the navigation bar, fast Hardware, improved camera, and more.

Read More:

How to Enable Developer Options on Your OnePlus 11 and OnePlus 11R 5G

How to Enable Developer Options on OnePlus 11 and OnePlus 11R


Step 1: Go to Settings.

Step 2: Scroll down at the end and tap on About or About phone.

Step 3: Tap on the Build number 7 times.

Step 4: Enter the PIN or Password to unlock the phone.

This message appears on the OnePlus screen: You are now a developer!

Now, access all hidden developer settings in your OnePlus devices. You can view developer mode settings in Settings > System > Developer options on your OnePlus device. Also, enable USB debugging using developer mode settings on your OnePlus devices.

How to Disable Developer Options on OnePlus 11 5G and OnePlus 11R

Settings > System > Developer options > Toggle off Developer options.

How to Turn On USB Debugging on OnePlus 11 and OnePlus 11R

Step 1: Go to Settings.

Step 2: Tap on System.

Step 3:Tap on Developer options.

Step 4: Tap USB debugging under the debugging section.

By default, turn off USB debugging in your OnePlus devices.

Step 4: Toggle on USB debugging.

You can quickly transfer data between the OnePlus to another computer or laptop using this OnePlus USB debugging settings.

And that’s all. I hope this tip helps enable developer options in the OnePlus 11 series. If you have any questions, please tell us in the comment box below. Don’t forget to share with others if you found it helpful.

Read More:

How to Set Schedule Digest Time on YouTube Android Phone

Here’s how to set schedule digest time on YouTube Android devices. This YouTube schedule digest combines all your notifications into a single notification. It will combine your entire upload, live streams, and comment notifications you receive from the YouTube app. While enabling schedule digest on YouTube Android or iPhone, you’ll get all your notifications as a daily digest. Be default set schedule digest time at 7 PM. To set digest time on YouTube Android phone, you need to turn on it.

Recently YouTube added various new features for Android or iOS users such as take a break, enable schedule digest, autoplay control for next video, YouTube Digital Wellbeing, disable sounds & vibrations, Dark mode, Incognito mode, and more.

Read Also:

How to Enable and Set Schedule Digest Time on YouTube Android Phone

This YouTube new feature schedule digest sends only one digest notifications at your set time after turn on in your device. First of all, make sure YouTube app updates to the latest version on your android devices.

Step 1: Open the YouTube app on your Android phone or tablet.

Step 2: Tap the Profile icon at the upper right corner.

Step 3: Tap Settings.

YouTube App notifications settings android smartphone

Step 4: Tap Notifications.

Here you can see scheduled digest, subscriptions, channel settings activity on my comments, and more settings. By default turned off scheduled digest in your device.

How to set schedule digest time on YouTube android phone

Step 5: Tap Scheduled digest to customize YouTube notifications.

Automatically enable schedule digest in YouTube app android

Step 6: By default set Scheduled digest time 7 PM, choose a delivery time if you want to change.

After choosing a time, automatically enable the schedule digest in the YouTube app. Now you can receive all YouTube push notifications details into a single notification at the time you set in your device. Also, you can’t view live stream video until it finished.

How to Block or Disable YouTube Notifications in Android Oreo 8.1 & 9.0 Pie

If you don’t want to receive YouTube app’s notifications from appearing on your android Oreo 8.0 & 8.1 and Android Pie, disable show notifications in your devices.

Step 1: Go to Settings in your Android Pie or Oreo.

Step 2: Tap Apps & notifications.

Step 3: Tap See all apps.

Step 4: Find the YouTube app and open it.

Step 5: Tap Notifications.

It will include YouTube downloaded notifications and general notifications.

How to disable YouTube app notifications in android Phone

Step 6: Toggle off “Show notifications”.

Step 7: Now block YouTube app’s notifications in your Android 9.0 and Oreo 8.1.

And that’s it. Did you find the above tutorial helpful to set schedule digest time on YouTube android Phone? If you have any questions, tell us in below comment box. If you found it helpful, don’t forget to share it with others.

How to Disable App to Control WiFi in Android 12/11/10/9

Here’s how to enable or disable app to control Wi-Fi in Android devices. While some Apps in the Android Device consume data in the background, others don’t consume much data but connect to the Internet to saturate you with advertising. You can turn it on/off to control WIFI on Android 9, 10, 11, and 12 devices. You can specifically block Internet access on specific apps in Android 9, 10, and 11 devices.

Just allow it if you want to control Wifi Data usage in Android 9 (Pie). Under the special app, access locates for Wifi control option. Turning OFF/ON is very easy on Android Devices. Check how much data is consumed in the app usage setting on your Android phone and tablet.

Don’t Miss: How to Set Time Limit on Apps Android

How to Enable/Disable App to Control WiFi in Android 12/11/10/9

If you’re device updated with Android 12, follow the below-given settings to disable WiFi control access.

How to Disable App WiFi Control on Android 12

Step 1: Go to Settings.

Step 2: Tap on Apps.

Disable App WiFi Control on Android 11

Step 3: Scroll down and tap on Special app access.

How to Disable App WiFi Control on Android 12 device

Step 4: Scroll and tap on Wi-Fi control.

How to Disable App to Control WiFi in Android 12, 11, 10, 9

Step 5: Select the App from the list.

How to Disable App to Control WiFi in Android 12, 11

Step 6: Toggle off Allow app to control Wi-Fi.

For Android 11

Settings > Apps > Special app access > WiFi Control > App > Toggle off Access app to control Wi-Fi

How to Block Internet Access on Specific Apps in Android 12/Android 11

Using network and internet settings, you can stop the app from accessing the Internet on your Android 12/Android 11.

Note: Different Android devices have slightly different settings.

Step 1: Go to Settings.

Step 2: Tap on Network & Internet.

Step 3: Tap on your Carrier name or SIM.

Step 4: Tap on App data usage.

Step 5: Select the App usage of more data.

Step 6: Toggle off Mobile data.

Also, turn off WiFi data in Android devices.

Disable App to Control WiFi in Android 9 and Android 10

Check out the below given step-by-step process.

Step 1: Swipe down the notification panel from the top of the screen and tap the Settings icon.

Step 2: Tap Apps & notifications.

Step 3: Scroll down up to the end of the page and tap Advanced.

Android P special app access settings

Step 4: Tap Special app access.

WiFi control in android P device

Step 5: Scroll down to the end of the page and tap Wi-Fi control.

You can see a list of apps (Shown below given screenshot) that allow the app to control Wi-Fi in your Android phone or tablet devices.

Android P Wi-Fi control apps

Step 6: Tap App you want to turn off or disable app Wifi control in Android Pie 9.0.

How to disable app to control Wi-Fi in android P 9.0

Step 7: Toggle off “Allow app to control Wi-Fi”.

You can also view and manage Wi-Fi data usage in Android Pie 9.0 devices to disable background data and allow unrestricted data usage when the data saver is on in your devices.

How to Limit Data Usage in Android 9.0 (Pie) and Android 10

Step 1: Swipe down the notification shade and tap the Settings icon.

Step 2: Tap Network & Internet.

Step 3: Tap Data usage.

android P WiFi data usage settings

Step 4: Scroll down to the end of the page and tap Wi-Fi data usage

Here you can see individual app usage Wi-Fi data in your devices, including background and foreground.

Step 5: To restrict background data on Wi-Fi, tap any app you want to limit data usage of Wi-Fi.

Step 6: Enable/disable background data app Wi-Fi data usage.

Frequently Asked Questions:

How do I Disable App Background Data on Android 11?

To reduce app background data usage on your Android 11, go to Settings > Network and internet > Carrier name or SIM > App Data usage > Select the App > Toggle off Background data. You can also stop unrestricted data usage when the data saver is on in your Android device.

How do I Turn Off Wi-Fi Scanning on Android 12?

The Wi-Fi scanning feature is helpful for improving location-based features and services. You can enable or disable WiFi scanning on Android 12 by going to Settings > Location > Location services > Wi-Fi scanning > Toggle off Wi-Fi scanning.

Read Also:

And that’s all. We hope this clarifies how to enable/disable app to control Wi-Fi in Android devices. If you have any questions, please tell us in below comment box. Stay and connect with us for the latest Android tips and tricks.

How to Turn Off Vibrate Notifications Android 10, 9 Pie

Annoying by ring and notifications vibrations in Android Pie 9.0 and latest Android 10? Here’s how to stop vibration on android devices when receiving text messages or social media messages. You can enable or disable vibrate for calls, ring & notification vibration, mute sound & vibration, and more using android Pie touch vibration settings. By default while getting messages, email or other notification, every time your phone vibrates. You can also remove vibration on touch (Haptic feedback) settings in your latest android.

Different android device has slightly different settings to stop vibration. Follow the below-given step by step process to disable vibration Android 9 Pie.

Read Also:

How to Turn Off Vibration Android 9 Pie

First of all, let see how to turn off ring & notification vibration in the latest android 10 devices.

Turn off Vibrations in Android 10

Step 1: Go to Settings.

Step 2: Scroll down and Tap on Accessibility.

Turn off ring & notification vibration in the latest android 10

Step 3: Tap Vibration & haptic strength under interaction controls.

Turn off Vibrations in Android 10

Here you can see Ring vibration, Notification vibration, and touch feedback. By default turned all.

Step 4: Tap on Ring vibration and Choose Off.

Turn Off Vibrate Notifications Android 10

Step 5: Tap on Notification vibration and Choose Off.

Step 6: Tap on touch feedback and Choose Off.

For Android 9 Pie:

Step 1: Swipe down the notification shade and tap the Settings icon.

Step 2: Tap Accessibility.

Vibration settings in android P

Step 3: Tap Vibration under interaction controls.

Touch vibration in android P

Here you can touch vibration and ring & notification vibration in Android Pie 9.0.

Step 4: Tap Ring & notification vibration.

Ring and notification vibration in android P

Step 5: Choose Off.

Now turn off the ring and notification vibration in your android Pie devices. Using the above-given settings you can also turn off touch vibration in android Pie 9.0 devices.

How to Disable Touch Vibration in Android 9 Pie

How to turn off vibration android P 9.0

Settings > Accessibility > Interaction controls > Vibration > Touch vibration > Off

How to disable sounds & vibrations in android Pie 9.0

Step 1: Go to settings in your android Pie.

Step 2: Tap Sound.

Step 3: Scroll down up to sounds & vibrations.

Android P sounds and vibration settings

Here you can disable touch vibration and other android P sound including dial pad tones, screen locking sound, charging sound and touch sound.

How to disable vibrate for calls in android Pie 9.0

Vibrate for calls in android P

Settings > Sound >Turn off “also vibrate for calls

How to mute sound and vibration in Android 9 Pie

Settings > Do not disturb > Check mute sound and vibration

And that’s all. I hope this little tip helpful to turn off vibration Android Pie 9.0. If you have any kind of question, tell us in below comment box.

How to reset avatar in android Phone

When we first time create a Bitmoji in our android or iOS devices, we set Bitmoji style avatar. If you don’t like this created Bitmoji style, you can edit your Bitmoji or reset avatar in android phone to create a new one. In Bitmoji avatar style, you can see Bitstrips, Bitmoji deluxe and Bitmoji classic type styles. Choose your favorite style after reset Bitmoji avatar in your android devices.

If you want to make a new Bitmoji, first of all reset Bitmoji avatar you currently used in your android or iOS devices. You can also change your Bitmoji avatar in android using Bitmoji app. Check out below given step by step process to reset avatar in android Phone or tablet devices.

Related Content:

How to get 3D Bitmoji on Snapchat android device

How to use Bitmoji in android keyboard

How to group Video chat on Snapchat in android phone

How to reset avatar in android Phone: Bitmoji Style avatar

First of all download Bitmoji app from play store and install it in your android devices. Now follow below given complete guide to reset Bitmoji avatar in android phone.

Step 1: Open Bitmoji app in your android devices

Step 2: Log in with your Snapchat account or your email id

Open Bitmoji settings in your android

Step 3: Tap Three horizontal lines (Menu) at upper right corner

Bitmoji style avatar settings in android

Step 4: Select Settings

Bitmoji avatar change android phone

Step 5: Tap My account

How to reset avatar in android Phone

Step 6: Tap Reset Avatar

You will see pop up screen with this message in your device: Are you sure?

Reset Bitmoji avatar in android smartphone

Step 7: Tap OK to reset avatar

Now you lost your current avatar in your device. If you want to create a new Bitmoji, follow below given steps in your devices.

Step 8: You can see male and female Bitmoji icon in your device, Choose Male or female you want to create a new one

If you want to create your Bitmoji, take a selfie so you can easily create your face related Bitmoji in android devices.

Step 9: Tap Skip or Continue

Step 10: Now set skin tone, hair color, hairstyle, facial hair, eye color, eyebrows, eyebrow color, nose, glasses, face shape, mouth, headwear, body type and outfit.

Step 11: Tap Save avatar or Arrow icon at upper right corner

You can edit Bitmoji on Snapchat app in android devices. Also change Bitmoji outfit in your device.

How to edit Bitmoji on Snapchat android phone

Step 1: Open Snapchat app in your android device

Step 2: Tap Profile icon at upper left corner

Snapchat Bitmoji settings

Step 3: Tap Bitmoji

Step 4: Tap Edit my Bitmoji

Now follow on screen instruction in your android phone or tablet devices.

And that’s it. We hope this makes it clear how to reset avatar in android Phone. If you have any question, tell us in below comment box.