How to Enable Hidden Developer Mode in Google Pixel 3 and Pixel 3 XL

By default hidden developer options in Pixel 3 and Pixel 3 XL devices. To access developer mode settings, enable developer mode in Google Pixel 3 and Pixel 3 XL using system settings. You can see several useful settings in Pixel 3 developer mode including memory usage by apps, OEM unlocking, Night mode, USB debugging, select debug the app, background process limit, logger buffer size, camera laser sensor, USB configuration, Bluetooth audio codec, Disable Bluetooth A2DP, Windows animation scale, transition animation scale, simulate a display with a cutout, stand by apps and more.

Read Also:

How to Enable or Turn Off Developer Options Pixel 3 XL and Pixel 3

Step 1: Swipe down the notification panel and tap the Settings gear icon.

Step 2: Tap System.

Step 3: Tap about phone.

Step 4: Scroll down up to the end of the page and tap the Build number 7 times or tap until see “you are now developer! message on your Google Pixel 3 & Pixel 3 XL.

Step 5: Now turn on developer options in your device.

How to enable developer mode in Google Pixel 3

Step 6: To see developer option settings, Go to settings > System > Advanced > Developer options.

Here you can see several settings that intended for development use only. They can cause your device and the applications on it to break or misbehave.

Enable USB debugging in Pixel 3 and Pixel 3 XL

Make sure to turn on developer mode to enable and use USB debugging in Pixel 3 XL and Pixel 3.

Step 1: Swipe down the notification shade and tap Settings.

Step 2: Tap System.

Step 3: Tap Advanced.

Step 4: Tap Developer options.

Step 5: Toggle on USB debugging under the debugging section.

You can see pop-up message on screen: Allow USB debugging?

Step 6: Tap OK.

Now you can easily copy data between your computer and Google Pixel 3 and Pixel 3 XL devices.

And that’s all. I hope this little guide helpful to enable developer mode in Google Pixel 3 and Pixel 3 XL. If you have any questions, tell us in below comment section. Stay and connect with us for latest Pixel 3 updates.

How to Enable and Use Private Space in Huawei P30 Pro, P20 Pro, P20

Here’s how to enable Private space in Huawei P20 Pro and P20. Private Space feature is helpful to secure your important data safe from other people. After enabling & access private space in Huawei, you can see the private space and apps list in your device. You’ll exchange data and transfer apps from private space to main space also. All your private space protected by a set password.

Huawei P20 Pro and P20 device have several awesome features such as Natural tone, Enable/disable Notch, super speed face unlock, color & eye comfort, Private Space, Dolby Atmos, Master AI for the camera, Simple mode and more. Let see how to enable and use Private space in Huawei P20 Pro and P20.

Relevant Article:

How to Use Private Space on Huawei P20 Pro and P20

How to enable and use Private Space in Huawei P20 Pro

First of all, create PIN or Password to use Huawei Private Space in Huawei P20 Pro and P20 devices using below given steps.

Step 1: Swipe down the notification panel and tap Settings.

Step 2: Tap Security & privacy.

Step 3: Tap Private space.

On the lock screen, use the Private Space fingerprint to enter Private space and use the owner fingerprint to enter Mainspace.

Step 4: Tap the Enable button at the bottom middle.

Step 5: Now enter the PIN number (4 to 16 digits) for a Private space password.

Note: This password is used to unlock your device. If you forget it, you’ll need to restore your device to factory reset settings and all data will be erased.

Now turn on private space in your Huawei P20 Pro and P20 Lite device. To see Private space settings in Huawei P20 Pro, check below given settings.

Settings > Security & Privacy > Private Space

Here you can see the file transfer and settings section in your device.

File Transfer

  • MainSpace to PrivateSpace: Switching data and apps from MainSpace to PrivateSpace in Huawei P20 Pro and P20 phone.
  • private space to MainSpace: Move photos to private space, exchange other data and transfer apps from PrivateSpace to MainSpace in Huawei P20 Pro and P20 phone.

Settings

  • Hide PrivateSpace: You can hide or unhide PrivteSpace in MainSpace after enabling it.
  • Password Protection: You can reset the PrivateSpace password when necessary.
  • Space Close: Move you’re all PrivateSpace to a new phone. Only available on EMUI 8.0.1 or later.

You’ll also quite PrivateSpace and remove or delete Private Space in Huawei P20 Pro and P20 devices using this setting.

And that’s all. We hope this makes it clear how to enable and use Private Space in Huawei P20 Pro and P20. If you have any kind of trouble, tell us in below comment box.

How to enable split screen in OnePlus 6T

Want to use multi window mode on OnePlus 6T Oxygen OS? If no, here’s how to enable split screen in OnePlus 6T Pie 9.0. You can use split screen in OnePlus 6T to use two apps at same time in your device. You can watch movie on YouTube and chat with your friends on facebook or WhatsApp or Instagram at same time in your android device using this multi window mode.

There two ways to enable OnePlus 6T split screen view in Oxygen OS devices. In older android devices, we use overview button to use Split screen mode. Not all apps supported this split screen mode. You can’t find old settings in your latest OnePlus 6T. Check out below given methods to enable split screen in OnePlus 6T.

Read Also:

How to use apps in full screen mode in OnePlus 6T

How to take a scrolling screenshot in OnePlus 6T

How to activate DND mode in OnePlus 6T

How to enable split screen in OnePlus 6T Oxygen OS

How to enable split screen in OnePlus 6T

First of all let see trick to quickly enable OnePlus 6T split screen using recent app button.

1st Method: Activate OnePlus 6T split screen

Step 1: Tap Recent apps button in your OnePlus 6T

Step 2: Tap three vertical dots of all you want to use multi window mode

Step 3: Tap Split screen

You can see selected app screen in your device from upper half part.

Step 4: Select another app want to use split screen

Step 5: Now enjoy two apps at same time in your device

2nd Method: Enable split screen in OnePlus 6T using buttons & gestures settings

Step 1: Swipe down notification panel from top of the screen and tap Settings gear icon

Step 2: Tap Buttons & gestures

Here you can see Alert slider, Navigation bar & gestures, quick gestures and quick enable assistant app in your device.

Step 3: Tap Navigation bar & gestures

Step 4: Tap home button, recent button and back button

Step 5: Choose from long press home button or double tap action

Step 6: Select open/close Split screen

Step 7: Long press home button and you can see half screen in your device

Now see the app on upper half of the screen in your OnePlus 6T Pie 9.0.

Step 8: Select another app you want to use Split screen mode

To adjust the split screen view, long press the slider in middle of the screen and move right or left.

And that’s all. We hope this makes it clear how to enable split screen in OnePlus 6T Pie. If you have any kind of trouble, tell us in below comment box. Stay and connect with us for latest updates.

How to Use Top Shot Pixel 3 XL and Pixel 3

How to use top shot on Google Pixel 3 and Pixel 3 XL. This Pixel 3 XL Top shot feature is useful to recommend better photos automatically from the taken photos. Also, added several new cameras features such as Group selfie (184 percent wider), Night sight to capture awesome photo even low-light condition, add animated stickers to photos & videos that called Playground, Photobooth to automatically capture a photo when a smile or make a funny face, Portrait mode, bokeh control, and more.

Google launched the latest flagship Google Pixel 3 and Pixel 3 XL. One of the biggest improvements is the #1 camera that has splendid features to take extraordinary photos & videos. Google Pixel 3 has a dual front camera and a 12.2 mp rear camera. These two devices have Google’s best camera yet. Here’s how to use the Pixel 3 and Pixel 3 XL top shot feature.

Read Also:

How to Use Google Pixel 3 Top Shot Feature

How to use top shot on Pixel 3

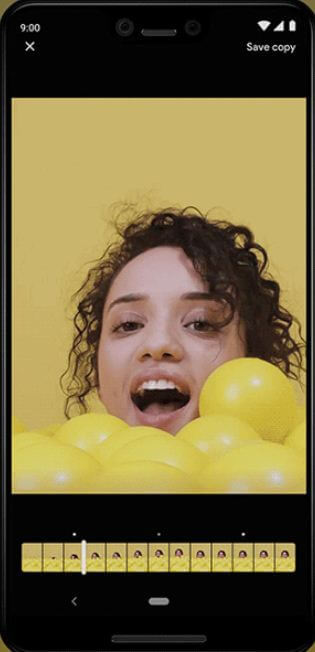
If you don’t want to miss a great moment photo, Pixel 3 and Pixel XL is the best for you. When you take pictures of several moments, sometimes you can see blocked faces, close eye, turned heads and more problems. So you miss a great photo of your important moments. Don’t be panic, using Google Pixel 3 top shot features, you can easily get your best moment photo from the captured photo. This Top shot feature recommends the best photo of a moment.

You will use the top shot Pixel 3 camera is use AI + HDR plus to perfect shot. After taken pictures, you’ll see a sequence of photos before or after you press the shutter button to capture a photo in your Google Pixel 3 and Pixel 3 XL.

Step 1: Open the camera app in your Google Pixel 3 & Pixel 3 XL.

Step 2: Quickly capture photos in your device.

Step 3: Now open taken photo in your device.

Step 4: Swipe up the screen until view photo details.

Here you can see the sequence of taken photos before or after you press the shutter button. It will automatically recommend you perfect photo moment from the photos.

Step 5: Now move finger left or right until view recommended.

Now you don’t miss your great photo when using the Pixel 3 top shot feature.

And that’s all. Do you still have questions about use top shot on Pixel 3 and Pixel 3 XL? If you have any kind of trouble, tell us in below comment box. Stay and connect with us for the latest update.

How to Change Google Keyboard on Pixel 3 and Pixel 3 XL

If you don’t want to use the default keyboard, here’s how to change the Google keyboard on Pixel 3 and Pixel 3 XL devices. Gboard – Google keyboard is one of the best android keyboards for android devices. By default set Gboard as a keyboard in all Pixel devices. You can change the Pixel 3 keyboard under the Languages & input section under system settings. You can set the keyboard on Google Pixel 3 from Google voice typing, Google Indic keyboard, and other best android keyboard.

You can change the Google keyboard theme, keyboard language, and other keyboard layout using this tutorial. Follow the below-given step by step process to change Google keyboard (Compatible with Google Pixel 4, 4 XL, 3a XL, 3a, 3 XL, 2 XL).

Read Also:

How to Change Keyboard on Google Pixel 3 and Pixel 3 XL

Let see settings to change the android keyboard, keyboard language and keyboard theme on Google Pixel 3 and Pixel 3 XL devices.

Step 1: Swipe down the notification panel twice and tap the Settings gear icon.

Step 2: Scroll down up to the end of the page and tap System.

Language & input settings Google keyboard Pixel 3 XL

Step 3: Tap Languages & input.

In Google Pixel 3 language & input settings, you can see Languages, keyboard & inputs and advanced settings. By default, Gboard set the default keyboard on Pixel 3 and Pixel 3 XL.

Virtual keyborad settings on Google Pixel 3 XL

Step 4: Tap Virtual keyboard under keyboard & input subheadings.

Here you can see Gboard, Google Indic keyboard, Google voice typing and other install android keyboard in your device.

How to change Google keyboard on Pixel 3

Step 5: Tap Manage keyboards.

Google keyboard

Step 6: Enable/disable keyboard you want to use in your Google Pixel 3.

You can easily change the Pixel 3 keyboard within a minute on the latest devices.

How to Change Google Keyboard – Gboard keyboard settings on Pixel 3

Here you can change Gboard settings in your all Google Pixel devices.

Gboard keyboard settings on Google Pixel 3 XL

Settings > System > Languages & input > Virtual keyboard > Gboard

You can see several Gboard keyboard settings including Languages, Preferences, Theme, Text correction, Glind typing, Voice typing, Predictive search and more.

How to Change the Language on Pixel 3 & Pixel 3 XL

By default set Google Pixel 3 language as English (US). If you want to change the default language on Pixel 3 XL and Pixel 3, apply below settings.

Change default language on Pixel 3 XL Pie device

Step 1: Go to Settings.

Step 2: Tap on System.

Step 3: Tap on Languages & input.

Step 4: Tap on Languages.

Step 5: Tap on Add a language.

Step 6: Tap on Select language.

Step 7: Long press on language and drag it to the first position to set default Pixel 3 language.

And that’s all. I hope this little tutorial helpful to change the Google keyboard on Pixel 3 and Pixel 3 XL. If you have any questions, tell us in below comment box. Stay and connect with us for the latest updates.

How to Fix Galaxy Note 9 Wireless Charging Not Working

Annoying by Samsung Note 9 wireless charging not working? Here’s how to fix Galaxy Note 9 wireless charging issue. Using this wireless charger, you can quickly charge your Note 9 without any cable in your device. Samsung Galaxy Note 9 is the latest Samsung flagship with improved camera and S Pen that compatible with Bluetooth connectivity.

In your Note 9 built-in Wireless charger Duo, so you can charge two devices at the same time. Also, the wireless charger stands helpful to watch movies or videos or chat with friends in your device. Follow the below-given step by step process to fix Galaxy Note 9 wireless charging not working issues.

Read Also:

How to Fix Galaxy Note 9 Wireless Charging Won’t Working

How to fix Galaxy Note 9 wireless charging not working

If you’re Galaxy Note 9 slow charging issues, you’ll use a Qi-certified wireless charger pad to fast charge your device. Apply below given possible solutions to fix wireless charging stopped working on Note 9 problem.

Forced Restart

One of the easiest solutions is restarting your Note 9. Long press the power button and volume down button at the same time until the Samsung logo appears in your device. After the restart, check you’re charging is working or not.

Make sure Note 9 fit to charging Pad

Make sure your Samsung Galaxy Note 9 is perfect fits in the charging Pad. Simply place your device to right on the center and check light turn on to start charging. Now activate Galaxy Note 9 wireless charging.

Check Wireless charger faulted to fix Galaxy Note 9 wireless charging not working

Several wireless chargers are available in the market. Charge your Galaxy Note 9 with other wireless chargers and check charge or not. If charging your device, then buy new Qi-certified wireless charger. If possible then always use an original wireless charger to fix Note 9 charging issues in your device.

Remove case or cover

To protect our device from scratches, dust, drops, we use case or cover in our galaxy Note 9. Some of the cases or covers not perfectly compatible with your Note 9, so sometimes stop the wireless charging working. Remove the cover or thick case and check Note 9 charging problem solve.

Check Also: Best Kickstand cases for Galaxy Note 9

End that list of possible methods to fix the wireless charging issue on Galaxy Note 9. If not fix issues, find nearby Samsung phone store and request a replacement if under warranty.

Enable Safe Mode

Step 1: Press & hold the Power button on your Note 9.

Step 2: Touch & hold the Power off button.

You can see this message: Reboot to safe mode.

Step 3: Tap OK.

Your device will restart in safe mode. You can see the Safe mode symbol at the bottom of the screen. Now, disable all third party downloaded apps in your device. Now, check your galaxy Note 9 charge. If you don’t found any problem, it means any third party apps causing a problem. Restart your device to exit safe mode. Remove recently installed third-party apps one by one of and check fix problems. After removing the app that causing the issue, reinstall the other apps in your device. If you still facing an app related issue, uninstall apps from your device and re-install it again.

Factory Reset

It will remove all your Samsung Note 9 data including Samsung account, Google account, photos, videos, internal storage data, etc. Now, back up and restore data in your device before factory data reset galaxy Note 9.

Step 1: Go to Settings in your galaxy Note 9.

Step 2: Tap Backup and reset under a personal subheading.

Step 3: Tap Factory data reset.

Step 4: Tap Reset the device.

Step 5: Tap Delete all.

Wait until complete the resettings process. After that check your device charge using Wireless charger. If you still have to face a problem, contact the Samsung store and replace it if under warranty.

And that’s all. We hope one of the above-given tips helpful to fix Galaxy Note 9 wireless charging not working problems. Do you have any other tips you want to share? Tell us in below comment box.