How to Create AR Emoji on Galaxy Note 9

Want to personalize and use AR Emoji Note 9? Here’s how to create AR Emoji on Galaxy Note 9 using camera mode settings. You can see different Disney characters AR Emoji such as Mickey Mouse, Donald Duck, Mr. Incredible (Disney/Pixer faces), and more. You’ll make AR Emoji Note 9, after the complete process, you can customize AR Emoji clothes, hair, and accessories. Also, add a funny background using animated stickers and share AR Emoji to your friends.

Your created Emoji follows your movement & expression when you take a selfie or capture video in your Samsung Note 9. Follow the below-given step by step process to get AR Emojis on Galaxy Note 9.

Read Also:

How to Make AR Emoji With Samsung Galaxy Note 9 Make Own Emoji

How to create AR Emoji on Galaxy Note 9

To create your own AR Emoji on Samsung Galaxy Note 9, go to camera mode in your device.

Step 1: Open Camera in your Galaxy Note 9.

On top of the screen, you can see Note 9 camera modes such as Auto, Live focus, Panorama, AR Emoji, Pro, Super-slow motion, and more.

Step 2: Swipe screen left side and tap AR Emoji.

You can see a screen of “Create my Emoji” in your Samsung Note 9. For better results, remove glasses and clear away the hair. Tap on the camera icon to take selfies or pictures in your device.

Step 3: Make sure your face complete show on a circle on the screen to make Emoji better.

Step 4: Select Male or Female and tap the Next button.

Now create AR Emoji Note 9 device. Once that’s done, you can customize it’s hair, clothes, sunglasses and other accessories.

Step 5: Tap OK at the upper right screen after completed customize AR Emoji.

Now you can send My Emoji stickers directly from the keyboard in Messages and other apps. Also, save My Emoji stickers in Gallery.

How to Share AR Emoji With Friends or other people on Note 9

Step 1: Open your Note 9 gallery and tap Pictures.

You can see your Emoji stickers.

Step 2: Tap AR Emoji sticker you want to edit, share, and delete on your Note 9.

Step 3: Tap Share icon at the bottom middle of the screen.

Step 4: Select contact or app you want to share AR Emoji.

Step 5: Tap Delete icon from bottom right corner to remove AR Emoji on Note 9.

You can also make a video using AR Emoji that record you speak in your Samsung Note 9. It’s quite easy to use AR Emoji Note 9 after using galaxy S9 AR Emoji.

And that’s all. We hope this makes it clear how to create AR Emoji on Galaxy Note 9. If you have any kind of trouble, tell us in below comment box. Stay and connect with us for the latest updates.

How to Fix Gmail Won’t Load on Google Chrome

Annoying that Gmail is stuck on loading in Chrome when logging in to my Google account. Have you ever faced this type of Gmail not loading issue or Google refused to connect email? There are several reasons behind Gmail not loading in Google Chrome & other browsers, such as a slow internet connection, Gmail is down, browser is outdated, the browser’s cache and cookies, disabling antivirus or firewall, and browser extension or application issues. I will surf the web and find some of the possible solutions to fix this can’t sign in to Gmail in the Google Chrome and Firefox browsers.

Read More: How to Fix YouTube Offline Error on Android and PC

How to Fix Gmail Not Loading in Chrome and Firefox Browser

Gmail stuck on loading in Chrome and Mozilla Firefox

Check out each one listed below the given method on your Chrome browser to fix the Gmail not loading problems.

Restart your PC

Step 1: Tap on the Windows Start icon.

Step 2: Tap on the Power button.

Step 3: Tap the Restart button to restart your desktop.

Check Internet connection

Ensure the internet is working on your PC to fix can’t load your Gmail account when open. A slow internet connection also causes Gmail not loading issues. Also, check your internet speed and contact your Internet service provider to fix slow internet issues.

Use Another Browser

If another browser is installed on your PC, try to sign in to your Gmail and check if it works.

Check if Gmail is Down

In the rare case, Gmail might be down. You need to check whether any Google service is down using a site like a down detector. You can see the real-time status, Website issues, and outages using this. If you found Gmail down, you need to wait until fix.

Read More: How to Fix GPS Issue

Clear Cache & Cookies in Chrome to Fix Gmail Won’t Load in Chrome

Step 1: Open the Google Chrome browser on your PC or Laptop.

Step 2: Tap on Three vertical dots at the top right corner.


Step 3: Tap Settings.

Privacy and security settings in Chrome Browser

Step 4: Tap Privacy and security.

Clear Browsing Data to Fix Gmail not loading Google Chrome


Step 5: Tap Clear Browsing data.

How to Fix Gmail Won't Load on Google Chrome


Step 6: Select the time range from Last hour/last 24 hours/last 7 days/last 4 weeks/all times you want to clear browsing data and tap on Clear data.

You can also see cookies, other site data & cache images, and file options. By default, check this option. If you don’t want to delete then uncheck it. Now, restart your PC or laptop device and check to fix Gmail not working issue in the Chrome browser.

Check Google Chrome Updates

Make sure you’re using the latest Google Chrome browser on your PC. If update related problem, these latest installed chrome browsers fix Gmail not loading issue.

Step 1: Open Google chrome on your PC.

Step 2: Tap Three vertical dots at the top right.

Step 3: Tap Settings.

About Chrome in your PC to check for Chrome Update

Step 4: Tap About chrome at last.

Google Chrome Update to Fix Gmail Not Loading in Chrome

Step 5: Chrome is updated if the latest version is installed.

Read More: How to Fix Chrome Sync Error on Android Phone

Disable Plug-in or Extension From Chrome Browser

Sometimes newly added plug-ins or extensions on your Chrome browser is causing for suddenly Gmail to stop loading.

Disable Extension in your Chrome browser

Open Google Chrome > Three vertical dots (Menu) at the top right corner > More tools > Extensions > Remove > Remove  

Disable or remove extensions one by one from your PC or Laptop, then restart your PC and sign in to Gmail again to see fix the problem or not.

Turn Off Antivirus Software or Firewall

Make sure the antivirus or firewall doesn’t block your Gmail. Temporarily disable the antivirus on your PC and check to fix the issue.

Re-install Browser

If you still have faced the Gmail won’t load problem, uninstall the browser from your PC. Restart your PC and re-install the Chrome browser on your desktop or laptop.

And that’s it. End the list of possible solutions to fix Gmail stuck on loading in Chrome and Mozilla Firefox browsers. Do you have any tips we missed above tutorial? Could you share with us in below comment box?

Related:

How to Clear Cache Partition on Google Pixel 2 and Pixel 2 XL

This clear cache partition on Pixel 2 XL and Pixel 2 devices fix various Pixel 2 issues such as can’t send or receive messages, low call volume or call dropping, touch screen not working, app crashing or freezing issue on your device. If you have found any particular app-related issues on android, clear the app cache or enable safe mode on Pixel to find a third-party app that causing this problem. It will remove all your Pixel phone data. Make sure to back up your data before performing this. Also, check for system software update fixes small bugs and improves the performance of your all Google Pixel and other Android devices.

Read Also:

How to Wipe the Cache Partition on Pixel 2 and Pixel 2 XL

Let see how to clear app cache and Pixel 2 XL & Pixel 2 wipe cache partition. Make sure to back up and restore your important data before performing the below settings.

Step 1: Turn off your Google Pixel 2 and Pixel 2 XL.

Step 2: Press & hold the volume down button and the power button at the same time until the phone vibrates.

You can view the Android system recovery screen on your Oreo device screen. By default Start button show on your device.

How to clear cache partition on Pixel 2 and Pixel 2 XL

Step 3: Press the volume down button until view Recovery mode.

Step 4: Press the power button to restart into recovery mode.

You can see the above screen of the Android robot exclamation mark with a red triangle symbol on your Pixel 2 phone.

Step 5: Press & hold the power button and press the volume up button one time only to see the recovery mode. When the screen appears, press the volume down button until highlight Wipe data/Factory reset.

This message view on your Pixel 2 & Pixel 2 XL screen: Wipe all user data?

Step 6: To confirm, press the volume down button to scroll to Yes and press the power button to select it.

Clearing the cache may take 4-5 minutes.

Step 7: Press the volume down buttons to scroll to the Reboot system now, press the power button to select it.

If you have found any specific app-related issues, clear the app cache in Pixel 2 devices.

Clear the app cache in Pixel 2 and Pixel 2 XL

Step 1: Go to Settings.

Step 2: Tap Apps & notifications.

Step 3: Tap App info.

Step 4: Tap app name want to clear the cache.

Step 5: Tap Storage.

Step 6: Tap Clear cache & Clear data.

And that’s all. I hope this little tip helpful to clear the cache partition on Pixel 2 and Pixel 2 XL. If you have any kind of problem, tell us in below comment box. Stay connected with us for the latest android tips and tricks.

How to Boot into Galaxy Note 10 and Note 10 Plus Recovery Mode/Download Mode

Boot Galaxy Note 10 and Note 10 Plus into Recovery mode & Download mode? You need to enter recovery mode on Samsung Galaxy to fix some of the system problems such as the unresponsive screen or Samsung galaxy won’t turn on or black screen issues, and more. You can easily boot Samsung Note 10+ into recovery using the power button and volume button. Sometimes users facing the issue of stuck on Samsung logo or Samsung stuck in Recovery mode.

Samsung Note 10 recovery mode settings include reboot system now, apply update from ADB, reboot to bootloader, update/recover from SDcard, Wipe data/factory reset, wipe cache partition and more. Follow the below-given step by step process to enter Recovery mode on Galaxy Note 10 and Note 10 Plus.

Read Also:

How to Boot Galaxy Note 10 Into Recovery Mode

How to boot Galaxy Note 10 into recovery mode

If you boot your Samsung Note 10 into recovery mode, apply below-given steps.

Step 1: Power off your Samsung Galaxy Note 10 and Note 10 plus.

Step 2: Press & hold the power button and volume up button to boot your phone into recovery mode.

Enter your Samsung Note 10 into recovery mode. Now, highlight any options using volume up or down button from recovery mode and press power button to apply it.

Step 3: Select option using the volume up or down button you want to apply.

If you perform a factory reset using recovery mode, make sure backup & restore data in your Samsung Galaxy device.

Step 4: Press the power button to confirm & apply.

Exit Recovery Mode on Galaxy Note 10

You’ll exit Samsung Galaxy Note 10 recovery mode using the same settings above. Just apply the above-given steps and select the reboot system now option and press the power button to reboot Note 10.

Put Samsung Note 10 and Note 10 Plus in Download Mode

Step 1: Power off your Samsung Galaxy Note 10 and Note 10 plus.

Step 2: Press & hold the power button and volume up button to boot your phone into recovery mode.

When you see the recovery mode screen, you can choose settings you want using volume up & down button.

Step 3: Press the volume down button highlight reboot to bootloader.

Step 4: Press the Power button.

Now, your Samsung Galaxy Note 10 and Note 10 Plus into download mode.

And that’s it. I hope this little tip useful to boot Galaxy Note 10 into recovery mode. Do you still have any questions? Tell us in below comment box. Don’t miss out to check our other latest updates.

How to Fix Samsung Galaxy Note 10 Apps Keeps Crashing & Freezing

Annoying by Messages or Phone apps crashing on Samsung Note 10+ and Note 10? This tutorial will help you to fix Samsung Galaxy Note 10 apps that keep crashing and freezing issues. There are several reasons for app keeps stopping android issues such as several apps running in the background, the app hasn’t been updated or OS update missed, lower memory slow down your device if installed more apps, etc. If you’re galaxy Note 10 plus apps keep stopping suddenly, you’ll try to clear the app cache or uninstall app updates on your Android phone or tablet.

Also, turn on safe mode on Samsung Note 10 to check any third-party app causing any issues. Check out below given different methods to fix Samsung Galaxy Note 10 apps keep crashing issues.

Read Also:

How to fix Galaxy Note 10 Apps Keep Crashing Issues

How to fix Samsung galaxy Note 10 apps keeps crashing

First of all, restart your Note 10 to the long press power button and tap the restart button. After restarting the device, open the app and check the fixed issue. Apply the below troubleshooting steps to fix apps freezing on Samsung Note 10.

Check for Phone Update

Check for any software update available for your Note 10+. The system updates will improve device performance and fix small bugs on your phone.

Step 1: Go to Settings.

Step 2: Scroll down and tap on About phone.

Step 3: Tap on Software information.

If the update is available, update it and check to fix the issue.

Check App Update

You need to check for apps updates using play store settings on your phone.

Step 1: Open the Play store.

Step 2: Tap on Three horizontal lines (Menu) at the top left corner.

Step 3: Tap on My apps & games.

Step 4: Tap on Update all.

Uninstall App Updates to fix Samsung Galaxy Note 10 Apps Keep Stopping

Make sure the app updated with the latest version to fix apps related problems. If the app suddenly stopped working, try to uninstall app updates and update again with the latest version.

Step 1: Open the Settings app.

Step 2: Tap Apps.

Step 3: Select the app you want to uninstall the update.

Step 4: Tap Three vertical dots (More) at the upper right corner.

Step 5: Tap Uninstall updates.

This will replace the app with the factory version. All app data will be removed from your device.

Step 6: Tap OK.

Now reboot your device and updates it using the given settings.

Play store > Three horizontal lines at upper left corner > My apps & games > Update all

I hope this solution will fix Samsung Note 10 apps freezing and crashing issues.

Clear App Cache on Note 10

If the app slows down your device or app freezing, try to clear app cache Note 10. It will temporarily remove app data from your device.

Step 1: Open the Settings app.

Step 2: Tap Apps.

Step 3: Select the app you want to clear the app cache on galaxy Note 10+.

Step 4: Tap storage.

Step 5: Tap clear cache.

Now reboot your device and check to fix app issues. If not, try to clear app data or clear storage.

Uninstall Updates Android System Webview to Fix App Crashes on Galaxy Note 10/Note 10 Plus

Step 1: Go to Settings.

Step 2: Tap on Apps.

Step 3: Tap on the Android system webview.

Step 4: Tap on Three vertical dots (Menu) at the upper right corner.

Step 5: Tap on the Uninstall updates.

It will replace this app with the factory version in your Samsung Galaxy devices.

Step 6: Tap on OK.

Now, restart your phone and update the app and you can see the fix app crashing issue.

Alternative Way: Settings > Apps > Three vertical dots at the top right > Show system > Android system webview > Three vertical dots at upper right > Uninstall updates > OK

Enable Safe Mode

Step 1: Press and hold the power button on your Note 10 plus.

Step 2: Tap & hold the Power off button until view the Reboot to safe mode.

Step 3: Tap OK to reboot Note 10+ into safe mode.

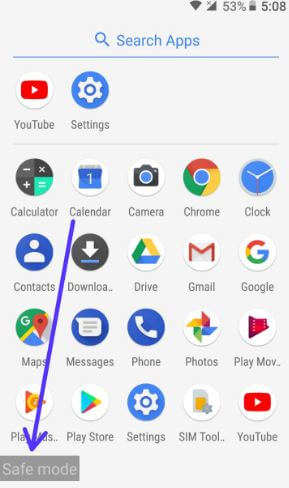
Step 4: You can see the Safe mode symbol appear in the bottom left corner.

Now hide all third-party apps you downloaded on your galaxy Note 10+ device. Check your phone crashing or freezing. If you can’t found issues, it means third-party apps causing problems. If your problem doesn’t go away in safe mode, it means the problem doesn’t relate to apps. Check for hardware-related problems. Restart your phone to turn off Safe Mode on Samsung Note 10 and Note 10+.

Force Stop App

Settings > Apps > Select app > Force stop > OK

Now, this app misbehaves on your device. Restart your phone and check the fixed issue. If none of the above-given methods solve the problem, uninstall the app using the below-given settings.

Uninstall the app and re-install it again

If none of the methods fix the app’s problem, uninstall the app from your Samsung Note 10+ and Note 10.

Step 1: Open the Play store.

Step 2: Tap More at the upper left corner of the screen.

Step 3: Tap My apps & games.

Step 4: Tap the Installed tab.

Step 5: Select the app from the list you want to uninstall.

Step 6: Tap Uninstall.

This pop-up message appears on the screen: Do you want to uninstall all updates to this Android system app?

Step 7: Tap OK.

Remove the app from your device. Now restart your phone and reinstall the app again using a play store or Samsung store and check to fix Note 10 apps issue.

End the list of possible methods to fix Samsung Galaxy Note 10 apps keeps crashing and freezing issues Do you have any other tips you want to share? Have you been applying them already? Hit the comments and let us know!

How to Change Your Bitmoji Style on Android Phone

Bitmoji is your personal Emoji. To change your Bitmoji style on Android phones, create Bitmoji on your devices. If not create your own Bitmoji, you can create your Bitmoji on Snapchat Android devices using this. Also, download the Bitmoji app on your Android devices from the Play Store. While the first time makes a Bitmoji on your Android device, you can choose from male or female and change Bitmoji face, hairstyle, facial hair, eye shape, glasses, hair color, mouth, body type, and also matching Bitmoji outfits. You can change Bitmoji gender from Bitmoji Deluxe, Bitstrips, or Bitmoji Classic. Also, reset or change Snapchat Bitmoji avatar on Android devices.

Related: How to Add Bitmoji to WhatsApp on Android Devices

How to Change Your Bitmoji Style on Android Phone

First, see the steps to change Bitmoji style 2023 using the Bitmoji app on Android devices.

Change or Edit Bitmoji using Snapchat App If Linked my Bitmoji

Step 1: Open the Snapchat app if linked with your Bitmoji app.

Step 2: Tap on the Profile picture at the top left corner.

Step 3: Tap the Settings gear icon at the top right corner.

Tap on Bitmoji on your Snapchat App Android Device

Step 4: Tap Bitmoji.

You can see three options: Change my Outfit, Edit my Bitmoji, and Choose a selfie.

Change Bitmoji Style using Snapchat App

Step 5: Tap Edit my Bitmoji.

How to Change Bitmoji Style on Android Phone

Step 6: Edit the Bitmoji outfits you want and tap Save at the top right corner.

You can see the change in your Bitmoji style.

How to Change Your Bitmoji OutFits using Snapchat Android

You can see several cute Bitmoji outfits male and female, and apply them to your Bitmoji using the below-given settings.

Step 1: Follow the above-given method in Steps 1 to 4.

Change Bitmoji OutFits using Snapchat Android

Step 2: Tap Change my Outfits.

You can see Bitmoji fashion outfits with colors like shirts, pants, caps, shoes (Footwear), Jackets, etc.

How to Change Bitmoji OutFits

Step 3: Select the Outfit and tap on Outfit if you want to send this outfit to your Snapchat friends.

Step 4: Tap Save at the top right corner.

How to Change Bitmoji Avatar on Snapchat 2023

You can change Bitmoji on Snapchat on your Android phone using the below-given settings.

Step 1: Open the Snapchat app.

Step 2: Tap on the Profile icon at the top left corner.

Step 3: Tap on your Snapchat avatar.

Here, you can change outfits, share outfits, pose & background, change selfies, and edit avatars on Snapchat.

How to Change Avatar on Snapchat

Step 4: Tap Edit avatar.

Change Bitmoji on Snapchat on your Android

Step 5: Edit an avatar and tap Save at the top right corner.

Using Bitmoji App (Older Version)

Step 1: Open the Bitmoji app on your Android devices.

Step 2: Log in with your Snapchat account or your email.

Open Bitmoji settings in android phone

Step 3: Tap Three vertical dots (Menu) in the upper right corner.

Bitmoji avatar settings in android phone

Step 4: Select Settings.

How to change your Bitmoji style in android

Step 5: Tap Change Avatar style.

You can see Bitmoji deluxe, Bitstrips or change your Bitmoji to classic options. You can use Bitmoji Exclusive or Bitmoji Classic if you want.

How to change your Bitmoji style in android phone

Step 6: Choose any one (We choose Bitstrips) and tap Use This Style.

Now let’s see how to change the Bitmoji style to Bitstrips on Android devices.

Step 7: Now set skin tone, hair color, hair style, eye color, nose, glasses, face shape, mouth, cheek lines, blush, lipstick, headwear, body type, outfit, and other matching Bitmoji outfits.

Step 8: Tap the Right arrow or Save avatar.

Now change Bitmoji gender in your Android devices. You can also reset Bitmoji avatar on Android devices to create a new Bitmoji-style avatar again.

How to Reset Bitmoji Avatar on Android Phone

Step 1: Open the Bitmoji app on your Android phone or tablet.

Step 2: Log in with your Snapchat account or your email id.

Step 3: Tap Three vertical dots (Menu) in the upper right corner.

Step 4: Select Settings.

Step 5: Tap My Account.

Reset Avatar in android devices

Step 6: Tap Reset avatar.

You can see a pop-up message on the screen: Are you sure?

Step 7: Tap OK.

Now reset your avatar on your Android device, and you will create a new one.

And that’s all. We hope this clarifies how to change the Bitmoji style on Android phones. Don’t forget to check out our other Snapchat tricks. If you have any questions, please tell us in below comment box.

Related: