How to Use 3D Panorama on Huawei P30 Pro, P20 Pro, P20 Lite, Mate 20 Pro

Take a 3D photo on Huawei P30 Pro, P20 Pro, and other latest Huawei devices? Here’s how to take a panorama on Huawei P20 Pro and P20 devices. Using panorama mode, you can capture a scene from different angles in your Huawei P20 and P20 Pro. You can take 3D panorama Huawei P20 Pro. Also available different shooting modes such as Portrait, Pro, Night, Slow-mo, Monochrome, watermark, Light painting, and more.

But in this tutorial, I’ll show you take a 3D panorama on Huawei P20 Pro (Available for Huawei P30 Pro, P30, P20, P20 Lite, Mate 20 Pro). Huawei P20 Pro has three rear cameras including 40 MP RGB (f/1.8 aperture), 20 MP Monochrome (f/1.6 aperture) and 8 MP Telephoto (f/2.4 aperture). This shooting mode takes multiple scenes at a single shot. You need to just follow the direction on the camera on your phone.

Relevant:

How to Take Panorama on Huawei P20 Pro and P20

Let see steps to use panorama on your latest Huawei devices.

Take 3D Photo Huawei P30 Pro: Take 360 Degree photos

Step 1: Open Camera app in your Huawei device.

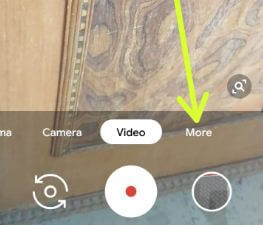
Step 2: Tap on More.

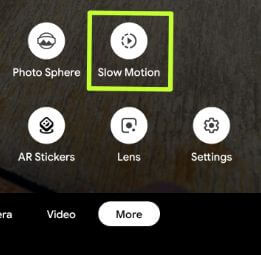
Step 3: Tap on Panorama.

Step 4: Touch & hold the camera icon to start capturing.

Step 5: Move your phone slowly around your subject in a direction shown on your device.

Release camera icon to stop capturing Panorama video.

Step 6: After capturing, touch the camera thumbnail & touch the 3D above the photo

Step 7: Now, you can see create a 3D Panoramic photo in your latest Huawei devices.

After a 3D panorama has been generated, you can tilt your Phone or drag the photo to view the 3D effect. Also, take selfies using 3D panorama on your Huawei devices.

Use Panorama on Huawei P20 Pro, P20 Lite, P20

Step 1: Open the camera app in your device.

By default set photo as shooting mode.

Step 2: Swipe the right side and tap More.

Here you can see shooting modes such as slow-mo, Panorama, Monochrome, 3D panorama, watermark, HDR and more.

How to take panorama on Huawei P20 Pro

Step 3: Tap Panorama.

Step 4: Tap the Shutter button to start shooting in your Huawei P20 Pro & P20.

Step 5: Now you can see the Arrow icon in the middle of your device. Move your phone slowly in the arrow direction to take a panorama on your device.

If you move the phone fast, you can see a warning message on the screen.

Step 6: Move your device in the arrow direction.

Step 7: Tap the shutter button again to stop panorama.

Now automatically save this panorama photo to your camera photos in your Huawei P20 Pro and P20 device.

Step 8: Go to gallery and open Panorama photo.

You can see several scenes capture with one photo in Huawei P20 Pro panorama mode.

How to take a 3D Panorama Huawei P20 Pro

Enjoy 3D panorama in your device. You can see a 3D icon on a panorama photo you have taken using this 3D panorama Huawei P20 Pro.

Camera app > Swipe screen right side up to More > More > 3D Panorama

And that’s all. We hope this makes it clear how to take panorama on Huawei P20 Pro and P20. If you have any question, tell us in below comment box. Stay and connect with us for the latest android updates.

How to Enable USB Debugging on Android Oreo 8.0/8.1

To use USB debugging on Android Oreo 8.1 and 8.0 devices, make sure to enable developer option in your device. USB debugging is useful for transfer files between your desktop PC and your smartphone. You can enable or disable USB debugging under developer mode only.

In android 8.0 developer option, you can see various options such as memory used by apps, running services, automatic system update, OEM unlocking, Webview implementation, quick settings developer tiles, USB debugging, USB configuration, Force GPU rendering, OEM Unlocking, strict mode, background process limit and more. Follow the below-given step by step guide to turning on USB debugging on android Oreo 8.0 devices.

Read Also:

How to Enable/Disable USB Debugging on Android Oreo 8.0 and 8.1

In android Oreo device slightly different settings compare to previous android OS.

Enable Developer Mode if hidden

Step 1: Go to Settings in your android Oreo 8.0 devices.

Step 2: Tap System.

Step 3: Tap About phone.

Step 4: Scroll down up to the end of the page and tap the Build number 7 times.

After enabling the developer option, you can see this message on the screen: You are now a developer!

To see Oreo developer mode settings, go to Settings > system > Developer options

Enable USB debugging Oreo 8.1

Step 1: Go to Settings.

Step 2: Tap System.

Developer option under Android Oreo system settings

Step 3: Tap Developer options.

Here you can view various sections. You will find the USB debugging option under the debugging section in developer mode.

Android 8.0 Oreo USB debugging option

By default disabled USB debugging Oreo and other devices.

Step 4: Toggle on USB debugging.

Enable USB debugging on android Oreo 8.0

Step 5: Press OK to enable it.

Now you will easily copy data between PC and your android device.

In Android Oreo developer mode settings, you can see OEM unlocking which allows the bootloader to be unlocked. And when enable OEM unlocking on the Oreo device, your android Oreo device protection feature will not work on this device.

And that’s all about android Oreo developer options. I hope this little tip helpful to enable USB debugging on android Oreo 8.0 devices. Do you have any developer mode tips you want to share? Tell us in below comment box. Don’t miss out on our single android Oreo ricks.

How to Fix Trusted Face Not Working on Android Oreo 8.1

Is a trusted face missing on Android 8.1 Oreo? Here’s how to fix Android 8 trusted face not working issue. A trusted face smart lock is useful to unlock your android device when the face is recognized. In the Android Oreo smart lock feature, you’ll see five options for unlocking your device including on-body detection, Trusted places, Trusted devices, Trusted face or face unlock, and trusted voice.

But several users reported trusted face has stopped on Android Oreo 8.1 or unfortunately trusted face keeps stopping suddenly in Nougat 7.0/Marshmallow 6.0/Lollipop 5.1 devices. Have you been ever faced this type of issue in your Android devices? Check out below given possible solutions to fix smart lock not working on android Oreo 8.1 devices such as Google Pixel 2, Pixel 2 XL, Pixel 3, 3 XL, Nexus 6P/5X, etc.

Read Also:

How to Fix Smart Lock (Trusted Face) Not Working on Android Oreo 8.1 & 8.0 

If suddenly a trusted face has stopped in your android device, reboot your Android device and after that check fix trusted face keeps stopping issues. If not working, then try below given possible two methods in your device such as Samsung Galaxy, LG, Motorola, Sony, etc.

Check Improve face matching

First of making sure your android device is at your eye level. If not unlock your device, check any issue with face matching or not. If you look different compare to when face recognized in your devices such as bearded or clean-shaven, with or without glasses and different lighting such as dim or bright. It might also problem for trusted face keeps stopping in your android Oreo 8.1. You’ll add more face or improve face matching in android Oreo using the below settings.

Step 1: Go to Settings in your Android Oreo 8.1 & other devices.

Step 2: Tap on Security & location.

Use Android Oreo smart lock feature

Step 3: Tap on Smart lock under the device security section.

Confirm your device PIN/Pattern or other security if set.

Tursted face in android phone 8.1 Oreo

Step 4: Tap on the Trusted face.

Imporve face making in android to fix trusted face not working issue

Step 5: Tap on Improve face-matching.

Step 6: Tap on Next.

How to fix trusted face not working on android Oreo

Step 7: Show your face in the circle to improve face matching.

After the completed process, check to fix trusted face not working issues on your android device or not. If not fix the issue, try the below-given method.

Remove trusted face and add again to fix trusted face not working on Android Oreo

Just remove added trusted face from your Android Oreo 8.1 using the below settings.

Remove trusted face in android Oreo and Nougat

Settings > Security & location > Smart lock > Trusted face > Remove trusted face > Remove

Your android device will not recognize your face and the trusted face feature will be disabled. Now restart your device and again add your face. To set up trusted face in Android device Go to Settings > Security & location > Smart lock > Trusted face > Set up > Next > Show you face

End the list of possible solutions to fix trusted face not working on Android Oreo, Nougat, and other devices. Do you have any other tips we missed above to fix a trusted face to keep stopping the problem? Share with us in below comment box.

How to Enable OnePlus Laboratory On OnePlus 6T, 6, 5T, 5

Have you ever heard about the OnePlus laboratory feature on OnePlus 5/OnePlus 5T? This is the OnePlus 5 unknown feature. In the android device has hidden system UI tuner settings, OnePlus 5 has this hidden OnePlus laboratory option. You can enable OnePlus laboratory on OnePlus 5 device as the same enable system UI tuner in your android devices.

In this OnePlus laboratory setting, you can activate power notification controls, lock screen notifications and Override Do not disturb mode options. By default disable this OnePlus laboratory on OnePlus 5/5T (Available on OnePlus 7 Pro, 7T Pro, 7T, 7, 6T, 6). This is the OnePlus 5T hidden feature you should know. Let see step by step process to enable OnePlus laboratory on OnePlus 5.

Read Also:

How to Enable and Use OnePlus Laboratory On OnePlus 5 and OnePlus 5T

Enable OnePlus laboratory on OnePlus 5 and OnePlus 5T

You can turn on OnePlus laboratory on your latest OnePlus devices using below given settings.

For OnePlus 7 Pro, 7T Pro, 7T, 7

Step 1: Go to Settings in your latest OnePlus devices.

Step 2: Tap on Utilities.

Step 3: Tap on OnePlus Laboratory.

Step 4: Toggle on OnePlus Laboratory. 

For OnePlus 6T, 6, 5T, 5

Step 1: Swipe down the notification panel on your OnePlus 5/5T devices.

Step 2: Touch & hold on the Settings gear icon a few seconds.

You will see this message on the screen: Congrats! OnePlus laboratory has been added to settings

Now turn on OnePlus laboratory on OnePlus 5 and OnePlus 5T devices. To activate it go to Settings > system > OnePlus laboratory

In OnePlus laboratory, you can see the power notification controls option for set importance level from 0 to 5 for app’s notifications in your OnePlus 5 devices. This setting is useful to prevent full-screen interruption, block all notifications from the app, hide notification from lock screen & status bar and more OnePlus 5 app’s notification settings.

To use this app-level feature for an app, open that app’s app info page using apps & notification settings in your device. In-app info page, tap on notifications. Here you’ll set the importance level you want in your OnePlus 5 device.

To disable OnePlus laboratory from your OnePlus 5/5T, tap & hold settings icon a few seconds and you can see a pop-up menu with this message on screen: Remove OnePlus laboratory from settings and stop using all of its features? Tap on Remove to disable it in your OnePlus devices. This is the same process as remove system UI tuner in Android devices.

And that’s all. I hope this tutorial helpful to enable OnePlus laboratory on OnePlus 5 and OnePlus 5T. If you have any kind of trouble, tell us in below comment box. Do you have any tips want to share with us? Don’t forget to check out our other OnePlus 5 tips and tricks.

How to Boot into Safe Mode on Galaxy Note 10 and Note 10 Plus

Reboot your Samsung Galaxy Note 10 and Note 10+ to safe mode? Here’s how to enable and turn off safe mode on Samsung Galaxy Note 10 plus. By default safe mode off on all Samsung galaxy and other android phones or tablets. There are two ways to enter Samsung Note 10 into safe mode. When starting your galaxy Note 10 in safe mode, it will disable all third-party apps from your device.

What is a safe mode on android and how to use it? If you’re an android device facing apps related issues, unresponsive screens and slow down your phone problem, you need to turn on safe mode to check if any third party app causing issues in your device. Apply below-given settings to turn on safe mode Samsung Note 10 and Note 10+.

Read Also:

How to Enable Safe Mode on Samsung Note 10 Plus and Note 10

How to enable safe mode Samsung Note 10

You’ll enter into safe mode on galaxy Note 10 plus when you’re device powered on and powered off. Check out below given both methods.

1st Way: Turn On Safe Mode on Galaxy Note 10+ When Powered on

Step 1: Press and hold the power button on your Note 10 until the power off button appears.

Step 2: Long press Power off button until appearing Reboot to safe mode.

Step 3: Tap OK to reboot Samsung Note 10 into a safe mode.

Wait until restarting your device.

Step 4: You can view Safe mode on the bottom left corner.

Now hide all downloaded apps in your Note 10+ device. Check your device facing any problems. If you can’t found issues, it means third party apps causing problems. If you still found a problem when enabling safe mode galaxy Note 10 plus, it means problems with physical hardware or OS.

How to Turn Off Safe Mode Samsung Note 10 Plus and Note 10

Want to get rid of safe mode on galaxy Note 10+? You can easily turn off to reboot your device.

2nd Way: Restart Galaxy Note 10 into Safe Mode

Step 1: Confirmed your Note 10 turned off.

Step 2: Press and hold the power button until the screen wakes up.

Step 3: Release the Power button while the Samsung logo appears.

Step 4: Immediately after releasing the power button, long press volume down button.

Step 5: Continue holding until you’re device restarts.

Step 6: When appearing safe mode on the bottom left corner, release the volume down button.

You can exit safe mode to restart your Samsung devices.

And that’s it. We hope the above-given methods useful to enable safe mode Samsung Note 10 plus and Note 10. If you have any questions, tell us in below comment box. Stay and connect with us for the latest updates.

How to Fix Galaxy Note 10 WiFi Issue

Annoying by Samsung Galaxy Note 10 not connecting to WiFi? Here’s how to fix Galaxy Note 10 WiFi issues. Different types of Wi-Fi connectivity issues occur such as authentication error (Incorrect password), slow WiFi speed, phone connected to WiFi but no internet, Wi-Fi connection keeps dropping, can’t access internet and more Note 10 wifi issues. Sometimes poor network signal is causing slow WiFi or disconnect connectivity in your Samsung devices.

If you’re using Wi-Fi through a router, you need to check if any router problem or cable issue on your PC or laptop. Check out below given different solutions to fix Galaxy Note 10 won’t connect to WiFi issues.

Read Also:

How to Fix Samsung Galaxy Note 10 Not Connecting to WiFi

How to fix Galaxy Note 10 WiFi connectivity issues

If you’re having trouble with Samsung Note 10 plus won’t connect to Wifi issues, apply below methods to fix it.

Remove the Connected Network

Open WiFi settings in your device and check your entered password is the same as your Wi-Fi connection. To confirm it, enter the password to other devices or PC. If you can’t connect then forget the WiFi network connection and re-connect again in your Samsung galaxy.

Settings > Connections > Wi-Fi > Long press Wi-Fi network connected > Forget

Now remove saved detail from your device. Enter the WiFi password again to connect and check to fix Note 10+ WiFi issue.

Turn Airplane Mode On & Off

If you’re Samsung Note 10 slow WiFi speed because of poor network signal, you’ll try to turn on airplane mode for 1 minute and turned it off to swipe down the notification panel from the top of the screen.

Restart Router or Unplug Modem to fix Galaxy Note 10 WiFi connectivity issues

If using a router to connect WiFi on mobile, switch off your router for 2-3 minutes and turn back on. Once the router has connected to the internet, try to connect your mobile with the network and check fix problems in your device.

Enable Safe Mode

To check any downloaded app causing this galaxy Note 10 won’t connect wifi issue, you need to enter your device into safe mode using below settings. It will disable all third-party apps when activating safe mode in Note 10.

Long press power button > Tap & hold the power off until seeing Reboot to safe mode > OK

You’ll see a safe mode icon at the bottom left corner of your Samsung Galaxy device. Now, connect the WiFi network, if you can connect to Wi-Fi while enabling safe mode, third-party app causing the issue on your phone. Remove most recently downloaded apps one by one and check fix problems. After finding the app, re-install apps that unnecessary deleted. To exit safe mode in Galaxy Note 10+, just restart your device.

Reset Network Settings to fix Galaxy Note 10 WiFi issues

It will remove saved Wi-Fi networks, Bluetooth connections, and mobile data related network settings from your Samsung Galaxy device.

Step 1: Open the Settings app in your galaxy Note 10.

Step 2: Tap General Management.

Step 3: Tap Reset.

Step 4: Tap Reset Network Settings.

Step 5: Tap Reset settings.

Step 6: Tap Reset settings to confirm it.

Now open Wifi settings and enter password and other details again to use it in your Samsung Note 10 and Note 10+. If none of the above-given methods fix Wifi connectivity issues on Samsung Galaxy Note 10 plus and Note 10, try a factory reset Note 10 to fix the WiFi problem.

End the list of possible methods to fix Galaxy Note 10 WiFi connectivity issues. Do you have any other handy tips you want to share? Have you been applying them already? Hit the comments below and let us know!