How to create a password for Windows 7 user account

Set up a new password on Windows 7 or Windows 8 or Windows 10? Here’s the process to create a password for windows 7 user account. We have set new password in Windows to secure or protect our data and other user accounts on pc or computer. You can manage all user account settings on Windows 7 using user accounts & family safety categories including set or change password, picture, account name & type, and another account.

Create a Windows 7 password for a user account is a simple and easy process. The main purpose of set or change password on your Windows 7 PC is a security or secures your data or document from unknown users. Some users have one or more accounts so create Windows 7 login password of both accounts. People who do not have an account can use the guest account to log on to the Windows 7 computer. Follow the below-given steps to create a password for Windows 7 user account.

Check Also:

How to change facebook password on Android

How to change lock screen time out in Windows 10

How to turn off auto-update in Windows 7

How to use tablet mode in Windows 10

How To Create a Password For Windows 7 User Account

Step 1: Tap on the “Windows Start” menu button

Step 2: Click on “Control Panel”

Tap on user accounts & family safety category

Step 3: Tap on “User accounts and family safety” category

Tap on user accounts on Windows 7

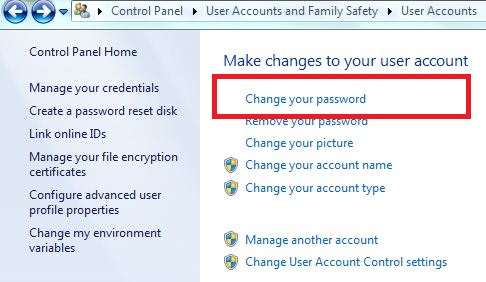
Step 4: Tap on “User accounts”

Create a password for your Windows 7 account

Step 5: Click on “create a password for your account”

How to create a password for windows 7 user account

Now you can see the above screen on your Windows 7 PC / desktop.

Step 6: Enter a new password then re-enter a password to confirm it and type a password hint that will be visible to everyone who uses this computer. The password hint is useful when we forgot Windows 7 login password.

Step 7: Click on “Create password”

Set the password on your Windows 7 desktop. Now you can change or remove the password to your Windows 7 user account using this setting. That’s all.

Above you can see the simple steps to create a password for windows 7 user account. If you’re having problems implementing the above steps, don’t hesitate to let me know. It would be a pleasure to help you. Connect with us for daily latest technology updates!

How to fix error 101 in Google Play Store

Here’s how to fix Google play store error 101 in android phone or tablet device. When trying to download apps from the play store, you can see this error code 101 due to server error or full internet storage. To fix it uninstall unnecessary apps from the device and try downloading & installing an app in the android device. It’s simple to fix error code 101 in the Google Play Store.

Other Google play store errors related to this are error 492, error 403, error 194, error 505, error 941, error 504, error 495 and other common errors. You can see this type of message “Facebook” could not be downloaded due to error. (-101) Another error is “App could not be downloaded” or “unable to download app” in an android device. In this tutorial, I will guide you step by step to fix error 101 in Google play store and other related errors.

Read Also:

How to fix error code 40e while downloading apps from play store

Fix Google Play Store error code 500

Fix Google Play Store error DF-DLA-15 in android

4 different methods to fix error 101 in Google play store while downloading the app

fix error 101 in Google play store

Try below given possible solutions to fix Google play store error code 101 in android devices.

1st Method: Clear the cache of Google Play Store

Step 1: Go to “Settings

Step 2: Under the device section, tap “Apps

Step 3: Touch “Google play store

Step 4: Tap “Storage

Clear the cache of play store to fix error 101

Step 5: Tap “Clear cache” & “Clear data

Clear cache of Google play services android device

Settings > Device > Apps > Google Play Services > Storage > Clear cache

2nd Method: Force stop Google Play store

Force stop Google Play Store to fix 101 error code

Settings > Device > Apps > Google Play store > Force stop

3rd Method: Uninstall Google play store updates to fix error 101 in Google play store

Step 1: Go to “Settings

Step 2: Touch “Apps” under the device section

Step 3: Find “Google Play Store” & open it

Step 4: Touch “More

Uninstall Google play store updates to fix 101 error code

Step 5: Touch “Uninstall updates

Step 6: Tap “OK

Reboot your android phone and try again to downloading apps from Google play store.

4th Method: Remove your Google account

Step 1: Go to “Settings

Step 2: Under the Personal section, touch “Accounts

Step 3: Touch “Google

Step 4: Tap “More

Remove your Google account to fix error 101 code

Step 5: Tap “Remove account

Step 6: Tap again “Remove account

After removing Google account from your device, restart your android phone and log in again. Now try to download an app from Google play store.

End the list of solutions to fix error 101 in Google play store. Share this article if you found it helpful? Don’t hesitate to let me know in below comment box if you have any kind of problem. We will respond as soon as possible.

How to Fix Unknown Network Error Occurred on Instagram

Instagram is one of the most popular social media apps to share photos, your story, and live videos. Recently while logging in to my Instagram account, I suddenly saw the error message “An unknown network error has occurred”. This type of Instagram error network error occurred primarily due to a poor wi-fi connection or network signal issue in your Android phone. Also, this unknown network error problem occurs on WhatsApp, Hike, Snapchat, WeChat, and other applications. Also, users face oops an error occurred, or Instagram couldn’t complete your request error when trying to log in. You can quickly fix Instagram unknown network error occurred using this tutorial.

Read More: How to Fix Instagram Crashing

How to Fix Instagram Network Error Occurred

Fix unknown network error on Instagram

Try below given a possible solution to fix Instagram error. An unknown network error has occurred.

Check Internet Connection – Mobile data or WiFi

How to Fix Unknown Network Error Occurred on Instagram

Check network settings for mobile data or WiFi networks if you can see no internet connection error. Make sure the internet is working on your phone. Swipe down the notification panel at the top and tap on Mobile data or Wi-Fi to enable and log in with your Instagram id and password. Also, several users face an Instagram loading screen because of a slow internet connection.

Check the Instagram App Update

Step 1: Open the Play store app on your phone.

Step 2: Tap the Profile icon at the top right corner.

Step 3: Tap on Manage apps and device.

Step 4: Tap the Manage tab.

Step 5: Tap Updates available.

Fix Unknown Network Error Has Occurred on Instagram Android

Step 6: Tap Update or Update all.

Clear Cache Instagram App to Fix Instagram an Error Occured

Step 1: Go to Settings.

Step 2: Tap Apps.

Step 3: Tap on See all apps.

Step 4: Scroll down until you view Instagram and tap on it

Step 5: Tap Storage and cache.

Clear Cache Instagram App to Fix Instagram an Error Occured


Step 6: Tap Clear cache.

Clear Instagram Data to Fix Instagram unknown network error occurred

Clear Instagram Data: Settings > Apps > See all apps > Instagram > Storage & cache > Clear storage > Delete.

Set Automatic Date & Time to Fix Unknown Network Error Occurred on Instagram

Check the date and time on your Android phone or tablet device. You can set automatic dates and times on your device using the below settings.

Step 1: Go to Settings.

Step 2: Scroll down and tap System.

Step 3: Tap Date & time.

By default, enable date & time on Android devices.

Step 3: Toggle off the Set time automatically.

Step 4: Tap Date and set it and press OK.

Step 5: Tap Time and set it, and press OK.

Set Automatic Date & Time to Fix Unknown Network Error on Instagram Login


Step 6: Toggle on Set time automatically.

Now, try to log in to your Instagram account.

Force Stop Instagram

Force Stop to Fix Instagram error network error occurred

Settings > Apps > See all apps > Instagram > Force stop > OK

Uninstall Instagram App and Re-install

Step 1: Open the Play store app.

Step 2: Tap the Profile icon at the top right corner.

Step 3: Tap Manage apps and device.

Step 4: Tap Manage.

Step 5: Tap the Instagram app.

Uninstall Instagram App and Re-install to Fix Instagram Network Error Occurred

Step 6: Tap Uninstall.

This pop-up view: Uninstall this app?

Step 7: Tap Uninstall.

Restart your phone, download the Instagram app from the Play Store, install it again, and check to fix Instagram error issues.

FAQs:

Why isn’t Instagram Fail to Send Message?

You can’t send messages to other people without an internet connection on your device. Due to an internet connectivity problem, you can’t log in to Instagram, Instagram app won’t open, or Instagram couldn’t load activity when you upload a post.

Why is Instagram saying No Internet Connection?

Make sure to enable your device’s mobile data or WiFi network to send photos and videos on Instagram. Pull down the notification panel at the top and tap on Wi-Fi or Mobile data to turn it on your device.

Related:

How to Reset Samsung Galaxy A50 Network Settings

This tutorial explains you steps to reset Samsung galaxy A50 network settings. Reset network settings on Samsung A50 will fix network problems such as Wi-Fi authentication error, can’t pair with Bluetooth, internet slow, or other network connectivity issues. When you reset your network settings on Samsung galaxy or Android, it will remove all saved Wi-Fi networks, Bluetooth pair and other network-related settings from your devices.

You can reset network settings on Galaxy A50 using General management settings. Different android version has slightly different settings to reset my Samsung network settings. Follow below given a complete guide to reset Samsung Galaxy A50 network settings.

Don’t Miss This:

How to fix slow internet connection on Galaxy S8 & S8 Plus

How to share the internet connection with Laptop or Desktop PC

How to set up VPN on Android Oreo 8.0

How to fix Wi-Fi not working on Samsung Galaxy A50

How to Reset Samsung Galaxy A50 Network Settings

Reset Wi-Fi, Bluetooth, Mobile data, APN settings and other network settings to their defaults using below steps on your Galaxy A50 and Galaxy A70.

Step 1: Swipe up from the bottom of the screen to open the App drawer

Step 2: Tap Settings app

Step 3: Scroll down and tap General Management

Reset network settings on Galaxy A50

Step 4: Tap on Reset

You can see Reset settings, Reset network settings, Reset accessibility settings, Factory data reset, and Auto restart options.

Reset your network settings on Samsung Galaxy

Step 5: Tap Reset network settings

Also, select SIM 1 or SIM 2 if use 2 SIM card in your devices.

How to Reset Samsung Galaxy A50 Network Settings

Step 6: Tap Reset settings

This pop-up message appears on the screen: All network settings will be reset. This action can’t be undone.

Reset network settings on Samsung A50

Step 7: Tap Reset

Network settings have been reset message shown on the screen. All connected Wi-Fi devices passwords and paired Bluetooth devices removed. To use Wi-Fi and Bluetooth, you need to enter the password again in your device. To connect WiFi, Go to Settings > Connection > Wi-Fi > Tap Wi-Fi name > Enter Password > Connect

And that’s all. We hope the above-given guide useful to Reset Samsung Galaxy A50 Network Settings. If you have any kind of trouble, tell us in below comment box. We will respond as soon as possible. Stay and connect with us for the latest updates.

How to fix Google Play Store error 406

Here’s how to fix Google Play Store error 406 in android phone. In my android device, while downloading apps or games from Google play store and suddenly seen error code 406. And see this message on screen: App could not be downloaded due to an error. (406) If you are using a Wi-Fi or mobile data network and the connected network is poor, you can not download or update apps or games on your device.

Another Google play store errors related to these types are error 504, error 194, error 500, error 492, error 403, error 920 and more. To fix this error 406 in the play store, clear the cache & data, uninstall update of Google play store, force stop play store, factory reset your android device. Below you can see the complete step by step guide to fix Google Play Store error 406 in android phone.

Read this:

Fix error code 492 on Google Play Store

How to fix Google play store error 403

How to fix Google Play Store error DF-DLA-15

5 Methods to fix Google Play Store error 406 in Android Phone

Fix Google Play Store error 406 in android

1st Way: Use another Wi-Fi network

If not update apps using connected Wi-Fi networks, turn off Wi-Fi and try to connect other Wi-Fi or mobile data network and update apps in your android phone or tablet devices.

2nd Way: Clear the cache and data Google play store

Step 1: Go to “Settings

Step 2: Under the device section, touch “Apps

Step 3: Scroll down until see “Google Play Store” and tap on it

Step 4: Tap “Storage

Clear cache of Google Play store to fix error 406

Step 5: Tap “Clear cache

Clear the cache of Google play services

Settings > Device > Apps > Google Play Services > Storage > Clear cache

3rd Way: Uninstall Google play store updates to fix Google Play Store error 406 in android

Step 1: Go to “Settings

Step 2: Under the device section, tap “Apps

Step 3: Scroll down until find “Google play store” & tap on it

Step 4: Touch “More

Uninstall Google Play store update to fix error 406

Step 5: Touch “Uninstall updates

Step 6: Tap “OK

Now try to download the app from play store in your android device.

4th Way: Remove your Google account

Step 1: Go to “Settings

Step 2: Under the Personal section, tap “Accounts

Step 3: Touch “Google

Step 4: Tap “More” from top of the right side corner

remove google account to fix error 406 in play store

Step 5: Touch “Remove account

Step 6: Again tap Remove account

After removing Google account from your device, log in with another Google account and try download apps or games to check to fix Google Play Store error 406.

5th Way: Factory data reset android phone

Step 1: Go to “Settings

Step 2: Under the personal section, tap “Backup & reset

Step 3: Touch “Factory data reset

Reset android phone to fix error 406 in Google Play Store

Step 4: Tap “Reset phone

Step 5: Tap “Erase everything

It will delete all your android device data and downloaded apps from your device storage.

That’s it. All possible solutions are given above to fix Google Play Store error 406 in android device. If you have known other easy trick to fix error 406 in the play store, please share it with us. Stay connected with us for latest android tips.

How to Fix WiFi Not Working On Samsung Galaxy A50

Here’s how to fix WiFi not working on Samsung Galaxy A50. Annoying by can’t Samsung A50 connect to Wi-Fi or Wi-Fi connection keeps dropping. Different Wi-Fi issues occur such as WiFi authentication, Wi-Fi icon with an exclamation point, Wi-Fi connected but not internet, etc. First of all, make sure to connect your phone with the same WiFi network or Wi-Fi is turned on in your phone.

Wi-Fi and Bluetooth stop working are most common problems on any Samsung galaxy and other Android devices. Check your device has a network or internet connection issues. Also, try connecting your Galaxy A50 to the WiFi with another phone. If other devices can use the network, the issue is your phone. Check out below-given troubleshooting methods to fix WiFi not working on Samsung Galaxy A50 And Galaxy A70.

Read Also:

How to fix Galaxy Note 10 plus keeps restarting

How to fix Wireless charging issue on Galaxy S9 & S9 Plus

Fix touchscreen not working on Google Pixel

How to fix Samsung Galaxy A50 Network Problem

How to fix wifi not working on Samsung Galaxy A50

If you’re having Wi-Fi connectivity issues or Samsung A50 Wi-Fi issues, try the possible solutions below.

1st Way: Make sure WiFi is on

Check your Wi-Fi network is on and you have entered the correct password. Turn off WiFi and on again to reconnect the network.

2nd Way: Check for the latest system update

Make sure your phone is updated with the latest version. Updates can improvements device performance and fix small bugs. Check for update and if available then update it.

Settings > Software update > Download and install

The phone will search for and download any available updates.

3rd Way: Find Netowork or internet error to fix wifi not working on Samsung Galaxy A50

Check your phone can connect to the public or office WiFi network. If your device can connect elsewhere, the problem is with your network.

If your phone connects to the Wi-Fi but you still have not internet issue, the problem is with your internet connection.

4th Way: Restart the router & Modem

Unplug the router and modem’s power cords from the wall outlet for 10-20 seconds. Plug the power cords back in. Check all cables connect securely. Wait until the modem lights. If the lights aren’t working, your device could have a problem with the router, modem, or internet connection.

5th Way: Delete the Wi-Fi network and re-add network again

First, remove the connected Wi-Fi network and re-add it again.

How to fix wifi not working on Samsung Galaxy A50

Settings > Connection > Wi-Fi (Turn on Wi-Fi if needed) > Tap network you want to remove > Forget

Now add the Wi-Fi network again.

Wi-Fi connectivity issues A50

Settings > Connection > Wi-Fi > + Add network > Enter details > Connect

Try to connect your device with Wi-Fi and check to fix WiFi issues.

6th Way: Reset all network settings on Samsung A50

Step 1: Go to settings

Step 2: Scroll down and tap General Management

Step 3: Tap Reset

Step 4: Tap Reset network settings

Step 5: Tap Reset settings

Step 6: Tap Reset settings again

Wait until complete the process. Now go to WiFi and add detail again to connect with Wi-Fi network, Bluetooth, or Hotspot in your Samsung devices.

And that’s all. We hope the above given one of the methods is useful to fix wifi not working on Samsung Galaxy A50. Do you have any alternative methods to fix Samsung 50 WiFi issues? Share with us in below comment box.