Last Updated on March 7, 2021 by Bestusefultips
How to use autofill in Android Oreo 8.1, 9 Pie and running Android 10. Autofill framework is useful to login account or fills up form without type login and password details. Autofill remembers your log-in details, just give him one-time permission to save password whenever you want to log-in first time your Google account and other accounts. It will save time. Android Oreo has several amazing features such as Picture-in-picture mode, background process limits, notification dots, Google Play protect and more.
To use Android 8.0 Oreo’s autofill feature, set up and use autofill password in android 8.1 Oreo using system settings. Sometimes when we log-in account or fill up a form, we mistake typing words or passwords. Autofill minimize user input errors and quickly enter details. Let see step by step guide to how to manage autofill in Android Oreo 8.1,9 and 10.
Read Also:
- How to use Picture-in-picture mode in Android Oreo
- How to change autofill service on Galaxy S10
- How To Allow Unknown Sources Android 10, 9 (Pie), 8.1 (Oreo)
- How to automatically enable public Wi-Fi on android 8.0 Oreo
- How to delete saved passwords in Chrome android phone
How To Enable And Use Android Autofill Service In Oreo 8.0
You can enable autofill service on your latest Android devices using below given settings.
Use Autofill in Android 10 and 9 Pie
Step 1: Go to System.
Step 2: Tap on Language and input.
Step 3: Tap on Advanced.
Step 4: Tap on Autofil service under the Tools section.
You can add service or choose an account to use the Google autofill password on Android 10 and 9 Pie. Also add your personal information, addresses, payment methods, and passwords.
For Android 8.1 & 8.0 Oreo:
Step 1: Go to settings in your android 8.0 devices.
A various section is seen on your android phone.
Step 2: Tap on the system.

Step 3: Tap on Languages & input.
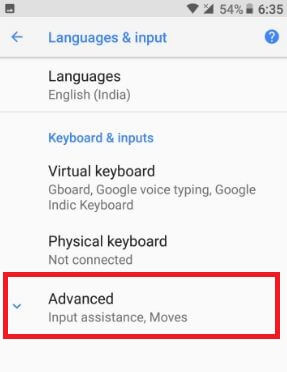
Step 4: Tap on advanced.
You can see keyboard & input, Input assistance and moves section in your android Oreo devices.

Step 5: Tap on the Settings gear icon in Auto-fill service.
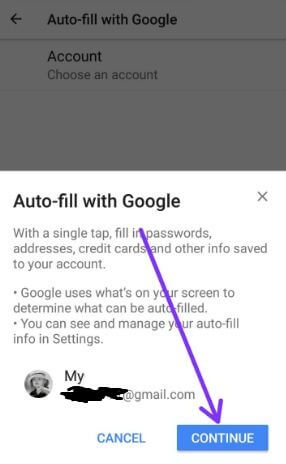
Step 6: Choose your account & tap on continue.
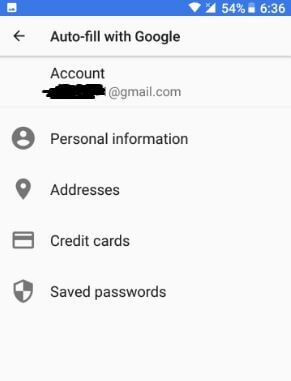
Here you can see auto-fill with Google section. You can see personal information, address, credit cards, and saved passwords detail you entered in your android phone. It will save all your details and now next time use any of them in your android O, automatically fill up details. It’s quite easy to use autofill in android Oreo 8.0 devices.
How to enable or disable Autofill in Chrome Android phone
Step 1: Open Google Chrome browser on your android phone.
Step 2: Tap three vertical dots from the top right side corner.
You can see various options in Chrome browser settings in your android device.
Step 3: Touch settings.
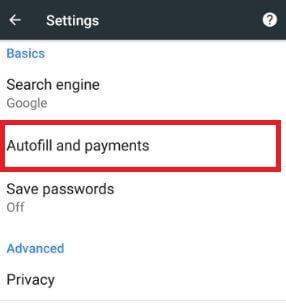
Step 4: Tap on autofill and payment under the basic section.

By default disable autofill forms in the android Oreo device. You can see Chrome auto-fill settings in your android device such as an address, Credit cards, and payment apps options. You can edit or delete the address or credit card details here.
Step 5: Enable autofill forms
Now it will automatically fill out forms, login details, address and credit card information, just confirm your permission and quickly fill details without any errors.
Find Autofill Passwords on Android Chrome Browser
Settings > Google > Manage your Google Account > Menu at bottom right corner > Security > Password Manager
Here you can see, change, or remove passwords you saved in your Google account using Android autofill settings.
That’s all. Are you satisfied with the above article to use autofill in android Oreo 8.0 devices? If you have any more useful auto-fill related tips, share with us in below comment box.