Google Assistant Tricks 2020

List of best Google Assistant tricks and tips in 2020. Google assistant settings are useful to play your favorite music, set reminders, set alarms, watch videos on Netflix, happy birthday songs, jokes, weather updates, latest news, find nearby places, check flight, translations language, and more. To use this feature, first of all, enable Google Assistant on nougat and other devices such as Google Pixel, Pixel XL, Moto G4 Plus, Nexus 6P/6, LG G6, LG V20, etc. This feature is related to Apple’s Siri, Microsoft’s Cortana, Amazon’s Alexa and others.

After enabling Google assistant on android device, you’ll have set up and use the OK Google voice model. Now your device recognizes your voice any time, even if your nougat device screen off or use any app. Always set up the Google Assistant account with the same account that uses your device. Below you can see the list of top best Google assistant tricks and tips you should try in your Google Pixel, Pixel XL, and other devices.

Related:

7 Coolest Google Assistant Tricks and Tips in 2020

1st Trick: Adjust Google Assistant settings

After turn on Google Assistant on your Android Nougat 7.0, 7.1 devices, you can adjust the Google Assistant settings menu using 2 ways.

1st Way: Adjust Google Assistant settings in nougat using a home screen

Step 1: Tap & hold the home screen on your device (From any screen).

Google Assistant tricks

Step 2: Touch the “More” button & tap “Settings“.

Adjust Google Assistant settings in pixel phone

Here you can adjust settings of your Google assistant such as home control, news, my day, shopping list, Google account settings, screen context and more.

2nd Way: Adjust Google Assistant settings using Google app

Step 1: Go to “Settings”.

Step 2: Under the personal section, tap on “Google”.

Step 3: Tap “search” under services.

Step 4: Tap “Settings” in Google Assistant.

You can see a list of all Google assistant settings. This is important for Google assistant tricks for all settings.

2nd Trick: Enable/Disable screen context in nougat 7.0 & 7.1

Screen context is used to Google to show your information on the phone screen when you hold the home button or use the Google voice search.  You can enable screen context in the nougat device using the below steps.

Step 1: Tap & hold the home screen button in the device.

Step 2: Tap the “More” button.

Step 3: Tap “Settings”.

Enable screen context in nougat 7.0 phone

Step 4: Under adjust settings for this device, turn on/turn off screen context.

By default enable screen context in your android device.

3rd Trick: Change Google Assistant language in Android

You can change the assistant language using your device’s language & preferences. This will also change the language of your device. By default set English (US) as assistant language.
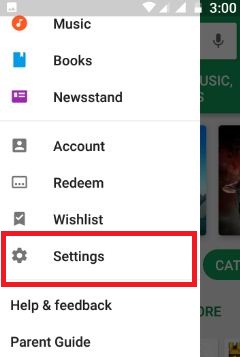
Assistant language settings in pixel

Tap & hold home screen > More > Settings > Adjust settings for this device > Assistant language

Also, change assistant language directly using the below settings.

Settings > Personal > Language & input > Languages > Add a language > select language

4th Trick: Real-time translation language using Google Assistant

Google Assistant Rela time translation language

One of the best assistant tricks that help to translate common phrases. Using this, you can talk with any people with their native language.  Launch the Google Assistant and say “hello in Poland”, you can show the screen that assistant translates it to the English language also.

5th Trick: Enable/Disable Ok Google

Enable Ok Google in your nougat 7.0 phone

Always enable Ok Google in your device. It will recognize your voice when saying “Ok Google” in your device, even the device screen is off or uses any apps.

Tap & hold home screen > More > Settings > Adjust settings for this device > Ok Google detection > turn on “Ok Google” any time

6th Trick: Use Ok Google to unlock your device – Best Google assistant tricks

Use Ok Google to unlock your device

Enable trusted voice to unlock your device when you say “Ok Google” in your nougat and other assistant devices.

Tap & hold home screen > More > Settings > Adjust settings for this device > Ok Google detection > Enable trusted voice

Also helpful while driving a car or bike to find ways using Google maps. You can also retrain the Ok Google voice model and delete the Ok Google voice model using above Google assistant settings in your android nougat device.

7th Trick: Enable/disable block offensive words in voice settings

This Assistant voice setting hides/blocks offensive words in your nougat 7.0 & 7.1 devices.

Block offensive words in voice settings nougat

Tap & hold home screen > More > Settings > Adjust settings for this device > Ok Google detection > Voice > Block offensive words

Also, hide offensive words using the below settings.

Settings > Personal > Google > Services > Search > Voice > Turn on / turn off block offensive words

You can also manage your nickname, addresses, and preferences and add home and work locations using this Google assistant tricks in your pixel and pixel XL device.

I hope the above given Google Assistant tricks helpful to use it in your android nougat 7.0 & 7.1, and other devices. If I miss any important Google Assistant tips, please share it with us.

5 Tips to Fix Error Transfer Files From Android Phone to PC via USB

Annoying by phone is not connecting to PC via USB cable? Here are the solutions to fix Android phones can’t transfer files to PC using a USB cable. Transfer files from android phone to computer or laptop device. There are various ways to transfer data android phone to pc such as USB cable, Xender, Dropbox and more. Sometimes when a file is copying & suddenly stops the copying files and seen error transfer files from PC to phone. Also error on accessing device storage files or error copying files on a computer.

Use USB debugging to copy data between your computer and android device, install apps without notification and read log data. By default USB configuration is set as charging mode, so first of all set it Media transfer protocol (MTP) on your android phone or tablet device. Otherwise not see your device on a computer. Follow below given possible solutions to fix error transfer files android to PC via USB.

Related tricks:

How to Fix Android File Transfer Not Working From Phone to PC via USB 

error transfer files android to PC

1st Method: Set USB configuration as MTP

First of all connect your android phone to PC via USB cable and Unlock your device. If not detect your android device, make sure not set charging as a USB connection. To change it, enable developer option on your device. You can enable developer mode on your device to tap the build number 7 times under system > About phone. In android nougat 7.0 devices, you can find USB configuration settings using the below settings.

Step 1: Go to “Settings”.

Step 2: Under the system section, tap “Developer options”.

Step 3:  Turn on developer mode & press OK.

Step 4: Tap “Select USB configuration” under the networking section.

You can see the below screen on your device.

USB configuration settings in nougat 7.0

Step 5: Choose “Media Transfer Protocol”.

Now try to transfer data and check to fix error transfer files android to PC on your computer or laptop device. If not then try the below-given solution.

Also, Enable USB debugging in Android 7.0 Nougat (Moto G4 plus):

Enable USB debugging android nougat 7.0 phone

Settings > System > Developer options > Enable developer mode > OK > Debugging > Enable USB debugging

Now transfer files from phone to computer via USB cable and transfer music, photos, videos, and other data.

2nd Method: USB cable is damaged

Check USB cable is not damaged. Try cable in other devices, if work then problem in your device or PC. If not work then try different USB cable to connect with computer or laptop.

3rd Method: Check USB port working correctly

First of all, check your PC’s USB port working fine or not a loose port. If loose port then stops copying files or folder when touch cable. Connect your pc with another smartphone to check USB Port is working or not.

4th Method: Error transfer files android to Windows 7/8/10

Using computer settings, check your USB device is detected. If not then restart your Windows PC and try again to connect.

5th Method: Error transfer files android to Mac OS

Check android file transfer latest version that is perfect for transfer files between android to Mac OS. Click here to download the android file transfer latest version.

Above you can see various solutions to fix android file transfer not working. You can also check software update or app update in your android device. Sometimes after updated your device, automatically fix this can’t copying files phone to PC issue.

Don’t forget to mention which method worked for you to fix error transfer files from PC to phone via USB cable. If you have known other tricks, please share it with us.

How to Disable Flash in Google Chrome

Here’s how to enable or disable Flash in Chrome browser. We use Adobe flash player to watch a high quality video or playing games on chrome device. Sometimes suddenly playing video in the background or automatically loading webpages in chrome browser. Annoying from this automatically plays videos or ads on the website? To control ads, games, music players and video on your chrome browser, block or disable a flash player.

In daily routine life, we search & watch videos, movies online on Google Chrome and other browsers. Also use Flash Block extension to block ads, videos, banners, animation and games on your Google Chrome browser. By default, the chrome browser allows cookies to save data from your sites or other search-related queries. If you find any website harmful then block the website of that particular domain. Follow the below-given step by step instruction to block flash videos in Google chrome browser.

Related Articles:

How to Enable or Disable Flash Videos in Google Chrome browser

1st Method: Block or Disable flash videos, games, animations, banners from Google Chrome browser

Step 1: Open the “Google Chrome” browser.

Tap on more in Google chrome browser

Step 2: Tap “More”.

Touch settings in the chrome browser

Step 3: Go to “Settings”.

Step 4: Tap “Show advance settings”.

Step 5: Under the Privacy section, tap “Content settings”.

You can show the various content settings including cookies, images, flash, automatic download, JavaScript, pop-ups, camera, notifications, location and more.

Step 6: Scroll down until see “Flash” settings.

By default set “Allow sites to run Flash”. Show below screen on your chrome browser.

block flash videos in Google Chrome

Step 7: Choose “Block sites from running flash”.

Step 8: Tap “Done”.

manage exceptions of flash video on chrome

You can block an individual website using flash manage exceptions settings. In this setting, enter the website name and a select block from the drop-down box and block it. And also remove exceptions from the list you won’t need. This is the simple and easy trick to block flash videos in Google Chrome.

2nd Method: How to Enable or Disable Adobe Flash in Chrome 2019

You can turn off the flash plugin in Google Chrome using below given settings.

Step 1: Open “Chrome://plugins/” on your chrome browser.

You can see the list of installed plugins in your Google Chrome browser. By default, turn on adobe flash player on chrome.

Disable flash in chrome browser

Step 2: Uncheck the box of “Adobe flash player”

To check flash player is working or not, use adobe flash player help page. You can see the message of the flash player is disabling on your Google Chrome browser.

Stop or Disable Autoplaying videos On Google Chrome Browser Android phone

Disable automatically play videos in Google chrome android

Open Chrome browser > More > Settings > Advanced > Site settings > Media > Auto-play > Enable / disable sites to automatically play videos

Disable Flash in Chrome Windows 10

Open Microsoft Edge > Three horizontal lines (More) at the top right corner > Settings > View Advanced Settings > Toggle off “Use Adobe Flash player”

I hope this tutorial helps you to enable or disable Flash in Chrome browser. If you have known other trick to block individual website, please share with us. Don’t forget to share this article with your friends on social networks.

How to Turn Off Camera Shutter Sound on Android and iPhone

Android phones have fantastic camera features, including panorama, slow motion, professional mode, and more camera settings. By default, turn on the camera shutter sound on your Android and iPhone device, so when you take a picture, the shutter sounds to listen. Sometimes enabling the shutter sounds annoying when continuously taking more photos. Here’s how to turn off camera shutter sound on Android. It’s simple to enable/disable camera shutter sound on your Android, iPhone, Samsung Galaxy, OnePlus, and other devices. Also, use an Android application on your device to take pictures without sound.

Read More: How to Turn Off Flashlight

How to Turn Off Camera Shutter Sound Android and iPhone

You can turn off camera sound on Android using camera settings and phone volume settings. In this tutorial, I will show you both methods.

How to Turn Off the Camera Shutter Sound using Camera Settings

Step 1: Tap the App drawer from the home screen on your Android devices.

Step 2: Tap the Camera app.

Open camera app on your android phone

Step 3: Tap on the Settings gear icon at the top or bottom of the screen (Depending on your model) or Slide the screen from left to right to open camera settings.

Enable camera shutter sound android nougat 7.0

You can see enable the camera shutter sound under the General settings on your phone.

turn off camera shutter sound nougat

Step 4: Toggle off the Shutter sound or Camera sounds.

You can use this setting to change your device’s camera storage location, photo or video size.

How to Turn Off Camera Shutter Sound on Stock Android

Step 1: Open the Camera app.

Step 2: Tap the Settings gear icon at the top right or left side.

Step 3: Toggle off the Camera sounds.

If you can’t find this option, use your Android phone sound settings to disable the camera shutter sound.

How to Silent or Vibrate Sound on Android Stock to Disable Camera Sound (Google Pixel)

Step 1: Go to Settings.

Step 2: Tap Sound & Vibration or Sound.

You can see media volume, call volume, Ring & notification volume, and Alarm volume.

Step 3: Silent or Vibrate the Ring & notification volume on your stock Android.

Read More: How to Allow Camera and Microphone Access on Google Pixel

How to Turn Off Camera Shutter Sound on Samsung

Step 1: Open the Camera app.

Step 2: Tap on the Settings gear icon.

Step 3: Toggle off the Shutter sound or Camera sound.

If you can’t find it, set the notification as mute or vibrate on your Samsung phone.

Read More: How to Hide Camera Cutout on Samsung Galaxy

How to Turn Off Camera Sound on OnePlus

Step 1: Open the Camera app.

Step 2: Tap Three vertical dots (More) at the top right corner.

Step 3: Tap Settings.

Step 4: Toggle off the Shutter sound in the General section.

Read More: How to Turn On Flash Notifications on Samsung Galaxy

How to Turn Off Camera Shutter Sound on iPhone – 3 Ways

You can turn off camera sound on iPhone devices using three different methods, including enabling live photos (Settings > Camera > Settings > Live Photo), switching your iPhone ring to mute or silent, and using Assistive touch settings to disable the camera shutter sound on your iOS devices.

Use Third-Party Camera Apps to Turn Off the Camera Shutter Sound Android 

You can take high-quality photos with continuous shooting silently without a camera shutter sound.

Silent camera – Download Now

If you know another trick to turn off the camera shutter sound on Android, please share it with us. Share this article with your friends on a social network.

FAQs:

How do I Turn Off the Camera Sound on Snapchat?

You can’t turn off the camera sound using Snapchat settings. To turn off Snapchat camera sound, you need to set your phone profile as mute or silent. Also, enable Do Not Disturb mode to turn off the camera sound.

11 Best Call Recording Apps For Android in 2020

Now days call recorder app inbuilt in the latest Android phone but you can use the limited feature. Here is the 11 Best Call Recorder for Android 2020. All apps are free and easy to use. These free phone call recording apps useful to automatically record a phone call while calling, organize your call records, search calls by group, or by names on your Android phone. You can play or pause recording audio, automatically deleted old recordings when full, edit call notes, directly share, and more. Also, integration with Dropbox, Google Drive, etc. There are times when we have the urge to keep the calls we made with us in the form of call recordings. From work-related calls to calls with our loved ones, technology has helped us big time in keeping records of our conversations, be it short or long.

Read this:

Top 11 Best Call Recorder Apps For Android Phone or Tablet

Check out below given free call recording apps for your android devices.

Automatic Call Recorder

Call recording apps for android

Record any incoming or outgoing phone calls and save any recording you want. To improve voice quality or fix call recording issues, use speaker mode on your android device. You can add notes, listen to audio recordings, and share it with others. Also, delete or share the call recordings and add a couple of settings such as exclude a couple of numbers from the call recorder app. It includes 3 default settings to automatic call recordings on your android phone or tablet.

Download

Call Recorder – ACR

Call recorder app android phone

You can open this app and allowing some permissions, the app doesn’t require your phone number to access, which is a good thing. This is the reason why the call recorder ACR app is featured in my best call recorder app listicle. Once you have set up the app, you are just required to make calls or receive some, and the calls will automatically get recorded within the app. Additionally, you can even transcribe the calls,  add notes for further convenience, or make use of Cloud storage services for easy backing up. Also, records all phone calls, auto or manual group recording, display contact name & photo, choose any recordings as important, and more. Automatically deleted recording when full. Start delayed recording with lots of formats and set a password to protect against unknown persons.

Download

Phone Call Recording App – Cube ACR

Call Recorder Cube ACR App For Android

The Cube Call Recorder ACR app is one of the best apps to record phone calls. The app, when launched, will provide you with gist as to how the phone call recorder will work. The app will automatically record normal incoming and outgoing, WhatsApp, Skype, and Viber calls for which you just have to click the on-screen app widget during an ongoing call. Now Zoom meetings are recorded in this app. Upon giving the app some permissions and switching on the Cube Call Recorder app connector, you will be able to record the calls with ease.

Download

Smart Recorder App For High-Quality Voice Recorder

Smart Recorder App For Voice Recorder

Smart Recorder is a voice recorder app. It wasn’t designed for call recording, but it can do it in a pinch. Most of its features are for call recording, including an interesting feature that skips silences so you don’t have to listen to it. It’s a good all-around voice recorder and the call recording feature is perfunctory. You may need to exempt this app from battery saving to make it work for longer recordings. This one is also free if you use Google Play Pass.

Download

Call Recorder

Call recorder android app

This is perfect for automatically record calls when calling. You can organize call records, the show calls list by group name or group dates, and by time. Also, set a password to protect recording and save call recording to mp3 files on your internal or external storage.

Download

Automatic Call Recorder For Android 2020

Automatic Call Recorder Apps for Android

It with a lot of good features, including automatic call recording, some organization features, the ability to record in several different audio codecs, and more. This app supports backup over cloud storage and a few other little features as well. It’s about as good as the other one with the same name so you can go with either one.

Download

Call Recorder Automatic

Call Recorder Automatic Best Call Recording Apps For Android

Call Recorder Automatic is a decent app. It is a great Telephone Recording app for android, Record any phone call you want, Choose which users or incoming\outgoing phone calls to record, and choose which calls you to want to save or share. The app is simple and it’s easy to use. The recorder, much like other call recording apps, asks for permission to access the storage, record calls, manage calls, and contacts of a smartphone. The app has a simple interface wherein there are three sections Incoming calls, All calls, and Outgoing calls. As a reminder, the calls can only be recorded when the speaker of the device is switched on.

Download

Voice Recorder

Best Voice Recorder App For Android

Voice Recorder app another most popular appr with call recording functionality. Most of its features are for voice recording so the call recording stuff is a bit light. This app including Features are variable bitrate settings, background recording, and, of course, call recording. It’s a cheap and effective voice recorder and not a bad way to go if you want to kill two birds with one stone. This one is also available on Google Play Pass if you use that.

Download

Call Recorder

Android app for call recording

You can record calls anytime if you want and save it on your device. To stop the audio recording, just touch the audio record. You can share & lock recorded items and delete the unnecessary recording from a device.

Download

Auto Call Recorder

best call recording apps for android

This is best for recording in HD voice quality. You can view all recent call records, set passwords for better security, manage call recording, and all notification on your Android phone. Also, view outgoing caller notifications details and listing all recording calls. And track unknown called ID using this auto call record app.

Download

Voice Recorder

Voice recorder app for android phone

This free voice recorder android app records phone calls, lectures, short voice reminders, and other chats. You can add notes on each recording and share it with others using Bluetooth, SMS, Email, etc. Also, sync all call recordings to Dropbox or Google drive using your Google account. And change the audio recording quality on an android phone or tablet.

Download

End the list of top best call recording apps for Android phone or tablet device. If you have known other best Android call recording app, please share it with us.

How to Fix YouTube Quality Unavailable Issue on Android

If you’re seeing “Quality Unavailable” or certain resolutions like 720p, 1080p, or 4K missing while watching videos on YouTube, you’re not alone. This issue can happen on Android, iPhone, Smart TVs, or desktop browsers. Here’s a complete guide explaining why it happens and how to fix YouTube revanced quality unavailable.

You may see several YouTube video quality issues, such as bad or low-quality video, YouTube video quality unavailable, blurry video, and poor video quality. When we watch videos on YouTube, auto quality is set by default, but sometimes low quality is selected. So, you need to change the YouTube video quality.

Read Also: How to Fix YouTube Offline Error on Android and PC

How to Fix YouTube Quality Unavailable on Android

Below are possible methods to fix YouTube quality-unavailable issues.

Why Is Quality Unavailable on YouTube?

There are several possible reasons:

1. App or Browser Glitch

Make sure the YouTube app is up to date on your phone. Outdated app versions or temporary cache issues can prevent quality settings from loading properly.

Long-press the YouTube app > i icon > Scroll down and tap App details at the end of the screen > Tap on the Update button if available

OR

Open the Play Store > Tap the Profile icon at the top right corner > Tap Manage apps & device > Tap See details > Tap Update if available

2. Video Still Processing

When a creator uploads a video, HD and 4K versions take time to process. Initially, only 360p or 480p may be available.

3. Data Saver Mode Enabled

If Data Saver is enabled in the YouTube app or in your phone settings, high-quality options may be restricted.

Set Video Quality Preferences for All Videos

How to Fix YouTube Quality Unavailable on Android

Open YouTube App > Tap the Profile Icon at the bottom right corner > Tap Settings gear icon in the top right corner >Tap the Video quality preferences in the video & audio preferences section > Select the Auto streaming quality for all videos on Mobile networks or Wi-Fi.

4. YouTube Premium or Device Limitation

Some older devices or browsers may not support higher resolutions, such as 1440p or 4K.

5. Clear App Cache and Data

How to Fix YouTube Quality Unavailable or Not Changing

Clearing the YouTube cache deletes the YouTube app’s temporary data. If you clear data, all your YouTube app data will be removed permanently from your phone.

6. Wait for Video Processing

If the video was just uploaded, wait a few hours. HD and 4K options appear after processing is complete

7. Try Another Browser or Device

If watching on desktop:

  • Refresh the page
  • Clear browser cache
  • Try Google Chrome, Microsoft Edge, or Firefox

8. Why 1080p or 4K Is Missing on Mobile?

YouTube sometimes limits high resolutions:

  • Due to server load
  • Regional testing

Switching networks or reinstalling the app often fixes this.

Quick Troubleshooting Checklist

✔ Restart phone
✔ Switch internet connection
✔ Update app
✔ Clear cache
✔ Disable data saver
✔ Reinstall YouTube

Final Thoughts

The YouTube Quality Unavailable issue is usually temporary and related to internet speed, app glitches, or video processing. Most of the time, updating the app and checking your connection solves the problem quickly.

Related: