How to fix Galaxy Note 8 GPS problem

Here’s a possible solution to fix Galaxy Note 8 GPS problem. Several users reported GPS location tracking issue or lost GPS signal on Samsung Galaxy Note 9/Note 8/Note 5/Note 4/Note 3 device. GPS is helpful to find a location you want to go and also locate lost or stolen Android device if turn on location in your device.

Some of the Note 8 user-facing Google Maps won’t show navigation arrow problem. One of the simplest solutions is to turn on and off GPS in your Note 8 device to fix the issue. Also, you can replace GPS radio if under warranty. Have you been ever facing a GPS issue on galaxy Note 8/9? Follow below given different methods to fix Galaxy Note 9/8 GPS issue.

You May Like:

How to fix Galaxy S8 overheating problem

How to fix Note 8 facial recognition not working

Fix Galaxy Note 8 wireless charging stopped working

Cheapest GPS Navigation system for car

How to fix Galaxy Note 8 GPS Problem

Lost GPS signal or Google maps not working in Galaxy Note 8/Note 9. Check out each one listed below methods to fix Galaxy Note 8 GPS not working.

Set Location mode as High accuracy to fix Note 8 GPS issue

Step 1: Open Settings in your Galaxy Note 8/9

Step 2: Tap on Location

By default disable GPS on your galaxy Note 8 devices. Enable GPS in your Note 8 device.

Step 3: Tap on Mode

How to fix Galaxy Note 8 GPS problem

Step 4: Set location mode as High accuracy

Check for any app update available

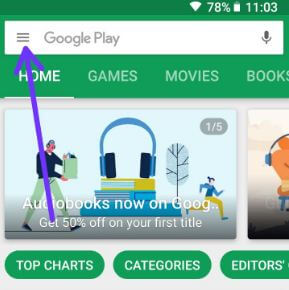
Step 1: Open Google Play Store in your device

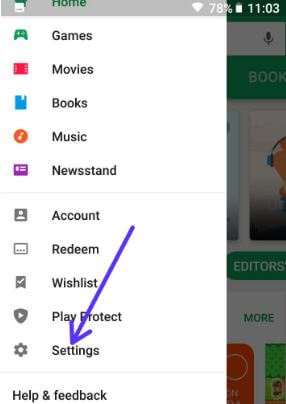
Step 2: Tap on Menu from top left side corner

Step 3: Tap on My apps & games

Step 4: Tap on Update all

If any update available, it’ll automatically update the GPS app in your Note 8 device. If you still facing issues, uninstall GPS app updates and restart your phone. After restart update it again with the latest version.

Clear cache Google Maps to fix Galaxy Note 8 GPS Problem

Step 1: Go to Settings in your Galaxy Note 8

Step 2: Tap on Application manager

Step 3: Tap on Three vertical dots at the top right corner side

Step 4: Select Show system apps

Step 5: Tap on Storage

Step 6: Tap on clear cache

If clear cache did not fixes Galaxy Note 8 GPS signal lost issue, clear data in your device.

Step 7: Tap on clear data

GPS satellite test

To check this GPS satellite test, first of all, download GPS Test Status & fix the app from the play store. After downloaded the app, open it and it will automatically check why GPS now working on your Note 8 device. Also, use diagnostic mode note 8 to fix GPS doesn’t work problems. To get Diagnostic information on your phone: *#9090#. If these secret codes are not working don’t panic, because some codes will only work on some firmware versions, if the firmware is updated in the meantime the code may not work.

Read Also: Best GPS tracker apps for android phone

5th Way: Factory reset your Galaxy Note 8

It will delete all your Note 8 personal data including third-party apps, music, Google account, and other personal data. Before reset you’re Note 8, back up & restore your android phone data.

Step 1: Go to Settings

Step 2: Tap on Backup & reset option

Step 3: Tap Factory data reset

Step 4: Tap Reset Phone

If set pattern lock / PIN / Password, draw it to unlock your Note 8 phone.

Step 5: Tap on Erase everything

If none of the above-given methods fix Note 8 GPS not working issue, wipe cache partition on Galaxy Note 8.

End the list of possible solutions. Did you find the above tutorial helpful? Don’t forget to mention which method worked for you to fix Galaxy Note 8 GPS Problem. Do you have any other method to fix this issue? Share with us in below comment box.

How to fix face recognition not working on Galaxy Note 8

Annoying by Galaxy Note 8 face recognition stopped working? Here’s the possible ways to fix face recognition not working on Galaxy Note 8 and Galaxy S8. Face recognition is one of the most useful secure features to protect your personal data from hackers and malware attack.

Several users reported Samsung galaxy Note 8 face recognition now working after update device. Have you updated your Note 8? If you have facing this type issue, check out each one listed below given methods to fix face recognition not working on Galaxy Note 8 devices.

Read Also:

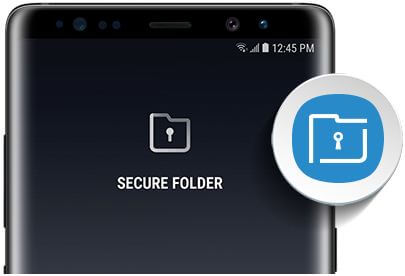
How to set up and access secure folder on Note 8

Fix randomly screen wake issue on Galaxy Note 8

Samsung galaxy S8 freezing or crashing: How to fix

How to fix face recognition not working on Galaxy Note 8

How to fix face recognition not working on Galaxy Note 8

Here I’ll show you four different methods to fix Note 8 face recognition disable or grayed out.

1st Method: Make sure not disable facial recognition on Note 8

Step 1: Go to settings in your Note 8

Step 2: Tap on Lock screen & security

Step 3: Tap on Facial recognition under phone security

Step 4: Confirm turn on face unlock

2nd Method: Clear Face app cache & data to fix face recognition not working on Galaxy Note 8

Step 1: Go to settings in your Note 8

Step 2: Tap on Apps

List of installed apps view on the screen. By default hidden this face app in your galaxy Note 8.

Step 3: Tap on three vertical dots at top right side

Step 4: Select Show system apps

Step 5: Find face app and tap on it

Step 6: Tap on Storage

Step 7: Tap on Clear cache

If clear app cache can’t work to fix issue in your device, clear the app data in your device.

Step 8: Tap on clear data

Now check fix Note 8 facial recognition stopped working.

3rd Method: Turn off Smart tray on Galaxy Note 8

Step 1: Go to settings in Note 8

Step 2: Tap on Display settings

By default enable smart tray on Note 8 device.

Step 3: Uncheck the Smart tray box in your Note 8

If none of the above given method worked for fix face recognition not working, hard reset your galaxy Note 8 using below steps.

4th Method: How to hard reset Galaxy Note 8

This method fixes all your galaxy Note 8 problems such as Note 8 freezing, won’t turn on, randomly wake up screen, blank screen and more problems.

Step 1: Turn off your galaxy Note 8

Step 2: Press and hold the Volume up, Bixby key and Power button at same time

When Samsung logo appears on screen, release power key in your galaxy Note 8. After few seconds, android system recovery screen display on your galaxy Note 8.

Step 3: Press volume down button until wipe data/factory reset, after that press power button to select it

Step 4: Press volume down button until Yes select, then press power button to start reset process on Note 8

Step 5: Press volume down button up to reboot system now and press power button to restart your galaxy Note 8

End the list of possible solutions to fix face recognition not working on Galaxy Note 8. DO you have any other tips? Share with us in below comment box. Don’t forget to check out our other Galaxy Note 8 tips.

How to Enable and Use Secure Folder on Galaxy Note 8

Galaxy Note 8 has several awesome features and one of them we discussed here’s how to set up and use a secure folder on Samsung Galaxy Note 8. If you can’t know about how does secure folder work on Note 8. In this tutorial, I will show you step by step process to access secure folder galaxy Note 8 and Samsung Galaxy S8. This secure folder secures your personal data and protects from malware attacks, hackers, and other unknown user’s activity. Also, move apps to secure folder for your data information privacy.

This Galaxy Note 8 secure folder uses the Samsung Knox security platform to provide an extra layer of security. To secure your personal information, lock your secure folder after add apps and files. Follow the below-given step by step guide to set up and use a secure folder on Galaxy Note 8.

Read Also:

How to Set Up and Use Secure Folder on Galaxy Note 8

First of all, let see how to set up a secure folder on the Galaxy Note 8 device. Different android devices carriers or versions have slightly different settings.

Step 1: Swipe down the notification panel from home screen & tap on the Settings gear icon.

Step 2: Tap on Lock screen & security.

Step 3: Tap on the Secure folder under the Samsung folder.

Step 4: Select Start or SKIP.

To access the secure folder in Galaxy Note 8, need your Samsung account.

Step 5: Select Sign in.

How to set up and use secure folder on Galaxy Note 8

Select lock type to protect your private apps and files such as PIN/Password/Pattern lock/fingerprint sensor/Iris scanning.

Step 6: Follow the on-screen instruction to set a lock.

After setting up the lock, you’ll view the secure folder Galaxy Note 8 device. Now let see steps to use a secure folder on Galaxy Note 8 device.

How to Access Secure Folder on Galaxy Note 8

Step 1: Swipe up or down from the center of the home screen.

Step 2: Select the Samsung folder.

Step 3: Select a secure folder app.

Step 4: Enter the password & press OK.

You can see below given four options to secure your personal data on Note 8 using a secure folder.

How to access secure folder on Galaxy Note 8

Lock: Lock your secure folder.

Add apps: Select apps to secure the folder you want to protect data.

Add files: Add files to a secure folder.

Edit apps: You can add apps to the home screen or remove the app from a secure folder in Note 8.

How to Hide Secure Folder on Galaxy Note 8

You’ll hide several apps & files to secure folders such as contacts, email, my File apps, calendar, gallery, Samsung notes, and more.

Settings > Lock screen & security > Secure folder > Enter PIN/Password > Show secure folder > Disable show secure folder

Uninstall Secure Folder on Samsung Note 8 

Step 1: Open the Secure folder on your device.

Step 2: Tap Three vertical dots (More) at the upper right corner.

Step 3: Tap Settings.

Step 4: Tap More settings under the general section.

Step 5: Tap Uninstall.

This message appears: Uninstall Secure Folder?

Step 6: Tap Uninstall.

And that’s it. I hope this tutorial helpful to set up and use a secure folder on Galaxy Note 8. If you have any kind of trouble, tell us in below comment section. We’ll respond as soon as possible. Don’t forget to check out our other Galaxy Note 8 tips.

How to wipe cache partition Note 8

Here’s complete guide to wipe cache partition Note 8. This Samsung galaxy Note 8 wipe cache partition is helpful to fix several issues such as Note 8 won’t turn on, randomly screen wake up issue on Note 8, phone restart again & again, overheating issue and more.

We already discusses about clear cache on Note 8 if any apps related issues in your device. Most of the android devices has same process to clear cache partition or wipe cache partition Note 8 using recovery mode. You can use this process even if your galaxy Note 8 not turns on.

See Also:

Fix auto brightness issue on Samsung Galaxy Note 8

Fix Galaxy Note 8 wireless charger stopped working

How to wipe cache partition Note 8 using hardware key

How to wipe cache partition Note 8

It will fix all of your Samsung galaxy Note 8 problems. Before process this, back up your important data safely using your Google account.

Step 1: Turn off your galaxy Note 8

Step 2: Press and hold the Volume up, Bixby key and Power button at same time

When Samsung logo appears on screen, release power key in your Note 8. After few seconds, android system recovery screen display on your galaxy Note 8.

Step 3: Press volume down button until wipe data/factory reset, after that press power button to select it

Step 4: Press volume down button until Yes select, then press power button to start reset process on Note 8

Step 5: Press volume down button up to reboot system now and press power button to restart your galaxy Note 8

If any app related issue in your Galaxy Note 8 such as app crashing or freezing, app work slowly, then clear app cache & data or use safe mode on galaxy Note 8.

How to clear app cache & data on Note 8

Step 1: Go to settings in your Note 8

Step 2: Tap on Apps

Here you can see list of installed apps in your device.

Step 3: Select app you want to clear the app’s cache

Step 4: Tap on Storage

Step 5: Tap on Clear cache

If clear app cache can’t work then clear data in your galaxy device.

Step 6: Tap on clear data

That’s it. Have you any questions regarding wipe cache partition Note 8? Do you have any Galaxy Note 8 tips? Share with us in below comment box. Stay connected with us for latest android technology updates.

How to disable Instagram last active status in android device

Instagram added new feature to show last activity time of your account. This feature allows users to see who’s online from your Instagram followers. You’ll hide last seen status on Instagram to disable Instagram last active status in android devices. You can see activity status in direct messages in your android device.

When enable show activity status in your android phone, all you follow accounts and anyone you message to see when you were last active on Instagram app. When disable this, you won’t be able to see the activity status of other accounts. Follow below given step by step process to disable Instagram last active status in android devices.

You May Like:

How to add multiple photos to Instagram stories in android phone

How to post GIF on Instagram android device

How to disable Instagram last active status in android phone

By default enable show activity status in android devices. To hide your Instagram activity from followers, follow below given steps and disable it in your device.

Step 1: Log in with your Instagram account

Instagram profile icon in android devices

Step 2: Tap on Profile icon at bottom right side corner

Hide last seen time on Instagram account in android

Step 3: Tap on Three vertical dots at top right side

Step 4: Scroll down up to Show activity status option (Show below screenshot)

Enable show activity status in android devices

By default turn on activity status in android device. To hide last seen time on Instagram, disable Instagram last active status in android phone.

How to disable Instagram last active status in android device


Step 5: Turn off toggle button of Show activity status

You can see last seen time on Instagram account in android using direct share button.

How to check last seen time on Instagram in android:

Step 1: Log in with your Instagram account

Check last seen time on Instagram in android

Step 2: Tap on direct share button at top right side

Here you’ll see list of Instagram follower and last seen time. If not view last online time, make sure your Instagram app is latest updated.

And that’s it. I hope this tutorial helpful to disable Instagram last active status in android phone. If you have any kind of trouble, tell us in below comment box. We’ll respond as soon as possible. If you find it helpful, don’t forget to share this article to your friends.

How to Remove Google Pixel 2 Status Bar Icons

Want to hide status bar icons on Pixel 2 and Pixel 2 XL? Here’s a complete guide to remove Google Pixel 2 status bar icons. You’ll add or hide status bar icons using system UI tuner settings on your Pixel devices. By default system UI tuner feature is hidden on your Google Pixel 2 & 2 XL (Oreo). Let see steps to enable hidden system UI tuner on Pixel 2 XL. In your Google Pixel 2 and other Pixel devices, you can see the battery icon, time, Wi-Fi, or mobile data when turning on and more. Also, add other Pixel 2 icons such as Alarm, Hotspot, DND, location, Ethernet, etc.

Read Also:

How to Add or Remove Google Pixel 2 Status Bar Icons

First of all, make sure to enable system UI tuner in your Google Pixel 2 and Pixel 2 XL Oreo 8.1 & 8.0 devices. You’ll enable it using below steps:

Step 1: Swipe down the notification panel from the top of the screen in your Pixel 2.

Activate system UI tuner on Pixel 2 Oreo

Step 2: Tap & hold on the Settings gear icon a few seconds.

Enable hidden system UI tuner on Pixel 2 XL Oreo

You can see this message: Congrats! System UI tuner has been added to settings

If not enable system UI tuner then first of all make sure to enable developer mode in Pixel 2 device using below settings.

Settings > System > About Phone > Tap build number 7 times

Step 3: After enabling developer mode, again follow step 1 and step 2.

Pixel 2 system UI tuner settings

Now go to Settings > System > System UI tuner

Pixel 2 icons remove from status bar

Here you can see the status bar and Do Not Disturb settings.

Step 4: Tap on the Status bar.

Here you’ll see many options such as Auto-rotate screen, headset, work profile, cast, hotspot, Bluetooth, Do not Disturb, Aeroplane mode, Alarm, Battery, and more. Adjust Pixel 2 icons on the status bar you want to see on screen.

How to remove Google Pixel 2 status bar icons

Enable option you want to show icons on the status bar and disable the toggle button to hide or remove Google Pixel 2 status bar icons.

Hide Pixel 2 XL status bar icons

If you want to disable all options, all Pixel 2 icons remove from the status bar (Show above screenshot).

And that’s it. I hope this tutorial helpful to remove Google Pixel 2 status bar icons. Do you find this information helpful? Share your thought with us in below comment section. Don’t forget to check out our other handy Pixel 2 tips.