How to Use App Locker on OnePlus 5T

By default added app locker feature in OnePlus 5T and OnePlus 5 to secure your important application data. Here’s how to use app locker in OnePlus 5T/5 to lock apps. You can lock apps with fingerprint or PIN numbers in OnePlus 5T/5/3T/3 devices. Also, lock individual apps on your device. This built-in OnePlus 5T app locker feature is helpful to hide contacts, phone, photos, messages, and other files also. After the set the lock, whenever you open a locked app, enter a PIN or fingerprint to access it in your OnePlus 5/5T devices. Several users also facing the issue of the OnePlus 5 app lock not working. Have you ever been facing this type of issue?

Read Also:

How to Enable and Use App Locker on OnePlus 5T and OnePlus 5

How to use app locker on OnePlus 5T

By default disable the app locker feature in your OnePlus 5T devices. You can enable the app locker in OnePlus 5T under security & fingerprint settings.  After enabling it, select apps from the list to use the app locker on OnePlus 5T/5.

How to Hide/Lock Apps on OnePlus 5T/OnePlus 5 Using App Locker Feature

Step 1: Go to Settings on your OnePlus 5T devices.

Step 2: Scroll down and tap on Utilities.

Step 3: Tap on the App locker.

Step 4: Tap on + Add apps.

Step 5: Select the Apps from a list you want to lock apps.

Now lock apps using fingerprint or PIN or Password security. You’ll download and install third-party applications also to secure your app’s data from malware or hackers.

How to Unlock App From App Locker in OnePlus 5T

Step 1: Go to Settings.

Step 2: Scroll and tap on Utilities.

Step 3: Tap on App locker.

Step 4: Tap on the Cross icon in front of the app to remove it from the app locker.

How to Access Hidden Space in OnePlus Oxygen OS

Step 1: Open the app drawer and swipe the screen right side to access the hidden space.

Step 2: Tap on the “+” icon at the top.

Step 3: Select the Apps to hide.

That’s all. We hope this makes it clear to enable and use the app locker on OnePlus 5T. If any problem persists, don’t hesitate to let me know in the below comment section. Connect with us for daily OnePlus 5T tips.

How to Disable Shelf on OnePlus 5T

Shelf widget is one of the unique features of the OnePlus 5T device. In OnePlus 5T shelf feature, you can see the whether, recently opened apps, and more options. You can easily enable/disable shelf on OnePlus 5T and customize shelf widgets. Also, add any other widgets to your device’s home screen. You’ll add new widgets, change the text displayed, weather information, create app shortcuts, and other OnePlus 5T home screen settings. Also, remove the weather from the shelf from the home screen in your OnePlus 5T if don’t need it.

Also Read:

How to Enable/Disable Shelf on OnePlus 5T and OnePlus 5

How to disable shelf on OnePlus 5T

Let see first of all steps to enable/disable shelf widget on OnePlus 5T/5/3T device. By default turn on shelf in your OnePlus devices.

How to Enable/Disable Shelf on OnePlus 5T/5

Step 1: Tap & hold the blank screen on your home screen wallpaper.

Step 2: Tap on Home Settings.

Here you’ll see shelf, icon pack, swipe down and app shortcuts options. If enable shelf in your OnePlus 5T and OnePlus 5 device, disable it.

Step 3: Toggle off the Shelf widget in your OnePlus 5T.

It’s quite easy to turn off and customize the shelf in OnePlus 5T OxygenOS.

How to Disable Widgets on OnePlus 5T Home Screen

Step 1: Tap & hold the blank screen on your OnePlus 5T home screen wallpaper.

Step 2: Tap on Widgets.

Step 3: Press & hold the widgets you want to delete.

Step 4: Drag widget to × Remove icon at top of the screen.

How to Use App Locker on OnePlus 5T

This OnePlus 5T lock apps feature is useful to lock apps using fingerprint unlock.

Step 1: Go to Settings on your OnePlus 5T device.

Step 2: Tap on Utilities. 

Step 3: Tap on App locker.

Step 4: Tap on + add apps to add the app.

Step 5: Select the Apps to want to lock.

Now open the app locker menu in your OnePlus 5T device and turn on notifications.

And that’s it. I hope this tutorial helpful to disable Shelf on OnePlus 5T and OnePlus 5. If you have any kind of trouble, tell us in below comment box. We will respond as soon as possible. Stay connected with us for the latest OnePlus 5 tips.

How to enable parental controls on android 8

By default turn off parental controls on android 8.0 & 8.1 Oreo devices such as Google Pixel, Pixel XL, Pixel 2, Pixel 2 XL, Nexus 6P/5X and more. You’ll enable parental controls on android 8 Oreo using Google Play store settings.

This android Parental controls feature restricts download from Google play store or purchase from it. You can set a restriction for different type of content you want such as applications, games, video, movies, music, books, TV and more. Useful to protect your kids or child from restrict content on Internet. Follow below given step by step guide to enable parental controls on android 8.1 and 8.0 Oreo devices.

Read This:

How to set up parental controls in Android 10

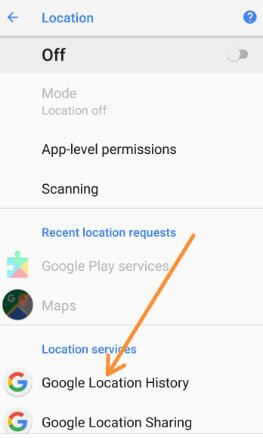
How to delete Google Location history on android Oreo

How to enable one-handed mode on Google Keyboard in android Oreo

How to enable parental controls on android 8.0 and 8.1 Oreo

You can set up parental controls in android Oreo device for 13 or older family member and also under 13 age.

Step 1: Open App drawer in your android Oreo

Step 2: Tap on Play Store

Google Play store in Oreo

Step 3: Tap on Three horizontal lines at top left side corner

Google Play store settings in 8.1 Oreo


Step 4: Select settings

Parental controls settings in android Oreo

Step 5: Tap on Parental controls under User controls

Turn off parental controls on android 8.1 Oreo

By default disable parental controls in your android Oreo, Nougat and other devices.

Step 6: Turn on toggle button of parental control

Set up parental controls in android Oreo

Step 7: Enter PIN to change parental control settings in android Oreo & tap on OK

Step 8: Confirm PIN & press OK

Now turn on parental controls in android Oreo devices and you’ll see below given three options in your android devices.

How to enable parental controls on android 8.0 Oreo

Apps & games:

Restrict rated or unrated apps and games you can’t view or download from Google Play store.

Films:

Restrict purchase or playback of movies from Google play store in your android devices.

Music:

Restrict music purchase from Google Play store. Also block explicit songs in radio in play music settings online or on a device.

If forgot parental control PIN in your android device, clear data of Google Play store in your android device. It will reset your parental controls PIN.

And that’s it. I hope this tutorial helpful to enable parental controls on android 8. If you have any kind of trouble, tell us in below comment box. Don’t forget to check out our other android Oreo tips.

How to Enable or Disable One Handed Mode in Gboard Keyboard Android

Here’s how to enable one-handed mode in Google’s Gboard keyboard in Android devices. You can use both right-handed mode and left-handed mode in the Gboard keyboard in your Android or Samsung devices. After enabling it, you can use it on the keyboard in WhatsApp, Instagram, and other apps. By default turned off one handed mode on all Android devices. You can activate one handed mode in Google keyboard on Android 8 using languages & input settings.

Read Also:

How to Enable Gborad One Handed Mode on Android Stock OS

Different android device has slightly different settings to activate it in your device. To use one handed mode in the Gboard keyboard on Android, follow the below steps.

Step 1: Open App drawer in your Pixel (Latest Stock Android OS).

Step 2: Tap on Settings.

Step 3: Tap on System.

Step 4: Tap on Languages & input.

Step 5: Tap on the On-screen keyboard under the keyboards section.

Step 6: Tap on Gboard under the virtual keyboard.

Step 7: Tap on Preferences.

One handed mode in android Oreo

Step 8: Tap on one-handed mode under the Layout section.

By default turned off one handed mode in Android devices.

How to enable one handed mode in Google keyboard android 8

Step 9: Choose from Right-handed mode/Left-handed mode.

Enable one handed mode in Google keyboard android 8.0

Now open WhatsApp or Instagram or other chat apps in your Android devices. Operate your device with the right hand or left hand.

How to Enable One Handed Mode on Android (Marshmallow 6.0 and Lollipop 5.1.1)

Step 1: Go to Settings in your Android.

Step 2: Tap on Advanced features.

Step 3: Tap on One-handed mode operation.

Step 4: Enable or Turn on toggle button One-handed input.

And that’s it. Did you find the above article helpful to enable one handed mode in Google keyboard Android? If you have any kind of problem, tell us in below comment box. Don’t forget to check out our other Android tips and tricks.

How to Install Gravity Box Xposed Module on Android Oreo 8.1

The gravity box Xposed module helps apply several tricks and customize your Android Oreo 8.1 and 8.0 devices. Here’s how to download and install the Gravity box module on Android 8.0/8.1 Oreo devices. This Gravitybox feature includes several tricks to apply on Android Oreo, Nougat, and Marshmallow devices, such as status bar trick, navigation bar trick, pie control, notification Gravitybox actions, and more. The gravity box runs on most ROMS. Also, custom UI such as Samsung Touchwiz, MIUI, HTC sense, Lenovo, Xperia, and more.

Read Also:

How to Download and Install Gravity Box Module on Android Oreo 8.1 and 8.0

How to download and install Gravitybox module on android Oreo

To install Gravitybox on android 8.1 & 8.0 Oreo, first of all, install the Xposed framework on your Android Oreo devices using the below steps:

Install Xposed Framework on Android Oreo

Step 1: Download the Xposed framework installer for Android 8.0 and 8.1 Oreo devices from the below-given links.

Download Xposed Framework installer v3.1.4

Download Xposed Framework installer – sdk26/arm64/zip file – Android 8.0 Oreo

Download Xposed Framework installer – sdk27/arm64/zip file – Android 8.1 Oreo

Step 2: Reboot your Oreo device to recovery mode to install the Xposed Framework zip file.

First of all, turn off your Oreo device, and press & hold the power and volume down buttons to get recovery mode.

Step 3: Install and find your Oreo’s Xposed Framework zip file.

Step 4: Tap on the Xposed Framework file & press install image, and swipe right to confirm flashing.

Step 5: Tap on the Reboot system.

Step 6: After the completed reboot process, go to “Xposedlnstaller_3.1.4.apk” in the download section.

Step 7: Tap on Install.

Now follow the below steps to download and install the Gravity box module on Android 8 Oreo devices.

Install Gravity Box Xposed Module on Android Oreo 8.1

Step 1: First, download Gravitybox Oreo 8.0 APK file on your running Android Oreo devices.

This GravityBox APK file was tested on Nexus 5X running stock 8.1 and 8.1 Oreo devices. Make sure to enable unknown sources in your Android Oreo devices. If not, install the Gravitybox APK file on your device. You can enable it using the below settings.

Settings > Apps & notifications > Advanced > Special app access > Install unknown apps > Toggle on App

Step 2: After installing it on your Oreo, open it, and customize the Oreo devices you want.

Now enjoy this GravityBox feature on your Oreo devices.

And that’s it. I hope this tutorial helps download and install the Gravity box module on Android Oreo devices. Don’t forget to check out our other Android Oreo tips. If you have any trouble, please tell us in below comment box. We’ll respond as soon as possible.

How To Delete All Google Maps Search History On Android

Want to clear search and location history in Google Maps on Android devices? Here’s how to view and delete all Google Maps search history on Android devices using security & location settings. It will delete location & search history on Android in Google Maps. Also, remove Google Maps activities from your android devices. You can remove specific searches and location from your android devices. Different Android devices or OS has slightly different settings to delete maps search history on your Android Oreo 8.1, Nougat 7.1.2 & Marshmallow 6.0 devices.

Read Also:

How To Clear Google Maps Search and Location History On Android Devices

Step 1: Open App drawer in your device.

Step 2: Tap on Google Maps app.

Open Google Maps settings in android Oreo

Step 3: Tap on Three horizontal lines (More) at the top left side corner.

Select settings in Google Maps app in android

Step 4: Select Settings.

Here you can see Google location settings, Maps history, start maps in the satellite view, navigation settings, and more.

Maps history on android devices

Step 5: Tap on Maps history.

List of search you’ve viewed in your android devices.

How to clear Google Maps history on android Oreo

Step 6: Tap on × icon in front of search history.

You can see the below-given screen in your Android Oreo devices.

Clear Google Maps history on android device

Step 7: Tap on Delete.

Now delete your search history from Google Map in android device. To delete all Maps history, log-in your Google account in desktop or laptop devices.

Delete Google Map Location History on Android

Step 1: Open the Google Map app in your device.

Step 2: Tap the Profile icon at the top right corner.

Step 3: Select Settings.

Step 4: Tap Maps history.

Step 5: Tap More at the top right corner.

Step 6: Select Keep activity for.

Step 7: Choose from Keep until I delete manually/Keep for 18 months/Keep for 3 months and tap the Next.

Step 8: Tap Confirm.

Pause Google Maps Location History on Android

Step 1: Open the Google Map app in your device.

Step 2: Tap the Profile icon at the top right corner.

Step 3: Select Your Timeline.

Step 4: Tap More at the top right corner.

Step 5: Select Settings and privacy.

Step 6: Tap “Location History is on” under the Location settings section.

Step 7: Toggle off Location history.

Related:

How to Delete All Maps History Using Desktop or Laptop

Step 1: Log in with your Google account & open Google Map.

Step 2: Tap on Menu.

Step 3: Tap on History.

Step 4: Tap on three vertical dots.

Step 5: Select delete activity by.

Here you’ll delete Map history individual or delete all of your Google Map histories at the same time.

Step 6: Tap Maps & click Delete.

And that’s it. I hope the above-given tutorial helpful to clear Google Maps history on Android Oreo devices. If any kind of trouble, tell us in below comment section. We’ll respond as soon as possible. Stay connected with us for the latest Android Oreo tutorial.