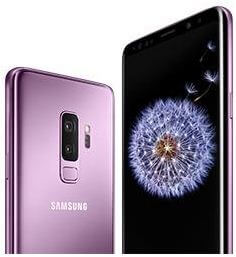
How to Enable WiFi Calling on Samsung Galaxy S9 And S9 Plus

Want to make calls over Wi-Fi on Samsung S9 & S9 plus devices? Let see steps to turn on wifi calling on galaxy S9 and galaxy S9 plus. Wi-Fi calling feature allows users to make & receive calls over Wi-Fi networks in galaxy S9 to when the cellular network isn’t available. You can enable/disable Wi-Fi calling under phone app settings.

By default disable Wi-Fi calling in your S9 device. The different carrier has slightly different settings to turn on Wi-Fi calling on S9 & S9 plus devices such as Verizon Wireless, AT&T, Sprint, etc. Follow the below-given step by step guide to set up wifi calling on galaxy S9 and galaxy S9 plus devices.

Read Also:

How to Turn on Wifi Calling on Galaxy S9 and Galaxy S9 plus

How to enable wifi calling on galaxy S9 and galaxy S9 plus

It’s quite easy to make Wi-Fi calls on Galaxy S9 and Galaxy S9 plus. Check out the below steps to activate Wi-Fi calling on your devices.

Step 1: Open Phone app in your galaxy S9 & S9 plus.

Step 2: Tap on three vertical lines at the upper right corner.

Step 3: Select settings.

Here you can see galaxy S9 call settings, phone settings, voice mail, and Wi-Fi calling section. By default disable Wi-Fi calling in your S9 devices.

Step 4: Turn on Wi-Fi calling toggle button

Now make Wi-Fi calls when mobile data networks not available in your galaxy S9 & S9 plus. In other galaxy S9 and galaxy S9 plus phone settings, you can hide contacts without number, block numbers, answering & ending calls, show caller information, call alert, voicemail settings, show call-in pop-up and more settings.

Turn on Wi-Fi calling on Galaxy S8 and S8 Plus

Step 1: Swipe down from the notification panel twice & select the “Settings” gear icon.

Step 2: Tap “Connection” under settings.

Step 3: Tap “Wi-Fi calling“.

Enter address, city, state, and other details if the first time set up Wi-Fi calling on Samsung Galaxy S8 devices.

Step 4: Tap “OK”.

Step 5: Toggle off or on Wi-Fi Calling on Samsung S8 and S8 plus.

How to Activate Wi-Fi calling on Google Pixel & Pixel XL (7.1.2)

You can enable Wi-Fi calling Google Pixel XL if support carrier. Make sure your Pixel devices connected with Wi-Fi.

Step 1: Open the Phone app in your Google Pixel.

Step 2: Tap on Three vertical dots from top of the right side corner.

Step 3: Tap on Settings.

Step 4: Tap on Calls.

Step 5: Enable Wi-Fi calling.

And that’s it. Did you find the above tutorial helpful to enable wifi calling on galaxy S9 and galaxy S9 plus? If you have any questions, tall us in below comment box. Stay and connected with us for the latest Galaxy S9 tips. Don’t forget to check out our other Samsung galaxy tips and tricks.

How to Change Home Screen Settings on Samsung Galaxy S9 and S9 Plus

Want to change my home screen on Samsung Galaxy S9 and Galaxy S9 plus? Here’s how to organize home screen settings in galaxy S9 & S9 plus. You can see several settings such as home screen layout, home screen grid, Apps screen grid, apps button,  app icon badge, add the app icon to the home screen, portrait mode, hide apps and more. Also, put apps on home screen from app drawer using drag & drop, add the contact to the home screen, and unlock home screen layout on the latest Galaxy S9 and S9 Plus.

You can also quickly open the notification panel to swipe down to open the notification panel from the home screen in galaxy S9 & S9 plus. Using Samsung S9 plus home screen settings, you can resize widgets, customize navigation bar and more. Check out below given all Samsung Galaxy S9 home screen settings.

Read Also:

How to Change Samsung Galaxy S9 Default Home Screen Settings

How to change Samsung Galaxy S9 home screen settings

Step 1: Tap & hold the blank space in your galaxy S9 & S9 plus.

Here you’ll see wallpapers, widgets, themes and home screen settings.

Step 2: Tap on Home screen settings.

Here you can see below given several Samsung S9 & S9 plus home screen settings.

Home screen Grid: Change home screen grid size on galaxy S9 & S9 plus. By default set 5×5 screen grid. Choose from 4×5/4×6/5×6.

Apps screen grid: By default set 5×6 as apps screen grid. You can change apps screen grid in galaxy S9 & S9 plus.

Apps button: Show a button on the home screen that opens the apps section.

App icon badges: Enable app icon badge to select how to show icon badge when apps send new notifications.

Add apps icon to the home screen: When downloading new apps from the play store, automatically add an app shortcut to the home screen. Enable/disable add the icon to the home screen in Galaxy S9 &S9 plus devices.

Read Also: How to enable/disable add the icon to the home screen in android Oreo 8.1 & 8.0

Quick open notification panel: To quickly open the notification panel in S9, enable this option in your device.

Portrait mode: It will prevent the home screen from rotating to landscape mode. Also, enable auto-rotate screen in your galaxy S9 & S9 plus.

Hide apps: You can hide or unhide apps in your galaxy S9 & S9 plus using this setting.

End the list. We hope this tutorial helpful to manage Samsung Galaxy S9 home screen settings. Do you have any other Samsung S9 tips? Share with us in the below comment.

How to Change Samsung S9 Plus Lock Screen Clock Style

Change the clock face on Samsung Galaxy S9 Plus? By default set always on display clock style and lock screen clock on Samsung S9 and S9 plus devices. You can change the lock screen clock on Galaxy S9 and Galaxy S9 Plus using lock screen & security settings. Also, change the always-on display clock style in galaxy S9 and galaxy S9 plus devices. If you don’t want colors, you can also change it.

You can set the image on always-on display in Samsung Galaxy S9 & S9 plus using clock & face widgets settings. Just choose the clock style from different styles you want to set on your galaxy device lock screen. Apply the below-given step by step process to change lock screen clock on Galaxy S9 and Galaxy S9 Plus.

Relevant:

How to Change the Clock on Samsung Galaxy S9 Lock Screen

How to change lock screen clock on Galaxy S9 and Galaxy S9 Plus

Step 1: Go to settings or swipe down notification panel & tap on the Settings gear icon.

Step 2: Scroll down up to lock screen and security settings and tap on it.

Step 3: Tap on clock and face widgets.

Step 4: Tap on the Clock style.

By default set clock style and color in your galaxy S9 & S9 plus devices. Here you can change both Samsung S9 lock screen clock and always on display clock.

Step 5: Select the lock screen tab.

Step 6: Choose the clock from the list you want to set the clock on the galaxy S9 lock screen.

You can change the clock color on Galaxy S9 Always-on-display if you don’t like the default. Also, add music controller to galaxy S9 always-on display or lock screen using the above settings. To switch to music controller, double tap on the Always-on display in your galaxy S9 and S9 plus Oreo devices. Also, remove clock from lock screen S9 plus and S9.

Turn on Always-on display on Samsung S9 & S9 Plus

Step 1: Go to Settings.

Step 2: Tap on Lock screen & security.

Step 3: Tap on the Always-on display.

Here you’ll customize always-on display on your Samsung Galaxy S9 and S9 Plus devices.

And that’s it. Do you still have questions about the change lock screen clock on Galaxy S9 and Galaxy S9 Plus? Let me know in the below comment section. Stay and connected with us for the latest S9 tutorial.

How to change lock screen shortcuts on Galaxy S9 and S9 Plus

By default set left and right side apps on lock screen in your galaxy S9 plus and galaxy S9 devices. Here’s the complete guide to change lock screen shortcuts on galaxy S9 and galaxy S9 Plus Oreo. By default camera and phone apps set as default shortcuts in your Samsung galaxy devices. You can change lock screen app shortcuts on Samsung S9 & S9 plus using lock screen and security settings.

In Samsung galaxy S9 lock screen settings, you can turn on Always-on display, change lock  screen clock, hide notification from lock screen, show Bixby home on the lock screen and more. If you don’t want to see app shortcuts on lock screen, remove lock screen app shortcuts in Samsung S9 & S9 plus devices. Follow below given step by step guide to change lock screen shortcuts on galaxy S9 and galaxy S9.

You Might Like This:

How to take screenshots on Galaxy S9 & Galaxy S9 Plus: 3 Ways

How to use Smart capture on Galaxy S9 & S9 Plus

How to set or change lock screen shortcuts on galaxy S9 and galaxy S9 Plus Oreo

How to change lock screen shortcuts on galaxy S9 and galaxy S9 plus


It’s quite easy to change right and left apps shortcuts in your Samsung galaxy S9 and S9 plus lock screen.

Step 1: Go to settings or swipe down notification panel & tap on Settings gear icon

Step 2: Scroll down up to lock screen and security settings and tap on it

Step 3: Tap on App shortcuts

By default camera set as left shortcuts and phone as right shortcuts in your galaxy S9 & galaxy S9 plus devices.

Step 4: Tap on Left or Right app shortcuts you want to change

Step 5: Choose from list of apps view in your galaxy S9 device

You will turn off apps shortcuts in Samsung S9 & S9 plus if you don’t want to shortcuts on lock screen.

How to change lock screen notifications on Samsung S9 & S9 Plus Oreo

You can show/hide lock screen notifications in your galaxy S9 & S9 plus using lock screen and security settings. Also hide lock screen notification of individually apps in your Samsung galaxy devices.

Settings > Lock screen and security > notifications

And that’s it. I hope this little tip helpful to change lock screen shortcuts on galaxy S9 and galaxy S9 Oreo. If you have any question, tell us in below comment box. Don’t forget to check out our other galaxy S9 plus tips. Stay and connected with us for latest technology news.

How to Auto Rotate Screen on Samsung Galaxy S9 and S9 Plus

Want to enable landscape mode on galaxy S9 and galaxy S9 plus? Here’s the quick guide to turn on auto rotate home screen on Samsung Galaxy S9 and Galaxy S9 Plus devices. By default turn off home screen rotation on Samsung S9. So when you rotate the phone, home screen can’t rotate in our devices.

You can enable/disable home screen rotation on galaxy S9 plus using display settings. If you want to rotate the screen, just enable the auto-rotate screen in Samsung S9 & S9 plus directly from the notification panel. So automatically rotate the screen when rotating your device. Follow the below-given step by step process to rotate home screen on galaxy S9 and Galaxy S9 Plus.

Read Also:

How to Enable Landscape Mode on Samsung Galaxy S9 and S9 Plus

Step 1: Go to settings in your galaxy S9 & S9 plus.

Step 2: Tap on Display settings.

In galaxy S9 display settings, you can see screen resolution, home screen, full-screen apps, easy mode, icon frames, LED indicator, Navigation bar, and more settings.

Step 3: Tap on the Home screen.

Here you can see several galaxy S9 and galaxy S9 plus home screen settings such as home screen grid, app icon badges, add/hide apps icon to the home screen, portrait mode, hide app and more. By default enable landscape home screen on galaxy S9 & S9 plus.

Step 4: Turn on the Portrait mode toggle button.

Now disable landscape mode on galaxy S9 and galaxy S9 plus devices.

Quickly Turn Screen Rotation On or Off Galaxy S9 and S9 Plus

You can also switch portrait to landscape mode in your galaxy S9 & S9 plus using below settings.

Step 1: Swipe down notification panel in your galaxy S9 & S9 plus.

Step 2: Tap on Auto-rotate.

Enable home screen rotation on Android Oreo 8.1 & 8.0

Step 1: Tap & hold the blank space in your Oreo home screen.

Step 2: Select Home settings.

Here you can see some of the useful android Oreo home screen settings such as change icon shape, notification dots, home screen rotation, At a glance and more.

How to auto rotate home screen on galaxy S9 and galaxy S9 Plus Oreo

Step 3: Turn on the home screen rotation toggle button.

Turn on Auto-rotate screen on android Oreo 8.1 & 8.0

Settings > Display > Advanced > enable Auto-rotate screen

And that’s it. I hope this little tip helpful to auto-rotate the home screen on galaxy S9 and Galaxy S9 Plus. If you have any questions regarding this article, tell us in below comment box. Stay and connected with us for detail technology updates.

How to change video size on Galaxy S9 plus and Galaxy S9

Samsung galaxy S9 and galaxy S9 plus devices has awesome super slow motion video, 4K video recording at 30 fps or 60 fps, Hyperlapse video support, face detection and other video settings. In this tutorial, I’ll show you steps to change video size on galaxy S9 plus and galaxy S9 Oreo. This super slow motion video only supports HD resolution.

In galaxy S9 rear & front camera settings, you can change picture size, video size, timer, HDR, tracking AF and super slow-mo options. You can change camera resolution on galaxy S9 & S9 plus using this S9 camera setting. Follow below given complete guide to change video size on galaxy S9 plus and galaxy S9.

Read Also:

How to enable/disable fast wireless charging in galaxy S9 & S9 Plus

How to change camera video resolution on OnePlus 5T/5

How to capture 4K video in Google Pixel & Pixel XL

How to change video size on galaxy S9 plus and galaxy S9 Oreo

How to change video size on galaxy S9 plus and galaxy S9

Using below given settings, you can change front and rear camera settings in galaxy S9 and galaxy S9 plus devices.

Step 1: Open camera app in your galaxy S9 & S9 plus

In top of the screen you can see several galaxy S9 plus camera settings such as Live focus, Auto, location tags, super slow-mo, AR Emoji, panorama, Food and Hyperlapse.

Step 2: Tap on Settings gear icon at bottom left side

Here you can see a rear camera and front camera setting that includes picture resolution, video resolution, HDR and more settings.

Step 3: Tap on Video size you want to change of rear or front camera

By default set FHD (1920×1080) size in galaxy S9 plus rear camera settings.

Step 4: Choose from UHD (60 fps)/UHD/QHD/FHS (60 fps)/FHD/18.5.9/1:1/HD

Maximum you can set video resolution as 3840×20160 in your galaxy S9 plus devices. You can also enable high efficiency video in galaxy S9 plus device using this camera setting.

Note: Tracking AF and video effects not compatible with UHD (60 fps), UHD, QHD and FHD (60 fps) resolutions. Video stabilization isn’t available in UHD (60 fps) and 1:1 resolutions.

And that’s it. I hope this little tip helpful to change video size on galaxy S9 plus and galaxy S9 Oreo. Let us know in below comment if you have any more galaxy S9 plus camera tips. Don’t forget to check out our other Samsung galaxy S9 and galaxy S9 Plus tricks.