How to translate text with Bixby on Galaxy S9 and Galaxy S9 Plus

Samsung’s Bixby uses for scan QR codes, shopping, real time translate text with Bixby voice and more. Here’s the quick guide to translate text with Bixby on galaxy S9 and galaxy S9 plus Oreo. In galaxy S8 and galaxy S8 device has taken time to translate text using Bixby voice or Google assistant. In Samsung galaxy S9 & S9 plus, you can quickly and real time translation text to use Bixby vision under camera settings.

This Bixby live translation galaxy S9 plus and galaxy S9 extremely helpful to translate foreign languages so that students or parents learning easily. Now translate any text or picture (Photo) to your language within a minute using galaxy S9 & S9 plus. Follow below given step by step guide to translate text with Bixby on galaxy S9 and galaxy S9 Plus.

You Might Like This:

How to use Bixby when phone is locked on Galaxy S9 & S9 Plus

How to disable Bixby button on Samsung galaxy S9 & S9 plus

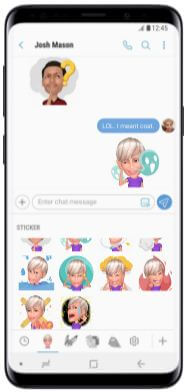
How to set up and use AR Emoji on galaxy S9 and galaxy S9 Plus

How to real time translate text with Bixby on galaxy S9 and galaxy S9 Plus

How to translate text with Bixby on Galaxy S9 and Galaxy S9 Plus

Step 1: Open camera app in your galaxy S9 & S9 plus

Step 2: Tap on Bixby vision button at lower left side

Now access Bixby vision in your S9. By default translate text to English language in your galaxy S9 & S9 plus devices. To change language for translate text, tap on language and select language you want to translate text with Bixby on Samsung S9 and S9 plus.

Step 3: Tap on T (Text) button at bottom screen in your S9 camera

Step 4: Move your S9 camera to text or image you want to translate

Step 5: Now you can see real time translation with Bixby voice in galaxy S9 and S9 plus

Only text inside the scanning object or photo is translated to other language you set. Now automatically Bixby detect which language text or image you scan in your galaxy S9 and S9 plus. You can also enable auto detect language or manually choose language you want to translate text with Bixby on galaxy S9 and galaxy S9 plus. If you don’t want to use Bixby, you can disable it or get rid of Bixby button in your Samsung galaxy devices.

And that’s it. Did you find above tutorial helpful to translate text with Bixby on galaxy S9 and galaxy S9 Plus? If you have any kind of trouble, tell us in below comment box. We’ll respond as soon as possible. Stay and connected with us for latest technology tips and tricks.

How to turn on night mode Samsung Galaxy S9 and Galaxy S9 plus

Turn on night mode Samsung galaxy S9 and galaxy S9 plus Oreo devices. This galaxy S9 and S9 plus night light mode changes the color of your S9 display when enable in your device. It will reduce blue light on screen. You can enable night mode on galaxy S9 plus and S9 under display settings.

By default never turn on automatically night mode in your Samsung galaxy S9 and other devices. When enable night mode Samsung S9, it makes easier to look at your screen or read in dim light, and may help you fall asleep more easily. Follow below given step by step process to turn on night mode Samsung galaxy S9 and galaxy S9 plus.

You May Like This:

How to enable Edge lightning Galaxy S9 plus & Galaxy S9

How to change lock screen shortcuts on Galaxy S9 and S9 Plus

How to turn on night mode Samsung galaxy S9 and galaxy S9 plus Oreo

How to turn on night mode Samsung Galaxy S9 and Galaxy S9 plus

Step 1: Go to settings or swipe down notification pale and tap on settings gear icon

Step 2: Tap on Display settings

Step 3: Tap on Blue light filter

Step 4: Set up Blue light filter on galaxy S9 & S9 plus Oreo

Here you can set schedule time for when turn on night light in your galaxy S9 and S9 plus Oreo devices. Also increase or decrease light intensity effect in your Samsung galaxy S9 devices. Also set Sunset to sunrise for Blue light filter if enable location in your S9. After turned on night mode, you galaxy S9 screen color changed.

In other Samsung galaxy S9 and galaxy S9 plus display settings, you can change display resolution & display colors, turn on video enhancer, turn on one-handed mode, full screen apps and more.

How to change display colors on galaxy S9 and S9 plus                 

It will change the look of your galaxy S9 and galaxy S9 plus display. By default set adaptive display. You can change galaxy S9 display color using below settings.

Settings > Display > Screen mode > Choose display you want to set

How to change screen resolution full HD+ to Quad HD+ on galaxy S9 and galaxy S9 Plus

By default set Samsung galaxy S9 and galaxy S9 plus screen resolution as full HD+. You can change display resolution in galaxy S9 plus and S9 using below settings.

Settings > Display > screen resolution > Choose from HD+ (1480×720)/ FHD+ (2220×1080)/WQHD+ (2960×1440) > Apply

Do you still have questions about turn on night mode Samsung galaxy S9 and galaxy S9 plus? Let me know what you think about our findings. Read more about Samsung S9 tips.

How to Set Up and Use Secure Folder on Galaxy S9 and Galaxy S9 Plus

Here’s how to enable and use a secure folder on Galaxy S9 and Galaxy S9 Plus. Using the secure folder, you can lock the apps/photos, add you’re important apps, add files, and edit apps. You can set up a secure folder on Samsung Galaxy S9/S9+ under lock screen and security settings. Just add apps or files to secure folder you want to safe and secure. You can customize a secure folder and change the secure folder style in Samsung S9 plus devices. Also, use fingerprints and Iris scanner to unlock a secure folder in S9. You’ll also set up a PIN number, pattern lock or password for the screen lock.

Read Also:

How to Enable Secure Folder on Samsung Galaxy S9 and S9 Plus

How to use secure folder on galaxy S9 and galaxy S9 Plus

There are two ways to access a secure folder on galaxy S9 and galaxy S9 plus devices.

Change Secure Folder Settings

Step 1: Scroll down notification panel & tap on the Settings gear icon.

Step 2: Tap on Lock screen & security/Biometrics and security.

Step 3: Tap on the Secure folder.

Sign in with your Samsung account if the first time use.

Step 4: Tap Three vertical dots at the top right corner.

Step 5: Tap Settings.

Here you can see below given some of the important secure folder settings in Samsung S9 and Galaxy S9 plus.

Secure Folder Style

Change the Samsung secure folder style here.

Lock Type

Here you can select lock type to unlock secure folder in Samsung Galaxy S9 and S9 plus. Also, set up a fingerprint or Iris scanner to open a secure folder. You can use fingerprint+ as your dedicated fingerprint for the quickly open secure folder from the Galaxy S9 lock screen.

Auto-lock secure folder

You can choose when auto-lock secure folder on Galaxy S9 from immediately/when the screen turns off/after 5 minutes/10 minutes/30 minutes or when phone restarts

Notifications and data

Here you can show or hide content on the lock screen, app notification, enable/disable show caller ID, allow clipboard, and full-screen apps.

Show secure folder

Enable show secure folder to quickly open on your apps screen.

You can also see other secure folder settings including apps, accounts, backup and restore, data usage, uninstall, and more. It’s quite easy to use a secure folder on Galaxy S9 and Galaxy S9 Plus.

How to Use Samsung Secure Folder to Hide Photos

Step 1: Open Gallary.

Step 2: Select the photos you want to hide.

Step 3: Tap Three vertical dots (More) at the top right corner.

Step 4: Tap Move to secure folder.

Enter the Password or other security you set to access your secure folder. Wait until moving the photos.

Add Apps To Secure Folder

Settings > Lock screen & security/Biometrics & security > Secure folder > Enter PIN/Pattern lock/Password > Add apps > Select the apps > Done

Remove Apps From Secure Folder

Settings > Lock screen & security/Biometrics & security > Secure folder > Enter PIN/Pattern lock/Password > Tap & hold the app > Uninstall

How to Show/Hide Secure Folder

You’ll hide several apps & files to secure folder such as contacts, Samsung notes, File apps, gallery, Photos, and more.

Settings > Lock screen & security/Biometrics & security > Secure folder > Enter PIN/Pattern lock/Password > Toggle off Show secure folder > Hide

Change Secure Folder icon and Rename

Settings > Lock screen & security/Biometric and security > Security > Secure folder > Three vertical dots > Customize icon > Rename & change the icon > Apply

Quickly Open a Secure Folder From the Lock Screen Using Fingerprint/Iris

Set up a secure folder lock type to quickly open a secure folder from the lock screen in Samsung Galaxy S9 and Galaxy S9 plus.

Settings > Biometrics and security > Secure folder > Lock type > Enable fingerprint+ or Iris

Now lock your galaxy S9 & S9 plus and use dedicated fingerprint to quickly open galaxy S9 plus secure folder from the lock screen.

And that’s it. We hope this makes it clear how to set up and use a secure folder on galaxy S9 and galaxy S9 plus. If you have any questions, tell us in below comment box. Stay and connected with us for latest technology updates.

How to Clear Cache Samsung S9 and S9 Plus device

Every time the app crashes and gets hung on your Samsung galaxy s9 and s9 plus? Okay, don’t worry. Now we will walk through the process to clear cache Samsung s9 and s9 plus devices. This looks pretty unresponsive, so to quickly solve the issue, clear the app cache on Galaxy S9 and Galaxy S9 Plus devices. This method will free up space and make your galaxy device faster.

In your Samsung s9 series, you are unaware of which application is causing the issue. With the help of this method, Galaxy S9 clear cache of apps and games you have installed. Please check below the step-by-step process to clear cache on Galaxy S9 and Galaxy S9 Plus.

How to Clear App Cache on Galaxy S9 and Galaxy S9 Plus

How to clear app cache on galaxy S9 and galaxy S9 Plus Oreo

First, let’s see the steps to clear cache Samsung S9+ and S9 devices.

Step 1: Go to Settings or Swipe down the notification panel and tap on the Settings gear icon in your S9 & S9 plus.

Step 2: Tap on Apps

A list of installed apps is viewed on your Samsung galaxy devices.

Step 3: Tap on the App you want to clear the cache.

Step 4: Tap on Storage under the usage section.

Here you can see clear data and clear cache button.

Step 5: Tap on Clear cache.

Now clear the app cache in your Galaxy S9 and S9 plus devices.

How to Clear App Data on Galaxy S9 and Galaxy S9 Plus

It will permanently delete this app’s information, including all settings, files, accounts, databases, and related apps from your Samsung Galaxy device.

Step 1: Go to Settings in your Samsung S9 series.

Step 2: Tap the Apps

Step 3: Select an App you want to clear the data.

Step 4: Tap the Storage under the usage section.

Here you can see clear data and clear cache button.

Step 5: Tap Clear data.

Step 6: Tap OK.

Related:

And that’s all. I hope this tip helps clear the app cache on Galaxy S9 and Galaxy S9 Plus. Don’t forget to check out our other galaxy S9 and Galaxy S9 plus tips. Let us know in below comment box if you have any problems.

How to disable displaying over other apps on Galaxy S9 plus

Annoying by Phone or messenger is displaying over other apps notification on Samsung galaxy S9 plus & galaxy S9 Oreo? You can disable displaying over other apps on galaxy S9 and galaxy S9 plus using android system view settings. In latest android Oreo 8.1 & 8.0 devices, you can see displaying over other apps notification at lock or home screen.

You can easily disable persistent notification under apps notifications settings in S9 Oreo. Sometimes several users reported about apps consuming battery notification issue in home or lock screen. Check out below given methods to disable displaying over other apps on galaxy S9 and galaxy S9 Plus.

Read Also:

How to set up and use AR Emoji in Samsung galaxy S9 and S9 Plus

Fix galaxy S9 and galaxy S9 touch screen not working

How to disable displaying over other apps on galaxy S9 and galaxy S9 Plus Oreo

Check out below given two methods to disable phone or messenger is displaying over other apps Nougat and Oreo devices.

1st Method:

Step 1: Scroll down notification panel and you can see Android system notification on the screen (Show below screenshot)

Messenger is displaying over other apps notification on galaxy S9 plus

Step 2: Swipe right side screen

Step 3: Tap on Settings gear icon

You can see android system view settings screen in Samsung galaxy S9 and S9 plus.

How to disable displaying over other apps on galaxy S9 plus

Step 4: Disable displaying over other apps notification you want

2nd Method:

Step 1: Go to settings in your Galaxy S9 & Galaxy S9 plus

Step 2: Tap on Apps

Step 3: Tap on Three vertical dots (Menu) from upper right side corner

Step 4: Select Show system

Step 5: Tap on Android system

Here you can see app icon badge, display over other apps and other several categories. By default enable display over other apps in your Samsung galaxy devices.

Step 6: Disable app you want annoying displaying over other apps on galaxy S9 & S9 plus

And that’s it. Do you still have questions about disable displaying over other apps on galaxy S9 and galaxy S9 Plus? Let me know what you think about this tutorial in below comment section.

How to change message app notification importance in Galaxy S9

Want to change notification importance control in galaxy S9 message app? Here’s the quick guide to change message app notification importance in galaxy S9 and galaxy S9 plus Oreo. In Samsung S9 app notifications settings, you can see app icon badge, emergency alerts and other settings.

By default set urgent as Importance notification. You can change notification important priority for message apps in galaxy S9 & S9 plus. Follow below given step by step process to change message app notification importance in galaxy S9 and galaxy S9 plus.

Check Relative Article:

How to disable app consuming battery Samsung S9 and S9 Plus

How to turn off notification reminder on Galaxy S9 and S9 Plus

How to change message app notification importance in galaxy S9 and S9 Plus Oreo

Step 1: Open messages app in your galaxy S9 and S9 plus Oreo devices

Step 2: Tap on Three vertical dots (Menu) at upper right corner

Step 3: Select settings

Here you can see notification, block numbers and messages, emergency alert and other settings.

Step 4: Tap on Notifications

Step 5: Tap on New messages under categories section

You can see importance, sound, vibrate, app icon badges, do not disturb and other settings.

How to change message app notification importance in galaxy S9 plus

Step 6: Tap on Importance

Below given four options view in your device.

Urgent: When receive notification in S9, your galaxy S9 sound or pop-up on screen

High: Only make sound when receive message notification S9

Medium: No sound

Low: No sound or visual interruption

Change message app notification importance in galaxy S9

Step 7: Choose from above given option as Importance level in S9

You can individually manage notification importance control for all apps in galaxy S9 and galaxy S9 plus devices using apps settings.

Change notification importance control for individual apps on android Oreo 8.1 & 8.0: Google Pixel, Pixel 2 XL

Step 1: Go to settings in your android Oreo

Step 2: Tap on Apps & notifications

Step 3: Tap on Notifications

Step 4: Tap on App notifications

Step 5: Tap on app you want to change important level

Step 6: Tap on Any categories options

Step 7: Tap on Importance

Step 8: Choose importance level from above options

And that’s it. I hope this article helpful to change message app notification importance in galaxy S9 and S9 Plus. Let us know if you have any kind of trouble, we will respond as soon as possible. Don’t forget to check out our other galaxy S9 plus tips.