How to Take a Screenshot on Google Pixel 10, 10 Pro, 10 Pro XL

Do you want to capture the screen for a specific page or any other document while surfing the internet on your Pixel phone? Here’s how to take a screenshot on Google Pixel 10, 10 Pro, 10 Pro XL, and 10 Pro Fold. Using the Pixel screenshot feature, you can share content, save information about the screen, etc. You can easily find all the screenshots you’ve taken in the Pixel screenshot folder on your Google Photos. The Pixel 10 Pro XL offers several easy ways to take screenshots, including using the recent apps feature or the Gemini feature.

3 Methods to Take Screenshots on Google Pixel 10 Pro XL, Pixel 10 Pro, Pixel 10: Android 16

Apply one of the methods to capture a screenshot on the latest Pixel 10 series.

Method 1: Using Physical Buttons (Most Common Method)

Locate the buttons: Power button (located on the right side) and Volume Down button (below the power button).

Press Simultaneously: Press both the Power button and the Volume Down button at the exact same time and quickly release them.

Visual Confirmation: You can hear a shutter sound, accompanied by a small preview appearing at the bottom of the screen, when taking a screenshot.

Google Pixel 10 Screenshot Taken

Preview Options: You can see the “Share,” “Edit,” “Up & down arrow (Android 16)”, or “Capture more” for scrolling screenshots on Google Pixel devices.

Method 2: Using Recent Apps/Overview Screen (Software Method)

 Two methods are available to capture a screenshot using the recent apps screen on the latest Pixel devices.

Access Recent Apps: Swipe up from the bottom of the screen and hold to open the Recent apps, or tap the Recent Apps button (located on the right side of the navigation bar) if using a 3-button navigation bar.

Take screenshot on Pixel 10 Pro, 10 Pro XL, 10

Screenshot Button: You can find the Screenshot option at the bottom of the screen, next to the “Select” button. Alternatively, tap on the App name at the top and then tap the Screenshot.

Tap to Capture: Tap this Screenshot button to capture a screenshot of the currently displayed screen on your Google Pixel.

Method 3: Using Gemini or Google Assistant

Open the page: Open any page or site to capture the screen.

How to Take a Screenshot on Google Pixel 10 Pro XL using Gemini or Google Assistant

Launch the Gemini or Google Assistant: Say “Hey Google” to launch the Gemini or Google Assistant and say “Take a screenshot”.

You can see the capture screenshot on your Pixel device’s status bar.

Method 4: Take a Scrolling Screenshot (For Long Pages) on Google Pixel 10

If you want to capture multiple pages or scrollable content on the screen, you can take a long screenshot or a scrolling screenshot on your Pixel device.

Take a Screenshot: Capture the screen using the standard method or the recent apps we mentioned above.

Take a Scrolling Screenshots (For Long Pages) on Google Pixel 10

Tap “Up & Down Arrow Icon”: Tap the “Up & Down Arrow” button on the screenshot.

Adjust Selection: Drag the corners of the box to include all the content they want to capture.

How to Take a Long Screenshot on Google Pixel 10 Pro XL

Save: Tap “Save” at the top left corner once they’ve selected the desired area.

Where Screenshots Are Saved on your Google Pixel 10 Series: How to Find Screenshots on Pixel

All screenshots are saved in the screenshots folder in your Google Photos app.

To navigate to this folder: Open the Google Photos app > Collection tab (Bottom middle) > On this device > Screenshots.

Conclusion:

Which of the above-given methods works best for you to take screenshots? Please comment in the box below.

How to Restart Google Pixel 10, 10 Pro, 10 Pro XL

When you reboot/restart your Google Pixel device, it will resolve several issues, including minor glitches, refresh your phone, and improve performance, which in turn speeds up your device. In this tutorial, I’ll explain different ways to restart Google Pixel 10, 10 Pro, 10 Pro XL, and 10 Pro Fold devices.

3 Ways to Restart Your Google Pixel 10 Pro, Pixel 10 Pro XL, Pixel 10: Android 16

Apply the methods below to reboot the Pixel 10 series.

Method 1: Standard Restart (Recommended for Most Situations)

Press and Hold: Simultaneously press and hold the Power button (located on the right side of the phone) and the Volume Up button.

Power Menu: The power menu appears on your Pixel’s screen, typically including options such as “Power off,” “Restart,” “Lockdown (If Enabled),” and “Emergency.”

How to Restart Google Pixel 10, 10 Pro, 10 Pro XL

Select Restart: Tap on the “Restart” option.

Phone Restarts: Now your Pixel device will shut down and automatically power back on.

Method 2: Reboot/Restart Pixel 10 from Quick Settings

Swipe Down: Swipe down the notification panel twice from the top of the screen to fully expand the quick settings panel.

Power Icon: Tap on the Power icon (often a circle with a Power Button Icon) at the bottom right corner of the quick settings panel.

Reboot/Restart Pixel 10 from Quick Settings

Tap Power Icon: Tap this Power icon to display the power menu.

Select Restart: Tap on Restart.

Read More: How to Turn Off Google Pixel 10 Series

Method 3: Using Gemini or Google Assistant

Activate Assistant: Make sure to enable Google Assistant on your Pixel device. Saying “Hey Google or OK Google”

Restart Google Pixel 10 Pro using Gemini or Google Assistant

Voice Command: Say the command: “Restart the phone” or “Reboot the phone.”

Confirmation: You can see the power options on your Pixel 10’s screen. Tap on Restart in the menu to reboot your Google Pixel 10 series.

Important Note:

Force Restart should be used when your Pixel cannot restart using normal methods. Reassure them that it won’t delete data but is for emergency situations.

Method 4: Force Restart/Hard Reset Google Pixel 10 (For Unresponsive Phones)

When to Use: You can force restart your Pixel device when the Pixel 10 is frozen, unresponsive, the touch screen is not working, or it won’t turn off normally.

Press and Hold: Press and hold only the Power button for an extended period, typically around 20-30 seconds.

Phone Powers Off and On: Your Pixel phone will force a shutdown and then automatically restart.

Conclusion:

Which of the above methods do you use to restart your Google Pixel 10 series? You can use the standard restart for routine issues and the force restart for situations that are unresponsive. Please tell us your thoughts in the comment section below.

How to Turn Off Google Pixel 10, 10 Pro, 10 Pro XL

Here’s how to turn off Google Pixel 10, 10 Pro,10 Pro XL, and 10 Pro Fold. When you turn off your Pixel 10 series, it will completely power off or turn off all your Pixel’s functions and systems, unlike simply turning off the screen or putting it in standby mode, which will improve the phone’s speed and performance. There are several ways to power off Google Pixel 10 series device, including using the power button in the quick panel, the power button, Google Assistant, or Gemini.

Read More: How to Restart Google Pixel 10, 10 Pro, 10 Pro XL

3 Methods to Turn Off Your Pixel 10 Pro XL, Pixel 10 Pro, Pixel 10

Apply one of the following methods to switch off your Google Pixel devices running Android 16 version.

Method 1: Using the Power and Volume Up Button (Standard Method)

Press and Hold: Long-press and hold both the Power button (on the right side of the phone) and the Volume Up button simultaneously.

Menu Appears: You can see the power menu that will appear on the screen that includes options like “Power off,” “Restart,” “Emergency,” etc. (Sometimes shows “Lockdown” option if you enabled)

How to Turn Off Google Pixel 10, 10 Pro, 10 Pro XL

Select Power Off: Tap on the “Power off” option.

Now your Google Pixel phone will shut down.

Method 2: Using Quick Settings Panel

Swipe Down: Swipe down twice from the top of the screen to access the full quick settings panel.

Power Icon: Tap the Power icon (often represented by a circle with a power symbol), typically located at the bottom right of the Quick Settings panel.

Power off Google Pixel 10 using Quick Settings Panel

Tap Power Icon: Tap the Power icon to view the power menu.

Select Power Off: Select “Power off” from the menu to switch off your Pixel device.

Method 3: Using Gemini or Google Assistant (If Enabled)

Activate Assistant: Ensure that Google Assistant is enabled on your Pixel device. Saying Hey Google or OK Google”

Turn Off Your Pixel 10 Pro XL using Gemini or Google Assistant

Voice Command: Say the command: “Turn off my phone” or “Power off my phone.”

Confirmation: You can see the power menu on your Pixel 10’s screen. Tap “Power off” in the menu to turn it off.

Method 4: Force Restart (Troubleshooting) Pixel 10 Pro XL

When to Use: Force restart your Google Pixel 10 series when the phone is unresponsive or frozen.

Press and Hold: Press and hold the Power button for about 20-30 seconds until your Pixel 10 restarts.

Conclusion:

Choose the method that’s most convenient for you to power off your Google Pixel 10 series. Do you like the new Pixel 10 series looks, camera & other specs? Please share your thoughts in the comment section below or explore other tricks.

How to Take a Screenshot on Vivo T4 Pro, T4R, T4 Ultra, T4X

Capturing what’s on your screen can be incredibly useful, whether you’re saving an important message, a high score in a game, or an interesting article. Your Vivo T4 Pro, T4R, T4 Ultra, and T4X offer several easy ways to take screenshots. Check out the methods below to take a screenshot on the Vivo T4 Pro, T4R, T4 Ultra, T4X, and T4 Lite, among others.

Read More:

How to Screenshot Vivo T4 Pro, T4R, T4 Ultra, T4X: Funtouch OS 15

Apply the methods below to capture a screenshot on your Vivo T4 series device.

Method 1: The Classic Button Combination – Power & Volume Down Buttons

This is the most common and widely used method across most Android devices.

Navigate to the Screen: Go to the screen you wish to capture.

Press Buttons Simultaneously: Quickly press and hold the Volume Down button and the Power button simultaneously.

Release and Confirm: Release both buttons once you see a visual flash on your screen and hear a shutter sound, indicating the screenshot has been taken.

Access you’re Screenshot: The screenshot will automatically be saved to your phone’s Gallery or Photos app, usually in a “Screenshots” folder.

Method 2: The Three-Finger Swipe Down

Vivo phones often come with convenient gesture controls, and a three-finger swipe is a popular one for screenshots.

Enable the Gesture (if needed)

Go to Settings.

Tap on Shortcuts & accessibility.

Tap the Super screenshot.

How to Take a Screenshot on Vivo T4 Pro, T4R, T4 Ultra, T4X

Look for an option like “Gesture screenshot” or “Three-finger swipe screenshot” and ensure it’s toggled on.

Perform the Gesture: With the feature enabled, place three fingers on your screen and swipe downwards.

Confirm: You’ll see the same visual flash or hear the shutter sound, confirming that your screenshot has been taken.

Method 3: Take a Screenshot through the Quick Settings Panel

Take a Screenshot using Quick Settings Panel

Vivo’s Funtouch OS 15 often includes a dedicated “Super screenshot” feature in its quick settings, offering more screenshot options, including screenshot, record screen, long screenshot, capture area screenshot, and record animation.

Swipe down twice from the top of the screen to access the full notification panel, tap “Super Screenshot,” and then tap “Screenshot” to capture the screen.

Method 4: Using Three-Finger Swipe – Specific Area/Portion Screenshot

How to Screenshot Vivo T4 Pro Three Finger Swipe Down

Two different methods are available to take a specific portion screenshot on your Vivo T4 series using the three-finger screenshot feature.

Swipe down with three fingers in the middle and hold to take a quick screenshot of the area. You can customize the area and shape of the screenshot, such as Rectangle, Rounded rec, circle, heart, poop, cloud, doodle, etc.

Tap and hold with three fingers in the middle to take a screenshot of an area.

Method 5: Take a Long Screenshot (Scrolling Screenshot) Vivo T4 Pro, T4R, T4 Ultra, T4X

For capturing entire web pages or long documents that extend beyond the visible screen, the long screenshot feature is invaluable.

Take a Long Screenshot Vivo T4 Pro

  • Take an initial screenshot: Use either the button combination or three-finger swipe to take a screenshot.
  • Tap “Long screenshot”: Immediately after taking the screenshot, a small preview will appear at the bottom of the screen. Tap on “Long screenshot”.
  • Scroll and Save: Your phone will automatically scroll down, stitching multiple screens together into a single, continuous image. Tap on the screen to stop taking a screenshot. Tap “Save” or “Done” when you’ve captured everything you need.

With these methods, you can easily capture anything on your Vivo T4 Pro, T4R, T4 Ultra, or T4X. Experiment to find which method works best for your needs! Tell us in the comment section below.

How to Customize Your Lock Screen on Vivo T4 Pro, T4R, T4 Ultra, T4X

Your phone’s lock screen is the first thing you see every time you pick up your device. It’s not just a security barrier; it’s also a canvas for personalization, allowing you to display important information and express your style. Vivo’s Funtouch OS on the T4 Pro, T4R, T4 Ultra, and T4X offers a range of options to customize your lock screen.

Read More: How to Customize Always-On Display in Vivo T4 Series

Here’s How You Can Make Your Vivo T4 Pro Lock Screen Truly Your Own

Accessing Lock Screen Settings

All lock screen customization options are typically found within your phone’s main settings.

Open Settings: Tap on the “Settings” app icon on your home screen or in your app drawer.

Navigate to Home screen, lock screen & wallpaper Options: Scroll down and look for “Home screen, lock screen & wallpaper.” This is where most of your lock screen and home screen customization options reside.

Enter Lock Screen Settings: Tap on “Lock screen settings“.

Changing Your Lock Screen Wallpaper

One of the easiest ways to personalize your lock screen is by changing its background.

Lock Screen Settings Vivo T4 Pro, T4R, T4 Ultra

From Lock Screen Settings: In the “Home screen, lock screen & wallpaper” section, tap on your “Wallpaper.” Tap on Select wallpaper at the bottom middle. You can then choose from:

Kinetic wallpapers: Select from pre-installed wallpapers such as Ascent, Moonlight stamen, powder blue peony, Cinnabar lily, Royal gold iris, etc.

Live wallpapers: 4 live wallpapers available.

Static Wallpapers: Select from pre-installed wallpapers

From Phone Gallery: Select your own photos from the Gallery and set them as the Vivo lock screen wallpaper. Just open the image from the gallery, tap the “More” or three-dot menu at the bottom right corner, and select “Set as wallpaper,” then choose “Lock screen wallpaper at bottom middle,” then tap “Right arrow icon at the top right corner.”

Change the Lock Screen Clock Style

Vivo’s Funtouch OS often includes various lock screen styles or themes that change the layout of the elements.

Change the Lock Screen Clock Style on Vivo T4 Seires

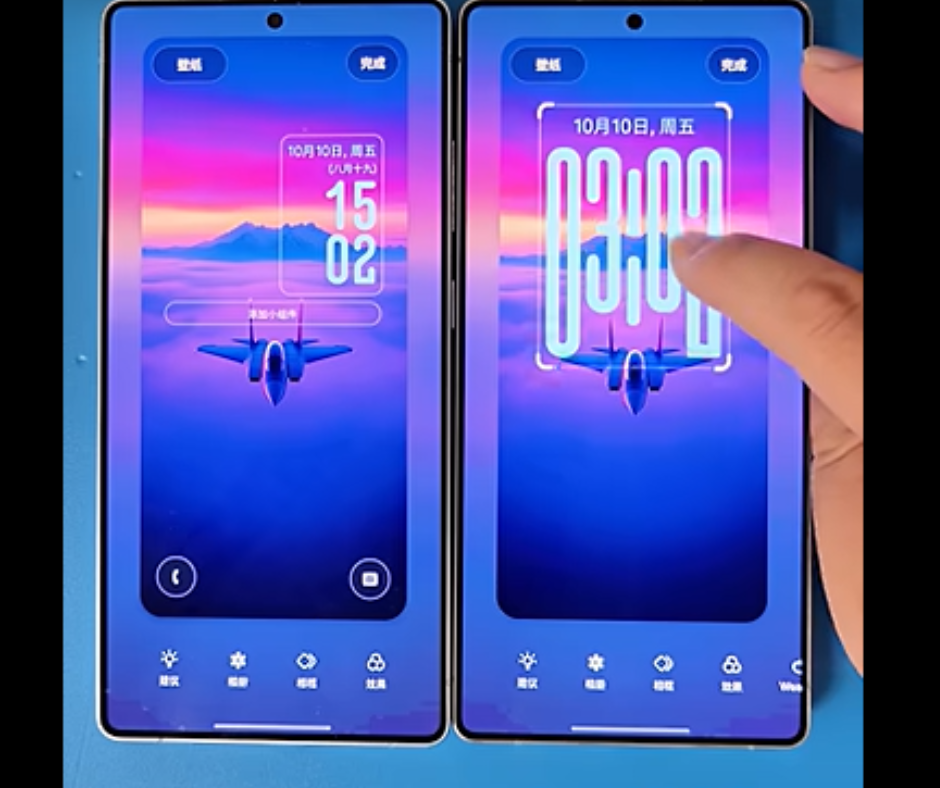
Lock Screen Style: Within the “Lock screen settings,” tap on the wallpaper. Tap the clock. You can see multiple clock & date styles. Additionally, modify the clock font, color, and style. Personalize your favourite clock style and tap apply at the top right corner.

Browse and Apply: You can browse through different pre-installed styles or download new ones from the Theme Store (if available on your device). Select a style that you like and apply it. These styles can change the font, clock design, and even add unique animations.

Change Lock Screen Settings

You can control what information appears on your lock screen at a glance.

How to Customize Your Lock Screen on Vivo T4 Pro, T4R, T4 Ultra, T4X

  • Date & Signature: Show date & day on the lock screen. Tap on the date above the clock style to add quick information, such as text (Signature) or a number, to the lock screen. Some Vivo models allow you to add custom text or your contact information to the lock screen, which can be helpful if you ever lose your Vivo phone.
  • Lock Screen App Shortcuts: Within the “Lock screen settings,” tap on the wallpaper. Tap the left app shortcut or right app shortcut and choose a function you want to access from the lock screen. Long-press the app and move it to the top to access it from the Vivo lock screen.
  • Notifications: Select how notifications appear on your Vivo T4 lock screen (e.g., show content, hide content, or don’t show at all). This is usually found under “Notifications on lock screen” in your main “Settings” > “Notifications & status bar” > “Lock screen” > Toggle switch to turn the feature “On” or “Off for Show lock screen notifications.
  • Change Lock Screen Wallpaper Based on Theme: Only static wallpapers can change based on the theme. Toggle on/off what you want.
  • Open Control Center from The lock screen: Quickly access quick settings panel from the lock screen.

Set Lock Screen – Setting Up Security Methods

While customization is fun, security is paramount.

Screen Lock: In “Settings,” go to “Security & privacy”, then “Device unlocking.”

Here you can set or change your Vivo T4 screen lock:

  • None
  • Swipe
  • Pattern
  • PIN
  • Password
  • Complex password
  • Fingerprint Unlock
  • Face Unlock

Tips for a Great Lock Screen on Vivo Phone:

Clarity: Choose a wallpaper that doesn’t obscure the clock or notification icons on your Vivo lock screen.

Personal Touch: Use a photo that makes you smile or a design that reflects your personality.

Functionality: Ensure essential information, like time and notifications, is easily visible.

By exploring these options, you can create a lock screen on your Vivo T4 Pro, T4R, T4 Ultra, or T4X that is both secure and uniquely yours.

How to Customize Always On Display on Your Vivo T4 Pro, T4R, T4 Ultra, T4X

Always On Display (AOD) is a fantastic feature that allows you to view important information, such as the time, date, battery status, and notifications, at a glance without needing to wake up your phone fully. Vivo’s T4 series, comprising the T4 Pro, T4R, T4 Ultra, and T4X, offers various customization options for AOD, allowing you to make it truly yours. Follow the step-by-step guide below to customize Always On Display on your Vivo T4 Pro, T4R, T4 Ultra, and T4X.

Read More: How to Customize Lock Screen on Vivo T4 Series

How You Can Personalize Your Always On Display in Vivo T4 Series | Funtouch OS 15

Accessing Always On Display Settings

First, navigate to the AOD settings within your phone’s system.

Open Settings: Tap on the “Settings” app icon on your home screen or in your app drawer.

Navigate to Home screen, lock screen & wallpaper Options: Scroll down and look for “Home screen, lock screen & wallpaper Options.” The exact naming might vary slightly depending on your Funtouch OS version.

Find Always On Display: Within this section, you should find an option specifically labelled “Always On Display” or “AOD.” Tap on it.

Enabling and Disabling Always On Display

Before customizing, ensure AOD is enabled.

How to Customize Always On Display on Your Vivo T4 Pro, T4R, T4 Ultra, T4X

Toggle On/Off: At the top of the Always On Display settings, you’ll usually find a toggle switch to turn the feature “On” or “Off.” Make sure it’s switched to “On” to use and customize it.

Change AOD Settings

Customizing Your AOD in Vivo T4 Pro

  • AOD Clock Styles: You’ll typically find various Vivo AOD clock designs, including Star Adventure, Beauty of Humanity, Personalized styles, Sensory Clock, Personalized Stickers, Digital Clock, Analog Clocks, Signature, AOD Tools, etc. Browse through them and select the one that appeals to you the most.

Custom Images/Text: Depending on your Vivo device and OS version, you might have the option to set a custom image or input personalized text to appear on your AOD. Look for options like “Custom Image” or “Text.”

  • Display Mode

Choose how to access Always on display on your Vivo T4 series from “Tap screen or raise/Move phone slightly”.

  • Always On Display for New Notifications

You can toggle the switch to turn the feature “On” or “Off for AOD new notifications.

  • Enable/Disable AOD Notifications for Specific App

Display new notifications as app icons on the AOD. You can double-tap app icons to view details. Up to 20 apps are supported.

Tips for Customizing Your AOD in Vivo T4 Pro, T4R, T4 Ultra, T4X

Battery Consumption: While AOD is designed to be power-efficient, displaying complex animations or bright images continuously can consume more battery. Consider a more straightforward style if battery life is a concern. AOD will increase power consumption. It will be temporarily turned off when the battery level is less than 10% or when battery saver is enabled.

Preview: As you select different clock styles, your phone will often show a live preview of how it will look on your screen, helping you make the perfect choice.

By following these steps, you can easily customize the Always on Display on your Vivo T4 Pro, T4R, T4 Ultra, or T4X to display the information and style that best suits your needs and preferences.