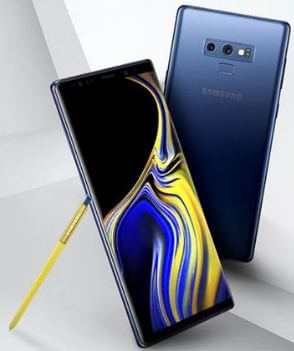
How to Enable or Disable Edge Panel on Galaxy Note 9

By default disabled edge panel on Samsung Galaxy Note 9. You can enable Edge panels on Galaxy note 9 using edge screen under display settings. When turning on edge panel on your note 9, you’ll access your favorite apps and functions on the edged screen. You’ll enable edge lightning on galaxy Note 9 using this setting. Also, open two apps at the same time using app pair and edit on apps edge settings in your device.

You can see the drag panel handle to your Samsung Note 9 screen. Drag the Edge panel handle to view your edge panels. So you can instantly access apps and other information at a glance without an open Note 9 app drawer. Follow the below-given step by step process to enable Edge panels on Galaxy note 9.

Relevant:

How to Enable Edge Panel on Samsung Galaxy Note 9

How to enable Edge panels on Galaxy Note 9

You’ll instantly access the apps you use the most on the Galaxy Note 9 edge screen. Let see how to enable and use Edge panels on Note 9.

Step 1: Swipe down the notification panel and tap the Settings gear icon.

Step 2: Tap Display.

In Samsung Note 9 display settings, you can see brightness, blue light filter, font & screen zoom, screen mode, screen resolution, full-screen apps, icon frames, Edge screen, LED indicator, status bar, screen timeout, block accidental touches and more settings.

Step 3: Tap Edge screen.

Here you can see Edge panels and Edge lighting options. By default turn off Edge panels in your Note 9. Also, enable Note 9 edge lightning.

Step 4: Turn on toggle “Edge panels”.

Now you can see Edge panel handle on your device screen.

Step 5: Drag the Edge panel handle to see Edge panels.

List of by default added apps appear on the screen. You can add your favorite apps to t this list, so easily access apps without an open app drawer in your Samsung Galaxy Note 9. Also, change apps Edge settings in your device.

Step 6: Tap + icon to add your daily routine use apps.

Step 7: Select the app from a list you want to add.

You’ll quickly open apps that added to edge panel in your Samsung Note 9 device.

How to Use App Pair (Split Screen View) on Galaxy Note 9

Step 1: Swipe home screen from right or left to open edge panel.

Step 2: Swipe edge panel screen until seeing Apps edge.

Step 3: Tap App pair.

Step 4: Select apps you want to use as an app pair.

Now, you can open two apps at the same time using this galaxy Note 9 app pair feature.

And that’s all. Are you using the Edge Panel feature on your Galaxy Note 9? Do you still have questions about enable Edge panels on Galaxy Note 9? Let us know in the comments below!

How to Use Blue Light Filter on Galaxy Note 9

By default turned off the blue light filter on Samsung Galaxy Note 9. You can turn on a blue light filter (Night Mode) on Galaxy Note 9 under display settings. Use the blue light filter at night to look at your screen easily or read in dim light and sleep better. Also, set a schedule to automatically activate a blue light filter on your Samsung Note 9. To use sunrise to sunshine, the location needs to be turned on in your Note 9. Follow the below-given step by step process to enable and use a blue light filter on Galaxy Note 9.

Read Also:

How to Turn On Blue Light Filter on Samsung Galaxy Note 9

How to turn on blue light filter on Galaxy Note 9

Let see a complete guide to enable the blue light filter/Night Mode on note 9 and set schedule time to automatically turn on in your device.

Step 1: Swipe down the notification panel and tap the Settings gear icon.

Step 2: Tap Display.

In galaxy Note 9 display settings, you can see brightness, Blue light filter, Font & screen zoom, Screen mode, Screen resolution, Full-screen apps, Easy mode, Navigation bar, and more settings.

Step 3: Tap the Blue light filter.

Step 4: Turn on toggle to activate blue light filter on galaxy Note 9.

You can also increase or decrease blue light filter opacity in your Samsung galaxy devices. Also, turn on the schedule in your device.

Step 5: Toggle on “Turn on as scheduled” and choose from Sunset to sunrise or Custom schedule.

In a custom schedule, you can set start time and end time to automatically enable the blue light filter on Galaxy Note 9.

Step 6: Tap Start time and set time.

Step 7: Tap End time and set time.

When the blue light filter turns on in your device, your device screen looks like dim color. It will be automatically turned off at the scheduled end time.

Change Screen Mode on Note 9

These galaxy Note 9 features automatically optimize the screen color, saturation, and sharpness of your display. Adjust the colors of your display to change the appearance of white tones. By default Samsung Galaxy Note 9 screen mode set as the adaptive display.

Settings > Display > Screen mode > Adaptive display/AMOLED cinema (Video, Movies)/AMOLED photo/Basic

And that’s all. Do you still have a question turn on blue light filter on Galaxy Note 9? What are your favorite features of Galaxy Note 9? Let us know, in the comment section below. Stay and connect with us for the latest updates.

How to Create a App Folder on Samsung Galaxy Note 9

Want to create folders on Galaxy Note 9 app drawer and home screen? Here’s how to create apps folder on Galaxy Note 9. It’s quite easy to create an app folder on the home screen and app drawer you want. You can rename folder name, add apps to a folder, and delete a folder from the home screen or app drawer in your Samsung Galaxy Note 9.

You can select apps, add the app to the home screen, and uninstall apps on Galaxy Note 9. Follow the below-given step by step process to make folders on Samsung Galaxy Note 9.

Read Also:

How to Create a New Folder on Galaxy Note 9

How to create apps folder on Galaxy Note 9

Let see the process to add apps folders to home screen and galaxy Note 9 app drawer.

Step 1: Swipe up the home screen to open the App drawer in your galaxy Note 9.

Step 2: Long press app icon from the list of apps.

Step 3: Here you can see three options including select items, add to home and uninstall.

Step 4: Tap Select items.

Step 5: Select apps you want to add a new app folder.

Step 6: Tap create a folder at the upper right corner.

Step 7: Enter the folder name you want to create.

Now create apps folder on your galaxy note 9 app drawers such s social media apps, games, news, technology, and more. You can add apps to created folders from the app drawer in your Samsung Galaxy Note 9 device.

Step 8: Tap & hold the app folder and move it to the home screen.

You can also remove the app folder from the home screen and app drawer in your Samsung Note 9 using below given settings.

How to Remove App Folders on Galaxy Note 9 home screen

Step 1: Long press the app folders in your Note 9 home screen.

Step 2: Tap the trash icon to delete a folder at top of the screen.

This pop-up message appears on the screen: The apps in this folder will still be available on the Apps screen.

Step 3: Tap delete.

Now remove the app folder from the Galaxy Note 9 home screen. This app folder is still available on note 9 app drawer.

How to Uninstall Apps on Galaxy Note 9

Step 1: Open app drawer in your galaxy Note 9.

Step 2: Long press the app icon you want to remove.

Step 3: Tap Uninstall.

Step 4: Tap OK

Now, remove apps from Galaxy Note 9 app drawer list.

We hope this makes it clear how to create apps folder on Galaxy Note 9. If you have any kind of trouble, tell us in below comment box. Stay and connect with us for the latest updates.

How to Change the Lock Screen App Shortcuts on Galaxy Note 9

Here’s how to change lock screen app shortcuts on Galaxy Note 9. By default set lock screen shortcuts on your galaxy Note 9. You can quickly access apps from the lock screen. If you don’t want to use default note 9 app shortcuts on the lock screen, you’ll change app shortcuts on lock screen under lock screen settings. By default camera app set as a left shortcut and phone app set as a right shortcut on your most android devices.

You can also customize the galaxy Note 9 lock screen such as lock screen wallpaper, lock screen type, Clock style, app shortcuts, and more. Follow the below-given step by step process to change app shortcuts on lock screen Samsung Note 9.

Read Also:

How to Change the Shortcuts on my Lock Screen App on Galaxy Note 9

How to change lock screen app shortcuts on Galaxy Note 9

Step 1: Swipe down the notification panel and tap the Settings gear icon.

Step 2: Tap Lock screen.

In galaxy Note 9 lock screen settings, you can see Always-on display, Clock style, Roaming clock, Facewidgets, Contact information, Notifications, and more.

Step 3: Tap App shortcuts (One UI 1.1)/Shortcuts (One UI 2.0).

Here you can see Left shortcut and right shortcut options. Select the app to open from the lock screen.

Step 4: Tap left shortcut and Select app icon from list you want to set.

Step 5: Tap right shortcut and Select app icon from the list

Now, you can quickly access apps from your Samsung Note 9 lock screen. If you don’t want to see any app shortcut on the lock screen, turn off toggle under left shortcut or right shortcut settings in your device. Let see other useful Note 9 lock screen settings called Facewidgets.

Use Facewidgets on Galaxy Note 9

To get quick access to useful information on the lock screen and always-on display screen in your Samsung Note 9.

Settings > Lock screen > Facewidgets > Toggle on the option you want to see in lock screen & AOD screen

And that’s all. I hope this little tip helpful to change lock screen app shortcuts on Galaxy Note 9. If you have any kind of trouble, tell us in below comment box. Stay and connect with us for the latest updates.

How to Enable Do Not Disturb on Samsung Galaxy Note 9

By default turned off Do not disturb in your Samsung Galaxy Note 9. You can enable and use Do not disturb on Galaxy Note 9 under sounds & vibration settings. It will useful to mute all calls and sounds, except for your custom exceptions. Also, set schedule to turn on automatically DND mode on galaxy Note 9. When use Do not disturb mode on galaxy Note 9, sound and vibration will be muted, except for the sound or media you allow in your device. Also, you won’t see or hear sound from new or existing notifications. But you can see critical notifications on your Samsung Galaxy device.

Read Also:

How to Customize Do Not Disturb Mode on Galaxy Note 9

How to enable Do not disturb on Galaxy Note 9

You can quickly enable and use do not disturb galaxy Note 9 to swipe down the notification panel. Let see phone settings to enable Samsung Do not disturb mode settings.

Step 1: Swipe down the notification panel and tap the Settings gear icon.

Step 2: Tap Sounds and vibration.

In Samsung Galaxy Note 9 sounds & vibration settings, you can set change ringtone, vibration intensity, vibration pattern, notification sound, touch & screen lock sound, enable/disable keyboard vibration, Dolby Atmos, and more.

Step 3: Turn on toggle “Do not disturb”.

Step 4: Tap Do not disturb to view DND mode settings.

Here you can see sound & vibration, notifications, calls, messages, event & reminders settings.

Sound & vibration

Here you can see alarms, media, and touch sounds. By default alarm and media disabled. Your galaxy Note 9 sound and vibration will be muted.

Notifications

By default, your galaxy Note 9 won’t show notifications on screen and won’t make sound or vibrate. Notifications won’t appear when you swipe down from the top of your screen on Samsung Note 9. In DND custom restriction settings, don’t turn on the screen, don’t blink light, don’t wake for notifications, hide status bar icons, and more settings.    

Calls

When Do not disturb is on, incoming calls are blocked. You can adjust settings to allow your friends, family, or other contacts to reach you. Also enable allow repeat callers, so if important calls then you don’t miss it.

Messages, Events & Reminders

All messages, reminders, and events will be muted, except for the settings you allow in your Samsung Galaxy Note 9.

And that’s all. We hope this makes it clear how to enable Do not disturb on Galaxy Note 9. If you have any questions, tell us in below comment box. Stay and connect with us for the latest updates.

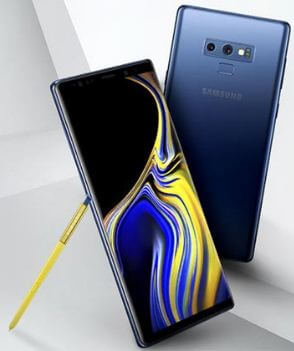
How to Use Samsung Secure Folder on Galaxy Note 9

Here’s how to enable and use Galaxy Note 9 secure folder. You can use Samsung secure folder to lock apps, add apps, add files, and edit apps. To use Samsung secure folder, open a secure folder app in your device. Easily move files to secure folders such as photos, videos, apps, and other documents. This secure folder will unlock with PIN number or Password or Fingerprint or Iris scanner.

It will secure your important data safely and also helpful to hide apps, photos, and other documents. Let see how to use the Secure folder on Galaxy Note 9.

Read Also:

How to Enable And Use Galaxy Note 9 Secure folder

How to use Galaxy Note 9 secure folder

You can customize a secure folder and change secure folder style in galaxy Note 9 devices.

Step 1: Open the Secure folder app or swipe down the notification bar & long press secure folder.

Step 2: Enter PIN or Password or other security if already set up.

Here you can see a lock, add apps, add files, and edit apps options in your Note 9 device.

Lock: Lock a secure folder in your galaxy Note 9.

Add apps: You’ll add apps to secure the folder you want to hide. Whenever you open this secure folder added apps, you need to enter a password or another lock screen you use.

Add files: Add files or other documents to secure folder in your Samsung Note 9.

Edit apps: Edit apps on your Samsung Galaxy Note 9 phone.

Step 3: Choose from the above-given list.

Step 4: Tap Three vertical dots (Menu) in a secure folder app.

Below given settings available in your Samsung Galaxy Note 9 devices.

Secure folder style

Change a secure folder style in your Samsung Note 9 devices.

Lock Type

Select which lock type you want to use for unlocking a secure folder on Galaxy Note 9. Also, use a fingerprint or Iris scanner to access the secure folder.

Auto-lock secure folder

You can select when an auto-lock secure folder on galaxy note 9 from immediately/when the screen turns off/after 5 minutes/10 minutes/30 minutes or when the phone restarts.

Show a secure folder

Enable show secure folder to quickly open in your device.

How to Move Files or Other Document to Secure Folder on Galaxy Note 9

You can move photos, videos, and other files to secure folder in your Samsung Note 9.

Open Secure folder > Add files > select app you want to add

Also, try the below-given method in your device if available in your Samsung Galaxy Note 9 device.

Select photos or videos or other documents > Three vertical dots > Move to secure folder

How to Move Apps to Secure Folder on Galaxy Note 9

Open Secure folder > Add apps > select app you want to add

Now, whenever open apps to secure folder, first of all, need to unlock a secure folder in your Note 9 and after that access app in your device.

Do you still have a question about how to use Galaxy Note 9 secure folder? If you have any questions or comments, we invite you to leave your feedback in below comment box. Stay and connect with us for the latest updates.