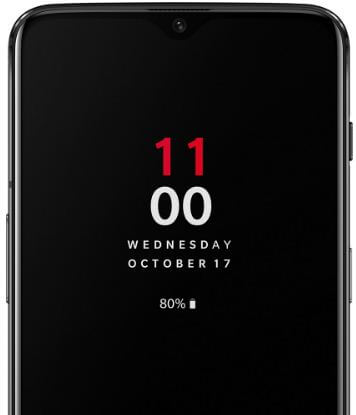
How to set up fingerprint in OnePlus 6T

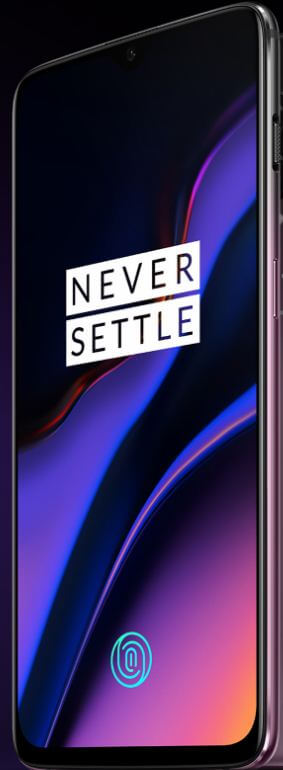
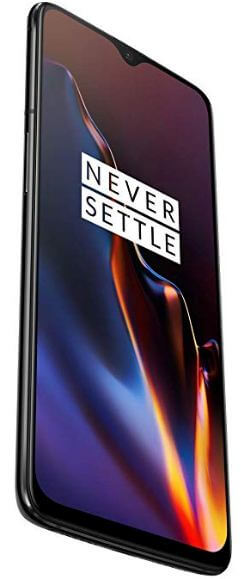
OnePlus 6T updated with new features including In display fingerprint sensor, teardrop notch, latest android 9 Pie & Oxygen OS, support T mobile, 3700 mAh battery and more. But in this tutorial, I’ll show you how to set up fingerprint in OnePlus 6T Pie devices. Now you can unlock your OnePlus 6T to putting your fingerprint on the front of the phone.

You can set up fingerprint lock in OnePlus 6T under security and lock screen settings. OnePlus 6T use optical in-display fingerprint. Also set up lock screen, face unlock in OnePlus 6T using this settings. Follow below given step by step process to set up fingerprint in OnePlus 6T Pie devices.

Don’t Miss This:

How to improve battery life on OnePlus 6

How to set up face unlock on OnePlus 6

How to enable auto call recording OnePlus 6

How to set up fingerprint in OnePlus 6T Pie 9.0

How to set up fingerprint in OnePlus 6T

To use fingerprint on OnePlus 6T, first of all set up fingerprint sensor in OnePlus 6T Pie 9.0 using below given settings.

Step 1: Swipe down notification shade from top of the screen

Step 2: Tap Settings gear icon

Step 3: Scroll down up to security & lock screen setting and tap on it

Here you can see screen lock, lock screen preferences, fingerprint, face unlock, smart lock, find my device and other settings.

Step 4: Tap Fingerprint under device security section

Now you can see OnePlus 6T fingerprint setup screen in your device.

Step 5: Press and make your finger cover the fingerprint identification area as much as possible, than lift after you feel a vibration

Step 6: Tap Next to set Edge input to adjust the position of the finger and get the edge information of the fingerprint

Step 7: Aging put finger on the front of the screen until complete process

You can see message of fingerprint added on the screen in your OnePlus 6T Pie.

Step 8: Tap Next

Now use fingerprint on OnePlus 6T for identification, authorize purchases and app access from play store. It’s quite easy to set up in-display fingerprint in OnePlus 6T Pie.

How to add new fingerprint on OnePlus 6T

If you want to add new fingerprint in OnePlus 6T, follow below given settings.

Settings > Security & lock screen > Device security > Fingerprint > Add fingerprint

How to change fingerprint animation effect on OnePlus 6T

By default set OnePlus 6T fingerprint animation effect as cosmos. You can choose from Cosmos / Wave / Stripe. Set fingerprint animation effect on OnePlus 6T Pie you want to set.

Settings > Security & lock screen > Device security > Fingerprint > Fingerprint animation effect

Also change settings for show fingerprint icon in Ambient display in OnePlus 6T. Here you can enable pick up your phone to show and tap the screen to show options.

How to delete fingerprint on OnePlus 6T Pie 9.0

Remove fingerprint in OnePlus 6T if you want to added temporarily fingerprint of some of the user.

Settings > Security & lock screen > Device security > Fingerprint > Trash icon > Remove

And that’s all. We hope this makes it clear how to set up fingerprint in OnePlus 6T Pie. If you have any kind of trouble, tell us in below comment box. Stay and connect with us for latest updates.

How to Turn On USB Debugging in OnePlus 6T

Want to connect the OnePlus 6T to your desktop or Laptop? Make sure to turn on developer mode in OnePlus 6T to enable USB debugging in your devices. You can turn on USB debugging in OnePlus 6T using the debug section under developer options settings. If you’ll use the ADB command and fastboot in your OnePlus 6T devices, your phone needs to enable USB debugging.

Read Also:

How to Turn On USB Debugging in OnePlus 6T

How to turn on USB debugging in OnePlus 6T

Make sure to enable developer mode in your OnePlus 6T using the below-given settings.

Step 1: Go to Settings.

Step 2: Tap About phone.

Step 3: Tap on the build number 7 times.

This message appears on your OnePlus 6T screen: You are now a developer!

Now let see the steps to activate USB debugging in OnePlus 6T.

Step 1: Go to Settings > System > Developer options.

In OnePlus 6T developer settings, you can see memory usage by apps, OEM unlocking, Windows animation scale, Night mode, debug app, background process limit, Bluetooth audio codec, Profile GPU rendering, background check, and more.

Step 2: Scroll down up to the debugging section and tap USB debugging. By default turned off USB debugging in your Android devices.

This pop-up message appears in your OnePlus 6T: Allow USB debugging?

Step 3: Tap OK.

This OnePlus 6T USB debugging feature is intended for development purposes only. You can use this USB debugging setting to transfer data between OnePlus 6T to desktop PC or MAC devices. Now turn on debug mode in OnePlus 6T when your device connected to the USB port.

And that’s it. I hope this little tip useful to turn on USB debugging in OnePlus 6T. If you have any questions, tell us in below comment box. Stay and connect with us for the latest updates. Don’t forget to share with others if you found it helpful.

How to Turn On Developer Options in OnePlus 10 Pro, 10T, 10R

By default, there is a hidden developer mode in your OnePlus 10 series. Here’s how to turn on developer options in OnePlus 10 Pro, OnePlus 10T, and OnePlus10R. You can find developer options under system settings if enabled. You can use OnePlus 10 Pro developer mode settings to use hidden developer settings like Memory, USB debugging, OEM unlocking, keeping the screen on while charging, webview implementation, logger buffer size, Bluetooth audio codec, Windows animation scale, and more. Follow the below-given process to enable developer options on OnePlus 10T, OnePlus 10R, and OnePlus 10 Pro.

Read More:

How to Turn On Developer Options on Your OnePlus 10 Pro, 10T, 10R 5G

How to Turn On Developer Options in OnePlus 10 Pro, 10T, 10R

Step 1: Open the Settings app.

Step 2: Scroll down at the bottom and tap the About device.

Step 3: Scroll and tap the Version.

Step 4: Tap the Build number 7 times until this message appears on your phone: You are now in Developer mode!

You can see the hidden developer option below the settings. Also, access all hidden developer settings in your OnePlus 10 series.

To Access the Developer Option in OnePlus 10 Pro/10T/10R: Settings > System settings > Developer options.

How to Turn Off Developer Options on OnePlus 10 Pro, 10T, 10R 5G

Settings > System settings > Developer options > Toggle Off Developer options > Go back.

Agin hidden the developer option from your OnePlus device. To reaccess it, follow the same process mentioned above.

How to Enable USB Debugging in OnePlus 10 Pro, 10T, 10R 5G

Step 1: Go to Settings.

Step 2: Tap the System settings.

Step 3: Tap the Developer options.

By default, you have disabled USB debugging in your devices.

Step 4: Find the USB debugging in the debugging section and toggle on it.

Using these USB debugging settings, you can quickly transfer data between the OnePlus 10 Pro/10R/10T to a desktop PC.

And that’s all. We hope this clarifies how to turn on developer options in the OnePlus 10 Pro, 10R, and 10T 5G. Tell us in the comment box if you have any trouble. Stay and connect with us for the latest updates.

Read Also:

How to Stop an App From Using Data on Pixel 3 and Pixel 3 XL

Want to restrict or turn off data for certain apps on Pixel 3 and Pixel 3 XL? Here’s how to turn off the app from using background data on Pixel 3 XL and Pixel 3. By default several apps running in the background ever we don’t use that reduce battery life in your phone. Enable usage of mobile data in the background by default. To save data and extend battery life on Pixel 3 XL and Pixel 3, stop an app from using background data.

You can see specific app-related data usage and Wi-Fi data usage using network & internet settings. Follow below given two different methods to stop an app from using data on Pixel 3 and Pixel 3 XL.

Read Also:

How to Turn Off Background Data Usage for Apps on Pixel 3 XL and Pixel 3 (Android 9 Pie)

You can restrict app background data on Pixel 3 and Pixel 3 XL using below given two different methods.

1st Method: Restrict app using data on Pixel 3 XL using network & internet settings

Step 1: Swipe down the notification panel from the top of the screen and tap the Settings gear icon.

Step 2: Tap Network & internet.

Google Pixel 3 data usage by apps

Step 3: Tap Data usage.

App data usage Pixel 3 XL Pie

Step 4: Tap App data usage under a mobile section.

List of all apps usage data is available in your Google Pixel 3 and Pixel 3 XL. You’ll restrict background data apps individually in your device.

Restrict app using data on Pixel 3 XL

Step 5: Tap app you want to disable app background data.

How to stop an app from using data on Pixel 3

By default turn on background data toggle in your Pixel 3 and other android devices. (Show above screenshot)

Step 6: Turn off Background data toggle of the app.

If you want to reduce data usage by apps on Pixel 3, set a data usage limit to automatically turn off data when reaching the limit you set.

2nd Method: Stop an app from using data on Pixel 3 XL using apps & notifications settings

Step 1: Swipe down the notification panel from the top of the screen.

Step 2: Tap Settings gear icon.

Step 3: Tap Apps & notifications.

Step 4: Tap See all apps.

Step 5: Select the app you want to turn off background apps in Pixel 3.

Stop an app from using data on Pixel 3

Step 6: Tap Data usage.

Step 7: Toggle off background data.

Now stop an app from using background data on the Pixel 3 and Pixel 3 XL devices.

How to stop an app from using data on Pixel 3a and 3a XL (Android 10)

How to stop an app from using data on Pixel 3a and 3a XL

Settings > Network & internet > Mobile Network > App data usage > Select App > Toggle off Background data

Stop an app from using data on Pixel 3a XL

Alternative Way: Settings > Apps & notifications > See all apps > Select the app > Mobile data & WiFi > Toggle off Background data

And that’s all. I hope this little tip useful to stop an app from using data on Pixel 3 and Pixel 3 XL. If you have any questions, tell us in below comment box. Stay and connect with us for the latest updates.

How to Clear Cache on Google Pixel 3 and 3 XL

Want to clear the cache on Google Pixel 3 and Pixel 3 XL? Here’s how to clear the app cache on Pixel 3 and Pixel 3 XL. This clear cache on Google Pixel 3 will use to improve particular app performance and speed up your devices. It will free up space on your Pixel 3 & 3 XL devices to remove the temporary file & app data from your device. Also, clear cache partition on your latest Google Pixel devices to fix issues.

Sometimes clearing the cache can help to solve some app-related issues such as app freezing or app crashing and suddenly app stopped working. If you want to clear cache for all apps on Pixel 3, download and use third-party apps. Follow the below-given step by step process to clear the cache on Pixel 3 XL and Pixel 3.

Read Also:

How to Clear Cache Data on Pixel 3 and Pixel 3 XL

You can clear the app cache of installed apps including Facebook, WhatsApp, Instagram, Snapchat and more. Apply below settings to clear application cache and data on Google Pixel 3 and Pixel 3 XL.

Step 1: Swipe down the notification shade from the top of the screen and tap the Settings gear icon.

Step 2: Tap Apps & notifications.

Step 3: Tap See all apps.

Google Pixel 3 apps settings

Step 4: Tap app you want to clear cache or clear storage.

Clear the cache on Pixel 3

Step 5: Tap Storage.

How to clear the cache on Pixel 3 Pie

Step 6: Tap Clear cache.

Now you can see disable clear cache button in your Google Pixel 3 device. If clear app cache can’t fix the Pixel 3 problem, try to clear storage on your device.

Step 7: Tap Clear storage.

Now restart your Pixel 3 and check the fixed app related issue.

Google Pixel 3 and Pixel 3 XL Clear System Cache

Back up important data safely before perform wipe cache data on Pixel 3 XL and Pixel 3. It will remove all your phone data including Google account, internal storage, photos and more.

Step 1: Power off your Google Pixel 3 and Pixel 3 XL.

Step 2: Press & hold the volume down button and the power button at the same time until your phone vibrates.

You can see the Android system recovery screen appears on your Pixel 3 & Pixel 3 XL. By default start button appear on your device.

Step 3: Press the volume down button until view recovery mode.

Step 4: Press the power button to restart into recovery mode.

You can see the screen of the android robot exclamation mark with the red triangle icon on your Pixel 3, 3 XL.

Step 5: Press & hold the power button and press volume up button one time only and then release the volume up button only

Step 6: Press the volume down button until Wipe data/factory reset.

You can see this message on the screen: Wipe all user data?

Step 7: Press the volume down button to move Yes.

Step 8: Press the power button to perform wipe cache data on Pixel 3 XL & Pixel 3.

And that’s it. Do you still have a question about clear the cache on Pixel 3 and Pixel 3 XL? If you have any question, tell us in below comment box. Don’t forget to share with others if you found it useful.

How to Block a Number on Google Pixel 3, 3 XL, 3a, 3a XL

Annoying by spam calls or unknown callers on Pixel 3 & Pixel 3 XL? Here’s how to block calls on Pixel 3 XL,  Pixel 3, Pixel 3a and Pixel 3a XL. You can block private numbers on Google Pixel 3 using phone app settings. When you block a number in your device, your device won’t receive that number incoming calls or text messages.

You can use the latest Google Pixel 3 screen calling feature for the alert about spam calls using Google Assistant. This tutorial is useful to stop spam calls on Google Pixel 3 XL. Follow the below-given step by step process to block phone calls on Pixel 3 and Pixel 3 XL Pie.

Read Also:

How to Block Numbers/Calls on Pixel 3 XL, Pixel 3, Pixel 3a, Pixel 3a XL

You can individually block or unblock a number on Pixel 3 & 3 XL devices using below given settings.

Block a number on Google Pixel 3, Pixel 3 XL

Step 1: Open the Google phone app in your Pixel 3, 3 XL.

Step 2: Tap Three vertical dots from the upper right side corner.

Step 3: Select settings.

Block a number on Google Pixel 3

Step 4: Tap blocked numbers.

Here, you can toggle on Unknown to block calls from unknown callers on your Pixel devices if running the latest version (Android 10).

Step 5: Tap Add a number.

How to block phone calls on Pixel 3

Step 6: Enter a phone number you want to block texts and calls.

Step 7: Tap Block.

You can’t receive any phone calls or text messages from that number in your Google Pixel 3 and Pixel 3 XL devices.

Google Pixel 3a Block Number/Pixel 3a Block Calls (Android 10)

Step 1: Open the Phone app in your Pixel 3 & 3 XL.

Step 2: Tap Recents tab.

Individually block or unblock a number on Pixel 3 & 3 XL

Step 3: Find a private number or unknown caller and tap on it.

Stop spam calls on Google Pixel 3 XL

Step 4: Tap on History.

Step 5: Tap on Three vertical dots (More) at the top right corner.

Google Pixel 3a Block Number

Step 6: Select Block.

How to Block a Number on Google Pixel 3, 3 XL, 3a, 3a XL

Step 7: Tap on Block.

Also, check the box “Report call as spam” in your Pixel devices.

Block or Unblock number on Google Pixel 3 XL

Alternative Way: Open Phone app > Tap Recents tab > Long press on the private or unknown number > block/report junk > Block

Unblock number on Pixel 3, 3 XL, 3a, 3a XL

Step 1: Open the Phone app in your Pixel devices.

Step 2: Tap More from the upper right side

Step 3: Select settings.

Step 4: Tap blocked numbers.

Unblock number on Pixel 3 and Pixel 3 XL

Step 5: Tap × icon of blocked number.

You can see this message on the screen: Unblock number

Unblock call on Google Pixel 3 and 3 XL

Step 6: Tap Unblock.

Now you can receive call or text message from this number in your android devices.

And that’s all. I hope this tip useful to block phone calls on Pixel 3 and Pixel 3 XL. If you have any questions, tell us in below comment box. Stay and connect with us for the latest updates.