How to Hide Galaxy Note 20 Ultra Apps

Here’s how to hide or find hidden apps on Galaxy Note 20 Ultra. You can hide apps in Samsung Galaxy Note 20 Ultra using home screen settings. When you are hiding the apps, you can’t find that app in your app drawer. To access it again, just unhide it using the same settings. Also, lock apps or photos/videos using a secure folder to secure your important data in your Samsung Galaxy devices.

Read Also:

How to Find Hidden Apps on Samsung Galaxy Note 20 Ultra

How to Hide Galaxy Note 20 Ultra Apps

To hide apps in Samsung Note 20 Ultra and Note 20, follow the below-given step by step process.

Step 1: Long press on the blank area of the home screen.

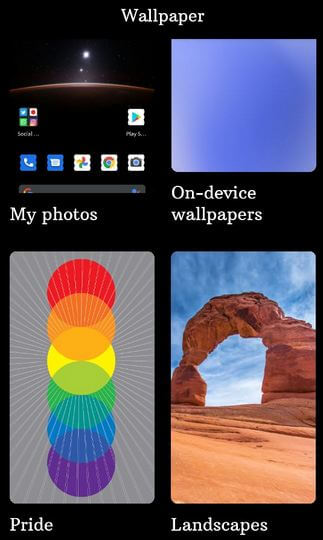
Four options available here include wallpapers, themes, widgets, and home screen settings.

Step 2: Tap on Home screen settings.

Step 3: Scroll down up to the end of the page and tap on Hide apps.

Lists of all applications are view here.

Step 4: Select the apps you want to hide from the app drawer and tap Done at the bottom.

Step 5: Open the app drawer and you can’t see the hidden apps.

How to Find Hidden Apps on Galaxy Note 20 Ultra and Note 20 

Step 1: Tap & hold the blank space on the home screen.

Step 2: Select Home screen settings.

Step 3: Tap on hide apps at the end of the list.

Step 4: Un-check the apps you want to show it again and tap Done.

Step 5: You can see this unhidden app at the last of the app drawer list.

How to Show or Hide Apps Button on Home Screen on Samsung Note 20 Ultra

If you want to quickly access the app drawer from the home screen, toggle on apps button using below given steps.

Long press on the blank area of home screen > Home screen settings > Toggle on “Apps button”

How to Enable Lock Home Screen Layout on Galaxy Note 20 Ultra

When enabling this, you can’t change the position of the home screen apps or items.

Long press on the blank area of home screen > Home screen settings > Toggle on “Lock home screen layout”

And that’s all. We hope the above-given article useful to hide apps in Samsung Galaxy Note 20 Ultra. If you have any questions, tell us in below comment box. Stay and connect with us for the latest updates.

How to Use Nearby Share on Galaxy Note 20 Ultra

Want to wirelessly share and receive photos, videos, or documents on any Samsung Galaxy devices? Here’s how to enable and use the nearby share on Galaxy Note 20 Ultra devices. Also, use Samsung’s quick share to transfer files, photos, and videos to non-contact people. This Samsung nearby share feature is working the same as Apple’s AirDrop to quickly transfer data. Samsung Galaxy and Pixel devices supported this feature. Let see one by one.

Read Also:

How to Use Samsung Nearby Share and Quick Share on Galaxy Note 20 Ultra and Note 20

How to Use Nearby Share on Galaxy Note 20 Ultra

First of all, let see steps to use Nearby Share on your Samsung Note 20 Ultra and Note 20.

How to Enable Nearby Share on Samsung Galaxy Note 20 Ultra

Step 1: Swipe down the notification panel from the top of the screen and long-press the Nearby share.

Step 2: Toggle on the “Off” button.

Step 3: Tap “Turn on” to enable Nearby share.

Step 4: Open your phone gallery and select the photo to share with other Samsung or Pixel device.

Step 5: Tap on the Share icon.

Step 6: Tap on the Nearby share icon.

Your device is looking for a nearby device. Make sure both devices enable nearby share feature.

Step 7: Tap on Notification at the top of the screen in your other Samsung galaxy devices.

Step 8: Tap on Device name to connect it.

Step 9: Tap Connect in other devices to sharing photos.

Step 10: Now, open the gallery and you can see the share picture.

How to Use Samsung’s Quick Share on Galaxy Note 20 Ultra/Note 20

It will useful to wirelessly share images and videos to non-contact people only on Samsun to Samsung devices. Make sure to enable quick share in both Samsung devices.

Step 1: Swipe down the notification panel and tap on Quick share.

Step 2: Toggle on “On” to enable it.

Step 3: Open the gallery and select a photo.

Step 4: Tap on the Share icon at the bottom.

Step 5: Tap on Quick share.

Step 6: Wait until searching the device. Select the device you want to share pictures.

Step 7: You can see the receiving file from the Samsung galaxy message on the screen.

Step 8: Swipe down the notification panel and tap on the image you received.

And that’s all. Do you have any alternative methods? Share it with us in below comment box.

How to Share Samsung WiFi QR Code to Pixel, OnePlus, iPhone

Do you want to scan QR code WiFi on your Samsung Galaxy, OnePlus, Google Pixel, iPhone, and other smartphones? Here’s how to share Samsung WiFi QR code with other Android devices to scan a QR code, nearby share, quick share, and save the QR code as an image. You can easily share wifi passwords from Samsung to Samsung, iPhone to iPhone, and iPhone to Android to scan a QR code. It will automatically transfer the WiFi network with other Samsung/Google Pixel/iPhone devices without entering the network name and password.

You can scan a QR code on Android using a QR code scanner or camera app. Also, find your hotspot password on your Samsung device to share Hotspot QR code.

How to Share Samsung WiFi QR Code to Pixel, OnePlus, iPhone

How to Share WiFi Password through QR Code in Samsung to Samsung

Check out the settings below to share QR code WiFi on other Android phones.

How to Share WiFi Password From Mobile to Mobile – Samsung Galaxy

Step 1: Swipe down the notification panel from the top of the screen and long-press the WiFi icon.

Step 2: Tap on the Settings gear icon of connected WiFi on your Samsung.

Step 3: Tap on the QR code at the bottom left corner.

You can see the QR code scanner in your Samsung Galaxy.

Step 4: Open the camera on your other Samsung Galaxy devices.

How to Share WiFi Password through QR Code in Samsung

Step 5: Scan the QR code to connect to the Wifi network automatically.

How to Get WiFi Password from QR Code on Samsung Tablet using Nearby Shre/Quick Share

Turn on Wifi and Bluetooth to share the WiFi network using nearby share in your Samsung tablet.

Step 1: Go to Settings.

Step 2: Tap the Connections.

Step 3: Tap on Wi-Fi.

Step 4: Tap the Settings gear icon of WiFi.

Step 5: Tap on the QR code at the bottom.

Scan a QR code on Android to connect to this WiFi without entering the password.

Step 6: Tap on Quick Share or Nearby Share if you want to share the QR code WiFi password for your Samsung tablet.

Also, create a link with a web browser that can be opened on any phone, computer, or other device.

How to Share Your Hotspot QR Code on Samsung Galaxy

You can see your Samsung phone mobile hotspot password using the below settings.

Step 1: Go to Settings.

Step 2: Tap on Connection.

Step 3: Tap on Mobile hotspot and tethering.

Step 4: Toggle on the Mobile hotspot.

Step 5: Tap on Mobile hotspot.

Step 6: Tap the QR code icon at the top right side.

Step 7: Open the camera on your other Samsung Galaxy devices.

Step 8: Scan the QR code.

Step 9: Toggle on the WiFi network.

How to Share WiFi Password From Mobile to Laptop

Step 1: Go to Settings.

Step 2: Tap on Network & internet.

Step 3: Tap the WiFi.

Step 4: Tap the Network in the saved networks you want to share.

Step 5: Tap the Settings gear icon of the network.

Step 6: Tap on Share.

Step 7: Scan the QR code with your laptop or another device.

How to Share WiFi Password on Google Pixel using QR Code

How to Share WiFi Password on Google Pixel using QR Code

Settings > Network & internet > Internet > WiFi > Settings gear icon of connected WiFi network > Share (QR code) icon > Open the camera app in other Pixel > Scan your Pixel’s QR code with another device you want to connect.

How to Scan a QR Code on My Phone (Google Pixel 8)

How to Scan a QR Code on My Phone

Swipe down the notification panel at the top and tap QR code scanner > Scan QR code from another device.

How to Share WiFi QR Code from iPhone to Android

You can’t directly share Wifi from iPhone to Android device. You must use a third-party app to share a wifi password from iPhone to Android.

That’s all. We hope the above-given tutorial helps share WiFi Passwords through QR codes in Samsung to Samsung. Do you still have any questions? Tell us in below comment box.

Read Also:

How to Customize Always on Display on Galaxy Note 20 Ultra

By default turned on always-on display in your Samsung Note 20 Ultra. You can customize always on display on Galaxy Note 20 Ultra including clock style, show music information, show or hide fingerprint icon on AOD screen, and more. This AOD displays a current clock style and notifications on the lock screen when you receive a new notification. You can change the Always-on display settings using lock screen settings. Also, use theme settings to change Always-on display picture/image.

Read Also:

How to Change Always on Display on Samsung Galaxy Note 20 Ultra

How to Customize Always on Display on Galaxy Note 20 Ultra

Step 1: Swipe down the notification panel from the top of the screen and tap the Settings gear icon.

Step 2: Scroll down and tap on Lock Screen.

Step 3: Tap on the Always-on display.

Step 4: Make sure toggle on “On” to activate Always-on display.

Three options available here to show AOD information on the lock screen.

Tap to show (By default): It will display the notifications and clock for 10 seconds when you tap the screen.

Show always: Choose this to show details all time.

Show as scheduled: Set a scheduled time you want to show notifications and clock style.

Step 5: Choose from above given three options.

How to Change Always on Display Clock Style on Galaxy Note 20 Ultra

Step 1: Go to Settings.

Step 2: Scroll down and touch on Lock Screen.

Step 3: Tap Always-on display.

Step 4: Tap Clock Style.

Step 5: Select a Clock.

Step 6: Tap the Colour tab and select the color.

Step 7: Tap Done.

Alternative Way: Settings > Lock Screen > Clock Style > Always on display > Select a clock style & color > Done

How to Show Music Information on Always-on-display on Samsung Note 20 Ultra

It will show the music details when the enable facewidgets in your device.

Settings > Lock screen > Always-on display > Toggle on “Show music information”

How to Show Fingerprint Reader on Always on Display on Galaxy Note 20 Ultra

Settings > Biometrics & security > Fingerprints > Show icon when screen is off > Select the “On Always On Display”

And that’s all. We hope this makes it clear how to customize the always-on display on Galaxy Note 20 Ultra. Do you still have any questions? Tell us in below comment box.

How to Change Clock on Galaxy Note 20 Ultra Lock Screen

Do you want to change the clock style on Galaxy Note 20 Ultra? Here’s how to set or change the lock screen clock style and always on display clock style on Samsung Galaxy Note 20 Ultra using lock screen settings. You can change the clock type and color on the lock screen and AOD. By default, set clock style in all Samsung Galaxy devices. Also, create a custom theme or download it from the Samsung store on your Note 20 Ultra device.

Check More | How to Change the Always-On Display Clock Style on Samsung Galaxy

How to Change Clock on Galaxy Note 20 Ultra Lock Screen 

How to Change Clock on Galaxy Note 20 Ultra Lock Screen

Let’s see the step-by-step process to change the clock style on your Samsung Note devices’ always-on display and lock screen.

How to Change Always on Display Clock Style on Galaxy Note 20 Ultra/Note 20

Step 1: Swipe down the notification panel from the top of the screen and tap the Settings gear icon.

Step 2: Scroll down and tap on Lock Screen.

Step 3: Tap on the Always-on display.

This AOD shows a clock and notifications on the lock screen when you receive a new notification.

Step 4: Tap on Clock Style.

Step 5: Select a Clock from the list.

Step 6: Tap the Colour tab and select your favourite clock color.

Step 7: Tap on Done.

Lock your screen, and you can see the new clock style with the color content you set on your phone.

Alternative Way: Settings > Lock Screen > Clock style > Always on display > Select a clock style  & color > Done.

How to Change Lock Screen Clock Style in Galaxy Note 20 Ultra/Note 20

Step 1: Go to Settings.

Step 2: Scroll down and touch on the Lock screen.

Step 3: Tap on the Clock style.

Two options are available here. One is an Always-on display, and another is the lock screen. By default, select Always-on display.

Step 4: Tap on the Lock screen.

Step 5: Select the clock style from the list. Tap on the Color tab and choose a colour you want to set.

Step 6: Tap on Done.

Lock the screen and see a new set clock style in your Samsung Galaxy Note 20 Ultra and Note 20 devices.

That’s all. Which is your favorite lock screen clock style on Galaxy Note 20 Ultra? Don’t forget to share this tutorial with your friends on social media if you find it useful. Stay and connect with us for the latest updates.

Read Also:

How to Record a Screen on Galaxy Note 20 Ultra

Here’s how to screen record on Galaxy Note 20 Ultra and Note 20. You can start recording with this screen recorder feature in your latest Samsung flagship. You can change the video quality and selfie video size using screen recording settings. When you enable a screen recorder, it will record the all information that’s displayed on your screen like password, photos, messages, and more you open. So, be careful while recording the screen.

Read Also:

How to Record Screen on Samsung Galaxy Note 20 Ultra

Step 1: Swipe down the notification panel from the top of the screen.

Step 2: Tap on “Click recording” in the second tiles.

This pop-up message appears: Start recording with screen recorder?

How to record a screen on Galaxy Note 20 Ultra

Step 3: Tap on “Start Recording”.

Wait until complete the countdown to start the screen recording.

How to screen record on Galaxy Note 20 Ultra

Step 4: Tap on the “Profile” icon at the top right side to open the front camera to record a screen of your own video.

Step 5: Tap on the “Pencil” icon to write on the screen (Show above screenshot).

Step 6: Tap on the “Stop” icon button to stop recording.

You can find the screen recording in your phone gallery.

How To Change Screen Recorder Settings on Galaxy Note 20 Ultra

Step 1: Swipe down the notification panel from the top of the screen.

Step 2: Long press on the “Click recording”.

You can see below the given Samsung Note 20 Ultra screen recording settings.

Change Screen Recorder Settings on Galaxy Note 20 Ultra

Sound: Choose from No sound, Media sound (By default), or Media sounds and mic.

Video Quality: Set or change the screen recording video quality as 1080p/720p/480p.

Selfie Video Size: Set a selfie video size as small or large you want to set. Just swipe the slider left or right to a respectively set size small or large.

And that’s it. I hope this makes it clear how to record a screen on Samsung Galaxy Note 20 Ultra devices. If you have any kind of question, tell us in below comment box. Don’t miss out to check our other Note 20 Ultra tips and tricks.