How to Enable and Use System UI Tuner Android 8.1 Oreo

By default is a hidden system UI tuner in your Android 7.1.2, 6.0, and 5.1.2 devices. To enable system UI tuner on Android, swipe down the notification bar from the top of the screen & long press settings gear icon to enable it. But in Android Oreo 8.1, you can find System UI tuner under system settings. It contains four options including status bar, do not disturb (DND), lock screen, and navigation bar. It’s quite easy to enable and use system UI tuner in Android Oreo devices. This Android Oreo System UI tuner added a new feature called “Navigation bar”. You can’t see this option in the previous Android Nougat 7.1.2 & Marshmallow 6.0 devices. Follow the below-given step by step guide to enable system UI tuner Android Oreo 8.0.

Read Also:

How to Use System UI Tuner Android 8.0 Oreo

Let see how to turn on System UI tuner and it’s new navigation bar feature (Android 8.0).

Step 1: Go to “Settings” in Pixel & Pixel XL (Android Oreo).

How to use system UI tuner android O

Step 2: Under system section, tap on “System UI tuner”.

Here you can see below given four options.

Status bar

You can enable/disable status bar icons from the given list to not show the icon on the notification bar in your Pixel and other devices. Remove Nearby or Aeroplane mode or torch and other listed icons.

Do not disturb (DND)

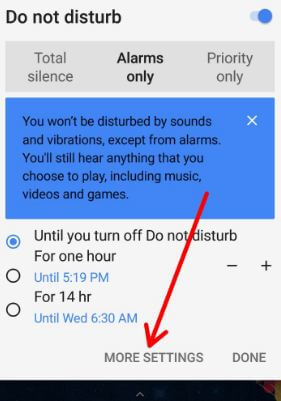
Enable Do not disturb from notification bar in android O

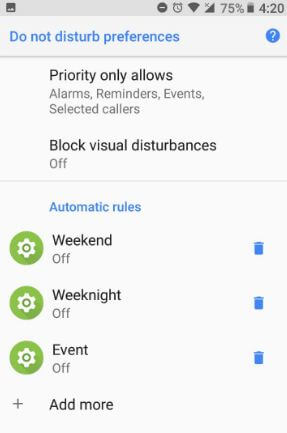
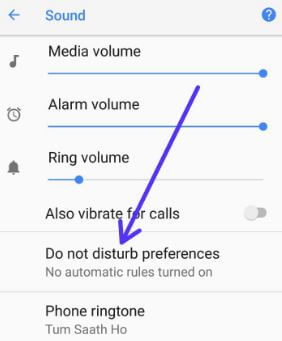
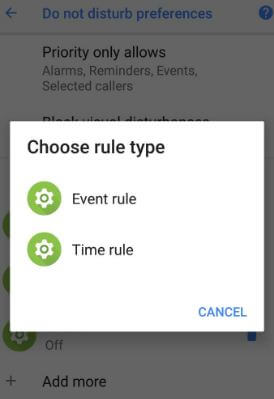
It works same as Android Nougat 7.1.2. Just press the volume down button up to fill vibration. You can also enable DND on Android Oreo directly from notification bar as Android Nougat. Other option is volume controls.

Lock screen

How to cahgne lock screen shortcut android O

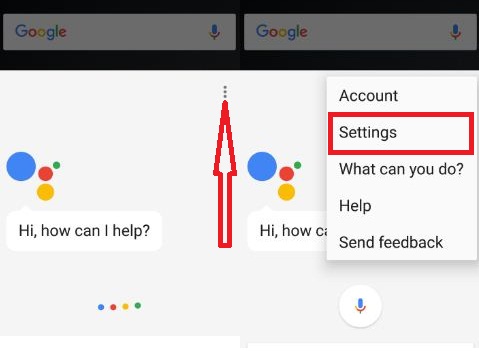
Lock screen subdivided into two options. One is left shortcut and another is the right shortcut. Change lock screen app icon or change lock screen shortcuts in Android Oreo. By default left shortcut set as a voice assistant and right shortcut as a camera icon. You can change it anytime using this feature.

Navigation bar

This is the last option of System UI tuner in Android Oreo. You can customize the navigation bar in Android Oreo 8.0 to choose the layout option from normal, compact, left-leaning or right-leaning. Also, add further buttons on the right and left of the on-screen navigation buttons. Choose from the clipboard, keycode, or keyboard switcher in Android Oreo.

That’s all about the Android Oreo System UI tuner and its Navigation bar feature.

I hope this little tip help to use System UI tuner Android Oreo. Do let us know liked this tutorial or not. We are waiting for your feedback. Stay connected with us for latest Android Oreo tricks.

How to Save Pictures From Facebook to Android Phone and PC/Laptop (Updated)

Want to download a Facebook photo on your Android devices? Here’s how to save photos from Facebook to the phone gallery on your Android in 2020. You can save cover photos, profile pictures, and featured photos of your friends or other people shared on Facebook. It’s simple to download and save uploaded pictures or other Facebook photos to your Android or iPhone devices. If you have to use the android messenger app, you have to see the option to set save incoming photos to your gallery and save new photos you take in the app to your gallery. Also, download GIFs images on your phone or desktop.

In the Facebook app, you can also share photos with external apps including Instagram, Xender, WhatsApp, etc. But here I will show you the simple steps to save Facebook photos android phone or tablet device.

Read Also:

How to Save Facebook Photos Android Phone or Tablet

If you have the latest updated Facebook app, you can download or save the photo using below given settings.

How to Save Facebook Pictures on Android in 2020

Step 1: Open the Facebook app in your Android devices.

Step 2: Tap Any photo you want to download.

How to Save Pictures From Facebook to Android Phone

Step 3: Tap & hold the photo and tap Save to phone.

You can see this message on the screen: Photo saved to this device.

How to Automatically Save New Photos You Take in Your Phone Gallery – Facebook Messenger App

Step 1: Open the Facebook Messenger app on your phone.

Step 2: Tap on the Profile icon at the top left corner.

Download a Facebook photo on your Android

Step 3: Tap Photos & Media under the Preferences section.

How to Save Facebook Pictures on Android

Step 4: Toggle on Save on capture.

How to Save Picture or GIFs From Facebook to PC or Laptop

Step 1: Log in your Facebook account on your desktop or laptop.

Step 2: Tap any photo or GIF image you want to save or download.

Step 3: Right click on the picture and tap Save image as.

Step 4: Enter the file name & set the download place and tap Save.

Using the Android App (Older Version)

Step 1: Create a new Facebook account or log in with your Facebook account.

You can see your friend’s shared post or your uploaded post on the screen.

Tap on photo to save on android device


Step 2: Tap on any photo you want to save on your android device.

Tap on three vertical dots to save facebook photo

Step 3: Tap on “Three vertical dots” on your device.

How to save facebook photos android phone

Step 4: Scroll down and tap on “save photo”.

save facebook photos android phone

Step 5: You can see this message: “Photo saved to this device”.

To see the saved photo on your android device open your android phone gallery and then open the Facebook folder. You can see you’re entire save Facebook photos on this android device folder. You can see all your mobile upload photos, cover photos, profile pictures, featured photos, and albums on the Facebook apps section. If accidentally delete your uploaded post or photos then there is no way to backup from Facebook but if save on your android device then you can see it.

That’s all. If you have concerns regarding the above process to save Facebook photos android phone then share with us on the below comment box. Don’t forget to share this Facebook trick with your friends.

How to clear search history dropbox android phone

Delete all search history or clear search history Dropbox android phone or tablet devices. Using Dropbox we can directly share photos, songs, videos and other document from mobile to PC / laptop without any USB cable. You can also download the uploaded photos and other document related data on your android mobile or PC. Mostly user use the Dropbox for uploads multiple files, add file from computer and easily transfer file android phone to PC without any cable or USB devices.

It’s simple to clear search history Dropbox android lollipop (5.1.1) and marshmallow. You can see the recent uploaded files on Dropbox and create new folder & new text file on your device. Also clear cache using Dropbox settings but in this tutorial, i will show you simple process to clear search history Dropbox android mobile.

Read Also:

How to delete multiple files from Dropbox on Android

How to clear search history facebook app android

How to clear search history chrome android 

How to clear search history Dropbox android phone

Step 1: Open “Dropbox” app on your android smartphone

open-dropbox-app-android-phone

Step 2: Tap on “three horizontal line” from top of the left side corner

how-to-clear-search-history-dropbox-android

Step 3: Click on “Gear” icon from top right side

You can see various options in Dropbox settings

clear search history dropbox android

Step 4:  Under advanced features, tap on “Clear search history

Now all you Dropbox search history deleted from your android mobile or tablet devices.

In Dropbox app, you can easily add downloaded files to your Dropbox, share with your contacts using sync contacts and manage default apps on your smartphone. Also move documents or files, share or send a link via different application such as one drive, skype, WhatsApp, save to drive etc.

Above you can see process to clear search history Dropbox android phone or tablet devices. Did you find the above process helpful? If you have any concern or question regarding above steps, do let me know via below comment box. Don’t forget to share this article with your friends on social network.

How to use Instagram stories type mode on android phone

Recently updated my Instagram app and I can see Instgram story added new “Type mode” feature in android and iOS devices. Let see how to use Instagram stories type mode on android phone. This Instagram type mode is available in different fonts such as Strong, Modern, NEON, and typewriter. You can also set different color background in this new Instagram type mode feature.

First of all make sure your Instagram app is updated to latest versions. This new update will allow Instagram to add text only to Instagram stories in android. Also change Instagram story privacy settings on android or iOS. Follow below given step by step process to use Instagram stories type mode on android phone.

Read Also:
How to add multiple photos to Instagram stories in android device

How to see WhatsApp status without them knowing on android phone

How to add a friend to your Instagram live story in android device

How to use Instagram stories type mode on android phone

Step 1: Open Instagram app in your android device

Tap on your Instagram story in android devices

Step 2: Tap on your story icon

Instagram added Type mode feature in stories in android

Step 3: Select Type

Here you’ll change text type of Instagram stories in your android devices such as Strong, NEON and more.

Instagram to add text only to Instagram stories in android

Step 4: Tap on screen to type text

Step 5: Type word you want to see on your Instagram story

Use Instagram stories type mode on android phone

Step 6: Tap on Arrow icon

Here you’ll edit on Instagram story in your android devices. After edit, tap on Done.

Instagram new type mode feature for text only stories in android


Step 7: Tap on Send to

Share Instagram story in android Oreo devices

Step 8: Select your story & other contact story you want to share this Instagram new Type mode feature and tap on Share

How to use Instagram stories type mode on android phone

Step 9: Tap on your story to see updated new Instagram Type mode feature for text only story

Now enjoy this Instagram new type mode feature for text only stories in android and iOS devices.

And that’s it. I hope this article helpful to use Instagram stories type mode on android phone. If you have any kind of issue, tell us in below comment box. We’ll respond as soon as possible. Stay and connected with us for latest android tips.

How To Fix Samsung S7 Won’t Turn On or Charge: 7 Solutions

Suddenly Samsung S7 not charging or turning on after updated the firmware? You can see a stuck in Bootloop or black screen of death on a Galaxy S7 Edge & S7. Here are the possible solutions to fix Samsung S7 Won’t Turn On Or Charge issue. There are various reasons for this issue such as battery faulted, charger fault, damaged charging port or power outlet, etc. If none of the methods fix Samsung Galaxy S7 won’t turn on issue, you need to factory reset or wipe cache partition on your Samsung S7 and Galaxy S7 edge device.

You can contact your Samsung service center. They are able to fix it to check if any hardware, motherboard, and battery-related issue, it may be replaced under warranty. They also wipe the storage of your device. Try below given possible solutions to fix Samsung Galaxy S7 won’t turn on after charging.

Related Tips:

7 Methods To Fix Samsung S7 Won’t Turn On or Black screen of death

Fix Samsung galaxy S7 wont turn on after fully charging


Use Power & Volume buttons

Hold down the power and volume down buttons until the phone restarts.

Try Vol down + home + power button for like 15-20 secs see if there’s any response.

Holding the power & volume down until vibrate and let go. After 1-2 minutes, now again apply the same process, and held for 10-15 seconds. Now check the phone turn on or charge.

Use Download Mode to fix Samsung S7 not turning on

Power off the device then hold volume down + home button then connect a device to PC it should force a device to enter download mode. If wake up the screen, charge your phone.

Check wall outlet

Sometimes if the wall outlet is damage or not reach power so you’re Galaxy S7 & Galaxy S7 edge won’t charge. Try another wall outlet and check it.

Wait until Complete discharge battery

Wait for the battery died then plug it into a wall charger and see if the charging appears. If it does, charge your phone and power on.

Check your device charger 

First of all, try your device charger to another device. If not charge, you’ll need a new charger to charge your Galaxy S7 device.

Turn on safe mode galaxy S7 to fix Samsung Galaxy S7 won’t turn on

Step 1: Turn off your Galaxy S7 device

Step 2: Press & hold the power button from Galaxy S7 screen

Step 3: While Samsung logo appears on screen, press & hold the volume down button until see “safe mode” in your galaxy S7 screen

Safe mode will display in the bottom left side corner of the screen. If your galaxy S7 device running normally in safe mode, it means any third party apps causing the issue. Find that particular app and delete it from your device.

To exit safe mode on Samsung Galaxy S7 & S7 edge, press the power button and tap restart. If none of the above-given methods worked for you to fix Samsung galaxy S7 & galaxy S7 edge won’t turn on after charging, try below given the last solution.

Use recovery mode to factory reset Samsung Galaxy S7 & Galaxy S7 edge

Step 1: Press and hold the power button, home and volume button at the same time

Step 2: While phone vibrate, holding the home & volume up button until appear “Android system recovery” screen

Step 3: Press volume down button until “Wipe cache partition” and press power button to select it

Step 4: Press volume buttons to scroll to “Yes” and press the power button to select it.

Clearing the cache data may take 2-5 minutes.

Step 5: Use the volume buttons to scroll to “Reboot system now”, press the power button to select it

That’s all. Is your Samsung Galaxy S7 and Galaxy S7 edge affected after fully charging? Did this solution fix Samsung galaxy S7 won’t turn on? Let us know by leaving a comment below box.

How to Add Emergency Information on Lock Screen Android

Are you putting emergency info on your lock screen Android Samsung? In this tutorial, I’ll show you steps to add emergency information on the lock screen on Android 14, Android 13, Android 12, and other Android devices. You can add medical information and emergency contacts on the lock screen. People who find your phone can show emergency information without unlocking your Android Samsung device. Also, make a call to your emergency contacts without unlocking your phone.

If you have a Samsung phone, you can activate emergency SOS and emergency sharing feature. If you have a Google Pixel device, you can turn on Emergency SOS, car crash detection (If the phone detects a crash), and crisis alerts (Natural disasters & public emergencies) feature. Follow the below-given process to add emergency contacts and information on Android and Samsung Galaxy.

Read More: How to Add a Profile Picture to Lock Screen on Your Android

How to Add Emergency Information on Your Lock Screen Android 14 and Android 13 (Google Pixel)

Apply the below-given settings to put emergency info on your lock screen Android stock OS (Google Pixel).

Step 1: Open the Settings app.

Safety and emergency settings on Android Phone

Step 2: Scroll down and touch the Safety & emergency.

You can see the emergency info settings below.

  • Medical information: Enter your name, blood type, allergies, medications, address, medical notes, and organ donor.
  • Emergency contacts: You can add up to 3 contacts in an emergency. People can contact you using one of these numbers in any trouble.
  • Emergency SOS: Press the power button 5 times or more to make an SOS call. Also, you can enable call emergency services (Call 112).
  • Car crash detection: When a car crash is detected, it will vibrate and sound an alarm at maximum volume. Your phone will share your location and updates to your emergency contacts. Also, attempt to contact 112 to share your location and car crash data. This feature won’t work in some countries.
  • Crisis alerts: It will notify you about your area’s natural disasters and public emergencies. Ensure your phone may not inform you about all public emergencies.

How to Add Emergency Information on Lock Screen Android

Step 3: Enter the above-given details to show emergency information on the lock screen.

How to Add Emergency Contacts to Lock Screen Android 14 and Android 13: Google Pixel

Step 1: Go to Settings app.

Step 2: Find the Display and tap it.

Go to lock screen settings to add message or number on the Android Lock Screen

Step 3: Touch the Lock screen in the Lock display section.

Add text on the lock screen on your Android Phone

Step 4: Touch Add text on the lock screen.

How to Add Emergency Contacts to Lock Screen Android 14 and Android 13

Step 5: Enter the emergency contact you want to display on the lock screen and touch Save.

Add emergency contact to the lock screen on your Android Phone

Step 6: Lock your phone, and you can see the contact number/phone number on your Android lock screen.

How to Add Emergency Information on Lock Screen Samsung Galaxy

Step 1: Open the Settings app.

Step 2: Scroll down and touch the Safety and Emergency.

You can see the given options below.

  • Medical info: Enter your medical information.
  • Emergency contacts: Add the emergency contacts.
  • Earthquake alerts: Alert when an earthquake is detected nearby. Not all earthquakes can be detected. Also, it is not supported in all regions.
  • Emergency SOS: Press the power button (Side Button) 3 or 4 times to send a SOS message (Call, Photos, or Audio recording) to the emergency contacts. Also, automatically call emergency number 112 when you are in an emergency.

How to Add Emergency Information on Lock Screen Samsung Galaxy

Step 3: Enter the details you want to view on your emergency info screen.

How to Add Emergency Contacts to Samsung Lock Screen

How to Add Emergency Contacts to Samsung Lock Screen

Settings > Lock screen > Edit in Lock screen > Contact information > Enter the phone number > Done.

This contact information is displayed on the lock screen so you can be contacted if you lose your phone.

How to Access Emergency Info on Your Android Samsung Phone’s Lock Screen

Step 1: Ensure lock your device.

Tap on Emergency on the lock screen to view emergency information on Android Samsung

Step 2: Swipe up from the bottom to view the Emergency or Emergency Call (Samsung) button on the lock screen and tap on it.

View Emergency Information on Lock Screen Android Phone

Step 3: Tap View emergency info.

How to Add Emergency Information on Your Lock Screen Android 14 and Android 13

Step 4: You can see the medical information and emergency contact numbers on your screen.

Read Also:
How to Set Up Emergency Info Android Lock Screen (Nougat 7.0 & 7.1)

Step 1: Tap on the App drawer from the home screen on your Android 7.0 Nougat.

Step 2: Go to Settings.

You can view various sections.

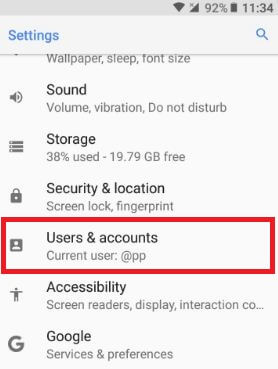
Touch user under device section in nougat

Step 3: Under the device section, tap on Users.

Emergency information under lock screen settings

Step 4: Touch on Emergency information under the lock screen settings.

You can see the message on the screen.

Step 5: Tap on Continue.

Set up emergency info android lock screen

Step 6: Add the information & contact number you want to view on the lock screen.

2nd Way:

Step 1: Swipe down the top of the home screen to open the notifications center.

Tap on User from nougat home screen status bar

Step 2: Tap on the User icon.

Tap on more settings to add emergency info

Step 3: Touch More Settings.

Step 4: Tap on Emergency information.

Step 5: Add the info and contacts you want to add.

How to View Emergency Information on the Lock Screen Android Phone

Step 1: Swipe up on the lock screen.

You can see the below screen on your smartphone.

Tap on Emergency from android lock screen

Step 2: Tap on Emergency.

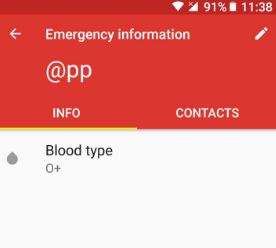
Emergency information of user

Step 3: Touch the Emergency Information at the top of the screen twice.

Emergency information on android lock screen

You can see all the information & contact details you add as an emergency.

Remove Emergency Information

Clear all emergency information on android nougat

Settings > Device section > Users > Emergency information > More > Clear all.

It will remove all information and contact numbers.

I hope you enjoy the above methods to set up an emergency info Android lock screen. Share this article on your social network.

Read Also: