How to Turn on And Use Do not Disturb on Android 10

Here’s how to customize Do not disturb schedules on Android 10. When Android 10 Do Not Disturb on, it will mute the sound, block calls, stop vibration, and block visual disturbances. Set schedules for sleeping or event time to automatically turn on Do not disturb in android 10. You can choose what you block and what you allow while enable DND mode in android 10 devices. When notifications arrive, your phone won’t make a sound or vibrate. Also set custom restrictions when the screen is off or on in your Samsung or latest Android phone.

By default play media sounds and touch sounds even activate DND mode in your android device. If you want, you’ll allow calls or allow messages you want for important contacts. Also, hide notification dots, hide status bar icons, hide pop-up notifications and hide from pull-down share even DND enabled. Follow the below-given step by step process to use Do not disturb mode Android 10.

Read Also:

How to Set Up Do Not Disturb Mode Android 10

Two ways to turn on android 10 Do not disturb mode. Let see one by one.

1st Method: Enable Do not disturb mode android 10 using sound settings

Step 1: Swipe up from the bottom of the home screen to access the app drawer.

Step 2: Scroll down and tap Sound.

Android 10 Do not disturb mode

Step 3: Tap on Do not disturb.

Enable and use Do not disturb mode Android 10

Step 4: Tap Turn on now button at bottom of the screen to turn on Android 10 DND mode.

Now mute phone calls, messages notifications and other sound interruption in your android or Samsung devices. You can customize do not disturb in android 10 using the below settings.

How to use Do not disturb mode Android 10

Calls

Turn on Do not disturb in android 10

By default don’t allow any calls when DND is turned on. You can choose from anyone, from contacts only, from starred contacts only, or Don’t allow any calls. Also, enable allow repeat callers to show caller name if the same person calls a second time within a 15 minute period.

SMS, MMS, and Messaging apps

Use Do not disturb mode Android 10

Choose from contacts you want to listen to the sound when receiving any message notifications on your android phone. To be sure allowed messages make sound, check your phone is set to ring, vibrate, or silent.

Restrict Notifications

Restrict notifications in Android 10

You will see notifications on your screen, but can’t hear sound from notifications. Choose No visuals or sound from notifications or custom notifications when Do not disturb in on.

Set default duration to automatically enable DND mode in Android 10

Set default duration to automatically enable DND mode in Android 10

When you turn on DND mode in your android phone, it will activate until you turn off. Also, set a time between 15 minutes to 12 hours or ask every time options. After set time duration, automatically enable Do not disturb the android app.

Settings > Sound > Do not disturb > Default duration

Customize Do Not Disturb Schedules On Android 10

Set schedule to turn on DND mode Android 10

Choose schedules type for sleeping or event time to turn on DND mode in your android phone. Set day, start time, end time and Do not disturb behavior in your devices.

Settings > Sound > Do not disturb > Schedules > Sleeping or Event

2nd Method: Quickly Enable or Disable Do not disturb on Android 10

First of all, add Do not disturb option to notification panel using the below steps.

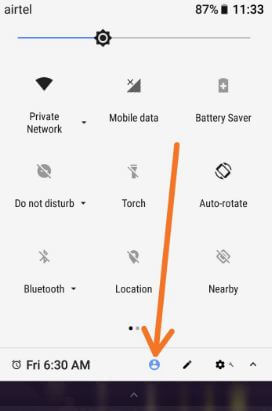
Step 1: Swipe down the notification panel twice from the top of the screen.

Step 2: Tap on the Pencil icon.

Step 3: Long press the Do not disturb and drag it to the panel.

Step 4: Now Swipe notification panel twice and tap on Do not disturb to activate it.

Android or Samsung galaxy Do not disturb will stay on until you turn it off.

And that’s it. I hope the above-given tutorial useful to use Do not disturb mode Android 10. Do you still have any questions regarding this article? Tell us in below comment box. Stay and connect with us for the latest updates.

How to Fix Bluetooth Connection Issues in Pixel 4 XL and Pixel 4

Annoying by Google Pixel 4 Bluetooth not responding or Bluetooth pairing problems? Here’s how to fix Bluetooth connection issues in Pixel 4 XL and Pixel 4 devices. Try the solutions below if your car or Bluetooth accessory isn’t connecting to your Google Pixel. First of all, confirm that your devices are paired and connected. Other Pixel Bluetooth issues occur, such as can’t pair with a car, can’t hear music, can’t make or get calls, etc. Not all cars can make or get phone calls or play music by Bluetooth. Several users facing can’t hear music or can’t make or get calls by Bluetooth.

You can use Bluetooth to transfer data between two devices. Also, share a mobile connection by Bluetooth tethering or hotspot on Google Pixel and Pixel XL. Follow the below-given possible solutions to fix Google Pixel Bluetooth issues.

How Do I Fix Bluetooth Pixel 4 and Pixel 4 XL?

How to fix Bluetooth connection issues in Pixel 4 XL and Pixel 4

Apply the troubleshooting methods below to fix Google Pixel 4 XL Bluetooth keeps disconnecting.

Restart your Pixel

Long press the power button and tap on the Restart button to reboot your phone. Now try to connect pair with other devices or car’s Bluetooth.

Turn Bluetooth off and On

Turn Bluetooth off and then on again. While Bluetooth settings are open, pair & connect a Bluetooth accessory.

Step 1: Open the phone’s Settings app.

Step 2: Tap on Connected devices.

Step 3: Tap on Connection preferences.

Step 4: Tap on Bluetooth.

Step 5: Toggle Off Use Bluetooth.

How to Fix Bluetooth Connection Issues in Pixel 4 XL

Step 6: After 05-10 seconds, toggle on Use Bluetooth.

Turn off Bluetooth when you’re not using it to save battery life.

Check Software Update

Check Software Update to Fix Bluetooth Connection Issues in Pixel 4

Settings > System > System Update > Check for update

Clear Bluetooth Cache in Pixel

Step 1: Go to the Settings app.

Step 2: Tap on Apps

Step 3: Tap on See all apps.

Step 4: Tap on Three vertical dots (More) at the top right corner.

Step 5: Tap on Show System.

Clear Cache for Bluetooth to fix Google Pixel Bluetooth issues

Step 6: Scroll down and tap on the Bluetooth from a list.

How Do I Fix Bluetooth Pixel 4

Step 7: Tap on Storage & cache.

This clear cache will remove temporary app data from your devices.

Fix Google Pixel 4 Bluetooth Not Responding

Step 8: Tap on Clear cache.

If clear cache won’t fix the issue, clear data or storage in your Pixel devices. This clear storage will remove all app data from your devices.

Change Bluetooth AVRCP Version 1.3/1.4 to Fix Pixel Cut Sound when Paired with Car’s Bluetooth

Step 1: Go to Settings.

Step 2: Scroll down and tap on System.

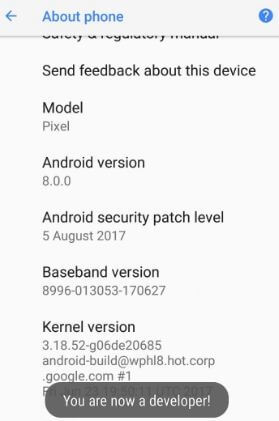
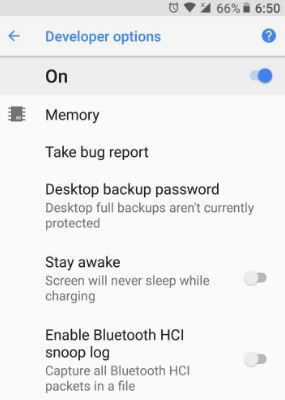
Step 3: Scroll down at the end of the page and tap on Developer options. If hidden developer mode in your Pixel, you can enable it here.

Change Bluetooth AVRCP Version to fix Bluetooth Connection Issues in Pixel 4 XL

Step 4: Scroll down and tap on the Bluetooth ACRCP version in the networking section.

Change Bluetooth AVRCP Version to Fix Pixel Cut Sound when Paired with Car's Bluetooth

Step 5: Select an AVRCP version from AVRCP 1.3/AVRCP 1.4.

Can’t Pair with a Car to fix Bluetooth Connection Issues in Pixel

If your device won’t pair with a Bluetooth accessory, clear devices from your phone’s memory and car’s memory.

Remove Connected Paired from your Google Pixel

Step 1: Go to the Settings app.

Step 2: Tap on Connected devices.

Step 3: Tap on See all in the previously connected devices section.

You can see a list of connected devices.

Step 4: Tap on the Settings icon of the device you want to remove.

Step 5: Tap on Forget.

Step 6: Tap on Forget device.

Now turn on Bluetooth and connect pair with other devices.

Clear Paired devices from your Car’s Connection

Follow the car’s manual to clear devices paired with your car. If you paired your device and car before, clear your phone. Now refresh the device list and pair it with your phone or car’s Bluetooth.

Can’t Pair with Other Accessories   

Check that your accessory is discoverable and ready to pair. If your accessory needs a passcode and you don’t have it, try 1234 or 0000. Refresh your accessory list and pair a new device.

Frequently Asked Question:

How Do I Reset my Bluetooth Pixel?

To reset Bluetooth on Pixel (Android 12), go to Settings > System > Reset options > Reset Wi-Fi, mobile, and Bluetooth > Reset settings > Confirm your screen lock > Reset settings. It will reset all your network settings, including WiFi, Bluetooth, and Mobile data.

How Do I Clear my Bluetooth Cache Pixels?

To clear Bluetooth cache Pixels (Android 12), go to Settings > Apps > See all apps > Menu at the upper right corner > Show system > Bluetooth > Storage and cache > Clear storage > OK. This will delete the Bluetooth app’s temporary data.

Read Also:

And that’s it. We hope the above is one of the methods used to fix Bluetooth connection issues in Pixel 4 XL and Pixel 4. Do you have any other tips to fix Pixel 4 Bluetooth issues? Tell us in below comment box. Stay and connect with us for the latest updates.

How to Recover Deleted Facebook Messages Using Android Phone and PC

Are you frustrating because of accidentally delete the Facebook messages? Here’s how to find and recover deleted Facebook messenger messages on Android devices. Sometimes you will lose important document related message conversation or work details on FB. It’s possible to retrieve deleted Facebook messages on android. If you have deleted Facebook messages from the messenger app, you can also recover Facebook conversation using the Android phone or computer. Also, use recovery tools for Facebook messenger in android phones or tablets that will help you to back up old messages. Facebook is one of the most used social networking apps to stay in touch with friends or family members.

Read Also:

How to Recover Deleted Facebook Messages on Android Devices

Apply below given possible methods to recover permanently deleted Facebook messages using your Android phone or PC/Laptop.

Retrieve Deleted Facebook Messages

Step 1: Open Device Storage or SD Card.

Tap on Android

Step 2: Tap on Android.

tap on data

Step 3: Tap on Data.

recover deleted facebook messages on android lollipop

Step 4: Tap on com.facebok.orca files.

recover deleted facebook messages on android

Step 5: Tap on Cache.

Now you will see chat backup files as the app creates automatically. You can explore the files using any file explorer app.

retrieve deleted facebook messages on android

You can also access this file from the computer to connect your phone to the computer using a USB cable.

Archive Facebook Messenger Messages Using PC/Computer

Step 1: Log in to your Facebook account.

Tap on messages on left on FB

Step 2: Tap on Messages on the left side taskbar.

After open messages, you can see the list of contacts with your past conversation.

Step 3: Click the contact you want to get back conversation chat.

Tap on action

Step 3: Tap on Settings (Action menu) gear icon.

Step 4: Tap on Unarchive.

Your message will be unarchived and deleted messages will be returned back to your Facebook messenger.

Step 5: Go to Messages > More > Archived

Follow the below-given steps to archive Facebook conversation messages using the messenger app.

Step 1: Open the FB messenger app.

Step 2: Tap and hold any conversation contact.

You can see several options list. 

Tap on archive the facebook message

Step 3: Tap on Archive.

Recover Deleted Messages on Android using Download Facebook Data

Step 1: Log in your Facebook account on your PC or Laptop.

Step 2: Tap Settings gear icon.

Step 3: Tap Your Facebook information from the left sidebar.

How to Recover Deleted Facebook Messages Using Android Phone and PC

Step 4: Tap Download your information.

Step 4: Select the information you want to back up such as posts, photos & videos, messages, groups, events, etc.

Step 5: Tap “Create files” or “Access your information” link if you don’t want to download it.

Step 6: Tap Messages (You can choose your option) you want to get details.

Step 7: Tap Your messages.

Above you can see the process to recover deleted Facebook messages on the Android device. Did you find the above process helpful? Please let us know! Comment below and connect with us for daily updates!

How to switch camera to professional mode android

Have you ever used professional mode in your Moto G4 plus or other android devices? In Moto G4 plus device, you can show various options including photo, video, slow motion video, professional mode and panorama. Also change camera phone size, video size (Full HD 1080p / HD 720p / VGA 480p) and Enable / disable camera shutter sound on Moto G4 plus (Android 7.0 Nougat) device. To use professional mode on Moto G4 plus phone, first of all switch camera to professional mode android phone.

Using this professional mode in camera, you can adjust white balance of photo, set shutter speed (1/4000, 1/3000, 1/2000 etc.) for quickly taken photo from camera, use ISO for camera’s sensitivity to light up to 3200, exposure for black or white light and manual focus on camera photo. Follow below given steps to switch camera to professional mode android phone such as Moto G4 plus, Samsung galaxy S7 & S7 edge, Galaxy S6, Huawei P9, Galaxy note 3 and more.

Don’t miss this:

Red exclamation mark android when sending message

How to use dexterity and interaction Android Marshmallow 6.0

Top best slow motion apps for android phone or tablet

How to switch camera to professional mode android phone: Moto G4 plus

Step 1: Tap on “App drawer” from home screen on your Moto G4 plus

Step 2: Open “Camera” app

You can show below screen on your device.

Touch camera icon on moto G4 plus phone

Step 3: Tap on “Camera” icon from below right side corner

You can view panorama, slow motion, professional mode, video and photo options.

Professional mode on moto G4 plus

Step 4: Click on “Professional mode

You can view below screen on your Moto G4 plus device. It contains different professional mode settings to set camera photo. You can individually use one by one professional mode settings, it looks like below screen.

Use professional mode camera on android nougat 7.0

Step 5: Tap on any icon want to change settings of photo

Professional mode camera use nougat phone

You can also view all settings on one screen also. Tap on “left side arrow” icon.

switch camera to professional mode android

Step 6: Adjust all professional mode camera settings at one screen

Also set timer (3S / 10S) on professional mode in your Moto G4 plus and other devices. To take panorama photo on your android phone moto G4 plus, slowly moving the screen on same direction.

Did you find above steps helpful to switch camera to professional mode android device? If you have any kind of trouble, let us know below comment box. Don’t forget to share this trick with your friends on social network.

How to Customize Home Screen Settings on Android Oreo

How to customize home screen settings on android Oreo 8.0. You can see app suggestion, display Google app, Add icon to the home screen, change icon shape, notification dots, and home screen rotation. All this setting quickly change your android Oreo’s home screen. Using Google app, you can daily get the latest news, live score, weather, find a nearby location, translate text, and more. Also, check out these 10 best Android Oreo tips and tricks.

Read Also:

How to Change Home Screen Settings on Android Oreo 8.0

Tap and hold the blank space on the home screen. You can see wallpaper, widgets, and settings options. You can see below the Android Oreo home screen settings.
Customize home screen settings on android Oreo 8.0

App suggestion

By default enable home screen app suggestion in android Oreo devices. If you don’t want to show the most used apps in your Oreo, turn off app suggestions in android Oreo 8.0.

Display Google App

By default enable display Google app in android Oreo and other devices. Swipe right side your Oreo home screen and you can see the Google app suggestion list. It includes the latest news, stories, cricket score, weather info, finds places or restaurants, and more details you like.

Display Google app settings in android Oreo

To add your favorite topics swipe right side home screen > Menu > Customize > + button to add topics you like. Turn off display Google app in the home screen on Android Oreo and other devices if not use.

Add icon to home screen

By default enable this feature in your Android devices. When you install new apps from the play store, it will add that app shortcut icon to the home screen in your devices. You can disable it if you don’t want to show the app shortcut on the home screen.

Change icon shape

This change icon shape in android Oreo 8.0 is the newly added feature in home screen settings  By default set icon shape in Android 8.0. Choose icon shape from the available options.

Step 1: Press and hold the Blank space on the home screen.

Step 2: Tap on the Settings gear icon.

Step 3: Tap on Change icon shape.

By default set system icon in Android Oreo and other devices.

Change icon shape in your android 8.0 Oreo device

Step 4: Choose the Android Oreo icon shape as Square/Rounded square/Squircle/Teardrop.

Notification dots

Notification dots settings in android Oreo home screen

It will show different color dots on apps notification you missed to read. A notification dot has several settings including android O app notifications settings, Blink light, use notification dots, on the lock screen content, and swipe fingerprint notifications to check your notifications.

Allow home screen rotation

By default disable home screen rotation. To rotate your android Oreo home screen when phone rotated, enable home screen rotation in Android Oreo 8.0 devices.

And that’s all. End the list to customize home screen settings on Android Oreo 8.0 devices. Don’t forget to share with others, if you find it helpful.

How to Stop Keyboard Sound and Vibrations on Android 8.0 & 8.1 Oreo

Here’s how to enable or disable Haptic feedback in Android 8.0 & 8.1 Oreo. In this Haptic feedback feature, you can feel vibrate when you touch your keyboard on an android device. Different android device has slightly different settings to turn off Haptic feedback or keyboard vibration. You can disable touch vibration and Haptic feedback using keyboard settings. Also, change Haptic feedback vibration intensity on android 8.0 & 8.1. If you use a Swifty or Swype keyboard, you have to go keyboard settings to disable haptic feedback in keyboard settings.

Read:

How to Turn Off Haptic Feedback Android 8.0 and 8.1 Oreo

Check out each one listed below methods to enable or disable haptic feedback and disable vibrate on tap on android 8.0 & 8.1 Oreo devices.

How to Disable Haptic Feedback

Step 1: Go to the Settings in your android Oreo.

Step 2: Tap on System.

Step 3: Tap on Language & input.

Step 4: Tap on Virtual keyboard under the keyboard & input section.

Here you’ll see Gboard, Google Indic keyboard and Google voice typing options.

Android 8.1 Oreo Gboard settings

Step 5: Tap on Gboard.

Now Gboard keyboard settings view in your Google Pixel 2 device. It includes Languages, Preferences, Theme, Text correction, Glind typing, Voice typing, and more settings.

Gboard keyboard settings in android 8.1 Oreo

Step 6: Tap on Preferences.

How to turn off Haptic feedback android 8.0 Oreo

Step 7: Enable/disable haptic feedback on keypress under the Keypress section.

To change haptic feedback vibration intensity on android 8.0 Oreo, must enable haptic feedback in your devices.

Android 8.1 Oreo vibration strength on keypress

Step 8: Tap on Vibration strength on keypress.

Change haptic feedback vibration intensity on android 8.0 Oreo

Step 9: Increase/decrease haptic feedback vibration strength on android 8.0 & 8.1.

It’s quite easy to turn off Haptic feedback android 8.0 and 8.1 Oreo and other devices.

Disable Vibrate on Touch

Step 1: Go to Settings in your Android.

Step 2: Tap on Sound.

Step 3: Tap on Advanced.

Here you’ll see Android Oreo sounds and vibration settings.

Disable vibrate on touch in android Oreo 8.0 & 8.1

Step 4: Enable/disable vibrate on tap.

How to Turn Off Vibrate on Keypress

How to turn off vibrate android 8.1 & 8.0 Oreo

Settings > System > Language & input > Virtual keyboard > Google Indic keyboard > Keyboard > Enable/disable Vibrate on keypress

Also, change vibration strength on keypress in android Oreo devices.

How to Turn Off Keyboard Vibration on Huawei P10

Settings > Sound > vibrate on touch > Toggle off

And that’s all about turn off keyboard vibration on android Oreo devices.

Did you find the above tutorial helpful to turn off Haptic feedback android 8.0 & 8.1 Oreo? If you have any kind of trouble, tell us in below comment box. We’ll respond as soon as possible. Don’t forget to check out our other android Oreo tips and tricks.