How to Close All Apps on Galaxy S20 Plus/S20 Ultra/S20+

Here’s how to close all running apps on Samsung Galaxy S20 Plus, S20 Ultra, and S20 devices. Several apps running in the background even we don’t use that slowly reduce battery life and slow down your phone performance. You can close the app one by one or close all apps at once using the recent apps list. Also, force stop apps that unnecessary and running in the background.

Read Also:

How to Close All Running Apps on Galaxy S20 Ultra, S20 Plus, and S20

How to Close All Apps on Galaxy S20 Plus

You can open and stop apps from the recent apps list.

Step 1: Tap on the Recent apps button (Left side) from the navigation bar or swipe up one time from the middle of the screen if using full gesture navigation.

Step 2: Swipe screen right side to see all recently opened apps.

These apps are using the background data in your device.

Step 3: Swipe an app to the top of the screen to close it.

Step 4: Tap Close all at the bottom middle to close all apps running in your Samsung S20+/S20 Ultra/S20.

Force Stop App on Samsung Galaxy S20 Ultra/S20 Plus

Step 1: Swipe down from the top of the screen to access the notification panel.

Step 2: Tap Settings icon.

Step 3: Scroll down and tap Apps.

Step 4: Select the app from the list.

Step 5: Tap Force stop at the bottom right side.

Step 6: Tap OK.

Turn Off App Background Data on Samsung S20 Plus/S20 Ultra/S20

Step 1: Go to Settings.

Step 2: Click Connections.

Step 3: Click on Data usage.

Step 4: Click on Mobile data usage.

A list of apps appears with usage data.

Step 5: Select the app using more data.

Step 6: Toggle off Background data.

That’s it. We hope the above methods useful to close all running apps in your Galaxy S20 series. Do you have any alternative methods? Share it with us in below comment box.

How to Set a Data Limit on Samsung Galaxy S20 Ultra/S20+

Want to set a mobile data usage limit on the Samsung S20 series? Here’s how to set data limit and data warning on Samsung Galaxy S20 Ultra/S20+ to reduce daily data usage. You can set a limit to how much data you use on a particular day or period. Once you reach the data limit, you’ll no longer use mobile data in your Samsung devices. Also, set a data warning on Samsung to alert you before reach the data usage.

Read Also:

How to Set a Mobile Data Usage Limit on Galaxy S20+/S20 Ultra

How to set a data limit on Samsung Galaxy S20 Ultra

You can find mobile data usage under the connection settings in your Samsung S20 series. Check out the below steps.

Step 1: Swipe down the notification panel from the top of the screen.

Step 2: Tap Settings gear icon.

Step 3: Tap on Connections.

Step 4: Tap on Data usage.

You can see data saver, Mobile data only apps, Mobile data usage, Billing cycle & data warning, WiFi data usage, and more.

Step 5: Tap on Mobile data usage.

Step 6: Toggle on Set data limit.

Step 7: Tap Data limit.

Step 8: Enter the data limit and tap Set.

Step 9: To set data warning, make sure to enable data warning toggle.

Step 10: Tap Data warning.

Step 11: Set the data warning and tap Set.

Set Billing Cycle Date on Samsung

Step 1: Follow the above-given method steps 1 to 5.

Step 2: Tap Settings gear icon.

Step 3: Tap Start billing cycle on.

Step 4: Select the date you want to start the billing cycle each month and tap Set.

Disable App Background data on Samsung S20 Ultra/S20+

Settings > Connections > Data usage > Mobile data usage > Select the app usage more data even don’t use > Toggle off Background data

I hope this article helps to set a data limit on your Samsung Galaxy S20, S20 Plus, and S20 Ultra. If you have any questions, tell us in below comment box.

How to Restrict Background Data For App on OnePlus 7T Pro/7T/7 Pro/7

Here’s how to turn off or restrict background data on OnePlus 7T Pro/7T/7 Pro/7/8 Pro/8. There are a bunch of apps using more data usage in the background even we don’t use it. If particular app usage more mobile data in the background, you need to turn off background data in OnePlus 7T/7T Pro and other devices. These running apps in the background will slow down your phone and reduce battery life also. Also, close all apps running in the background. You can set a data limit and data warning to automatically stop data usage when reaching the cellular data limit.

Read Also:

How to Turn Off Background Apps on OnePlus 7T/7T Pro/7 Pro/7/8 Pro/8

How to Restrict Background Data For App on OnePlus 7T Pro or 7 Pro

You can disable app background data and control data usage using below given settings in your OnePlus devices.

Step 1: Go to Settings.

Step 2: Click on Wi-Fi & internet.

Step 3: Tap on Cellular data usage.

Step 4: Select the SIM if using more than one SIM to check mobile data usage.

Step 5: Tap on the App usage more data.

Step 6: Toggle off “Background data”.

Disable Background data usage For App on OnePlus (Latest OxygenOS 10.3.4)

If you don’t want to use cellular data for a particular app, this is the best settings to disable it even using mobile data on your phone.

Settings > WiFi and internet > Cellular data usage > Select the app > Toggle on “Disable data usage”

Set Data Usage Limit on OnePlus (Latest OxygenOS 10.3.4)

Settings > WiFi and internet > Cellular data usage > Billing cycle > Toggle on “Auto-disconnect from network” > Data limit > Set data limit > Set

Disable WiFi Usage For App on OnePlus

Settings > WiFi and internet > Cellular data usage > Select the app > Toggle on “Disable WiFi”

Close Background Running Apps in OnePlus 7T/7T Pro/7 Pro/7/8 Pro/8

Step 1: Tap on Recent apps key of the right-side navigation bar button.

Swipe the right side screen to view all running apps in the background.

Step 2: Tap X symbol at the bottom middle of the screen to turn off running apps at once.

Do you have any alternative methods to reduce app data usage? Share it with us in below comment box. Which is your favorite OnePlus 7T Pro/7 Pro feature?
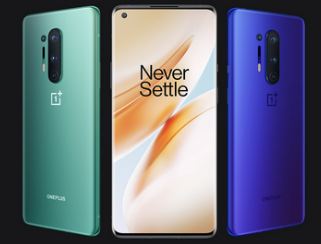
How to Close Apps Running in Background in OnePlus 8 Pro

There are several apps we opened and close some of the apps directly in our devices. These all background running apps will be draining battery and slow down performance in your OnePlus 8 Pro/8. This tutorial explains to you how to stop apps running in the background in OnePlus 8 Pro/8/7T Pro/7T/7 Pro and latest Oxygen OS (10.3.4) devices. Two ways are available to turn off running apps in OnePlus 8 Pro devices. Also, turn off or restrict background data in OnePlus devices using application settings.

Read Also:

How to Turn Off/Disable Running Apps OnePlus 8 Pro and OnePlus 8

How to Close Apps Running in Background in OnePlus 8 Pro

You can find all background running apps using the recent apps list. Let see how to close app one by one and close all apps at once in your OnePlus 8 Pro/OnePlus 8 devices.

Step 1: Open the Recent apps (Right side navigation bar button) in your OnePlus.

Step 2: Swipe the screen left to the right side to view all running apps.

To individually close the app in OnePlus 8 Pro, swipe the app top of the screen to stop it.

Step 3: Tap the “X” icon at the bottom middle of the screen.

Now, close all running apps at once in your latest OnePlus devices.

Force Stop App to Stop Background Process

Step 1: Go to Settings.

Step 2: Tap Apps & notifications.

Step 3: Select the app from a list you want to force stop.

Step 4: Tap Force stop.

Restrict App Background Data on OnePlus 8 Pro/8

Step 1: Swipe up from home screen open App drawer.

Step 2: Tap the Settings app.

Step 3: Tap WiFi & internet.

Step 4: Tap Data usage.

Step 5: Tap Cellular data usage.

You can see a list of apps using mobile data in your device.

Step 6: Tap the App.

Step 7: Toggle off “Background data”.

And that’s it. I hope the above-given methods useful to close apps running in the background in OnePlus 8 Pro. If you have any questions, tell us in below comment box. Stay and connect with us for the latest updates.

How to Fix Samsung Galaxy S20 Black Screen of Death issue

Annoying by suddenly Samsung S20, S20+, or S20 Ultra black screen issue? Here are the possible solutions to fix Samsung S20 black screen of death or screen not working problem. Most of the time this issue occurs when playing games continuously for long time or hardware damage if dropping your phone. Also, check for screen crack after dropping the phone. check out below given possible solutions.

Read Also:

5 Ways to Fix Galaxy S20 Black Screen of Death Issue

How to Fix Samsung Galaxy S20 Black Screen of Death issue

Restart your phone

Long press the power button and tap the Restart icon to reboot your phone. Sometimes it will fix the small bugs and improve your phone performance also.

Wait until discharge your phone and charge it

Wait until completely drain the battery. Now, charge your phone until 50-60 minutes using your phone original charger only. Unplug your phone and restart it to check to fix the issue.

Check for Hardware Issue

Check your phone screen cracked if hitting or dropping your phone. Rare of the case this hardware damage issue occurs. You need to replace the screen if the screen cracked or physically damaged.

Wipe Cache on Samsung S20/S20+/S20 Ultra

This Clear cache or wipe cache partition will use when your phone frozen, screen not responding, won’t turn on, slow down your phone, black screen, etc. This wipe cache will remove unnecessary files, logs, and other junk files. Wiping the cache will not remove your phone apps data or your phone data.

Step 1: Swipe down the notification panel and tap the Power button.

Step 2: Tap Power off. Tap again Power off to switch off your phone.

Step 3: Press & hold the power key and volume up key at the same time until seeing the recovery menu.

Step 4: Press the volume down button until highlight the Wipe cache partition.

Step 5: Press the power button.

Step 6: Press the volume down button to select Yes.

Step 7: Press the power key.

Wait until see wipe all data message on the bottom left corner of the screen.

Step 8: Press the power button.

Wait until starting your phone and check to fix the issue.

Factory Reset Using Recovery Mode If Samsung 20 Won’t Turn On

It will remove all your phone data, make sure backup & restore your important data to other devices or PC before performing the below steps.

Step 1: Swipe down the notification panel and tap the Power button.

Step 2: Tap Power off. Tap again Power off to turn off your phone.

Step 3: Press & hold the power key and volume up key at the same time until seeing the recovery menu.

Step 4: Press the volume down until the wipe data/factory reset option select.

Step 5: Press the power button.

This message appears: Wipe all user data? This cannot be undone.

Step 6: Press the volume down switch to highlight the Factory data reset.

Step 7: Press the power button.

Step 8: Press the power button to reboot your system now.

Now, wait until restart your phone.

Factory Reset S20/S20+/S20 ultra if phone turned on

Step 1: Go to Settings.

Step 2: Scroll down and tap General Management.

Step 3: Tap Reset.

Step 4: Tap Factory data reset.

Step 5: Scroll down and tap the Reset button.

Step 6: Tap Erase all data.

And that’s all. We hope one of the above-given methods fixes your S20 black screen issue. Do you have any alternative methods you tried and successful worked? Share it with us in below comment box.

How to Fix Samsung S20 Won’t Turn On or Power On

If your Samsung Galaxy S20, S20 Plus, and S20 Ultra won’t turn on or unresponsive screen, check out these solutions to fix Samsung S20 not turning on issue. This S20 won’t power on type of issue occurs because of hardware issues or after software updates. Also, you can check if the black screen issue to send messages or make calls and your phone vibrate. Make sure your phone updated with the latest software update.

Read Also:

4 Ways to Fix Galaxy S20 Won’t Turn On or Unresponsive Screen

How to Fix Samsung S20 Won’t Turn On

Forced Restart

Press & hold the power button and volume down button until automatically restart your Samsung device.

Charge with other accessories

Make sure your phone charger is not defective. Plug your phone into another charger or adapter. If you have a faulted charger, your phone is not charging and won’t turn on after power off.

Wipe Cache Using Recovery Menu

These S20 wipe cache will fix several issues like phone frozen, won’t turn on, screen not responding, black screen, slow down your phone, etc. It will remove unnecessary files from your phone. It will not remove your apps data.

Step 1: Press the volume down & power button at the same time and tap on the Power.

Step 2: Touch the Power off. Touch again Power off to turn off your phone.

Step 3: Press & hold the power key and volume up key simultaneously until the view recovery mode.

Step 4: Press the volume down button until select the Wipe cache partition.

Step 5: Press the power button.

Step 6: Touch the volume down button to highlight Yes.

Step 7: Press the power key.

Wait until see wipe all data message on the bottom left corner of the screen.

Step 8: Press the power key.

Factory Reset If Samsung Phone Won’t Turn On

It will delete all phone data including photos, videos, third party apps, Google account, Samsung account, and more. Make sure to backup your phone data before performing this reset setting.

Step 1: Press the volume down & power button at the same time and tap on the Power.

Step 2: Touch the Power off. Touch again Power off to turn off your phone.

Step 3: Press & hold the power key and volume up key simultaneously until the view recovery mode.

Step 4: Press the volume down button until select the wipe data/factory reset.

Step 5: Press the power key.

This pop-up view: Wipe all user data?

Step 6: Press the volume down button to highlight the Factory data reset.

Step 7: Press the power button.

Wait until complete the process.

Step 8: Press the power key to reboot the system.

If your Samsung S20 won’t turn on even follow the above-given methods, the issue is with the hardware. Find the nearby Samsung center and replace it if under the warranty or talk with a technician to fix it.

End the list of possible solutions to fix galaxy S20 won’t turn on issue. Which of the above-given method worked for you? Tell us in below comment box.