How to get Fornite beta on android phone

Here’s how to get Fortnite Beta on android phone. This epic game Fortnite for android is battle royale shooter game. To install fortnite on android device, first of all sign up with your email id on this Fornite page. After sign up, you’ll wait for email invitation link to download and install Fortnite on your android devices.

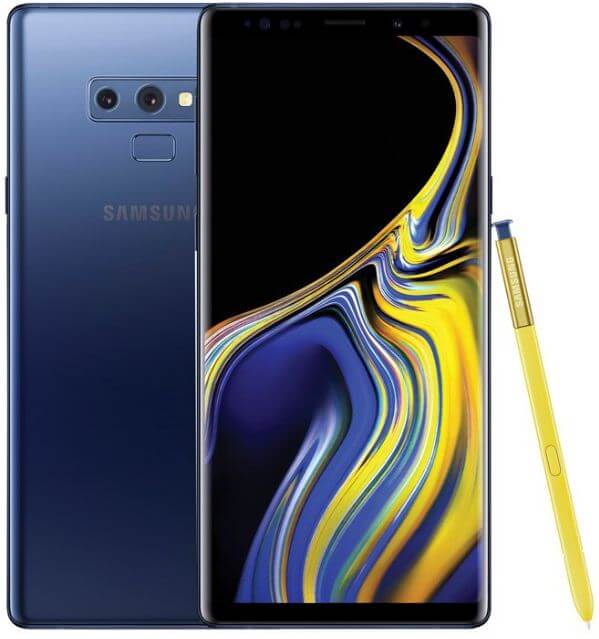
Samsung’s latest flagship galaxy Note 9 comes with this epic Fortnite game. You can check out your device support this new Fortnite game when sign up for email invite on website. Also Fortnite play on Playstation, XBOX, Switch, PC or MAC. Let see step by step process to get Fortnite Beta on android phone.

Read Also:

How to use S Pen on Galaxy Note 9 Oreo

Top 5 best android 9 Pie’s features

10 best Xbox 360 action games

How to get Fortnite Beta on android phone

You can download APK for Fortnite on Samsung galaxy devices including galaxy S7, S7 Edge, S8, S8 Plus, S9 & S9 plus, Tab S3, Tab S4 and Note 8. List of supported Fortnite game android devices.

Google: Pixel / Pixel XL, Pixel 2 / Pixel 2 XL

Essential: PH-1

Asus: ROG Phone, Zenfone 4 Pro, 5Z, V

LG: G5, G6, G7 ThinQ, V20, V30 / V30+

Huawei: Honor 10, Honor Play, Mate 10 / Pro, Mate RS, Nova 3, Huawei P20 / Pro, V10

OnePlus: 5 / 5T, OnePlus 6

Razer: Phone

Nokia: 8

ZTE: Axon 7 / 7s, Axon M, Nubia / Z17 / Z17s, Nubia Z11

Xiaomi: Mi 5 / 5S / 5S Plus, 6 / 6 Plus, Mi 8 / 8 Explorer / 8SE, Mi Mix, Mi Mix 2, Mi Mix 2S, Mi Note 2, Blackshark

If you’re device is available on above given list, apply below given step by step process to download Fortnite beta on android device.

Step 1: Open Fortnite sign up page in your android devices

Step 2: Tap Sign up for Email invite

Here you can see pop-up message: Do you already play Fortnite?

Get Fortnite Beta on android phone

Step 3: Tap Yes or No

Step 4: You can see sign up page in your device. Enter details to get Fortnite beta link

Step 5: After fill up details, tap create account

How to get Fortnite Beta on android phone

Step 6: Select your android device you want to download Fortnite beta

Step 7: Tap Select

You can see message of “You’re now on the waiting list”. Now wait for get email that content link to the Fortnite installer.

Step 8: Open mail in your PC and tap Get started to pre-install Fortnite on your device

Step 9: Now visit fortnite.com/android on your android device or Scan the QR Code

You can get Fortnite Beta on android phone. Enjoy this epic games in your PC or Mac.

How to download Fortnite on android using mobile phone

First of all open Fortnite Beta webpage in your android device and log in with your account. After log in follow below given step in your android device.

Step 1: Tap Three horizontal lines at upper right corner

Step 2: Tap Get Fortnite

Step 3: Tap Android Beta on screen

Step 4: Tap Download

Download Fortnite on android using mobile phone

You can see download Fortnite installer-2.0.2.apk in your device. Your browser required special permissions to install the Fornite installer. Make sure enable install unknown source in your device to install Fortnite on android phone.

Step 5: Tap Open

Step 6: Tap Install to install Fortnite on android phone

Step 7: Wait for install Fortnite on your device and after that tap Open

Step 8: Tap Install

How to get Fortnite Beta on android

Now downloading Fortnite game in your android phone or PC. Enjoy this epic game Fortnite on your android device.

And that’s all. We hope this makes it clear how to get Fortnite beta on android phone. If you have any kind of trouble, tell us in below comment box. Stay and connect with us for more updates.

How to Customize Active Edge on Pixel 3 and Pixel 3 XL

Here’s how to change the active edge squeeze settings on Pixel 3 and Pixel 3 XL. You can customize Active Edge on Pixel 3 XL under gesture settings. In Google Pixel active edge setting, you can see squeeze for your assistant, squeeze for silences and access assistant even the screen is off. Also, adjust squeeze sensitivity as light or firm squeeze.

You can also fully customize an active edge on Pixel 3 or Pixel 3 XL using commands. Download edge sense plus app from play store in your Pixel 3 device. Let see step by step process to customize Active Edge on Pixel 3 XL and Pixel 3.

Read Also:

How to Use Pixel 3 Active Edge

By default turn on the active edge on Pixel 3 XL. You can disable Active Edge on Pixel 3 XL under gesture settings. Let see how to enable and change Pixel 3 active edge settings.

Step 1: Swipe down the notification panel and tap the Settings gear icon.

Step 2: Scroll down up to the end of the page and tap System.

Step 3: Tap Gestures.

Here you can see the active edge, swipe fingerprint for notifications, jump to camera, swipe up on the home button, lift to check phone and more.

Step 4: Tap Active edge.

Below given three Pixel 3 active edge settings appear on your screen.

How to customize Active Edge on Pixel 3 XL

Squeeze for your assistant:

Quickly squeeze the bottom half of your phone, then release to talk to your assistant on Pixel 3 and Pixel 3 XL. Turn on toggle squeeze for your assistant to activate it in your phone.

Allow when the screen is off:

Open your assistant even when the Pixel 3 screen is off. This setting will automatically disable when turning off squeeze for your assistant option.

Squeeze for silence:

Turn on this option for silence incoming calls & notifications in your Google Pixel 3 and Pixel 3 XL device.

And that’s all. We hope this makes it clear how to customize Active Edge on Pixel 3 XL. If you have any questions or comments, we invite you to leave your feedback. Let us know in the comments below!

How to Use the S Pen on Galaxy Note 9 Camera

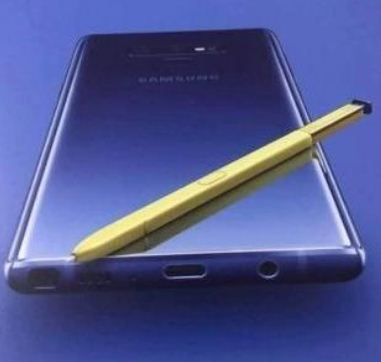
Here’s how to enable and use S Pen on Galaxy Note 9. This Samsung Note 9 S Pen stylus is useful to play or pause music, take a photo without touch your Note 9, open app, unlock your device remotely, create a note, and more. Also, use S Pen as a remote control for presentations (Slideshow), writing & drawing on applications, capture group photos, and more. You can fully charge your Galaxy Note 9 S Pen for 40 seconds to place S Pen into the holder on your phone. Four different types of color S Pen including Yellow S-Pen (Ocean Blue), Black S-Pen, Purple S-Pen, and Copper S-Pen. You can change S Pen settings under advanced feature settings.

Samsung Galaxy Note 9 flagship phone mainly focus on the S-Pen stylus and gaming. This Galaxy Note 9 S Pen is the most important feature than any other. One of the best S Pen functions is to support Bluetooth so you can operate your Note 9 easily from other nearby places. Samsung will launch the S Pen SDK (Software development kit) in September month. Other important Samsung Galaxy Note 9 features including Fornite Game access, Super AMOLED screen, massive 4000mAh battery, Qualcomm Snapdragon 845 processor, faster wireless charging, and more. Let see how to use S Pen on Galaxy Note 9.

Read Also:

How to Use S Pen on Samsung Galaxy Note 9

How to use S Pen on Galaxy Note 9 Oreo

The S Pen supports Bluetooth connectivity with low-energy and fast capacitor. Let see how to change galaxy Note 9 S Pen settings.

Step 1: Swipe down the notification panel and tap the Settings gear icon.

Step 2: Tap Advanced features.

Step 3: Tap S Pen.

Here you can set up S Pen on Galaxy Note 9. Let see one by one galaxy Note 9 S Pen settings.

  1. General

In the General section, you can see four S Pen settings for Note 9.

Air view:

This setting is useful to get details about photos & texts when your S Pen is hovering. Also, see calendar & task events. You can feel Note 9 S Pen sensitivity to touch lighter than air. Just turn on Air view on galaxy Note 9 and move S Pen near to screen for a soft touch.

Direct Pen input:

Whenever fill up forms on your Samsung Note 9, transfer keyboard to S Pen when activating direct Pen input.

Pointer:

Show a pointer when you hover your S Pen over the screen on your phone.

  1. AIR Command

Shortcuts:

You can create a note, view all notes, smart select, screen write, live message, translate text, and PENUP.

Read More: How to write screen off memo on Galaxy Note 9

Floating icon:

Turn off the floating icon on Note 9 if you don’t want to show S Pen on the home screen. You can move S Pen around the screen.

  1. Removal

When S Pen is removed:

When S Pen is removed, open air command in your device. You can select from open air command/create note/do nothing.

Read More: How to hide Air command on S Pen Note 9

Alarm:

It will help to find lost S Pen. If you forgot to insert your S Pen, sound an alarm if set.

Power saver:

Save battery power by not trying to detect your S Pen while it’s on your phone.

  1. Feedback

Sound:

Play sound when you insert or remove S Pen or write on the screen.

Vibration:

Vibrate your Galaxy Note 9 when insert or remove the S Pen.

And that’s it. We hope this makes it clear how to use S Pen on Galaxy Note 9. If you have any kind of trouble, tell us in below comment box. Stay and connect with us for the latest updates.

How to Change the Lock Screen Clock Style on Galaxy Note 10 Plus, Note 10, Note 9

Here’s how to change the on Samsung Galaxy Note 9 lock screen and always-on display. You can change lock screen clock style on galaxy Note 9 using clock style in lock screen settings. In Samsung Galaxy Note 9 lock screen settings, you can customize always-on display and change clock style on lock screen galaxy Note 9 (Compatible with Galaxy Note 10, Note 10 Plus). You can set the type and color for the clock on the always-on display and lock screen in your Samsung Note 9.

Just customize the clock styles for lock screen and always-on display on your phone. Also, download a new AOD clock faces from the Samsung store. Follow the below-given step by step process to change the lock screen clock style on galaxy Note 9.

Read Also:

How to Change Clock on Lock Screen on Samsung Galaxy Note 9

How to change lock screen clock style on galaxy Note 9

Let see how to customize clock styles for Always-on display and lock screen on your Samsung Galaxy Note 9. It will change the clock layout on lock screen on your Note 9.

Step 1: Swipe down the notification panel and tap the Settings gear icon.

Step 2: Tap Lock screen.

Here you can see screen lock type, always-on display and clock style options.

Step 3: Tap Clock style.

Now appear always-on display and lock screen options. Here you customize the clock type & color of your cloak also. Choose from Digital clock/Analog clock/Calendar/Image/World clock/Edge clock.

Step 4: Tap Always-on display.

Step 5: Select clock type & color and tap Apply to change always on display clock style on Note 9.

Step 6: Tap Lock screen.

Step 7: Select clock type & color and tap Apply to change lock screen clock style on Note 9.

Now when your Samsung Galaxy Note 9 lock or sleep, you can see clock style & other information on always-on display and lock screen. Also, use a clock widget on galaxy Note 9 to set a lock on the home screen in your device.

How to Enable Always-on display on Samsung Galaxy Note 9

Step 1: Swipe down the notification panel and tap the Settings gear icon.

Step 2: Tap Lock screen.

Step 3: Tap Always-on display.

Step 4: Turn on toggle “Show always”.

Now always turn on Always-on display in your Samsung Galaxy Note 9 devices.

And that’s all. I hope you will enjoy viewing the change lock screen clock style on galaxy Note 9. If you have any queries regarding this trick, let us know by leaving a comment below. We will respond As soon as possible.

How to Set Up Intelligent Scan on Galaxy Note 9

Want to use an Intelligent scan on galaxy Note 9 to unlock your device? Let see how to set up and use Intelligent scan on Galaxy Note 9 to secure your phone data. In Samsung note 9 biometric security, you can see various options including Intelligence scan, Face recognition, Iris scanner, and Fingerprint scanner. First of all, register your face and Iris scanner to use an intelligent scan on Samsung Galaxy Note 9.

Galaxy Note 9 intelligent scan feature uses both iris scanning and face unlock method to improve the accuracy & security of your device. Remember one thing, intelligent scan can’t be used at the same time as face unlock. Let see how to set up and use an intelligent scan on Samsung Note 9.

Read Also:

How to Set Up And Use Intelligent Scan on Galaxy Note 9

How to set up and use Intelligent scan on Galaxy Note 9

To use Samsung intelligent scan on Note 9, make sure your face and Iris have been registered.

Step 1: Swipe down the notification shade and tap the Settings gear icon.

Step 2: Tap Biometrics and security.

Step 3: Tap an Intelligent scan under biometrics.

Here you can see intelligent scan unlock and screen-on intelligent scan options. By default turn off both options.

Intelligent scan unlock

Unlock your phone using combined face and Iris scanning. Turn on toggle if unlock your Note 9 using an intelligent scan.

Screen-on intelligent scan

Unlock your phone with intelligent scan as soon as the screen turns on, without wiping first.

Samsung Pass

Use an intelligent scan to verify your identity on the internet and other apps you use Samsung pass services.

How to Remove Face and Iris Data on Galaxy Note 9

Settings > Biometrics and security > Intelligent scan > Remove face and iris data

Now unlock your Samsung Galaxy Note 9 with PIN number or password in your devices.

And that’s all. Do you have still questions about setup and use Intelligent scan on galaxy Note 9? Tell us in below comment section. Stay and connect with us for latest updates.

How to Set Up and Use Face Recognition on Galaxy Note 9

You can see various Biometrics security options available in your Samsung Galaxy Note 9 such as Intelligence scan, Face recognition, Iris scanner, and Fingerprint scanner. But in this tutorial, I’ll show you how to set up face recognition or face unlock on Galaxy Note 9 devices. To use face recognition on galaxy Note 9, you need to register your face. You can find galaxy Note 9 face recognition features under Biometric and security settings.

Also, set up Intelligent scan on galaxy Note 9 that combined face and Iris scanning for a better result to unlock your device. Follow the below-given step by step process to set up and use face recognition on Samsung Galaxy Note 9.

Read Also:

How to Set Up Face Recognition on Galaxy Note 9

How to set up face recognition on galaxy Note 9 Oreo

For better performance, ensure you are indoors or away from direct sunlight in your Samsung Note 9. Let see how to set up face unlock on the Galaxy Note 9.

Step 1: Swipe down the notification panel and tap the Settings gear icon.

Step 2: Tap Biometrics and security.

Here you can see an Intelligence scan, Face recognition, Iris scanner, and Fingerprint scanner.

Step 3: Tap face recognition under Biometrics.

Step 4: Tap Continue.

First of all set pattern lock, PIN, or password in your device to use face recognition securely on your Samsung Note 9. You’ll need it to unlock your Note 9 after the restart and sometimes.

Step 5: Choose PIN or Pattern or Password.

Step 6: After setting up a screen lock, you can see face unlock screen, tap Continue.

Step 7: Now hold your phone 8 to 20 inches from your face and make sure your face in the circle shown on the screen.

Step 8: Wait up to 100% completed, you can see a message of “Your face has been registered”.

Now, use face unlock on galaxy Note 9 to quickly unlock your device. But facial recognition is not more secure compare to Password or Pattern lock security. Sometimes it’s possible to photo look like you will recognize your face.

You’ll also enable/disable hide content & notification icons and set transparency as low or high you want to set in your Samsung Galaxy Note 9 devices. Also, use face recognition on Samsung pass to verify your identity with internet and other supported apps.

How to Disable/Remove Face Recognition on Galaxy Note 9

Settings > Biometrics and security > Biometrics > Face recognition > Remove face data

And that’s all. I hope this tutorial helpful to set up face recognition on Galaxy Note 9. If you have any kind of trouble, tell us in below comment box. Stay and connect with us for the latest updates.