How to Turn Off Facebook Face Recognition on Android

By default enabled face recognition on Facebook in your android or iPhone devices. You can use Facebook Face Recognition feature to identify photos & videos you tagged. When someone uploads your photos or videos, it’ll notify you about that picture. Several users don’t like this facebook facial recognition photo tagging feature. If you don’t want to use this feature, turn off or disable face recognition on Facebook using your android phone or PC/Laptop.

Want to stop Facebook from identifying your Face? Check out below methods to turn off Face recognition using the Facebook Messenger app, Android app, and PC/laptop.

Read Also:

How to Turn Off Facebook Face Recognition on Android and Windows PC

Check out below given both methods to disable Facebook face recognition on android and Windows 7/8/10 devices.

Disable Facebook Face Recognition on Messenger App Android in 2020

Step 1: Open your Facebook Messenger App on your Android devices.

Step 2: Tap the Profile icon at the top left corner of the screen.

Disable Facebook Face Recognition on Messenger App Android

Step 3: Scroll down and tap the Account Settings under the account section.

Disable face recognition on Facebook

Step 4: Tap Face Recognition under the Privacy section.

Stop Facebook from identifying your Face

Step 5: Tap the option under the Face recognition section.

How to Turn Off Facebook Face Recognition on Android Devices

Step 6: Choose No to disable FB Face Recognition on Android.

Turn off Facebook Face Recognition on Android using Facebook app

Step 1: Log in your Facebook account in your android.

Step 2: Tap on Three horizontal lines at the upper right side corner.

Turn off facebook face recognition on android

Step 3: Tap on Account settings under the help & settings section.

Face recognition settings in Facebook app

Step 4: Select Face recognition settings.

By default turned on this feature so you can use face recognition on Facebook in android.

Enable Facebook face recognition in android phone

Step 5: Tap on Face recognition to change face recognition settings in the Facebook app.

You can see this message: Do you want Facebook to be able to recognize you in photos and videos?

Step 6: Choose No to disable Facebook face recognition in Android phone.

Alternative Way (latest Facebook Version):

Turn off Facebook Face Recognition on Android using Facebook app

Open Facebook app > Three horizontal lines at the top right corner > Settings & Privacy > Settings > Tap Face recognition under the Privacy section > Tap Do you want Facebook to be able to recognize you in photos and videos? > No

Disable Facebook Face Recognition Using PC/Laptop

Step 1: Log in with your Facebook account in Windows 7/8/10.

Facebook account settings in Windows PC

Step 2: Tap on Menu & select Settings.

Turn off face recognition on facebook app in PC

Step 3: Tap on Face recognition from left side settings.

Now you can see by default selected Yes.  

Step 4: Tap on Edit to change face recognition settings in PC.

Step 5: Select No from the drop-down box.

Now disable/turn off Facebook facial recognition in Windows 7/8/10 devices.

And that’s it. I hope this tutorial helpful to turn off Facebook face recognition on android. If you have any questions, tell us in below comment box. Stay and connected with us for the latest Facebook tips.

How to Set Custom Text Message Notification Sound on Android (2020)

Here’s how to change the text message notification sound on the latest Android phones or tablets. You can change text message ringtone sound on your android phone using messages app or sound settings. There are several notifications sound settings available on your android devices such as message notifications sound, S planner notifications sound, ringtone notifications sound, Keypad tone, touch sound, and app notification tone.

You can individually change the notification sound of all (text message, ringtone, S planner, alarm) from your android device. Here you can see the two different ways to change text message notification sound on android device.

Read Also:

How to Change Text Message Notification Sound on Android Lollipop 5.1.1, Marshmallow 6.0, Nougat 7.1.2

Check out below given settings to change the notification tone on Android devices.

For the Latest Android Devices (Android 10)

How to Change the Message Notification Sound

You can change the phone ringtone, default notification sound, and default alarm sound using sound settings.

How to Change the Message Notification Sound (Stock Android 10)

Change default notification sound on Android devices

Settings > Sound > Advanced > Default notification sound > My sound > Choose audio file from your phone > Save at the top right corner

How to Set Custom Text Message Notification Sound on Android

Messages app > Three vertical dots (More) at the top right corner > Settings > Notifications > incoming messages > Advanced > Sound > Browse ringtone > Save at the top right corner 

Set Text Message Ringtone Sound

Step 1: Open the “Messages” app on your android lollipop (5.1.2) device.

Tap on more in top of the right side corner

Step 2: Tap “More” on top of the right side corner.

Select settings

Step 3: Tap on “Settings”.

Tap on notificaitons under message settings

Step 4: Tap on “Notifications”.

How to change text message notification sound on android

Step 5: Choose from the SIM 1/SIM 2, tap on “Notification sound”.

change text message notification sound on android lollipop

Step 6: Tap on your favorite notification sound from the given list to set it to text message notification sound.

Read Also:

How to Change Notification Sound Android 5.1.2 & 6.0

Step 1: Open “Settings”.

 Step 2: Tap on “Sounds and notifications” under the Quick settings section/Device section.

Tap on ringtones and sounds

Step 3: Under the sound section, tap on “Ringtone and sounds”.

Tap on message notifications

Step 4: Under the ringtone section, tap on “Messages notifications”.

Step 5: Choose from the SIM 1/SIM 2, tap on “Notification sound”.

Step 6: Tap on your favorite text message ringtone from the list.

Did you find the above-given process to set or change text message notification sound on android phone or tablet helpful? If you’re having problems implementing this, don’t hesitate to let me know on below comment box. Connect with us for daily latest technology updates!

How to Change Your Name on Facebook Using PC and Android

Do you want to change the Facebook profile name using Android phone or PC/Laptop in 2025? Here’s how to change your name on Facebook or add another name such as Nickname, maiden name, birth name using a Facebook app on Android and PC. You can only change the Facebook name if you won’t change your name within the last 60 days. You can still add other names not change Facebook account profile name on your PC or laptop device. You can also edit or change your Facebook page name on Android or PC devices.

Read Also: How to change Facebook cover photo Android

How to Change Facebook Name on PC or Android

Check out below given different methods for your Facebook app, Messenger app, and desktop/laptop devices.

How to Change Your Name on Facebook in Android 2025

Step 1: Open Facebook App in your Android devices.

Facebook settings to change name

Step 2: Tap Three horizontal lines or Profile icon at the top right corner.

Facebook Settings and Privacy Settings for Change Facebook Profile name

Step 3: Scroll down and tap on Settings & Privacy.

Step 4: Tap Settings.

How to Change Profile Name on Facebook Messenger App on Android

Step 5: Tap Personal information under the account settings.

Change the Facebook profile name using Android phone or PC

Step 6: Tap Name.

You can’t change your name on Facebook if you’ve changed it in the last 60 days. You can still change the order name.

How to Change Your Name on Facebook Using PC and Android Phone

Step 7: Enter the First name, Middle name, and Surname and tap Review Change.

You can see “preview your new name” screen. Choose how your name will appear on your profile.

How to Change Your Name on Facebook

Step 8: Enter your Facebook password and tap Save changes.

Also, add a nickname and birth name on your Facebook account.

How to Change Profile Name on Facebook Messenger App on Android

Step 1: Open the Facebook Messenger app in your device.

Step 2: Tap the Profile icon at the top left corner.

Change your name on Facebook Messenger App Android

Step 3: Scroll down and tap Account settings under the account section.

Step 4: Follow the above-given method steps 5 to 8.

Using PC/Laptop

Step 1: Log in with your Facebook account on your desktop/laptop.

Tap on account settings of facebook

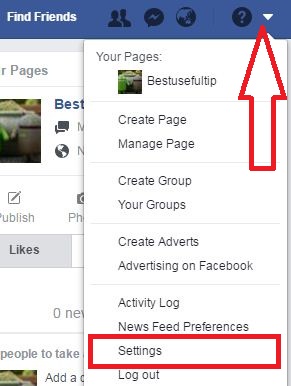
Step 2: Tap on the Down Triangle icon from the top of the right side corner and tap Settings.

Under general settings tap on name

Step 3: Tap on “Name” under the General category.

Step 4: You can see the first, middle & last name, now enter the new name want to set, or change Facebook profile name.

change facebook name PC

Step 5: Tap on the “Review change” button.

You can see the screen of “preview your new name” screen.

How to change facebook name PC

Step 6: Choose from your profile name & enter a password if set or change the Facebook name.

Step 7: Click on “Save changes” button.

If you can change the Facebook name within the last 60 days then you can’t change your name.

How to Add Nickname on Facebook on PC

Step 1: Follow the above-given method steps 1 to 3.

Add another name on facebook

Step 2: Tap on “Add other names”.

You can see the profile page of “details about you”.

Add nickname or birth name on facebook

Step 3: Tap on “Add a nickname/birth name”.

Change facebook account nickname

Step 4: Select name type from the dropdown box list & enter the name want to change your Facebook account name. Tick mark the checkbox of “show at top profile” if you want to show a nickname at top of the profile.

Step 5: Click on “Save Changes”.

That’s it. Change the Facebook account name or add another nickname on your PC or other devices.

If you have any concerns regarding the above steps to change Facebook name PC/laptop device, feel free to let us know on the below comment box. Stay and connect with us for the latest updates.

How to Fix Android Oreo Bluetooth Issues

Several Oreo users reported Bluetooth not working in Android 8 Oreo after the update. Most of all new Android devices Bluetooth issue occurs when trying to connect Bluetooth pair with other Android phones or cars or other Bluetooth accessories. Your phone can’t connect Bluetooth accessories, or different cars like BMW, Audi, Mercedes Benz, Volvo, Tesla, etc. First of all check any update available on your phone. If not fix the issue after updating your phone, clear the Bluetooth cache, or reset network settings in your Android phone or tablet.

Read Also:

How to Fix Android Oreo Bluetooth issues

Check out each one listed below methods to fix the Bluetooth issue on android 8.0 Oreo devices.

Restart Your Device

Tap & hold the power button until the power menu appears and tap on “Restart”. After the restart, try to pair with Bluetooth.

Turn Bluetooth Off and On

Swipe down the notification panel from the top of the screen and tap on the Bluetooth icon to enable or disable it. Now search nearby Bluetooth device to connect with your Android device.

Remove Paired Devices and Pair it again

Make sure your device paired with a nearby device. If you can’t found your device, remove paired devices, and pair it again.

Fix Android Oreo Bluetooth Issues Solve

Settings > Connection/Network & internet > Bluetooth > Pair devices > Settings gear icon > Forget > Forget device

Now, restart your phone and try to pair it.

Settings > Connection/Network & internet > Bluetooth > Pair new device > Tap your device Bluetooth name

Clear the Bluetooth Cache

Step 1: Go to Settings in your Android Oreo.

Step 2: Tap Apps & notifications.

Step 3: Tap App info.

By default, Bluetooth is hidden in system apps.

Step 4: Tap Three vertical dots (Menu) at the top right corner.

Step 5: Tap Show system.

Step 6: Tap Bluetooth.

Step 7: Tap Storage.

Fix android Oreo Bluetooth issues

Step 8: Tap Clear cache.

Reset Network Settings on Android 8.0 Oreo

Step 1: Go to Settings in android Oreo.

Step 2: Tap on System.

Step 3: Tap on Reset.

Step 4: Tap on Network settings reset.

Reset settings in android Oreo Smartphone

Step 5: Again touch Reset settings.

It will reset all network settings from your android 8.0 devices including Wi-Fi, Bluetooth, and mobile data. Check to fix the Bluetooth connectivity issues on Android Oreo.

Enable Safe Mode to Fix Bluetooth issues Android Oreo 8.0

Step 1: Press and hold the power button in your Android 8.0 Oreo.

Step 2: Touch & hold Power off.

Now, your Android Oreo phone is in safe mode. You can see the safe mode symbol below the left side corner.

If you’re Android Oreo Bluetooth connection with other devices in safe mode, it means any third party downloaded apps causing problems. Remove one by one third-party app. Find the app that causing problems to Bluetooth connectivity and remove it from your device. To exit safe mode on Android Oreo, long-press the power button and tap restart.

The list ends here. Don’t forget to mention which method worked for you to fix android Oreo Bluetooth issues. Let me know in the comment section if you have any trouble.

How to Mute WhatsApp Group Notifications on Android

Irritated of constantly gettings WhatsApp group notifications on your Android devices? You can easily mute notifications on WhatsApp group Android phones and tablets. You can mute WhatsApp notifications for 8 hours/1 week/1 year on your Android devices. When you mute WhatsApp group notifications chats then you can only show notifications on your device. You can turn off group notifications on WhatsApp Android using apps & notification settings. Also, hide WhatsApp group notifications on your Android phone.

You can use custom notifications in WhatsApp group that use to set notification tone, vibrate, light, and enable high priority notifications that show previews of notifications at the top of the screen in your Android devices. Also, anytime reset group notification settings if you don’t like the settings.

Read Also:

How to Mute WhatsApp Group Notification on Android

Step 1: Open the WhatsApp app in your Android device.

Tap on Chats on WhatsApp

Step 2: Tap on the Chats tab.

Tap on WhatsApp group on your android device

Step 3: Tap any Group you want to mute or turn off chat notifications.

Step 4:  Tap on Three vertical dots (Menu) at the top right corner or Tap on the Group profile name.

Tap on mute in the WhatsApp right side corner

Step 5: Tap on Mute (Toggle on Mute) or Mute Notifications (Toggle on Mute notifications).

How to mute WhatsApp group on android lollipop

You can see the above screen on your android devices. By default 8 hours time selected for turn off group chat notifications. Now set the mute WhatsApp group on android for 8 hours/1 week/1 Year.

Step 6: Choose time and tap on “OK”.

Now, you can only show notifications on your WhatsApp contact.

Disable WhatsApp group chat notification

If you have don’t show notifications of WhatsApp group chat on your home screen then uncheck the “Show notifications” checkbox and tap on “OK”.

How to Turn Off Group Notifications on WhatsApp Android in 2020

Step 1: Go to Settings.

Step 2: Tap Apps & notifications.

Step 3: Tap See all apps.

Mute WhatsApp Group Notification

Step 4: Scroll down until seeing WhatsApp and tap on it.

Mute notifications on WhatsApp group Android

Step 5: Tap Notifications.

How to Turn Off Group Notifications on WhatsApp Android Phone

Step 6: Toggle off Group notifications.

How to Disable Notification Sound on WhatsApp Group Android

Disable Notification Sound on WhatsApp Group Android

Open WhatsApp > Three vertical dots (More) at the top right corner > Select settings > Notifications > Tap Notification tone under the Groups section > Choose None > Save

Follow the above given simple steps to mute WhatsApp group on Android devices. If you have any kind of problem, tell us in below comment box. Stay and connect with us for the latest updates.

How to turn on mobile hotspot on android

If you want to connect your desktop to the internet using a mobile hotspot or public Wi-Fi hotspot then you can turn on mobile hotspot on android. You can use your device as an Internet access point using a mobile hotspot. This allows up to 10 other devices to connect its Wi-Fi. The connected device will have access to the internet via your mobile network.

First of all, create a mobile hotspot that will allow a laptop or other devices to use your android mobile hotspot to connect the internet. Using a mobile hotspot can increase battery consumption and data usage. This method of how to turn on the mobile hotspot on android mobile is perfect working on the latest android phones including Samsung Galaxy J7, Samsung Galaxy J5, Samsung Galaxy S6 Edge, Samsung Galaxy S6, HTC desire 826 and other latest android lollipop 5.1.2 and marshmallow 6.0 devices.

Read Also:

How to turn on Wi-Fi automatically on Galaxy S9 & S9 Plus

How to set up a static IP address on Android phone

How to set up and use Wi-Fi hotspot on Android Oreo 8.0

How to turn on mobile hotspot on android or turn Android mobile or tablet into a Wi-Fi Hotspot 

Follow below steps to create or turn on mobile Hotspot on android mobile and other devices within a few seconds.

Tap on Setting

Step 1: Go to Settings

Tap On Mobile Hotspot & Tethering


Step 2: Tap on “Mobile Hotspot and tethering” in the connections section. In some of the old version android mobile, you can go to

Settings > Wireless & Networks  

Tap On Mobile Hotspot


Step 3: Tap on Mobile Hotspot

Turn On Mobile Hotspot on mobile

Step 4: Turn on Mobile Hotspot on android

After turn on the mobile hotspot on an android device, you can connect your mobile with a Wi-Fi device that will share your mobile network connection. You can also change the mobile Hotspot configuration using the below steps.

Step 1: Go to Settings

Step 2: Tap on “Mobile Hotspot and tethering” in the connections section

Step 3: Tap on Mobile Hotspot

Tap on More option

Step 4: In the Mobile Hotspot, tap the top right cornerMore” menu

Tap on Configure Mobile Hotspot

Step 5: Tap on More option, after that choose ‘Configure Mobile Hotspot

Change Configure Mobile Hotspot name and password

Step 6: Now, you can change the Network name, enter the password and save it

Follow the above steps for turn on mobile hotspot on android devices and easily access the internet via a mobile network. If you have known other simple tricks to enable mobile Hotspot then please share with us.