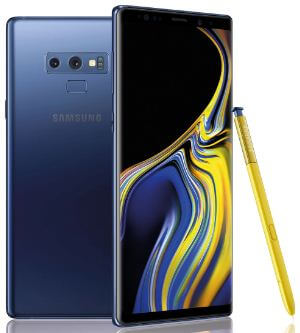
How to Change Screen Resolution on Galaxy Note 10 Plus and Note 10

Here’s how to change the resolution on Galaxy Note 10 and Note 10 Plus. You can find screen resolution under display settings in your Note 10 plus. By default galaxy Note 10+ screen resolution set as FHD+ (2280×1080). Choose Samsung resolution as HD+ (1520720) or FHD+ (2280×1080) or WQHD+ (3040×1440). Some currently running apps may stop working when you change the display resolution.

Recently launched Samsung’s latest flagship Galaxy Note 10 and Galaxy Note 10 plus. Samsung Galaxy Note 10 plus has a cinematic Infinity-O dynamic AMOLED display with a 6.8 inches larger display, powerful 7nm processor and more. Check out below given settings to set screen resolution on Galaxy Note 10 plus.

Read Also:

How to Adjust Screen Resolution on Samsung Galaxy Note 10 and Note 10 Plus

How to set screen resolution on Galaxy Note 10 Plus

You can change display resolution in Samsung Note 10 plus using the below-given display settings.

Step 1: Swipe down the notification panel from the top of the screen and tap the Settings gear icon.

Step 2: Tap Display.

Samsung Note 10 plus display settings include brightness, adaptive brightness, Blue light filter, Night mode (dark mode), screen mode, font size & style, screen resolution, full-screen apps, screen timeout, and home screen.

Step 3: Tap Screen resolution.

Set FHD+ (2280×1080) as default screen resolution. Also, different apps set as different resolutions that comfortable with resolution. Not all apps supported all resolution.

Step 4: Choose from HD+ (1520720) or FHD+ (2280×1080) or WQHD+ (3040×1440) you want to set.

Step 5: Tap Apply.

It’s easy to change display resolution on Samsung Galaxy devices.

Change Screen Mode on Samsung Galaxy Note 10 Plus

By default set Note 10+ screen mode as natural. If you want to change it, set vivid as screen mode.

Settings > Display > Screen mode > Vivid or Natural

You can change several galaxy Note 10 plus display settings using the above settings you want on your phone.

And that’s it. I hope this little tutorial useful to set screen resolution on Galaxy Note 10 Plus. Which is your favorite Galaxy Note 10 plus features? Tell us in below comment box.

How to Set Up Ultrasonic Fingerprint in Galaxy Note 10 Plus and Note 10

Want to secure your phone data using the fingerprint sensor on Samsung Note 10+? Here’s how to set up in-display fingerprint in Galaxy Note 10 plus. You can remove or add fingerprints on galaxy Note 10. There are different types of lock screen security available such as Face recognition, Fingerprint scanner, Pattern lock, Password, and PIN. Samsung Galaxy Note 10 plus and Note 10 has in-display fingerprint. Password is the strongest lock screen security compare to others lock screen security.

To use the fingerprint scanner on Note 10+, first of all, you need to set a PIN, pattern, or password in your device. Also, use fingerprint to unlock apps, purchase app from play store and more. Follow the below-given step by step process to set up ultrasonic fingerprint in Samsung Galaxy Note 10 and Note 10 plus.

Read Also:

How to Add a Fingerprint to Galaxy Note 10 and Note 10 Plus

How to set up in-display fingerprint in Galaxy Note 10 plus

You can add your fingerprint on Samsung Galaxy Note 10 plus using below given biometrics & security settings.

Step 1: Swipe down the notification panel from the top of the screen and tap the Settings gear icon.

Step 2: Tap Biometrics & security settings.

Step 3: Tap Fingerprints.

Step 4: Tap Continue.

Now set a secure screen lock type (PIN, Pattern, or Password) before you register your fingerprint. This screen lock needs it to unlock your phone after reboot.

Step 5: Choose from Pattern or PIN or Password.

After setting up a screen lock, scan your fingerprint on galaxy Note 10 plus.

Step 6: Place your finger on the sensor, then lift it off when you feel a vibration, wait until complete 100 percentage.

Now lock your Samsung Note 10+.

Step 7: Unlock your device using a Note 10+ in-display fingerprint sensor.

Your fingerprint data is secured by Knox. You’ll also set up face recognition if you want to unlock your device without a touch phone.

Add Fingerprint to Galaxy Note 10 Plus

Settings > Biometrics & security > Fingerprints > Add fingerprint

Also, remove fingerprint on Note 10+ anytime you want using below given settings.

Settings > Biometrics & security > Fingerprints > Trash icon of fingerprint you want to remove > Delete

And that’s it. It’s quite easy to set up in-display fingerprint in Galaxy Note 10 plus. If you have any questions, tell us in below comment box. Don’t miss out to check our other latest android tips.

Android Q Beta 6 features

Google releases final Android Q Beta 6 for all Pixel and other supported devices. If you’ve already installed Android Q Beta 5, you can get OTA update in your Pixel device. Click here to download and install android Q Beta 6 on Pixel 3 XL, Pixel 3, Pixel 3a, Pixel 3a XL, Google Pixel, Pixel XL, Pixel 2 and Pixel 2 XL. Check out best Android Q Beta 6 features.

Don’t miss out to check what’s new in Android Q Beta 1, Beta 2, Beta 3, Beta 4, and Beta 5

This last released Android Q Beta 6 includes new back sensitivity settings under gesture menu, hidden gesture navigation bar (Pill icon) in the home screen, rotation button darker, Google play system update and Night sight in main UI in camera settings. Check out everything new in Android Q Beta 6 features for Google Pixel.

Don’t Miss This:

Android Q Beta 4 accent colors

7 Best Google Pixel 3 tips and tricks: Hidden features

How to disable dark mode in Android Q 10

How to get Google Pixel 3 features to any android device

Android Q Beta 6 features – What’s the new

The final Android Q Beta update is officially available for all Pixel devices. Recently updated my Pixel device and get below given new settings.

Back sensitivity 

You can find back sensitivity settings under system navigation in your device. Adjust back sensitivity to move slider left or right to set low or high sensitivity. Higher sensitivity may conflict with any app gestures along the edges of the screen. New added Android Q Beta 6 features.

Android Q Beta 6 back sensitivity gesture

Settings > System > Gestures > System navigation > Tap Settings gear icon in-front of Gesture navigation > back sensitivity > Low / high > OK

Gesture navigation bar hidden (Pill icon or Horizontal line) on the home screen  

Android Q Beta 6 features

When enable fully gesture navigation on Android Q Beta 6, you can’t see pill icon on middle of the screen. When slide up or open app drawer or other activity in your phone, you can see navigation bar.

Night Sight in main camera UI

Night Sight in main camera UI in Android Q Beta 6

Now you can view camera Night sight feature in main UI. Before this android Q Beta, you can find it under more settings.

Read Also: Pixel 3 camera features: Top Shot, Night Sight, Group Selfie

New emergency icon in power menu

New emergency icon in power menu in Android Q Beta 6

Just long press power button in your Pixel devices and you can see new Emergency icon in power menu.

Google Play system update

Google play system update added instead of Google play system update under android version in your Pixel devices.

Google play system update settings Android Q Beta 6

Settings > About phone > Android version > Google play system update

Also find this setting under security settings in your Pixel.

Settings > Security > Security status > Google Play system update

And that’s it. End the list of added new Android Q Beta 6 features. Have you update your device with latest android Q Beta? Tell us in below comment box. Click here for more android 10 Q tips and tricks.

How to Install Android Q Beta 6 on Pixel

Google launches the final beta for Android Q Beta 6 for all Pixel devices. Here’s how to download and install android Q Beta 6 on Pixel 3 XL, Pixel 3, Pixel 2 XL, Google Pixel, and other devices. If you already installed Android Q Beta 5, you’ll get an OTA update in your Pixel device. If your device running Android 9 Pie and get android Q Beta, sign in android Beta page and check the list of devices supported android Q Beta.

You can download system images and flash them to get Android Q Beta on your Pixel devices. Manually flash system images do not receive OTA updates automatically to the latest beta. Follow the below-given step by step process to install Android Q Beta 6 on Pixel 2 XL, Pixel 3a, 3a XL, Pixel 3 XL, Pixel XL, and other devices.

You can check all details of the previous Android Q Beta 1, Beta 2, Beta 3, Beta 4, and Beta 5.

Read Also:

How to Install Android Q Beta 6 on Pixel 3a XL, Pixel 3, Pixel 2, Google Pixel

You can manually check the OTA update in your Pixel running Android Q Beta 5 using below given settings.

Step 1: Open the Settings app in your Pixel devices.

Step 2: Scroll down up to the end of the page and tap System.

Step 3: Tap Advanced.

Step 4: Tap System update at the end of the page.

This update will install the best version of Android Q (QPP6.190730.005) on your all Pixel devices. The update size is 158.5 MB.

How to install android Q Beta 6 on Pixel 2 XL

Step 5: Tap the Download and install button at the bottom right corner.

Now installing system update in your Pixel devices. After a completer process restarts your device to see what’s new in Android Q beta 6. This android Q Beta 6 includes new back sensitivity in gesture, gesture navigation bar hidden on the home screen, Night sight in the main UI, rotation button darker, and Google play system update adds in the Android version menu.

And that’s it. It’s easy to download and install Android Q beta 6 on Pixel via OTA update. If you have any questions regarding this tutorial, tell us in below comment box. Stay and connect with us for the latest updates.

How to Delete WhatsApp Chat History on Android

Want to clear all WhatsApp chat from your Android phone or tablet? Here’s how to clear chat history on WhatsApp Android. Using WhatsApp chat settings, you can clear all WhatsApp messages for individual contact and group message in one click. Also, remove individual conversation messages one by one or multiple messages on the WhatsApp group or particular contact chat. Also, delete WhatsApp chat permanently on your Android or iPhone devices.

Before clear WhatsApp chat history or group message, backup WhatsApp chat messages and media files to Google drive over Wi-Fi. You can restore them when you reinstall WhatsApp. Your messages and media will also back up to your phone’s internal settings. Also backup WhatsApp videos. Follow below given simple steps to clear all WhatsApp chat android.

Read Also:

How to Clear All WhatsApp Chat on Android Phone

Step 1: Open the “WhatsApp” app on your android device.

click-on-more-whatsapp-chats

Step 2: Tap on “Three vertical dots” from top of the right side corner.

tap-on-settings-under-whatsapp-chat

Step 3: Click on “Settings”.

click-on-chats-under-whatsapp

Step 4: Tap on “Chats”.

tap-on-chat-history-under-whatsapp-chats

Step 5: Click on “Chat history”.

clear-all-whatsapp-chat-android-phone

Step 6: Tap on “Clear all chats”.

You can see this message on your android device screen: Are you sure you want to clear messages in all chats? And also see the checkbox of keep starred messages. If the latest updated WhatsApp version, you can see delete media in chats and delete starred messages options.

clear all WhatsApp chat android

Step 7: Tap on Clear or Clear messages.

Now, all WhatsApp conversation and Group messages delete from your WhatsApp database.

How to Permanently Delete WhatsApp Chat Messages on Android

Step 1: Open WhatsApp in your Android devices.

Step 2: Tap Three vertical dots (More) at the top right corner.

Step 3: Tap Settings.

Step 4: Tap Chats.

Step 5: Tap Chat history.

You can see the Export chat, Archive all chats, Clear all chats, and Delete all chats options.

How to Permanently Delete WhatsApp Chat Messages on Android

Step 6: Tap Delete all chats.

If you don’t want to remove WhatsApp media, uncheck the box “Delete media in chats”.

How to Delete WhatsApp Chat History on Android

Step 7: Tap Delete.

Did you find the above steps to clear all WhatsApp chat android phone or tablet helpful? If you have any concerns regarding the above WhatsApp trick then do let me know on below comment box. It would be a pleasure to help you. Don’t forget to share this WhatsApp article with your friends on social networks.

How to Clear App Cache and Data on Galaxy Note 10 and Note 10 Plus

This tutorial explains to you how to clear the app cache and data on Samsung Note 10 plus and Note 10. This Samsung Galaxy clear app cache will remove the app data temporarily. Clearing cached data can free up storage by removing temporary files. If your device running slow or app keeps crashing & freezing, won’t open, or respond issues, you can try clearing the cache on Samsung Note 10+.

Clear individually app cache & data in your Samsung galaxy devices using apps settings. If clear app cache on Samsung Galaxy Note 10+ doesn’t fix apps issues, check for android updates, app update, or force stop the app, or uninstall the app in your device. Follow the below-given step by step process to clear app cache and data on Galaxy Note 10 Plus.

Read Also:

How to Clear Cache on Samsung Note 10 Plus and Note 10

How to clear app cache and data on Note 10 Plus

You can clear the cache and data on Samsung Note 10 plus using below given settings.

Step 1: Open the Settings app in your device.

Step 2: Tap Apps.

Here you can see the list of installed applications in your Samsung device.

Step 3: Select app from the list you want to clear app cache on galaxy S10 plus.

Step 4: Tap storage.

Step 5: Tap clear cache.

Now remove app data from galaxy Note 10+. When open apps after clear the app cache, the app running slower sometimes.

Clear App Data on Galaxy Note 10/Note 10 Plus

It will delete app data permanently in your device.

Settings app > Apps > Select app > Storage > Clear data

If you want to check if any third party app causing your phone issues, you need to enable safe mode on galaxy Note 10+.

And that’s it. We hope this makes it clear how to clear app cache and data on Note 10 Plus. Do you still have any questions regarding this tutorial? Tell us in below comment box. Stay and connect with us for the latest updates.