Last Updated on March 7, 2021 by Bestusefultips
Here’s how to customize the navigation bar on Android 8.0 Oreo devices. You can easily customize your favorite navigation bar Oreo. This feature allows us to change the navigation bar on Android 8 Oreo with additional functionality. Also, use Android O launcher to make your device looks like Android 8.0 Oreo. In the Android 8.0 Oreo OS, lock screen shortcuts and navigation bar have removed from the System UI tuner settings. Sometimes users facing issues of Android Oreo Navbar not working on Android devices.
Android 8.0 Oreo with its great features such as Install unknown apps, Android Instant apps, Picture in picture mode, Background process limit, Smart text selection, Autofill API, Notification dots, and more.
Read This:
- How to enable gesture navigation on Pixel 3 and 3 XL
- How to use full-screen gestures in Samsung Galaxy A50
- Top 7 best Android 8.0 Oreo features you must know
How to Customize Navigation Bar on Android 8.0 Oreo
Here you will see two different solutions to use the navigation bar on Android Oreo for both rooted and non-rooted android devices.
Customize Navigation Bar on Android 8.0 Oreo For Non-rooted Android devices
Step 1: Download android O Navbar app on your android device
Step 2: To enable developer options in your device go to Settings > About phone > Click build number 7 times
Now enable developer mode in your android device.
Step 3: Again go to Settings > Developer options.
Step 4: Scroll down in the debugging section and Enable USB debugging in your Android device.
Step 5: Download and install the ADB driver in your desktop PC or laptop device.
Step 6: Open the ADB installation folder and press SHIFT & right-click on the mouse at the same time and click on Open Command Window Here.
Step 7: In your PC command prompt will see, type command ADB devices and list of connected devices view on the screen.
Step 8: Now type ADB shell pm Grant xyz.paphonb.Systemuituner android.permission.WRITE_SECURE_SETTINGS and press enter button.
Step 9: Disconnect your phone with PC and open custom android 8.0 Oreo navbar and modify Navbar you like.
Now enable or install android O Navbar without root on android devices. You can change the layout, extra left button, and extra right button in navigation bar in android Oreo.
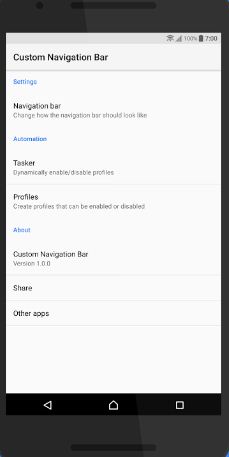
Customize Navbar in Android Oreo For Rooted Device
You can add extra functionality and buttons to changing the navigation bar. But let see how to get an android Oreo navigation bar on rooted android phones.
Step 1: Download the Android Oreo navigation bar app from the above link and install it in your device.
Step 2: Open Android Oreo Navbar, click on next, and approve the root access when prompted.
If your android device is not compatible with the navigation bar, you will view this message: No navbar installed
Step 3: Open the Layout tab and select your favorite layout to want to set from different layouts.
Step 4: Also add an extra new button on the right or left side with a feature of you like most
I hope the above-given steps helpful to install the Android O Navigation bar in a rooted device.
And that’s all. Do you have other tips to customize the navigation bar on Android 8.0 Oreo? Share with us in below comment box. If you have any kind of trouble, let us know. We will respond as soon as possible.